Our view at Stack - our team love using Miro as an online workspace for innovation, enabling distributed teams to dream, design, and build together. With a full set of collaboration capabilities, it simplifies cross-functional teamwork, meetings, and workshops. Create concepts, map user stories, and conduct roadmap planning in real-time.
If your PB&J bread keeps getting soggy from the jelly, slather peanut butter on each slice and then put the jelly in the middle.
That’s process improvement in its simplest form: You identified the existing order and found a way to make it better. Easy enough, right?
But workflow optimization becomes a lot trickier when you’re dealing with a complex process. When there are layers of steps, contributors, and stakeholders, it’s hard enough to figure out how the process works — let alone how it can be improved.
That’s where a flow diagram (often called a flowchart) comes in. This visual representation of a process makes it easier to break down the steps and understand where things can be smoother. Here’s how to make your own.
From a pad of paper to sticky notes on a wall, there are plenty of ways you can make a flowchart. But in the modern working world, you can forego those manual methods and build your flow diagram digitally with a platform like Miro. Doing so offers several advantages:
- It’s collaborative and accessible to the entire team, rather than remaining siloed in a conference room or one person’s files.
- It’s responsive and easy to update, so you don’t have to delete or manually rework everything when the process changes.
- It’s intuitive to use, with shapes, colors, and arrows that are easy to add to your chart.
- It gives you a helpful starting point with plenty of flowchart templates to use.
Build and design faster with an easy digital workspace. Get started with Miro for free today.
2. Walk through the existing process and take notes
It’s tempting to jump right into dropping shapes and arrows on the screen (we get it — it’s fun). But before you do, take a little time to get the lay of the land and understand how a process typically works.
Your goal isn’t to design anything pretty here. Instead, walk through the process and document any key decisions or actions. Take notes about things like:
- What happens
- When it happens
- Who typically does it
- What (if any) steps or tasks are dependent on it
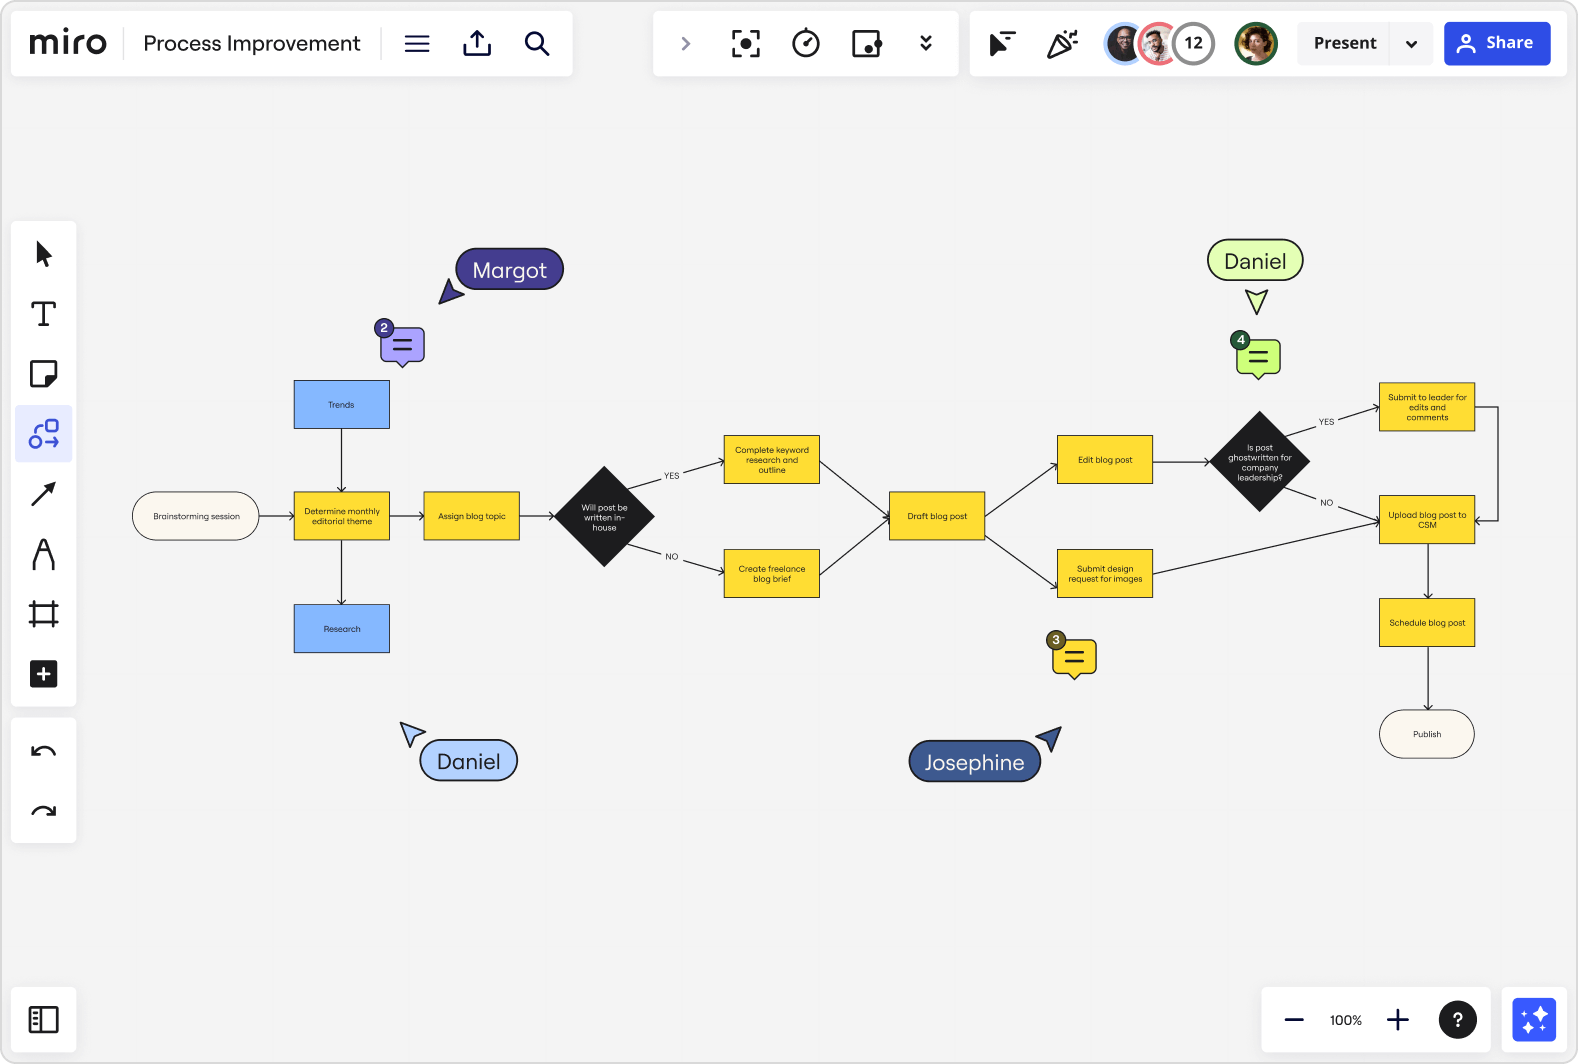
Keep in mind that processes can still have variables, so jot down any special circumstances or considerations that could alter things. For example, your process for drafting and publishing a blog post might have additional review and editing steps if it’s ghostwritten on behalf of company leadership.
3. Select (and document) your flowchart elements
Armed with a rough outline of your process, you’re ready to start thinking about it more visually. There are different types of flowcharts, but in the case of process improvement, you should opt for a process flowchart, which maps out the steps of your process. Here are a few helpful templates to check out:
Before you start building, you’ll also need to identify the elements you’ll use on your flowchart. The most common flowchart symbols include:
- Oval: Start or end of the process
- Rectangle: Task or activity
- Arrow: Direction and order of the process
- Diamond: Decision
- Circle: Answer or jump in the flow of the process
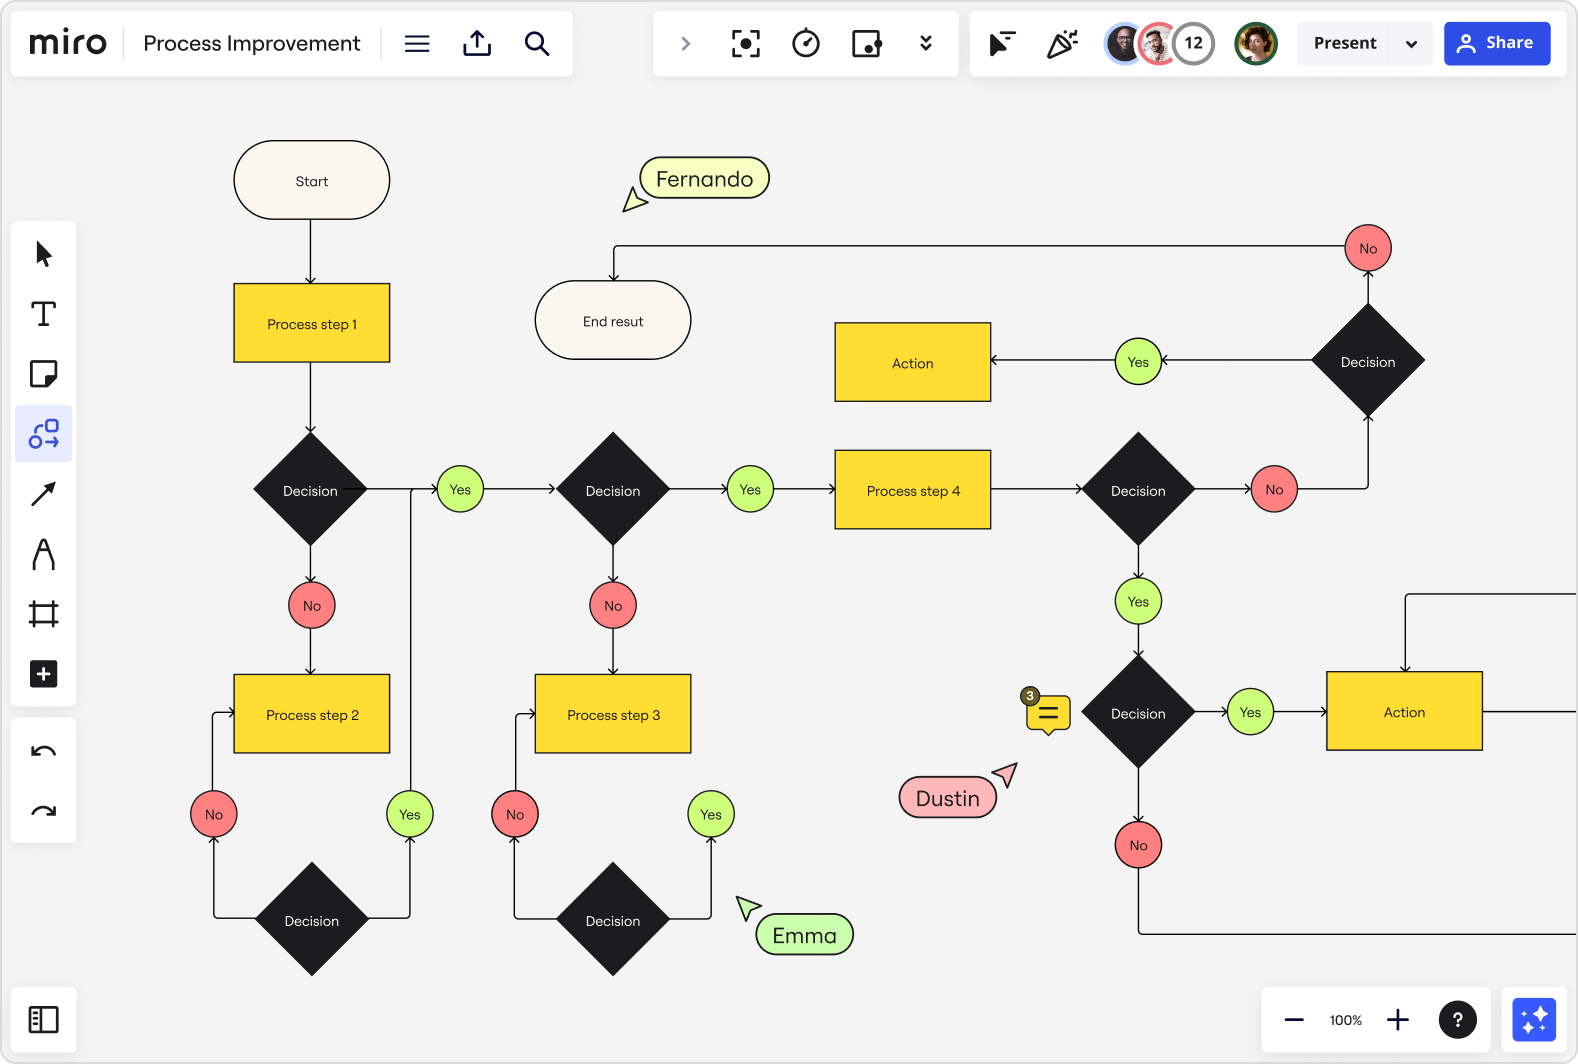
Here’s what those shapes look like in action:

Those shapes are considered “standard.” But the important thing is that your flowchart makes sense to you and your team. Just make sure to document your rules so everybody is on the same page from the start. It’ll make your complex process far easier to build and follow.
4. Piece together your flowchart
You’ve identified the basic steps of your process as well as the elements you’ll use to represent them. That means you’re ready to map them out visually.
You can start from scratch with a blank board or use a flowchart template and customize the details. Either way, pick a starting point and piece things together. Depending on your process, you might find it easier to start at the beginning. Or, you might rather start at the end (or the outcome) and move backward.
Don’t get too hung up on perfection as you work. That’s another benefit of a digital whiteboard: You can easily adjust or move things later. Just aim to get the bulk of the process down on your board in an order that mirrors the real-life flow of steps. Once you do that, you can go back and polish where necessary.

5. Identify improvement areas
You aren’t just using your flowchart to understand the process — you’re trying to improve it. So once you have your workflow documented, go back through and look for bottlenecks, sticking points, or other areas where things run off the rails.
It’s helpful to involve other team members or stakeholders in this step, as they have different experiences and insights. If you’re worried about this conversation becoming a free-for-all, use a designated process improvement template to guide your discussion, identify the root of your problems, and determine the best fixes.
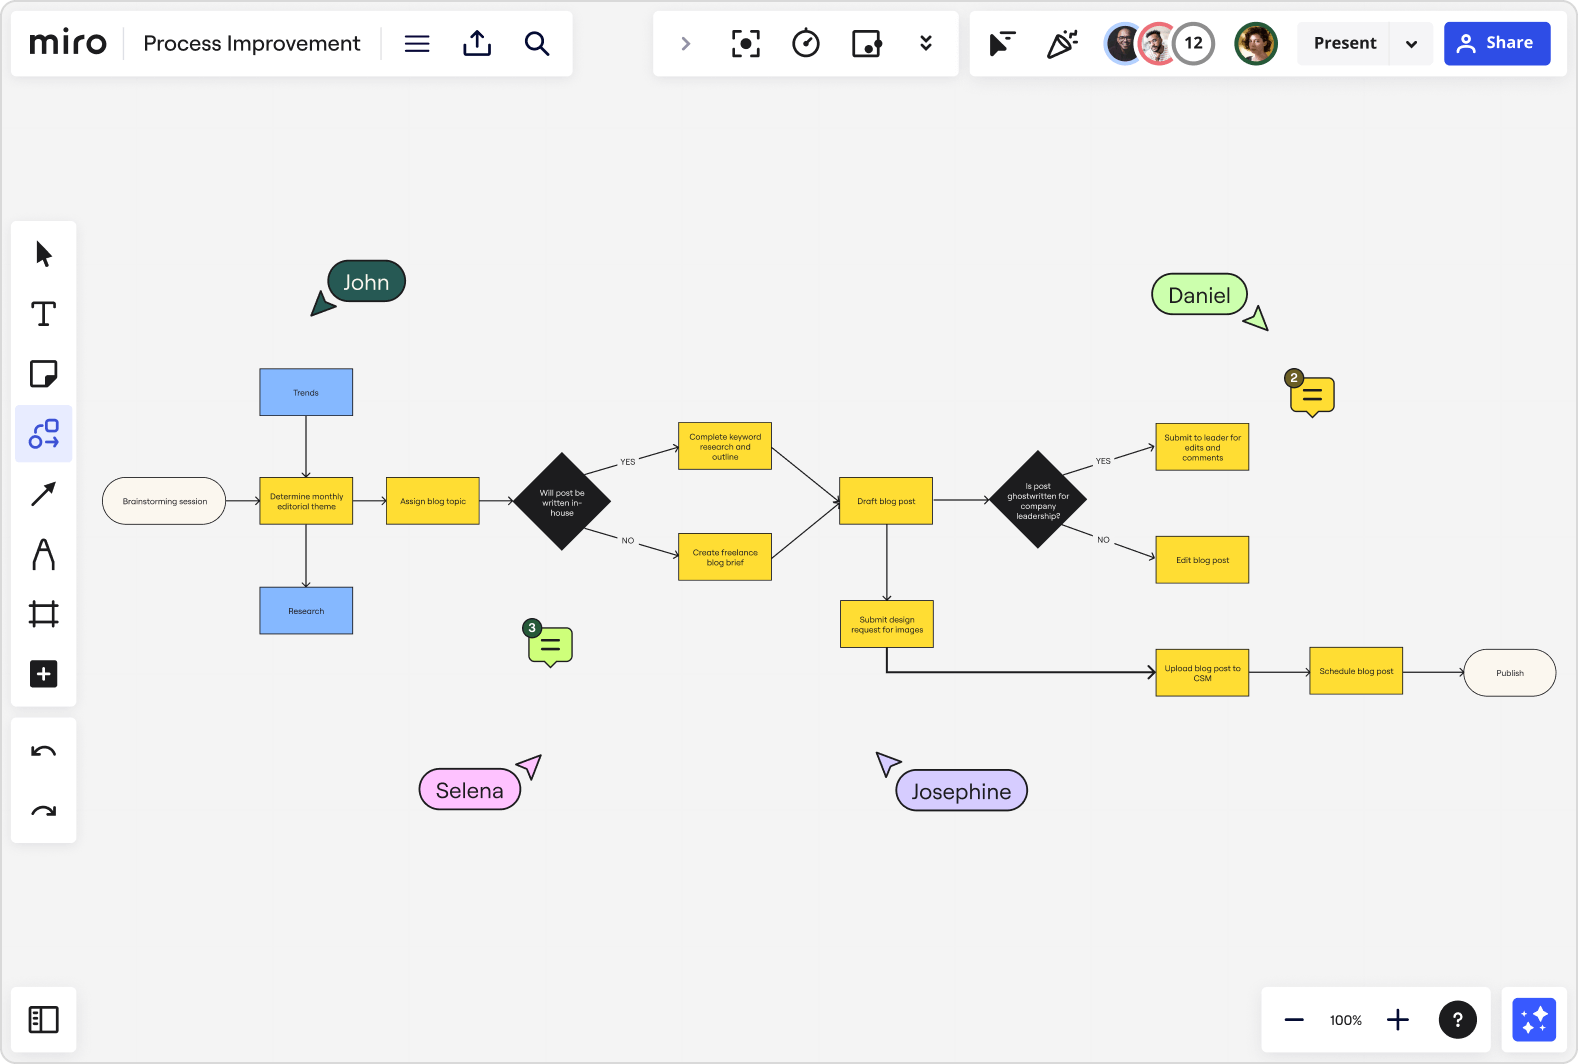
If and when you spot an inefficiency, figure out how you can adjust the process and then update your flowchart accordingly. For example, if leadership review always slows down your blog posts, maybe you’ll move that step before your internal edits. Here’s what your adjusted flowchart would look like:

Simplify and streamline even the trickiest processes
There are times when process improvement feels intuitive and easy. But there are plenty of other times (particularly when dealing with complex processes) that it feels like untangling a knot.
Fortunately, flowcharts can help you make sense of the chaos with a visual representation of what needs to be done.
Start creating your own flowcharts in Miro and you’ll build a better understanding of not only how your current processes work, but how you can make them — and, as a result, your collaboration, team, and entire organization — even better.
If Miro is of interest and you'd like more information, please do make contact or take a look in more detail here.
Credit: Original article published here.
