.circular {
position: relative;
top: 150px;
left: 50%;
height: auto;
width: 42px;
margin-top: -21px;
margin-left: -21px;
animation: loading-rotate 2s linear infinite;
}
.path {
animation: loading-dash 1.5s ease-in-out infinite;
stroke-dasharray: 90, 150;
stroke-dashoffset: 0;
stroke-width: 2;
stroke: #0E71EB;
stroke-linecap: round;
}
@keyframes loading-rotate {
100% {
transform: rotate(360deg);
}
}
@keyframes loading-dash {
0% {
stroke-dasharray: 1, 200;
stroke-dashoffset: 0;
}
50% {
stroke-dasharray: 90, 150;
stroke-dashoffset: -40px;
}
100% {
stroke-dasharray: 90, 150;
stroke-dashoffset: -120px;
}
}
Workflow & Automation
10 Best Freshservice Alternatives for ITSM in 2025
Namely, while Freshservice remains a popular choice, many teams are hitting roadblocks, ranging from steep pricing and feature limitations to inflexible workflows and underwhelming reporting.
The truth is, ITSM isn’t one-size-fits-all. What works for an enterprise might be overkill (or over-budget) for a fast-moving mid-market team.
That’s why I researched and tested dozens of ITSM platforms to find the best Freshservice alternatives – tools that deliver on automation, incident tracking, and service delivery without the hidden trade-offs.
Whether you’re scaling support, streamlining change management, or improving response times, this list will help you find a solution that actually fits your team and budget.
Ready to upgrade your ITSM stack with confidence? Let’s begin!
Why do you need Freshservice alternatives?
Freshservice is an enterprise-level ITSM platform, meaning its features – and pricing – are designed with large-scale companies in mind.
As such, it has a few functionalities large IT teams can find handy, such as:
- Robust automations and workflows that help you streamline various processes.
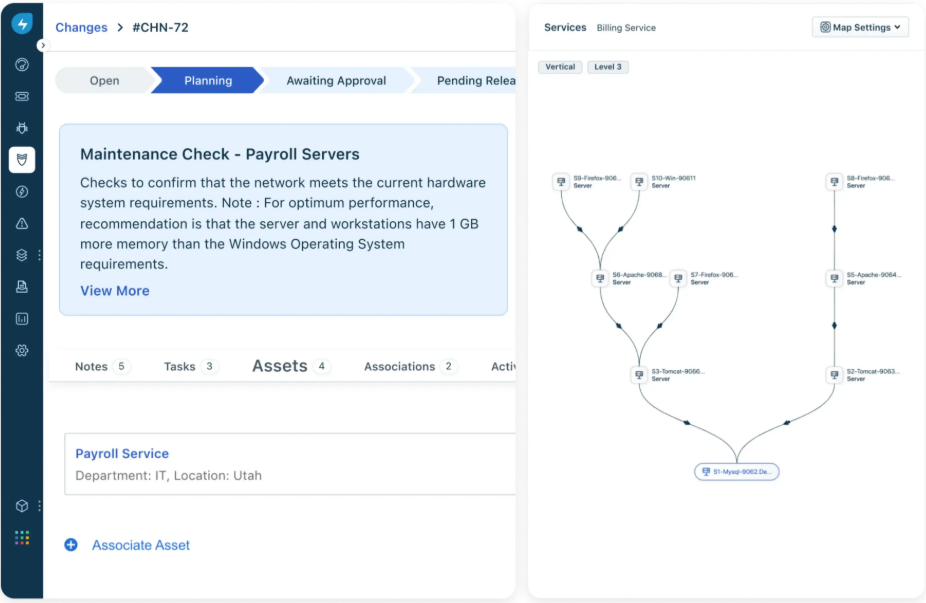
- An advanced CMDB that gives you a complete, real-time picture of your IT environment, allowing you to trace incidents back to the root cause faster and tackle them head-on.
However, there are quite a few limitations some users experience with Freservice that often urge them to look for an alternative solution.
Let’s get a closer look at some of the major concerns users have with Freshservice.
1. It can be cost-prohibitive for smaller businesses
Although Freshservice has a multi-tiered pricing system, it’s fair to say that it’s still on the pricier end of the range.
Firstly, its pricing is user-based, meaning that your costs will grow as your team does, which is not ideal for scaling businesses.
And secondly, its best, AI-powered features are available only on its most expensive, Custom plan.

“There are a few aspects that could be improved. The associated subscription cost is a bit on the higher side, especially since some advanced features are locked behind higher-tier plans. Additionally, more customization options are required for business needs.” – G2 Review
2. Its reporting and analytics features leave a lot to be desired
Having robust analytics and reporting as part of your ITSM platform is critical for a number of reasons.
Being able to track key metrics in real-time, dissect reports and adjust them to your specific needs helps detect issues in time, monitor performance, allocate tasks and resources more efficiently, etc.
Freshservice’s reporting features are pretty clunky and limited in terms of customization and the metrics they let you track.
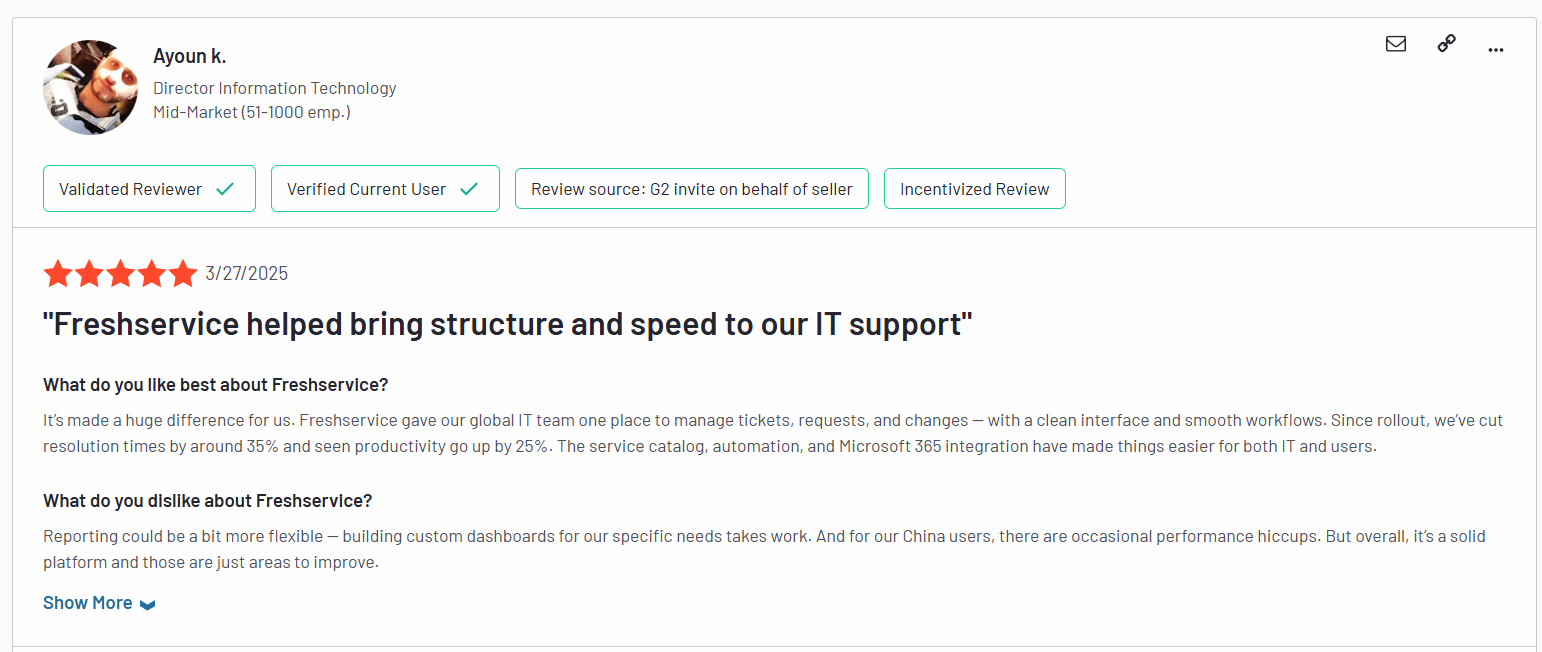
“Reporting could be a bit more flexible – building custom dashboards for our specific needs takes work.” – G2 Review
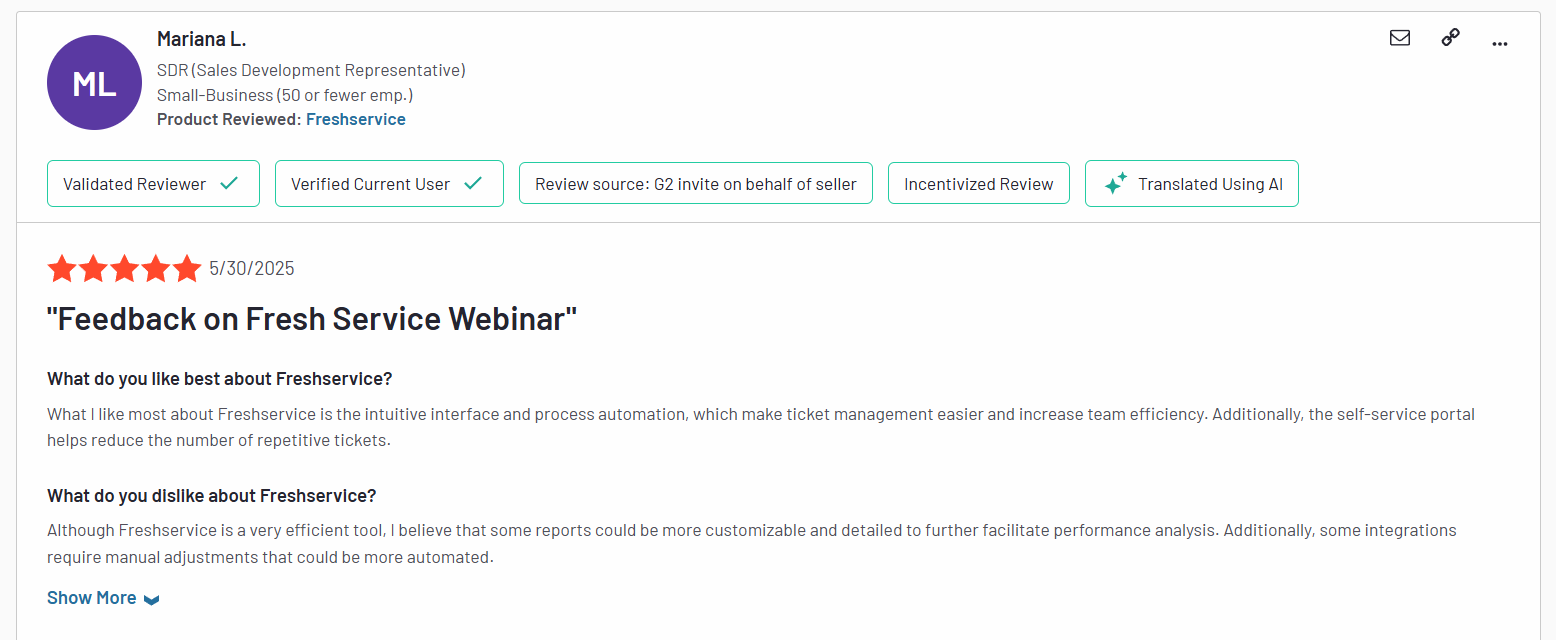
“Although Freshservice is a very efficient tool, I believe that some reports could be more customizable and detailed to further facilitate performance analysis. Additionally, some integrations require manual adjustments that could be more automated.” – G2 Review
3. Limited customization options
Finally, many users complain about Freshservice being pretty rigid and lacking more sophisticated customization options.

Sometimes, reporting features feel a bit limited. Customizing reports could be easier. Also, the pricing can get high as you add more features or users. – G2 Review
This can easily turn into a big problem for teams with bespoke needs that require more flexibility and freedom to tailor their solution to their own goals and workflows.

The limited customization of the Support Portal (would love to be able to incorporate the company colours / themes on the Support Portal). – G2 Review
What are the best Freshservice alternatives for ITSM in 2025?
After testing a bunch of different tools and interviewing long-term users, here’s the curated list I came up with:
- SmartSuite – A no-code, all‑in‑one work and ITSM platform that empowers teams to customize workflows, automate service delivery, and scale support operations without friction.
- Jira Service Management – An agile-first ITSM tool that integrates deeply with development pipelines and offers a rich catalog of pre-built workflows for modern DevOps teams.
- Atera – A unified RMM+PSA solution with built-in ticketing, patching, remote access, and AI-driven automation designed for MSPs and IT support teams seeking full operational visibility.
- ServiceNow – Enterprise-grade ITSM powerhouse offering advanced CMDB, change, incident, and release management capabilities ideal for large-scale, complex IT environments.
- Zendesk – A multichannel ticketing platform that bridges internal IT support and external customer service through AI-powered routing and self-service portals.
- SolarWinds Service Desk – An AWS-hosted ITSM suite with strong incident, asset, change, and configuration management backed by AI automation and intuitive dashboards.
- ManageEngine ServiceDesk Plus – A cost-effective ITSM tool that combines incident, change, and asset management with robust automation at scales suitable for SMBs and enterprises.
- HappyFox – A lightweight, multichannel help desk focused on simplifying request management and analytics for teams that want fast deployment and straightforward workflows.
- SysAid – A highly customizable ITSM platform offering deep automation, asset discovery, and flexible deployment options.
- Budibase – A low-code platform enabling teams to build their own secure, self-hosted ITSM apps with custom workflows and AI integrations on top of a modern data stack.
1. SmartSuite
Best for: Teams of all sizes looking for a customizable, no-code ITSM platform that’s easy to use, fast to deploy, and flexible enough to grow with you.
Full disclosure: While SmartSuite is our platform, we’ll share an unbiased view of the tool’s abilities and why it stands out from other Freservice alternatives.
SmartSuite redefines what an ITSM platform can be by combining the power of enterprise-grade service management with the accessibility of a no-code interface.
Whether you’re managing incidents, automating change approvals, or tracking assets across departments, SmartSuite gives you complete control without requiring IT to hardcode every process.
Its intuitive drag-and-drop workflow builder, built-in templates, and real-time reporting make it easy to tailor workflows to your exact needs, from help desk ticketing to cross-functional service delivery.
And because it’s built to be flexible, SmartSuite scales seamlessly as your IT operations evolve without the bloated costs or complexity of legacy tools like Freshservice.
Here are some of the key features that make SmartSuite a strong Freshservice alternative:
1. Provides a unified, no-code platform for comprehensive ITSM
At the heart of SmartSuite’s appeal as a Freshservice alternative is its unified, no-code platform designed to simplify and centralize every aspect of ITSM.
Instead of juggling disconnected tools or relying on technical teams to hardwire every workflow, SmartSuite puts power directly in the hands of IT teams and business users alike.
From request intake to resolution, every process lives in one flexible system that adapts to how your team actually works.
As a result, you get a smarter, more streamlined approach to ITSM that’s fast to implement, easy to scale, and built to evolve with your organization.
Here are some of the things SmartSuite lets you do from a single point of control:
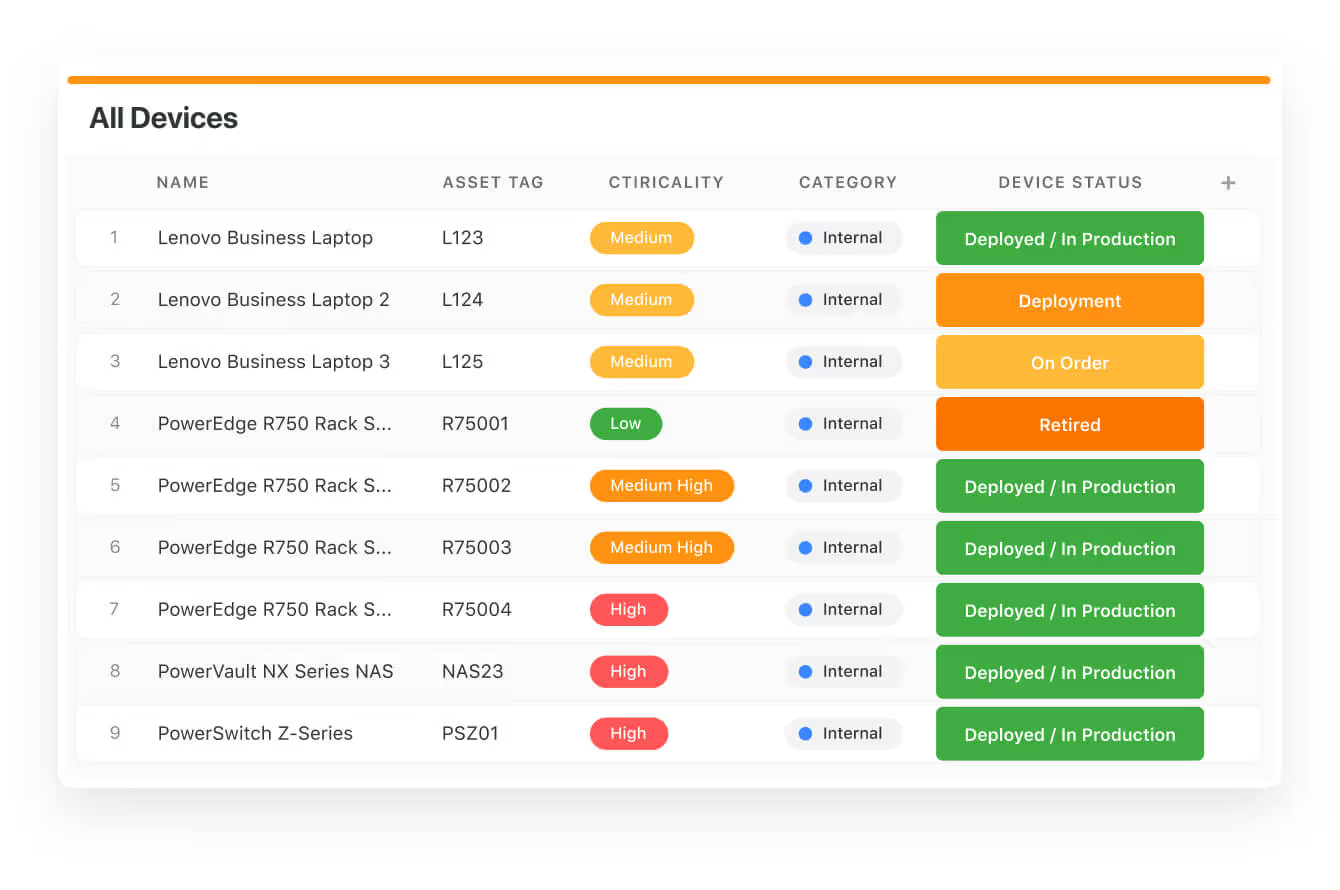
- Track tickets & issues in real-time – Deploy help desk and issue tracking solutions to capture, resolve, and analyze IT incidents and spot trends before they impact operations.

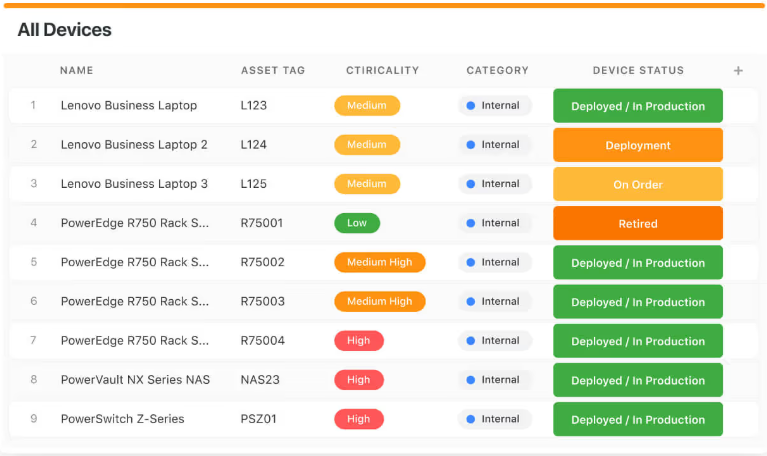
- Manage IT assets & licenses – Monitor hardware, software versions, user assignments, and license renewals in one place to stay compliant and budget-ready.
- Manage internal IT projects seamlessly – Plan, assign, and track internal IT initiatives to roll out technology solutions faster, and always stay on time and under budget.
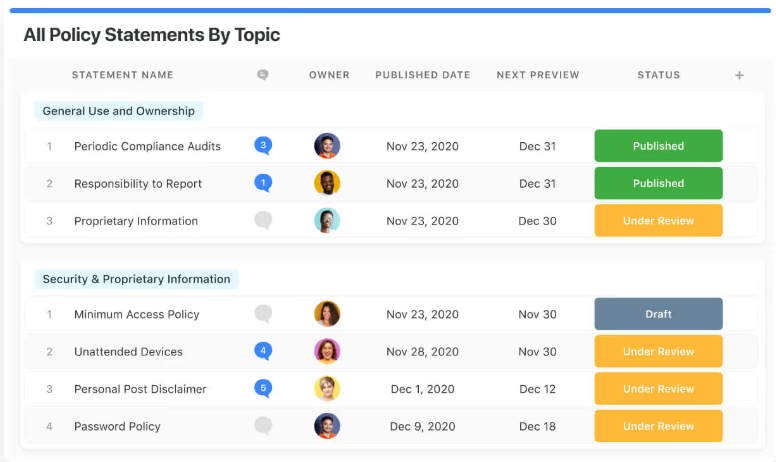
- Elevate IT governance – Publish IT policies, manage audits, and ensure compliance with centralized documentation that supports your security and data protection goals.
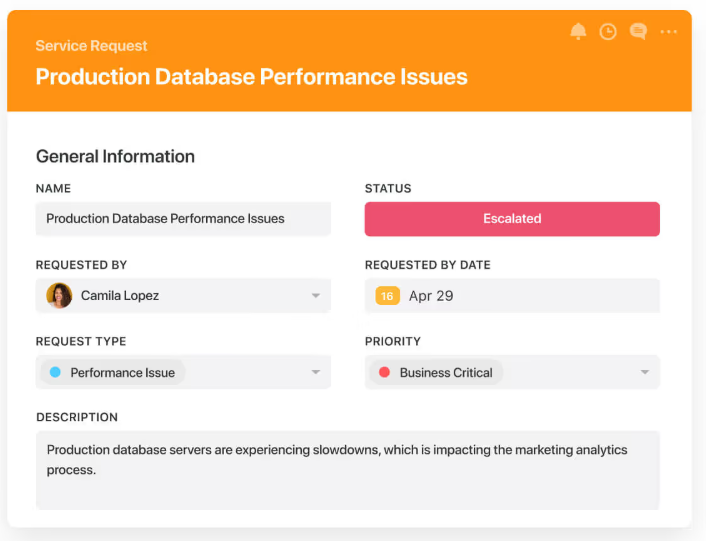
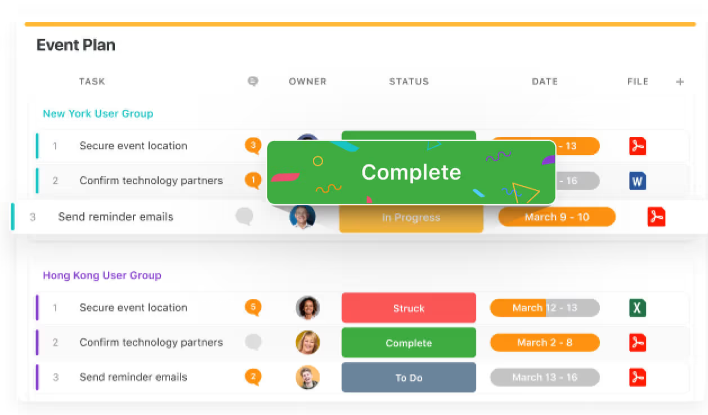
- Streamline IT workflows – Centralize service requests, prioritize incoming tickets, and track resolution SLAs through dashboards that keep your team aligned in real time.

- Automatically prioritize tasks – Use dynamic triggers to intelligently push or pull work based on urgency, helping your team respond faster and more proactively.
- Automate repetitive work – Set up no-code automations that power your IT operations in the background, so your team can focus on what matters most.
2. Lets you collaborate in real-time wherever work happens
Modern IT support moves fast, and SmartSuite is built to keep your team moving with it.
Instead of waiting for emails, chasing updates in chat threads, or losing time in status meetings, SmartSuite brings collaboration directly into your IT workflows.
Whether it’s triaging a ticket, escalating an urgent issue, or resolving a system outage, teams can communicate in context, in real time.
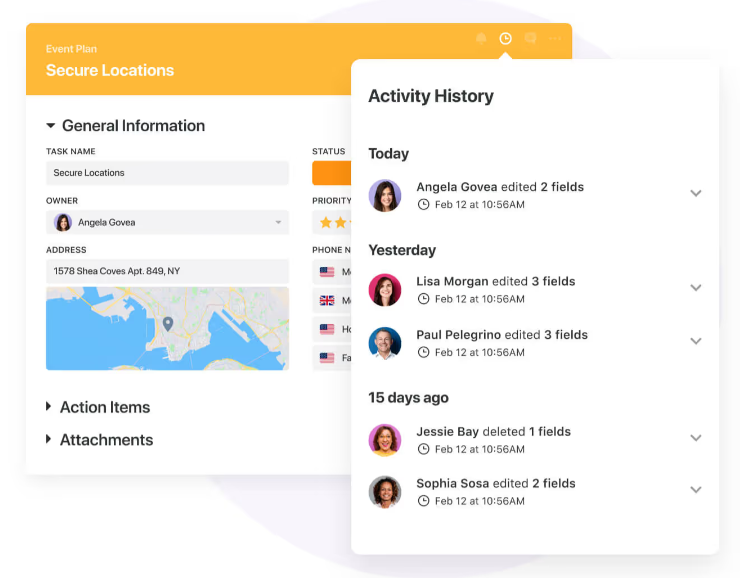
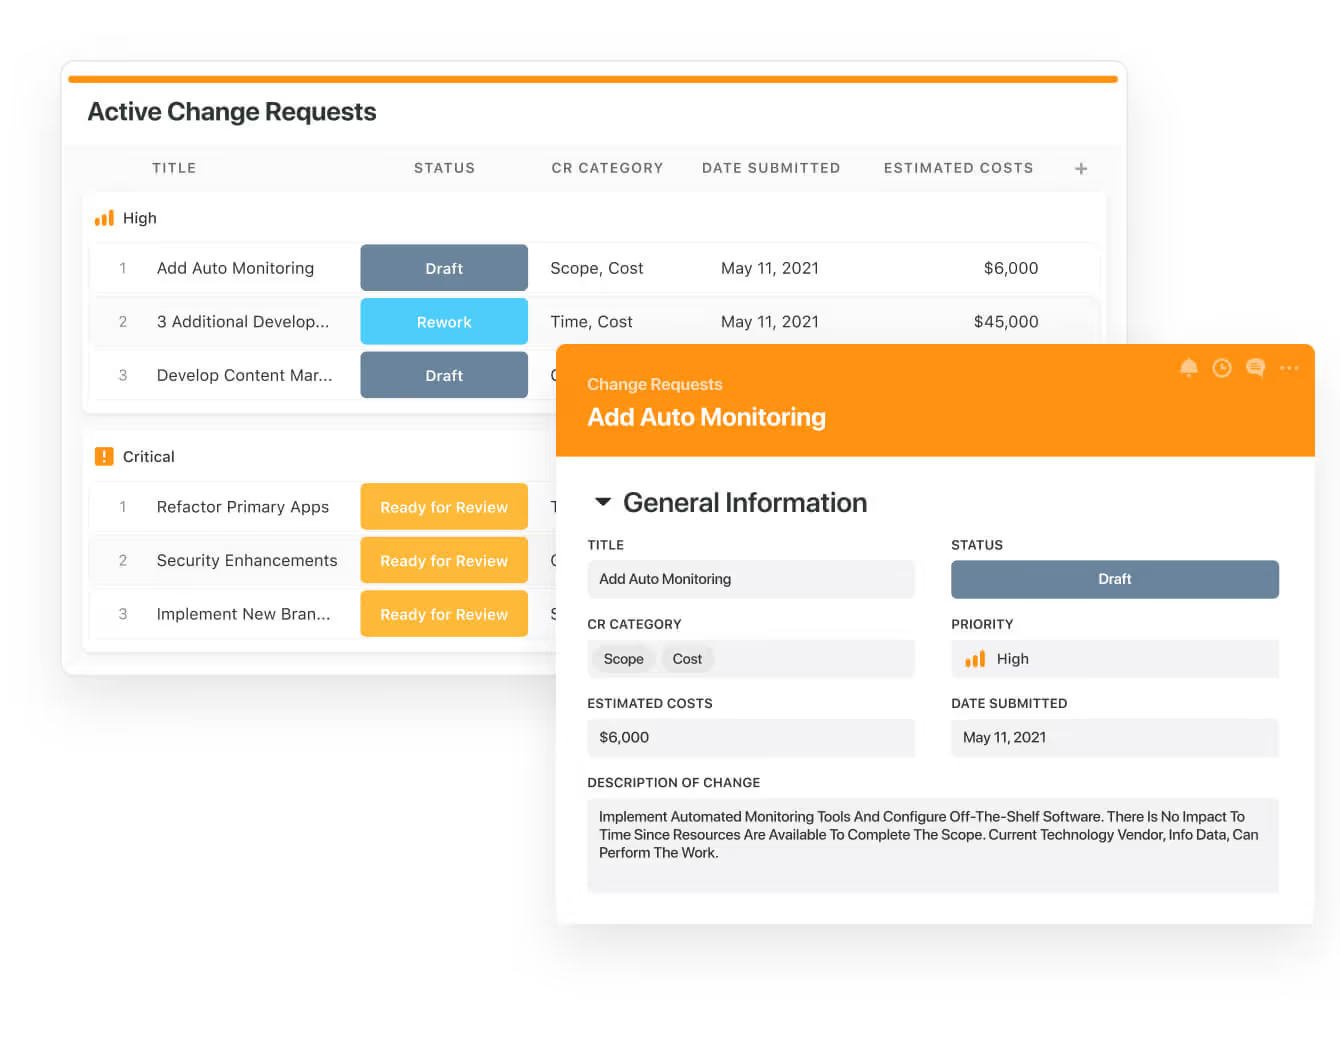
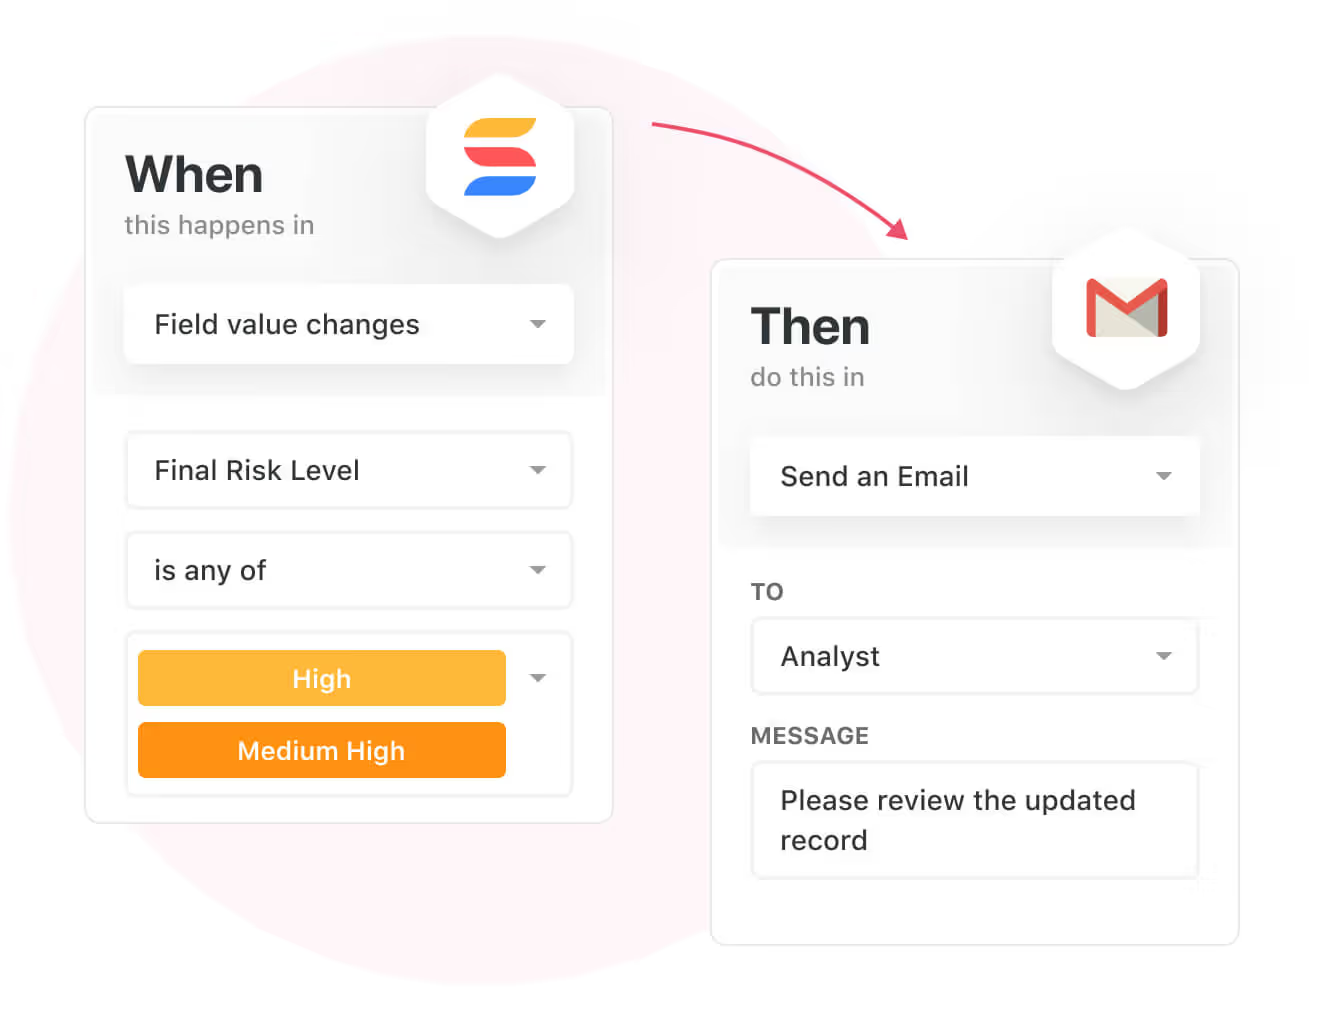
For example, SmartSuite enables you to start conversations exactly where the issue is unfolding – within the record itself.

Loop in subject matter experts, tag teammates, and share insights to troubleshoot faster and keep everyone aligned.
Moreover, with fully native iOS and Android apps, SmartSuite keeps you synced on the go.
This means that you can easily access tickets, share updates, upload files, and keep the resolution process moving from anywhere, which is perfect for remote or hybrid teams.
Finally, the platform’s flexible team management lets you assign and escalate tickets based on expertise and workload
As a result, you can ensure that critical problems are seen by the right people instantly, so nothing slips through the cracks.
3. Advanced analytics and dynamic reporting
You can’t fix what you can’t see, and that’s why SmartSuite’s reporting and analytics capabilities are built directly into every layer of your ITSM workflow.
Whether you’re tracking ticket volumes, spotting recurring incidents, or monitoring team performance, SmartSuite gives you instant visibility into what’s happening, what’s at risk, and where to focus next.
With its reporting capabilities, you can:
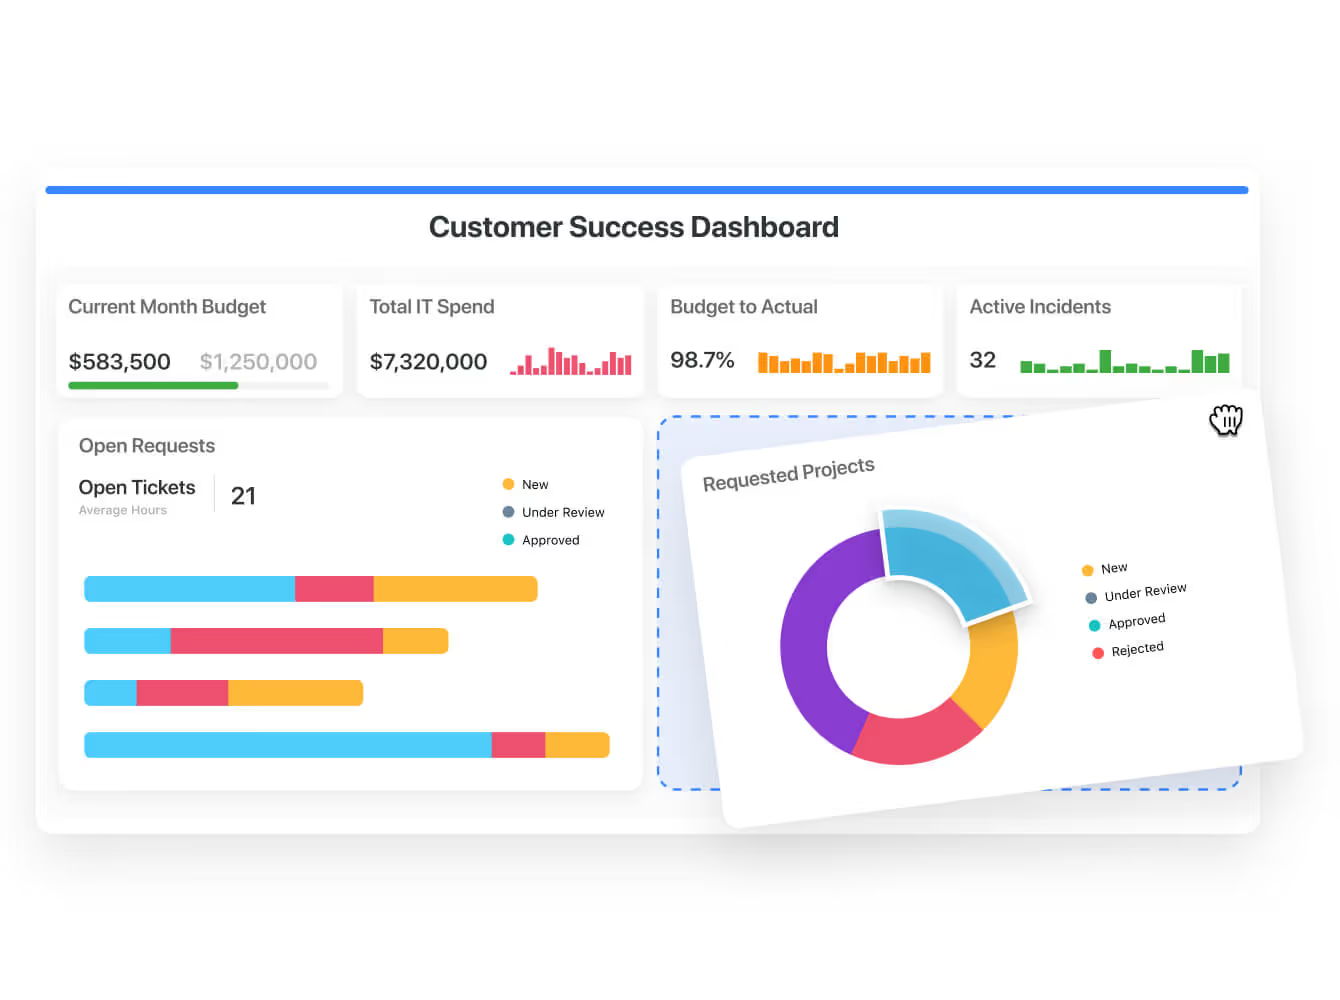
- Track tickets, trends, and team performance – Use real-time dashboards to visualize key metrics like response times, resolution rates, and SLA compliance, all in one place.
- Drill into the data – From high-level summaries to deep-dive insights, you can slice and filter ticket data to uncover root causes, spot bottlenecks, and take proactive action.
- Highlight critical issues before they escalate – Roll up key metrics into leadership-ready dashboards that surface red flags and track progress toward resolution in real time.
- Stay in control, wherever you are – SmartSuite’s flexible reports and visual dashboards keep you informed on any device, whether you’re in the office, in a meeting, or out in the field.
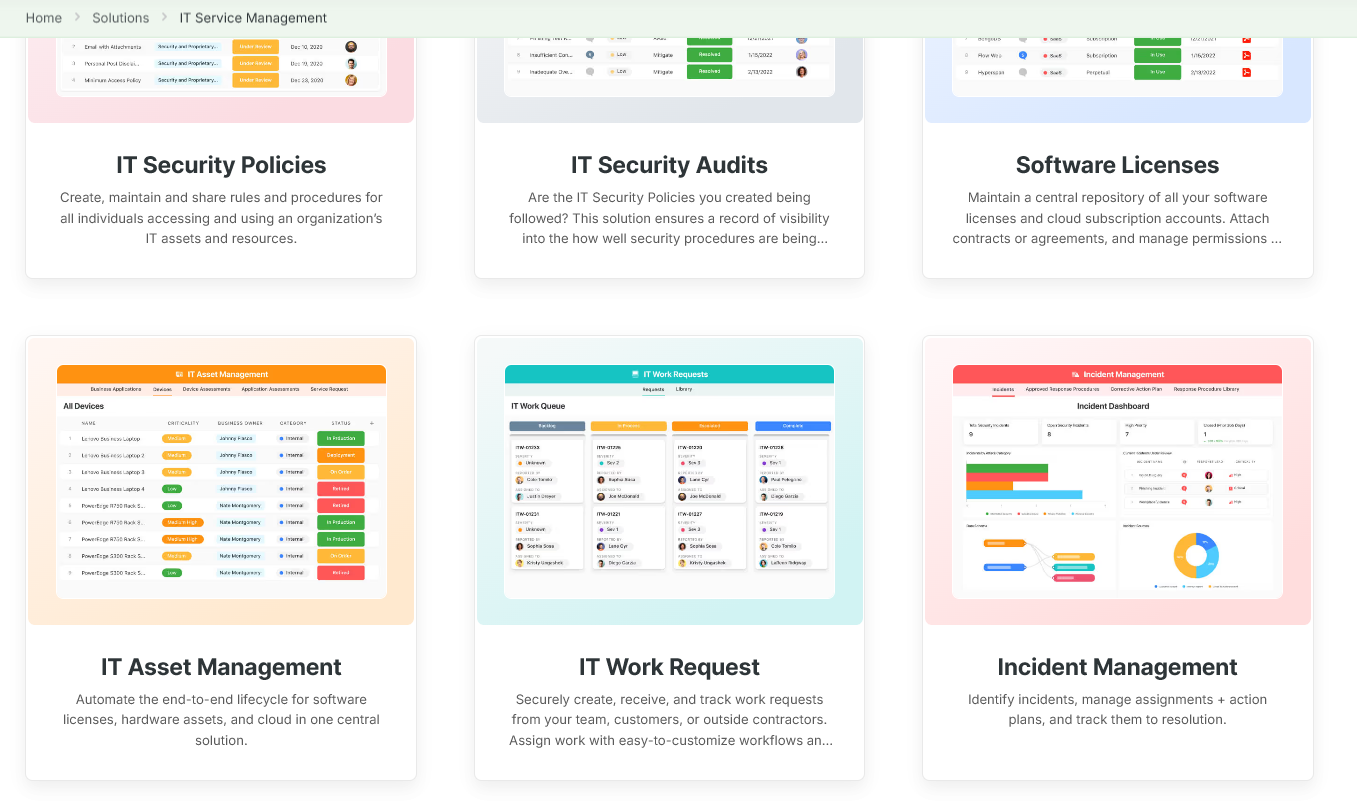
4. Jumpstart success with customizable ITSM templates
SmartSuite takes the guesswork out of setting up ITSM by offering a library of customizable templates designed to match the real-world needs of modern IT teams.
These pre-built solutions give you a head start for anything from tracking asserts to enforcing security policies, while still offering the flexibility to tailor every field, workflow, and dashboard to your team’s unique needs.
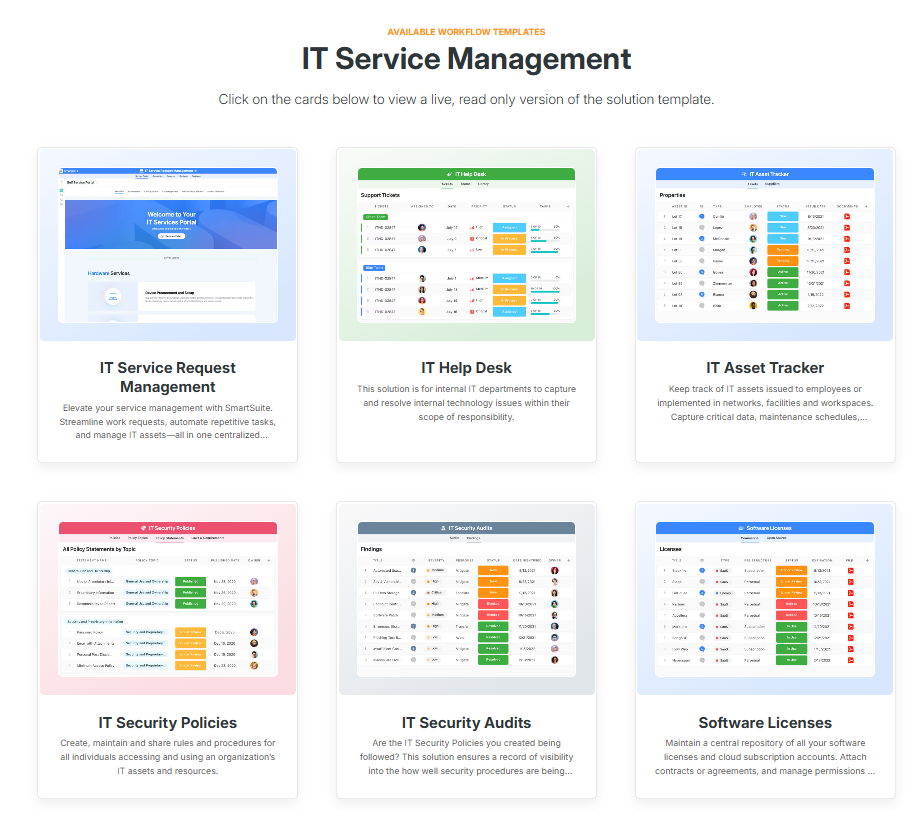
For example, with these templates, you can instantly deploy:
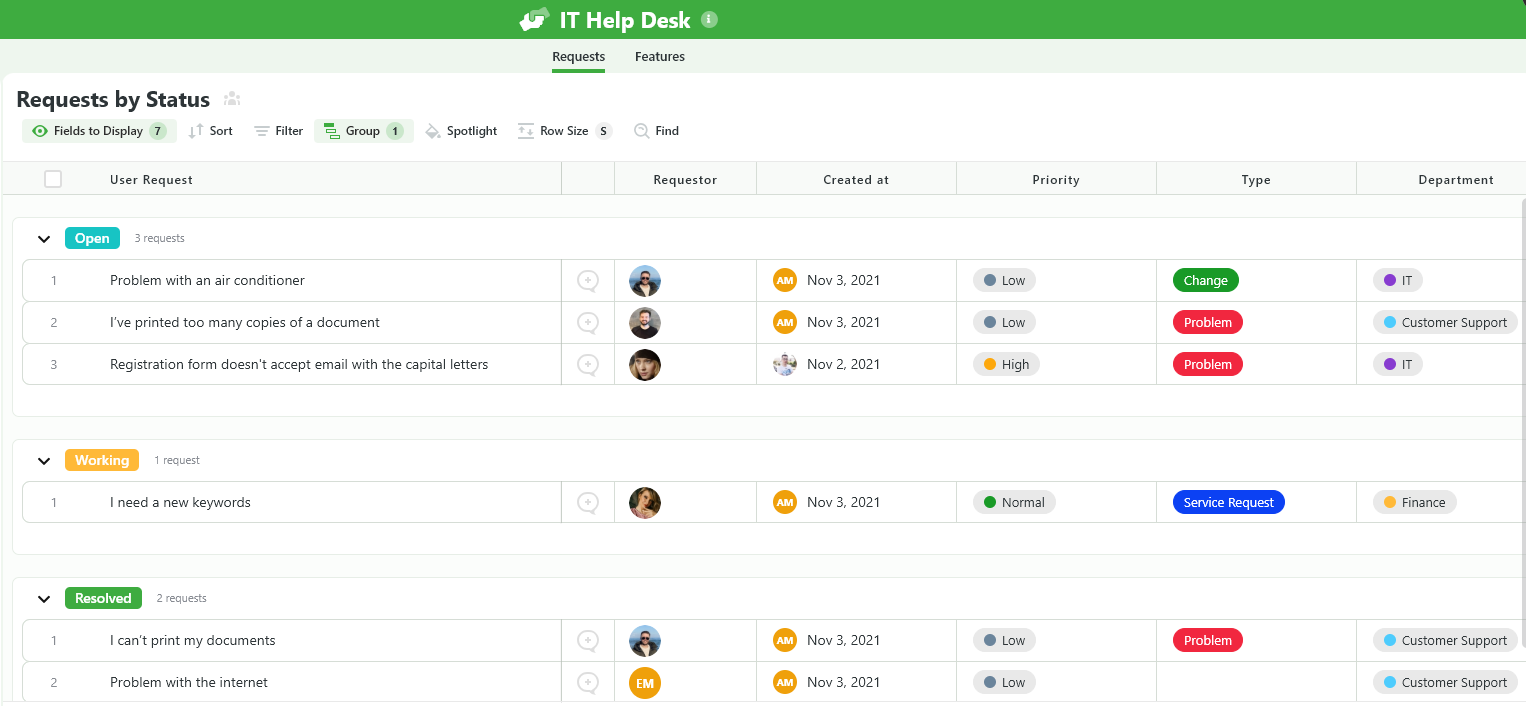
- IT help desk – Lets you centralize ticket intake and support delivery with visibility into maintenance schedules and hardware lifecycle data.
- IT security policies – Easily create, update, and distribute internal policies to ensure safe and compliant tech usage across the organization.
- IT asset management – You can automate asset procurement, assignment, and decommissioning across software, hardware, and cloud infrastructure.
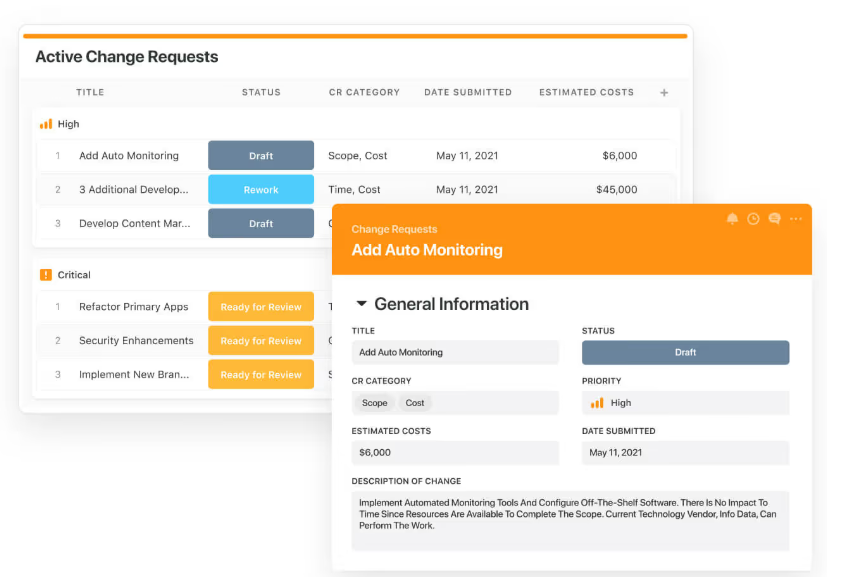
- IT work request – Receive and process work orders from internal teams, contractors, or external vendors in one secure location.

Want to try one of our templates out for size?
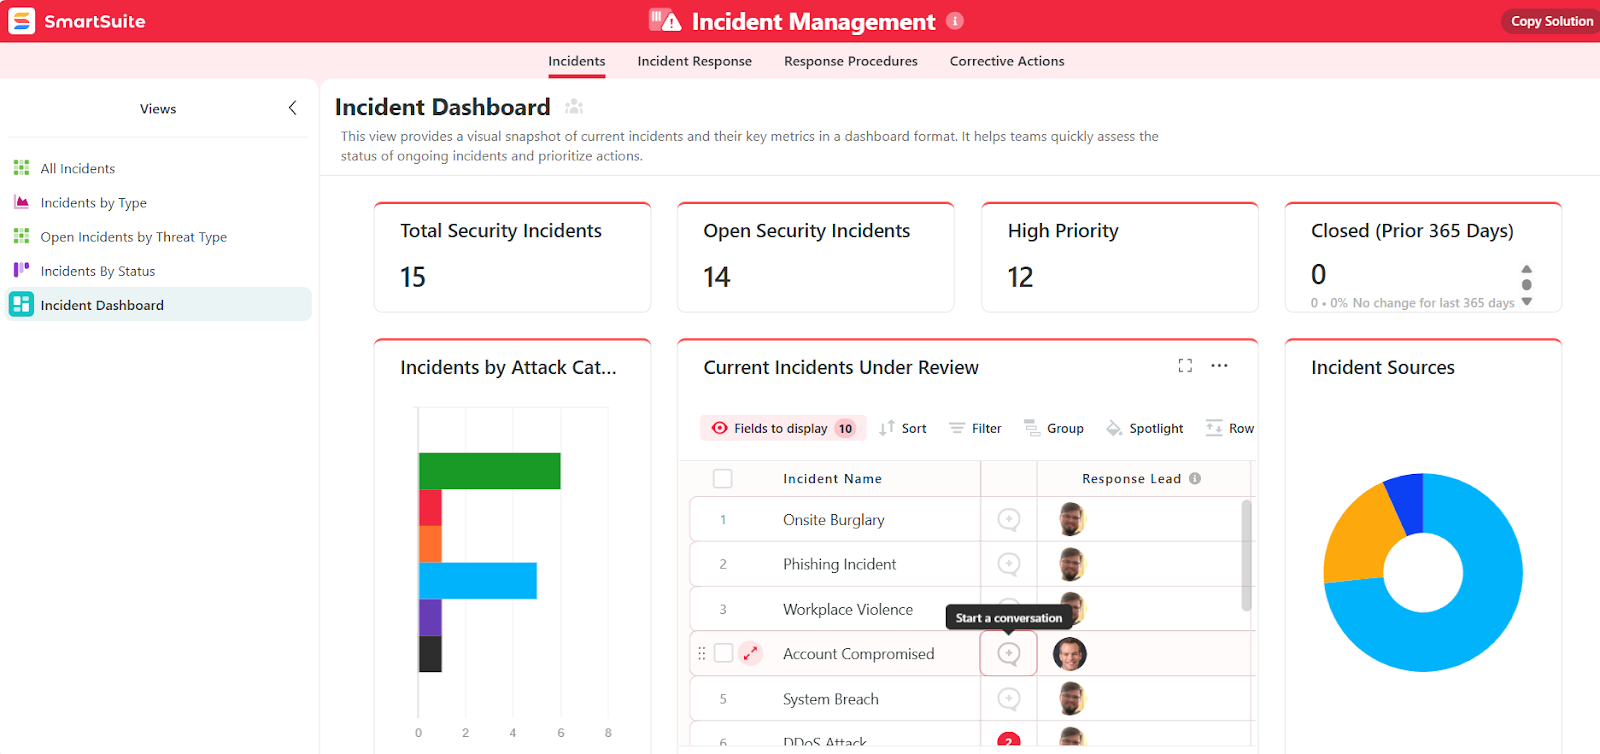
Test the incident management template that lets you capture, assign, and resolve issues faster, all in one streamlined workspace.
The best part is that these templates aren’t just plug-and-play – they’re built to evolve with your team.
This means you can customize every element to match your internal processes and scale your IT operations without building from scratch every single time.
Pricing
Unlike Freshservice, SmartSuite has a free forever plan that provides access to its templates, dynamic dashboards, team collaboration features, 100 monthly automations, etc.
Moreover, each of SmartSuite’s paid plans includes unlimited users, making it ideal for growing teams.
There are four tiers to choose from:
- Team: $12/user/mo, includes everything in Free, plus unlimited users, Gantt charts, 5,000 automation runs, etc.
- Professional: $30/user/mo, includes everything in Team, plus two-factor authentication, Gmail & Outlook integrations, AI features, more automation runs, etc.
- Enterprise: $45/user/mo, includes everything in Professional and adds audit logs, data loss prevention, 50,000 monthly API calls, etc.
- Signature: A customized plan tailored to your organization’s needs and team size with no predefined limits.
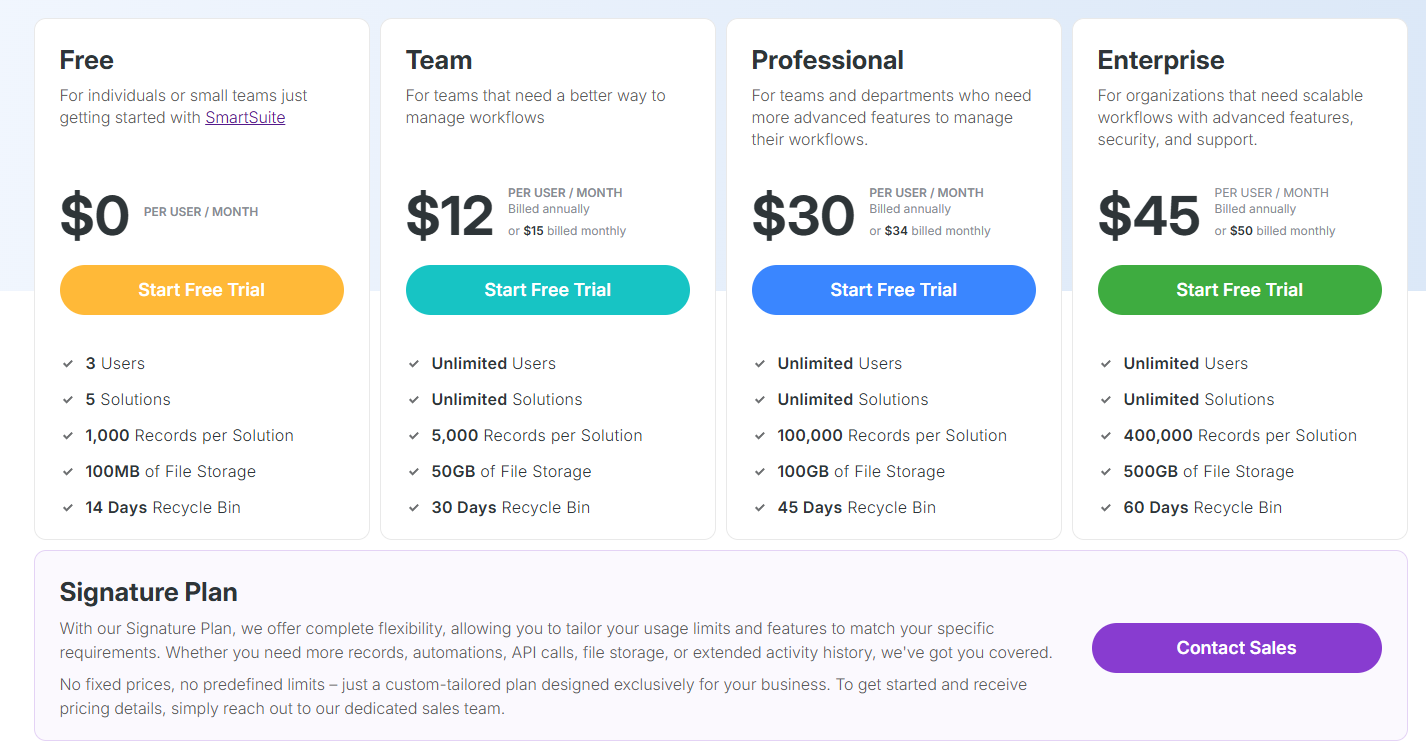
The first three paid plans have a 14-day free trial – no credit card needed.
How does SmartSuite compare to Freshservice?
Although Freshservice is packed with enterprise-grade features, for many teams, it comes with trade-offs, such as high pricing, limited customization, and underwhelming reporting.
SmartSuite flips that model on its head.
It gives you a unified, no-code ITSM platform that’s easy to customize, quick to deploy, and built to scale without requiring a dedicated IT department to manage it.
Unlike Freshservice, SmartSuite lets you create flexible workflows, collaborate in real time, and gain instant visibility into performance metrics, all from a single interface.
And with built-in templates and unlimited users on every paid plan, it’s a future-ready solution that works just as well for growing teams as it does for mature ones, all without breaking the budget.
Pros & Cons
✅ No-code platform makes it easy to customize workflows without technical expertise.
✅ Unified workspace for tickets, assets, audits, and projects in one place.
✅ Built-in ITSM templates to accelerate setup and standardize best practices.
✅ Real-time collaboration features, including mobile access and in-record conversations.
✅ Transparent pricing with unlimited users on all paid plans.
✅ Flexible reporting and dynamic dashboards for better visibility and decision-making.
❌ Fewer native ITSM integrations compared to enterprise platforms.
2. Jira Service Management
Best for: Agile IT and DevOps teams that want deep integration with development pipelines and powerful, customizable workflows.

Built on the robust Jira platform, Jira Service Management delivers an ITIL–aligned ITSM suite with top-tier incident, problem, and change management, while offering unmatched flexibility, automation, and seamless integration with development tools.
It’s ideal for teams that value agility, visibility, and a unified approach to support and engineering workflows.
Key features
- Customizable workflows – These let you tailor every ticket, lifecycle, and escalation path to mirror internal processes.
- Real-time reporting & analytics – You get dashboards, burndown charts, velocity reports, and JQL-powered filters for data-driven IT decisions.
- Self-service portal & knowledge base – These come with ML-powered search and virtual agents that ensure users find answers fast without agent intervention.
Pricing
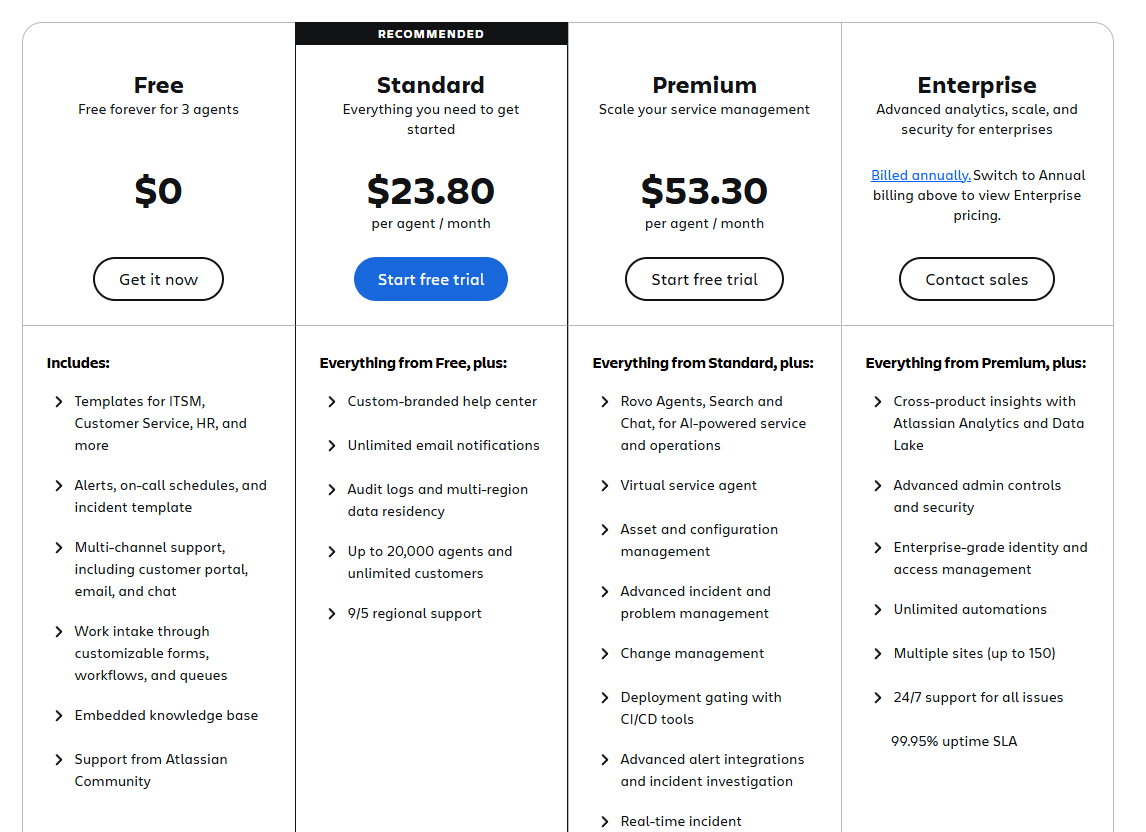
Jira Service Management has a free forever plan that lets you onboard up to three agents.
On it, you get ITSM templates, alerts and incident templates, multichannel support, knowledge base, etc.
If you need more features or users, you can subscribe to one of three paid plans:
- Standard: Starting at $23.80 per agent per month, includes everything in Free, plus custom-branded help centre, unlimited email notifications, up to 20,000 users and unlimited customers, etc.
- Premium: Starting at $53.30 per agent per month, includes everything in Standard, plus Rovo Agents, Search and Chat, for AI-powered service and operations, virtual service agent, advanced incident management, real-time incident monitoring, etc.
- Enterprise: Custom pricing, annual billing only, includes everything in Premium, plus cross-product insights, advanced admin controls and security, unlimited automations, etc.

Similar to most Atlassian products, you get a volume discount on the price, meaning that the price per user goes down the more users you onboard.
Pros & Cons
✅ Strong reporting tools and community support.
✅ Excellent multi-tool integration via Atlassian Marketplace.
❌ Asset management module locked behind Premium plan.
3. Atera
Best for: MSPs and small-to-mid IT teams needing unified RMM + PSA with AI-powered automation.
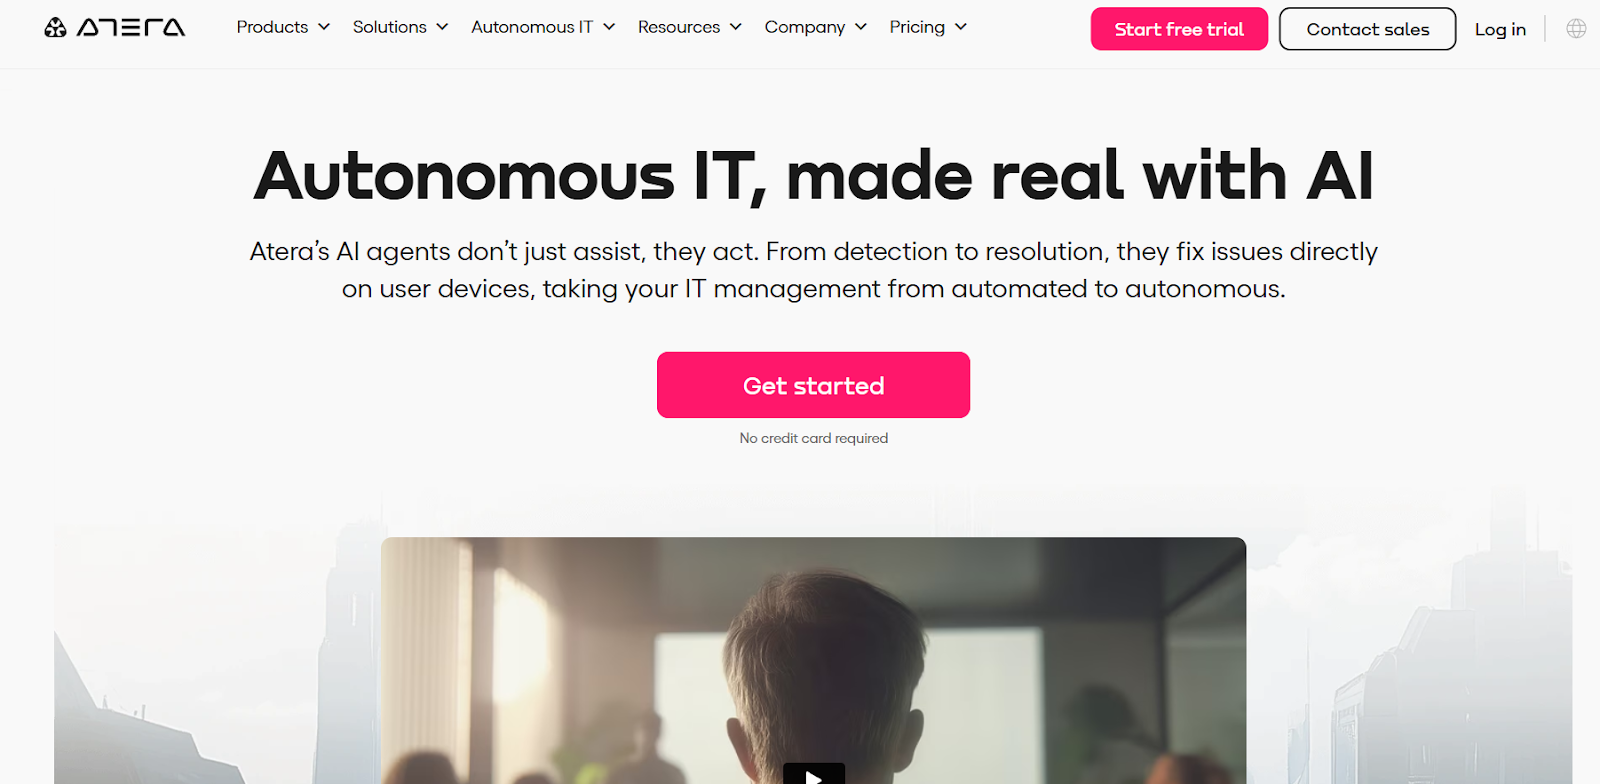
Atera is an all-in-one IT management platform that combines remote monitoring, professional service automation, patch management, and AI-driven insights.
Additionally, it recently introduced a range of AI agents that enable autonomous ITSM, making it perfect for teams who want to make the most of AI capabilities.
Key features
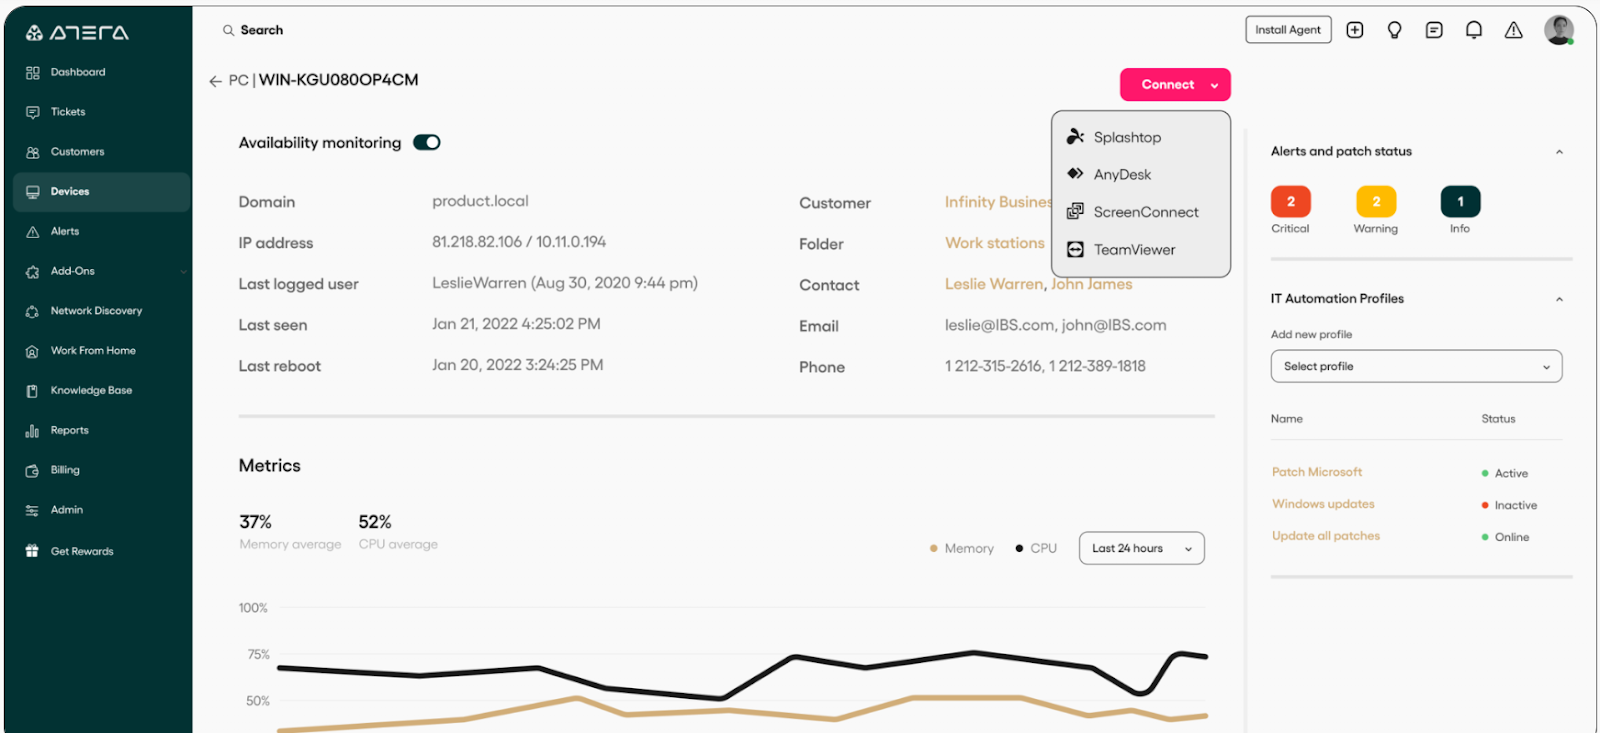
- Remote monitoring & management (RMM) – Tracks servers, workstations, and network devices in real time with customizable alerts to address issues before they escalate.
- AI Copilot – Real-time productivity assistant for IT technicians that delivers instant ticket summaries, remote troubleshooting insights, script and command-line generation, and knowledge base recommendations.
- IT Autopilot – Independently handles tickets, troubleshoots issues, and delivers 24/7 support through human-like interactions across Slack, Teams, email, and the user portal.
Pricing
Atera has separate packages for IT departments and MSPs.
When it comes to IT departments, there are four pricing plans to choose from:
- Professional: $169/technician/mo, includes remote monitoring, management, and alerts, patch and software management, service portal, etc.
- Expert: $229/technician/mo, includes everything in Professional, plus custom asset, ticket auto-tagging, remote access using AnyDesk, etc.
- Master: $269/technician/mo, includes everything in Expert, plus custom analytics reports, longer audit log, more custom assets, data recovery, etc.
- Enterprise: Custom price, includes everything in Master, plus SSO, Azure AD continuous sync, script-based custom fields, etc.

If you’re an MSP, there are also four plans you can check out:
- Pro: $139/technician/mo, includes the same features as the IT Professional plan.
- Growth: $189/technician/mo, includes the same features as the Expert plan.
- Power: $249/technician/mo, includes the same features as the Master plan.
- Superpower: Custom price, includes the same features as the Enterprise plan.

Each of these plans for both IT departments and MSPs comes with a 30-day free trial.
In addition to these plans, there are also optional add-ons which you can purchase on any of these eight plans:
- AI Copilot: $95/technician/mo, includes all of AI Copilot’s capabilities.
- Network Discovery: $29/technician/mo, scans your network, detects unauthorized devices, and onboards new assets.
- AI Agents: Custom price, depending on the type and scale of agent you want.

Pros & Cons
✅ Intuitive interface.
✅ Strong RMM, PSA, patch management, and remote access in a single platform.
❌ Reporting capabilities are functional but could be deeper.
4. ServiceNow
Best for: Large enterprises and complex organizations that need a full ITSM ecosystem with strong ITIL alignment, robust AI capabilities, and deep integrations across IT and business functions.
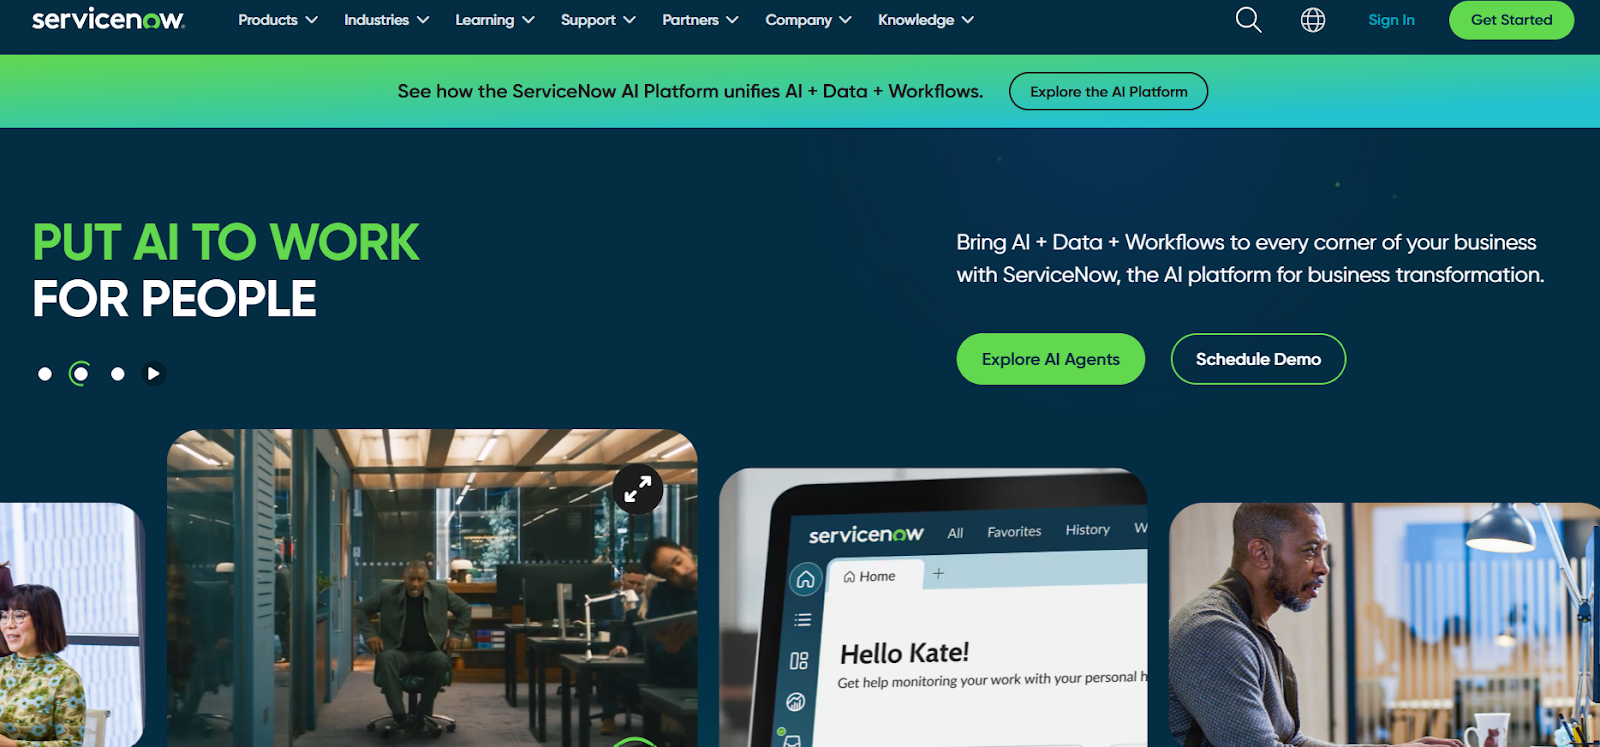
ServiceNow offers an end-to-end, cloud-based ITSM platform built on the Now Platform, providing seamless incident, problem, change, and asset management across the service lifecycle.
With powerful AI, automation, and a unified CMDB, it enables complex workflows and enterprise-scale operations with consistency and control.
Key features
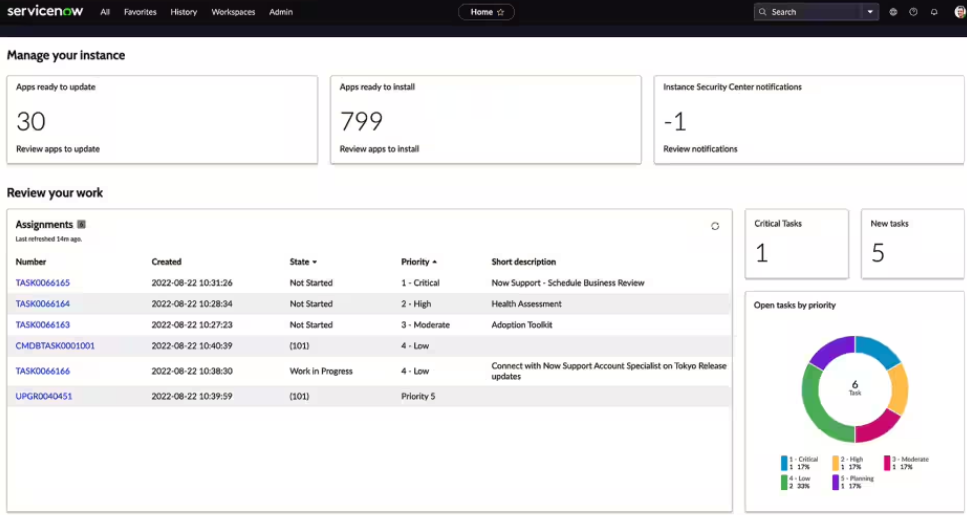
- Comprehensive ITIL-aligned suite – Has tools that cover incident, problem, change, request, and asset management for full service lifecycle management from a single platform.
- Powerful CMDB & asset management – Lets you centrally track configurations, dependencies, lifecycle data, and compliance across all IT and field assets.
- Generative AI and virtual agents – These tackle things like predictive analytics, automated resolutions, and conversational support.
Pricing
ServiceNow doesn’t disclose prices for any of its products, including its ITSM product suite.
You’ll have to contact sales for details or check our in-depth guide on its pricing.
Pros & Cons
✅ Robust CMDB and 360-degree asset lifecycle visibility support a compliant and proactive approach to incident management.
✅ Advanced AI-powered automation capabilities.
❌ Steep learning curve and interface complexity can be overwhelming for smaller teams.
5. Zendesk
Best for: Mid-sized teams and internal IT/help desk groups that prioritize intuitive setup, multichannel support, and fast deployment with minimal technical overhead.

Zendesk offers a clean, user-friendly platform that consolidates tickets from email, chat, phone, and social media into a centralized support environment.
As such, it can deliver fast-to-deploy IT service management capabilities – like incident tracking, SLA enforcement, and self-service portals – while leveraging AI-powered automated workflows and dynamic knowledge bases to deflect tickets and drive efficiency.
Key features
- Omnichannel ticketing & SLA automation – Lets you centralize support requests across email, chat, voice, and social into one stream, with rules to triage based on urgency.
- AI-driven self-service & bots – Helps you reduce ticket volume by offering automated answers and smart article suggestions powered by prior conversations.
- Knowledge base & community forums – Allow your end users to access self-help articles and peer insights, and cut down reliance on IT agents.
Pricing
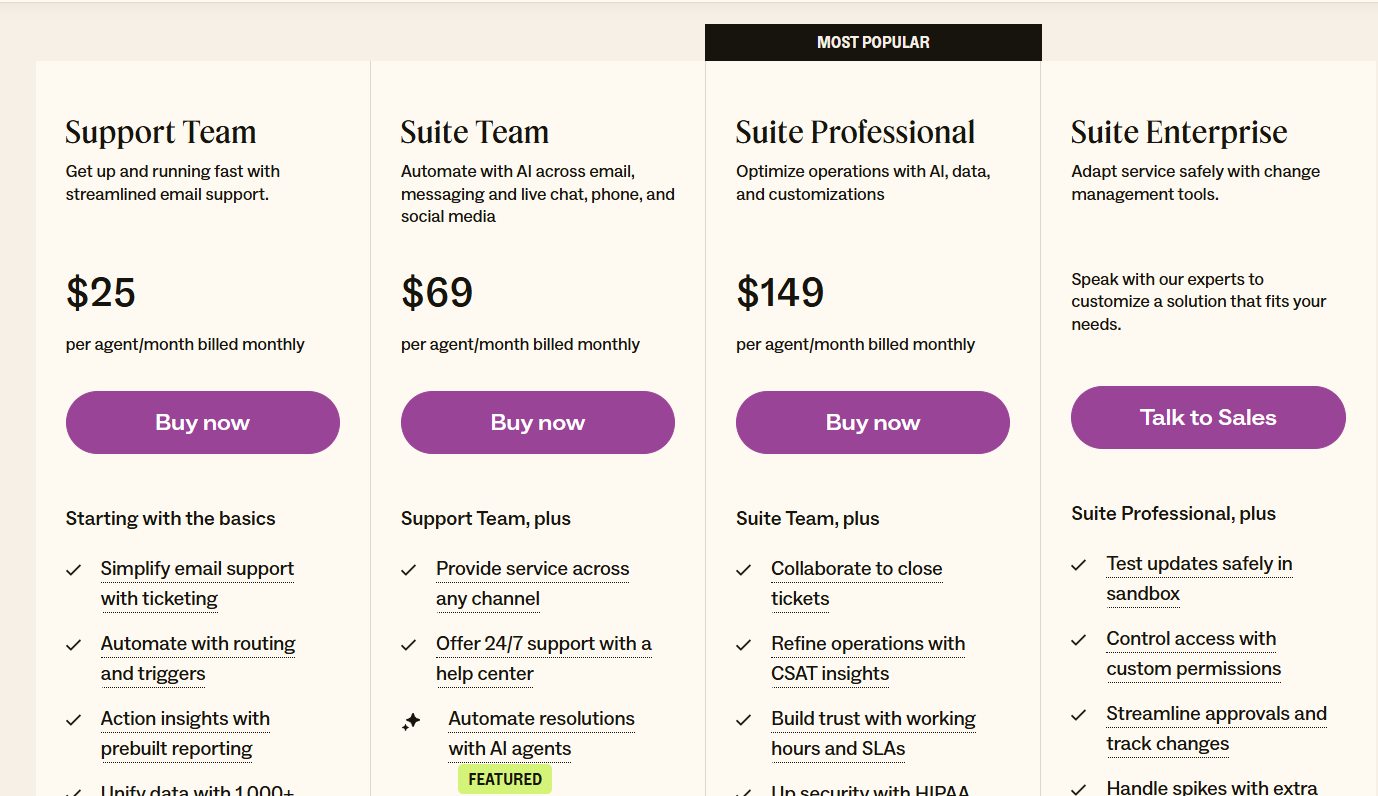
Zendesk has four essential pricing plans:
- Support Team: $25/agent/month, includes basic automations and insights, simplifying email support with ticketing, etc.
- Suite Team: $69/agent/month, includes everything in Support Team, plus omnichannel support, AI agent-driven automations, etc.
- Suite Professional: $149/agent/month, includes everything in Suite Team, plus team collaboration on closing tickets, smart routing, etc.
- Suite Enterprise: Custom price, includes everything in Suite Professional, plus sandbox for testing updates, custom permissions, change tracking, spikes handling, etc.
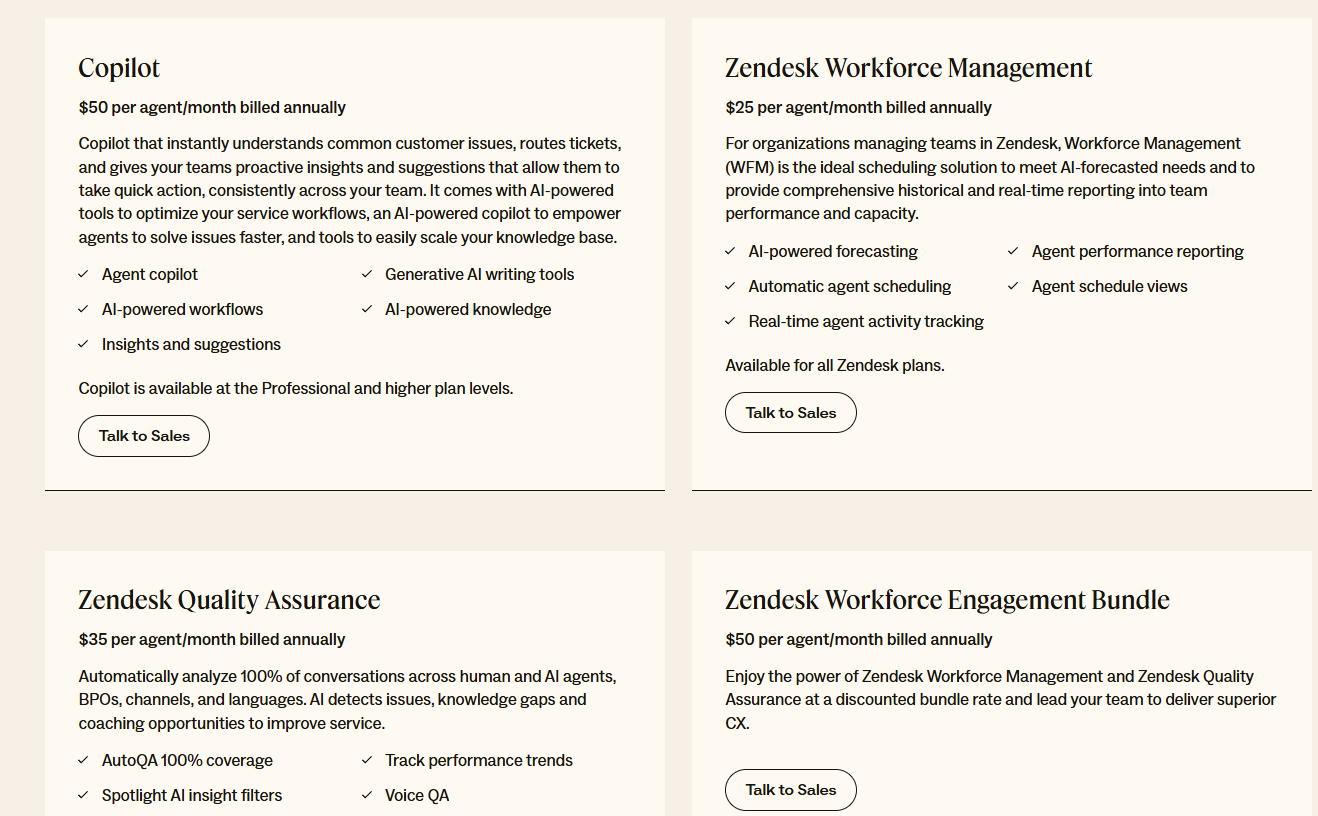
In addition to these, there’s a wide range of add-ons you can purchase on top, such as:
- AI Copilot: $50 per agent/month, billed annually, available on Professional and above.
- Zendesk Workforce Management: $25 per agent/month, billed annually, for organizations managing teams in Zendesk.
- Zendesk Quality Assurance: $35 per agent/month, billed annually, lets you automatically analyze 100% of conversations across human and AI agents, BPOs, channels, and languages.
- Zendesk Workforce Engagement Bundle: $50 per agent/month, billed annually, lets you enjoy the power of Zendesk Workforce Management and Zendesk Quality Assurance at a discounted bundle rate and lead your team to deliver superior CX.
- Advanced Data Privacy and Protection: $50 per agent/month, billed annually, supports your compliance and security policy obligations with an extra layer of protection and privacy.
- Contact Centre: $50 per agent/month, billed annually, lets you power the world’s most complex contact centres with Zendesk’s ease of use and flexibility, available on all Suite plans.
Pros & Cons
✅ Easy, fast deployment with a low learning curve.
✅ Powerful omnichannel support for internal IT teams spanning email, chat, phone, and social.
❌ Lacks advanced ITSM features like native CMDB or comprehensive asset/change management because it’s not an ITSM dedicated platform.
6. SolarWinds Service Desk
Best for: Mid‑sized to large IT teams that need a full-featured, ITIL-compliant platform with strong asset and configuration management at a predictable, per-technician cost.

SolarWinds Service Desk is a cloud-based ITSM suite praised for combining powerful incident, change, and asset management with AI-driven automation and an intuitive interface.
The platform includes a visual CMDB, intelligent runbooks, virtual agents, and customizable reporting, making it a strong choice for teams seeking operational efficiency without excessive complexity
Key features
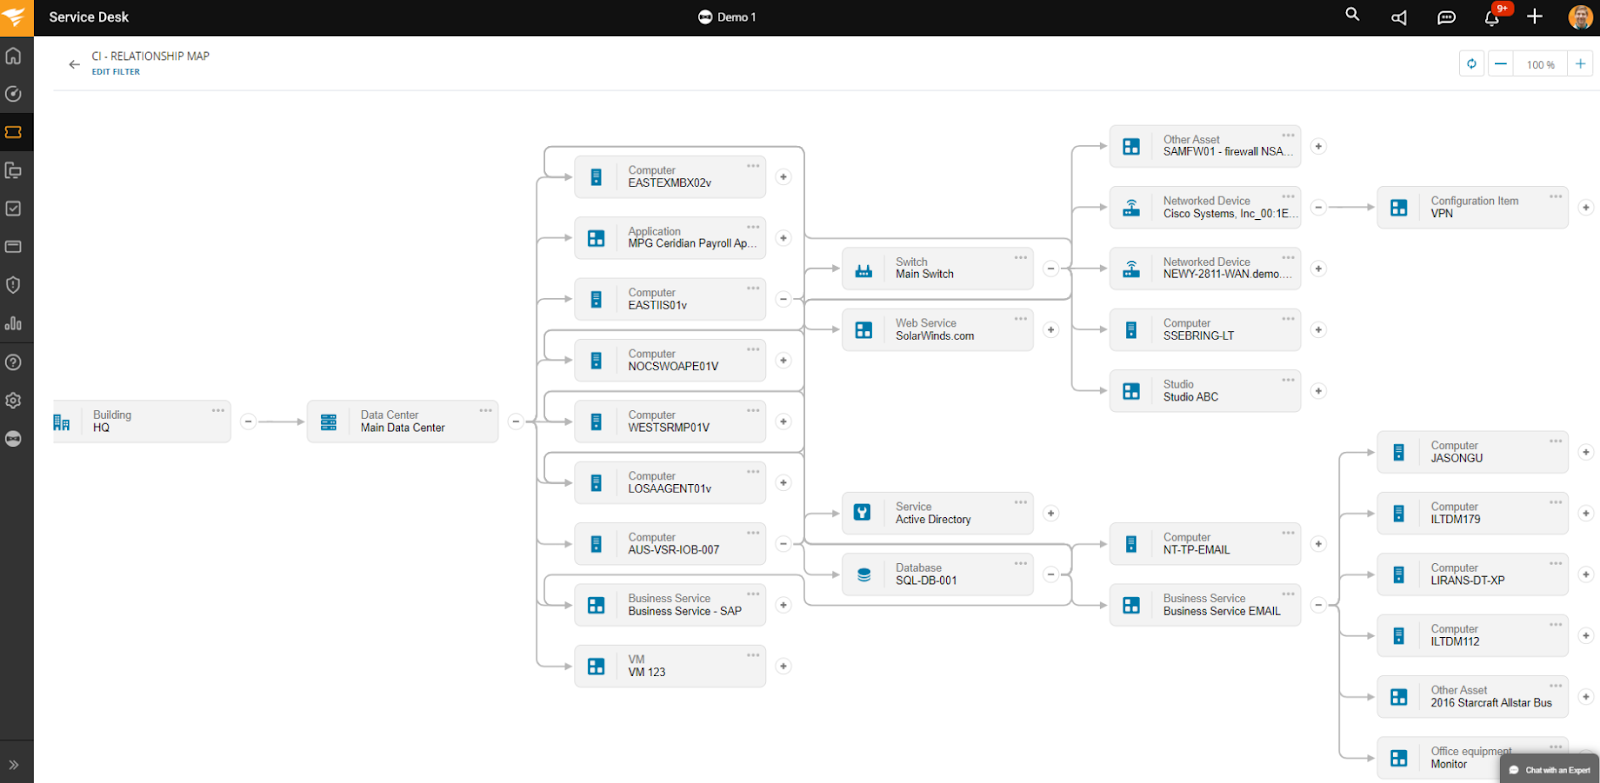
- AI-powered incident management – The platform provides sentiment detection, auto-routing, and virtual agents to speed resolution and reduce response time.
- Visual CMDB with dependency mapping – Offers real-time visibility into asset relationships and incident impacts to support proactive change and risk analysis.
- Customizable reporting & powerful dashboards – This lets you track all the essential metrics, while providing downloadable 360° reports and Power BI integration for advanced analytics.
Pricing
SolarWinds has several different product packages, each of which has distinct pricing.
When it comes to IT Service Management, there’s one plan, Service Desk, with pricing starting at $39/technician/month.
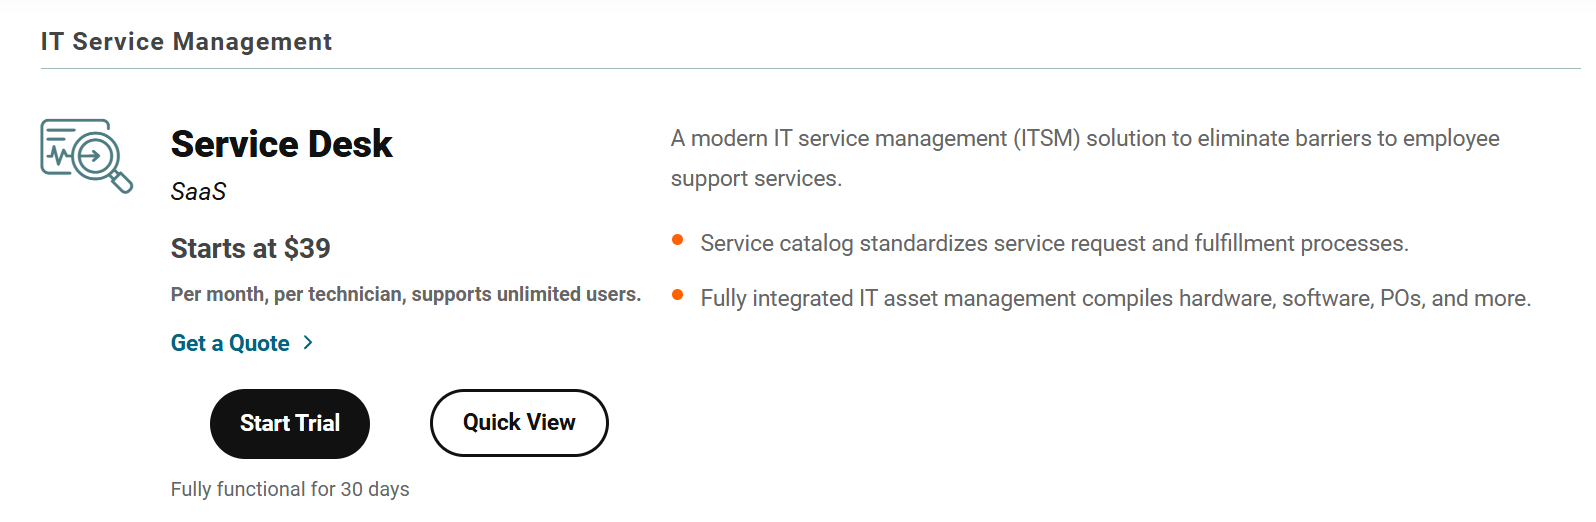
It’s best to request a custom quote to find out the exact price for your organization. If you’d like to test it first, there’s a 30-day free trial.
However, if you need incident response features too, you should know that these are included in a separate Incident Response plan, with pricing starting at $9/user/month.
Pros & Cons
✅ Easy to use with lots of out-of-the-box features.
✅ Highly configurable and customizable, can be adjusted to various workflow types.
❌ Lacks a free or entry-level plan, plus its per-user pricing scales badly.
7. ManageEngine ServiceDesk Plus
Best for: SMBs to mid-size enterprises seeking a full ITIL-aligned ITSM + asset management suite at transparent, technician-based pricing.
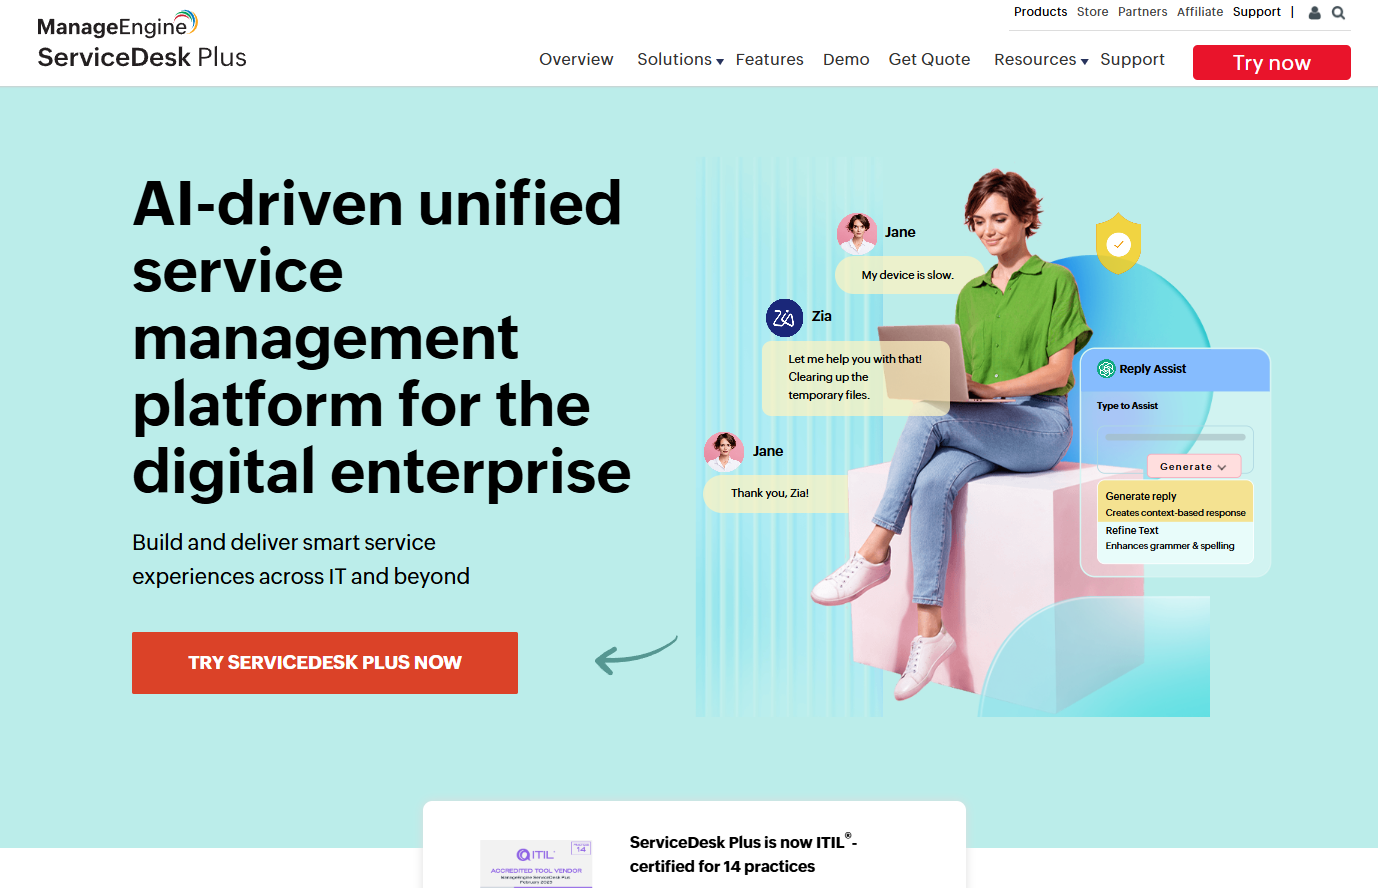
ManageEngine ServiceDesk Plus delivers a broad IT service desk capable of handling incidents, assets, change, problems, and project management, all within a single platform built on ITIL-certified best practices.
It combines flexible workflow automation, multi-channel ticketing, and powerful asset discovery to enable end-to-end ITSM.
Key features
- Asset & CMDB management – Automatically discovers hardware/software assets and lets you visually map and track configurations, lifecycles, contracts, and licensing.
- Customizable workflows & business rules – Allows configuration of ticket actions, escalations, notifications, and approval steps with no coding required.
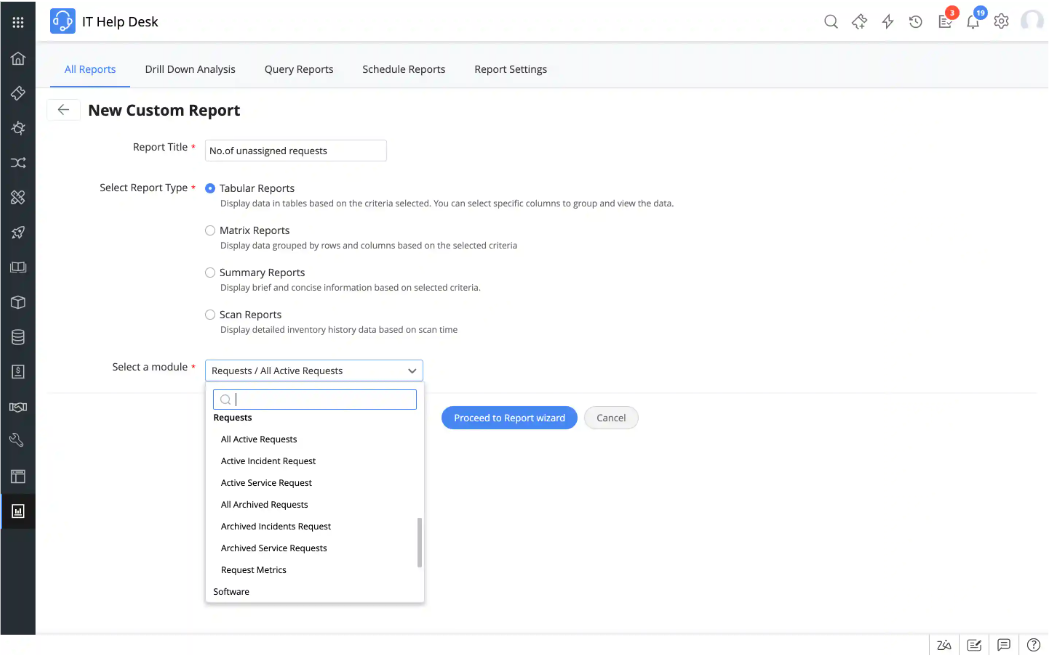
- Reporting & dashboards – Offers 150+ pre-built reports and lets you easily build custom reports to drill down into essential metrics.
Pricing
When it comes to ManageEngine ServiceDesk Plus’ cost, there’s little I can tell you, as the platform doesn’t publish pricing details.
Judging by its quote request form, though, it’s fair to assume that the pricing will depend at least partially on the number of technicians you need to onboard and your preferred deployment method.
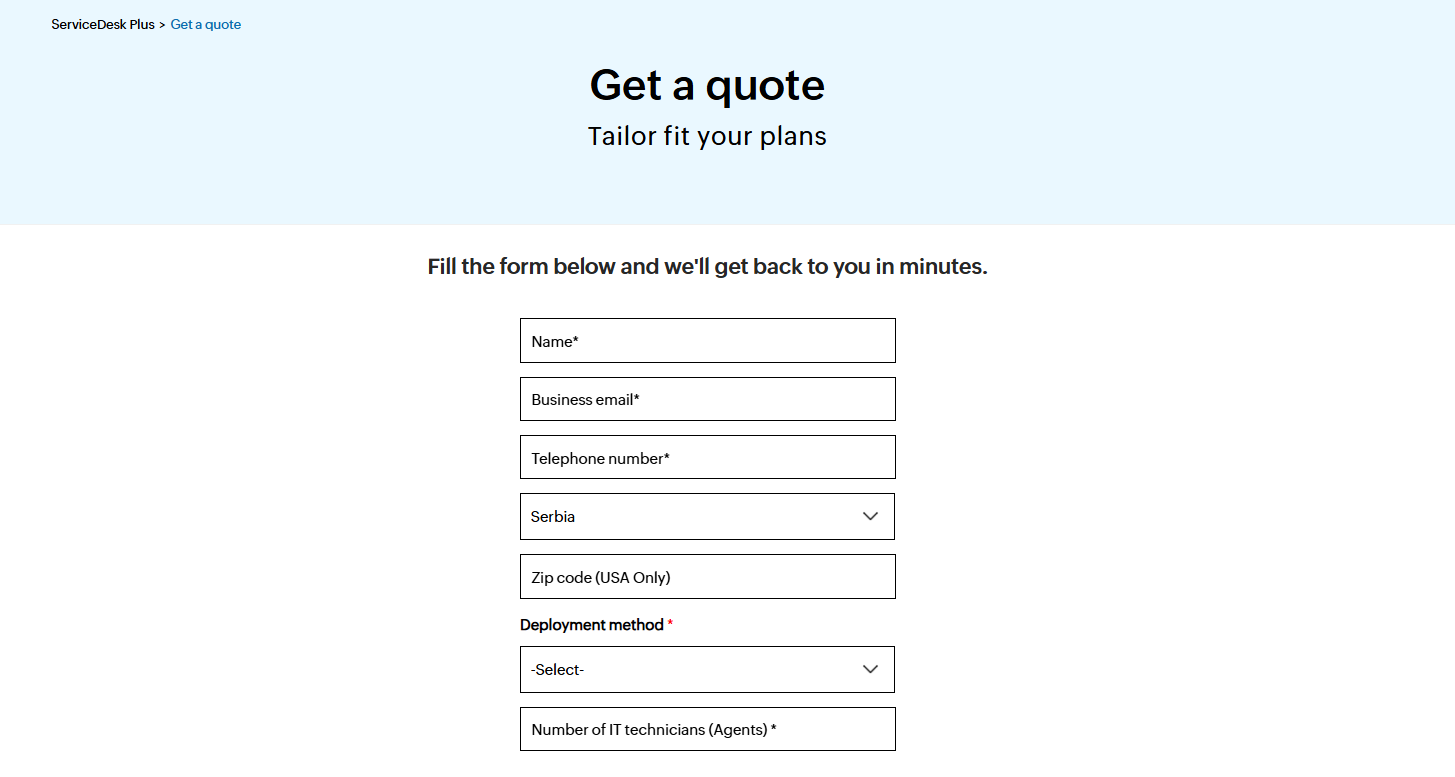
You can contact its team for a custom quote.
Pros & Cons
✅ Virtual agent and AI features (triage, assistance) available out-of-the-box.
✅ Flexible deployment options.
❌ Complex initial implementation.
8. HappyFox
Best for: Small to mid-sized teams and internal help desks that want a clean, highly customizable ticketing system with strong automation without enterprise complexity.

HappyFox offers a sleek, intuitive help desk that consolidates requests from email, chat, phone, and social media into a unified support queue.
With powerful smart automation rules, a built-in knowledge base, and multi-channel support, it simplifies ticket handling while empowering teams to streamline workflows efficiently.
Key features

- Smart automation rules – You can easily automate ticket assignment, prioritization, escalation, and reminders based on various criteria.
- Optimized asset management – Built-in tool for centralized asset management that provides instant visibility into affected users, impacted services, and asset histories when troubleshooting.
- Wide range of AI features – These include autonomous AI agents for handling repetitive tasks, auto responses, ticket summarization, writing assistance, insights and recommendations, etc.
Pricing
HappyFox has three pricing tiers:
- Team: $69/agent/mo, includes incident and service request management, service and product catalogs, 500 assets, etc.
- Pro: $119/agent/mo, includes everything in Team, plus problem, change, and release management, custom roles and permissions, 2,000 assets, etc.
- Enterprise PRO: Custom price, includes everything in Pro, plus 25 service portals, 5,000 assets, email archival, etc.

However, neither of these plans includes any of HappyFox’s AI features, which are only available as add-ons, with pricing starting at $14/agent/month for the most basic package.
You can get a free trial if you request a demo in order to determine whether HappyFox could be the right fit for your organization.
Pros & Cons
✅ Powerful automation rules reduce repetitive tasks and manual follow-up.
✅ Clean, user-friendly interface that’s quick to implement and easy to use.
❌ Reporting setup and customization are complex and limited.
9. SysAid
Best for: Mid-sized to large IT teams that require ITIL-aligned support with deep automation, customizable workflows, and flexible deployment.
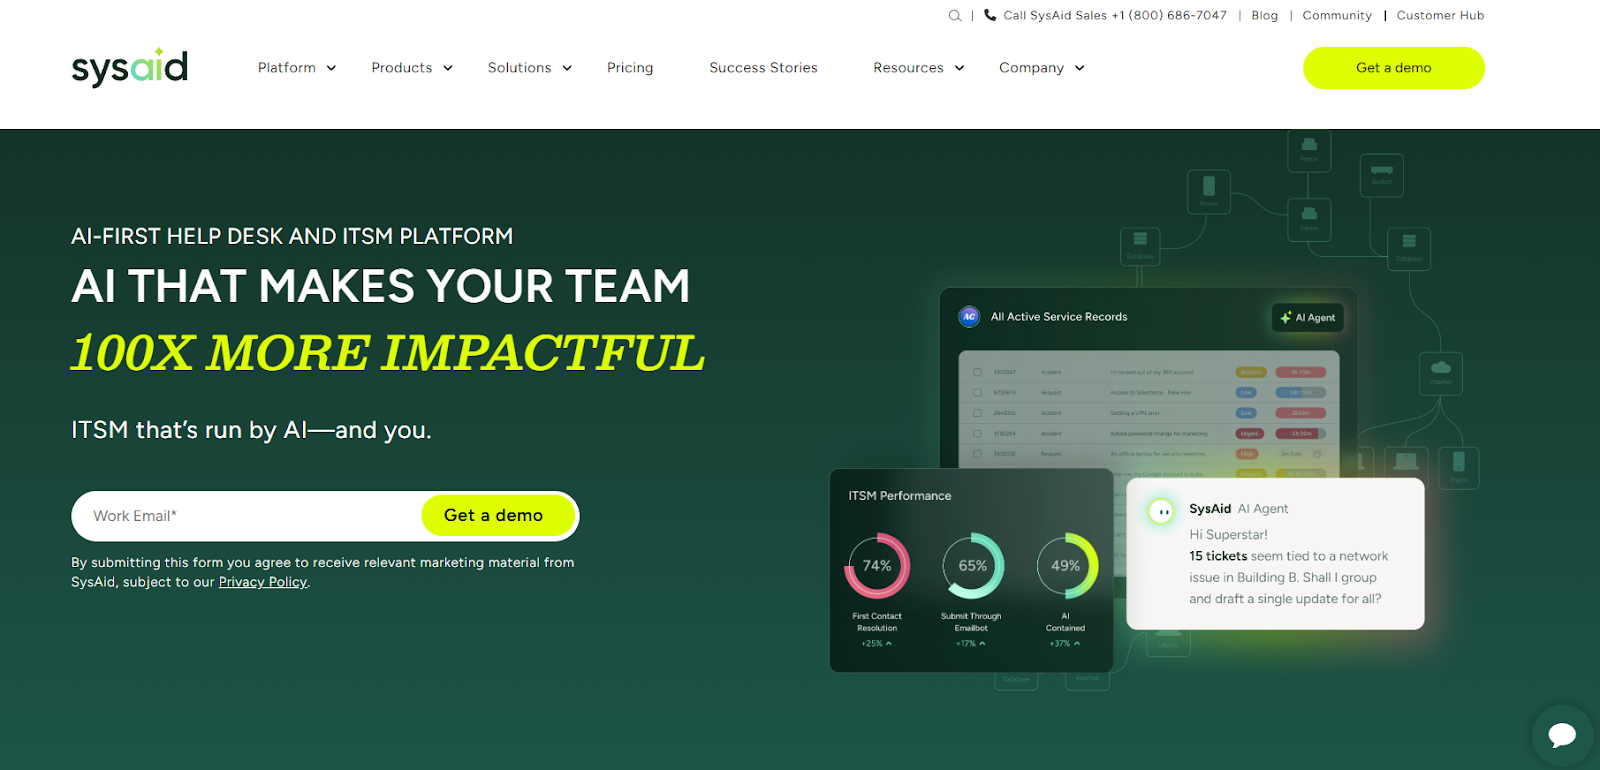
SysAid offers a comprehensive ITSM suite featuring incident, problem, change, and request management, backed by powerful asset discovery, automation, and self-service capabilities.
Its unique strength lies in its high configurability, offering unlimited templates and custom fields to match exact business needs
Key features
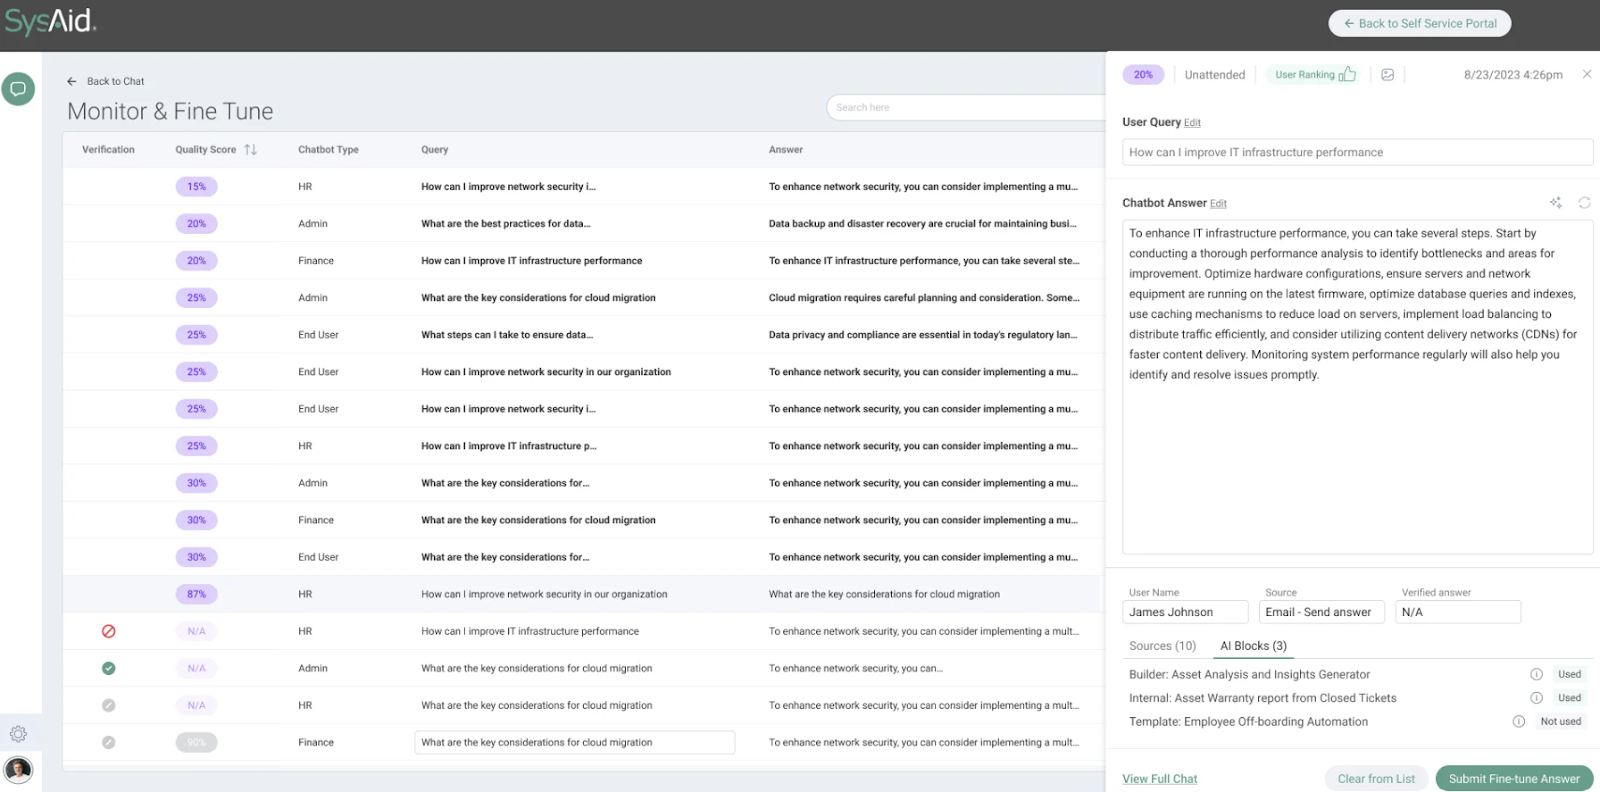
- SysAid Copilot – Lets you incorporate generative AI into every aspect of ITSM for faster and more accurate service.
- Automation & workflows – Visual workflow builder lets you streamline approvals, notifications, and repetitive tasks with easy-to-configure rules and triggers.
- Service level management – You can customize SLAs and performance metrics to align with your unique service delivery goals, ensuring issues are resolved within agreed timeframes and customer expectations are consistently met.
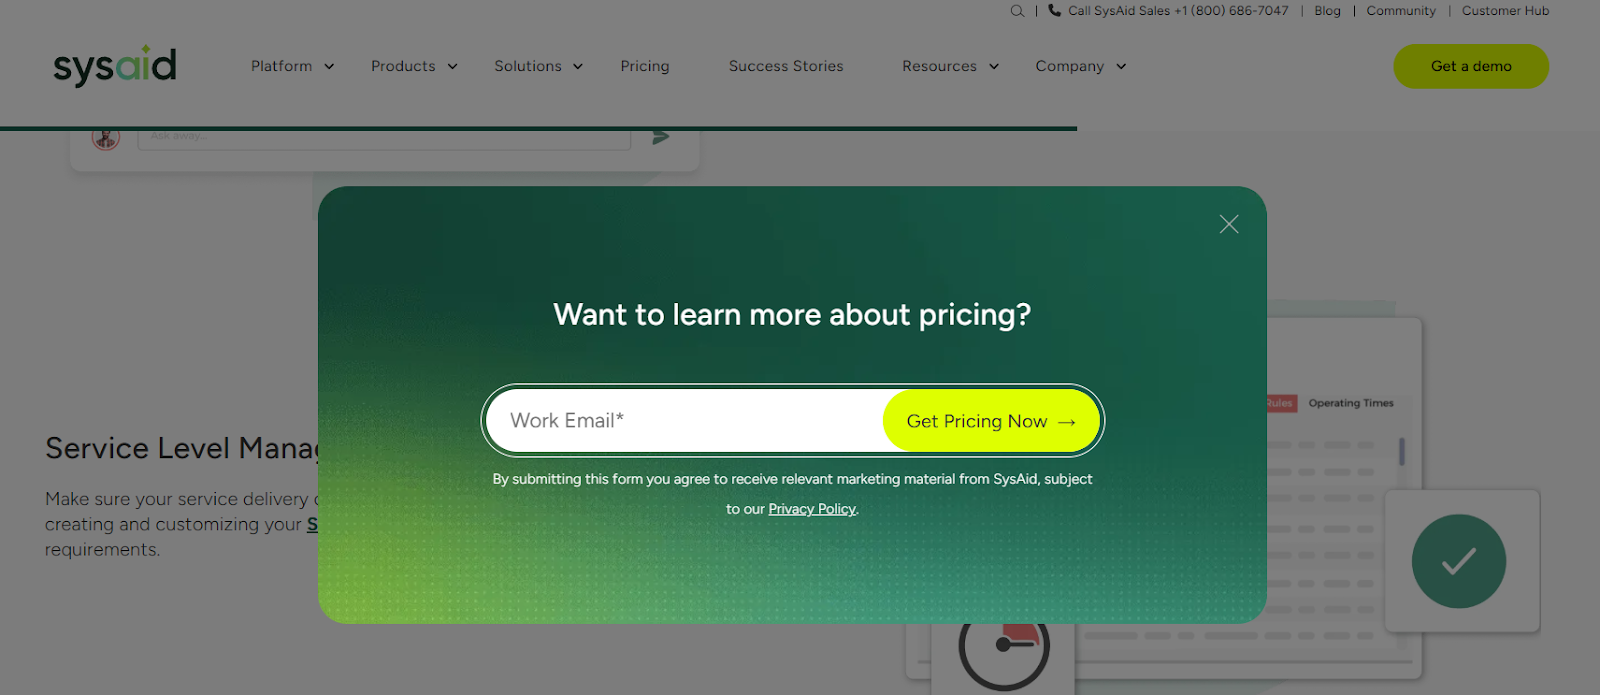
Pricing
SysAid doesn’t publish prices.
You can contact its team for more information.
Pros & Cons
✅ Highly customizable, meaning it can easily fit into varied and complex organizational needs.
✅ Advanced AI features powered by ML algorithms that adapt and learn with time.
❌ The UI can feel clunky at times.
10. Budibase
Best for: IT teams or business units that need ultra-flexible, low-code internal tools – like custom ITSM apps, asset trackers, or ticketing systems – that they can build and self-host without heavy engineering dependency.
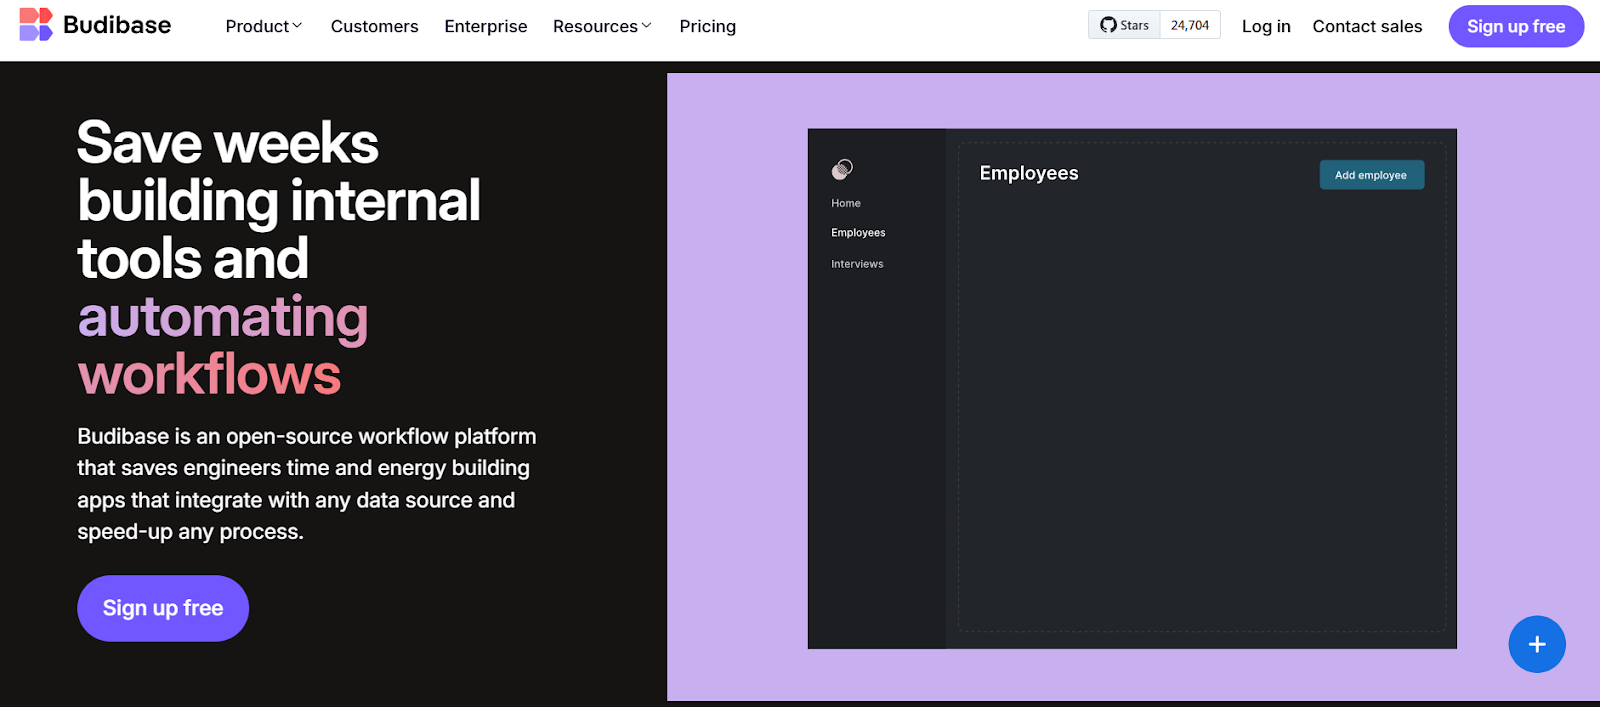
Budibase isn’t an ITSM platform as such.
Instead, it’s an open-source low-code platform designed for creating tailored internal tools in minutes, with no-code building blocks and full data integration capabilities.
This means that, unlike pre-baked ITSM suites, Budibase lets you design exactly what your team needs – whether that’s a check-in/out portal, incident tracker, or asset dashboard – and deploy it either in the cloud or on-premises.
Key features

- Drag-and-drop app builder with pre-built components – Lets you rapidly design all kinds of CRUD apps, forms, portals, and admin panels.
- Self-hosted or cloud deployment – This ensures total control, with ISO 27001 security and GDPR compliance available for both use cases.
- Built-in app security & scalability – Including SSO, RBAC, backup snapshots, and enterprise SLAs for maximum safety and stability.
Pricing
Budibase has a free plan for teams that would like to try it out. It includes unlimited apps, data sources, and automations, but has a limited number of users and omits more advanced features.
If you need more, you can subscribe to one of two paid plans:
- Premium: $60 per app creator/month + $6 per app user/month, includes Budibase AI, custom branding, PDF generation, etc.
- Enterprise: Creator only pricing + free & unlimited app users, includes everything in Premium, plus active directory/SCIM, custom AI (LLM) connection, audit logs, PWA support, etc.
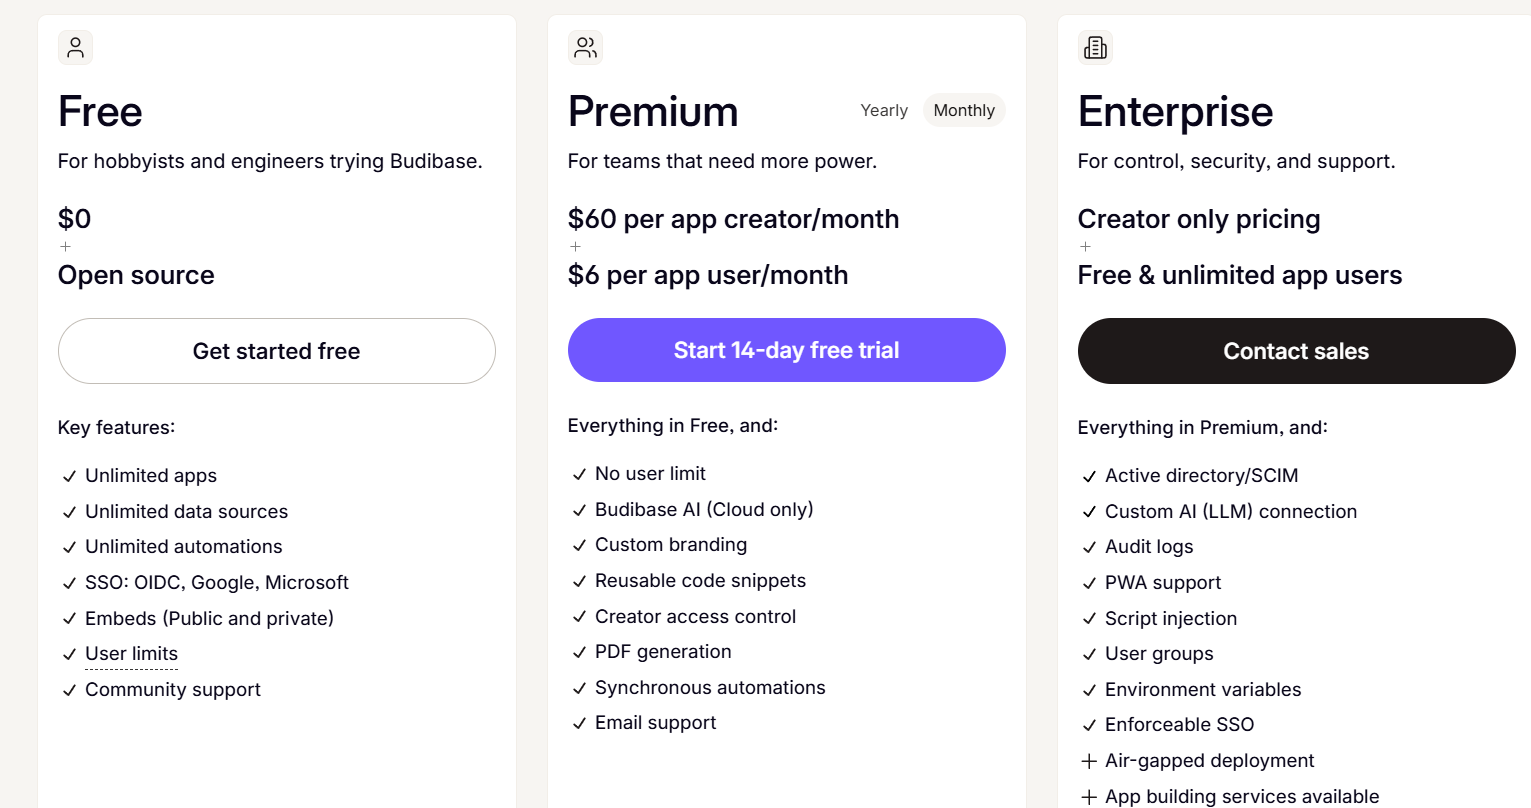
With each of these plans, you can choose to either self-host or host with Budibase.
Pros & Cons
✅ Allows fast app creation using visual tools and data-driven autogeneration features.
✅ Supports wide data integrations and custom logic, providing you with the flexibility to build anything from a ticket system to a license tracker
❌ Lacks built-in ITSM modules out of the box, meaning you’ll need to build each workflow yourself.
Next steps: Choose the right ITSM platform for your team
The ITSM landscape in 2025 offers more flexibility than ever.
Whether you’re looking for a fully packaged solution, deep customization, or a lightweight help desk, there’s no shortage of Freshservice alternatives that can fit your team’s size, complexity, and budget.
That said, if you’re looking for an ITSM platform that combines ease of use, full customization, powerful automation, real-time collaboration, and transparent pricing – all without the enterprise bloat – SmartSuite stands out as one of the most flexible and scalable solutions on the market.
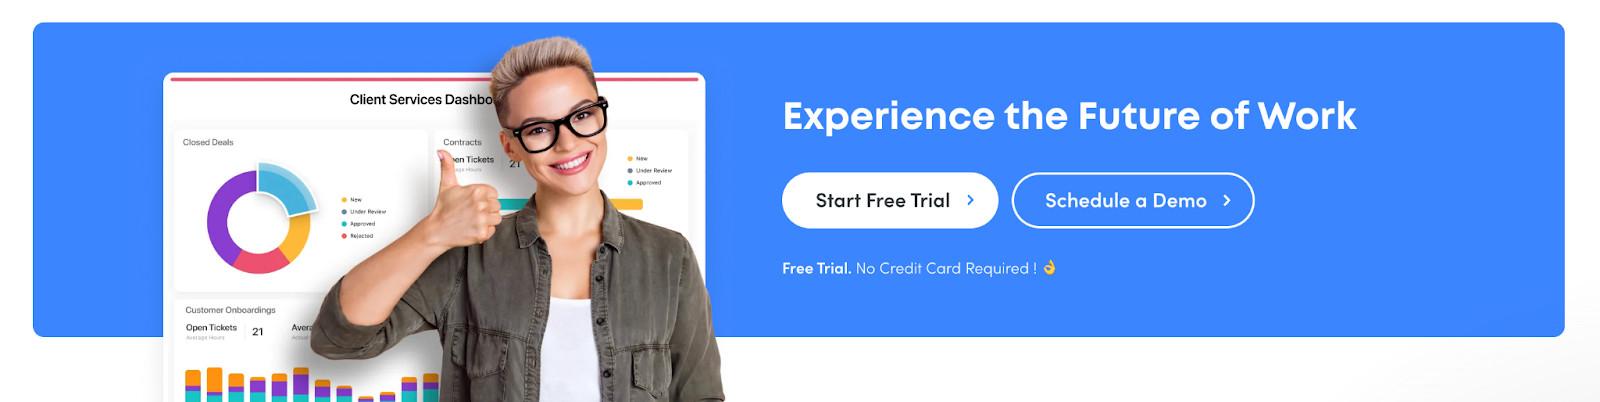
Start your free trial today and see how SmartSuite can simplify your ITSM workflows.
Or, if you want to see it in action first: Schedule a demo with our team and get a personalized tour.
Read more
10 Best Jira Service Management Alternatives in 2025
When it comes to IT service management, Jira Service Management is often a go-to – but it’s far from the only option.
In 2025, teams are looking for Jira Service Management alternatives that offer greater flexibility, simpler pricing, stronger automation, or a better fit for their unique workflows.
Whether you’re a growing business, an enterprise IT team, or a cross-functional organization tired of complex configurations, the right platform can make all the difference.
In this guide, you’ll find the handpicked list of the 10 best Jira Service Management alternatives for 2025.
I reviewed each solution thoroughly based on features, pricing, strengths, and ideal use cases, so you can confidently find the tool that actually matches your needs, without compromising on functionality or budget.
Let’s dive in!
Why look for Jira Service Management alternatives in the first place?
Jira Service Management is Atlassian’s ITSM solution designed to help teams manage incidents, service requests, changes, and assets in one centralized platform.
It’s tightly integrated with the Atlassian ecosystem, making it especially appealing for companies already invested in those tools.
Moreover, its powerful automation capabilities and built-in knowledge base powered by ML-driven search are often praised for streamlining repetitive tasks and improving self-service options for end users.
But while Jira Service Management offers plenty of power, it’s not always the perfect fit for every team.
Many users eventually run into challenges around complexity, steep learning curves, or the costs associated with scaling.
Here are some of the most common reasons why businesses start exploring alternatives and what they’re hoping to fix.
1. Steep learning curve
One of the most common complaints users have regarding Jira Service Management is its steep learning curve, making it too complex for leaner teams in particular.
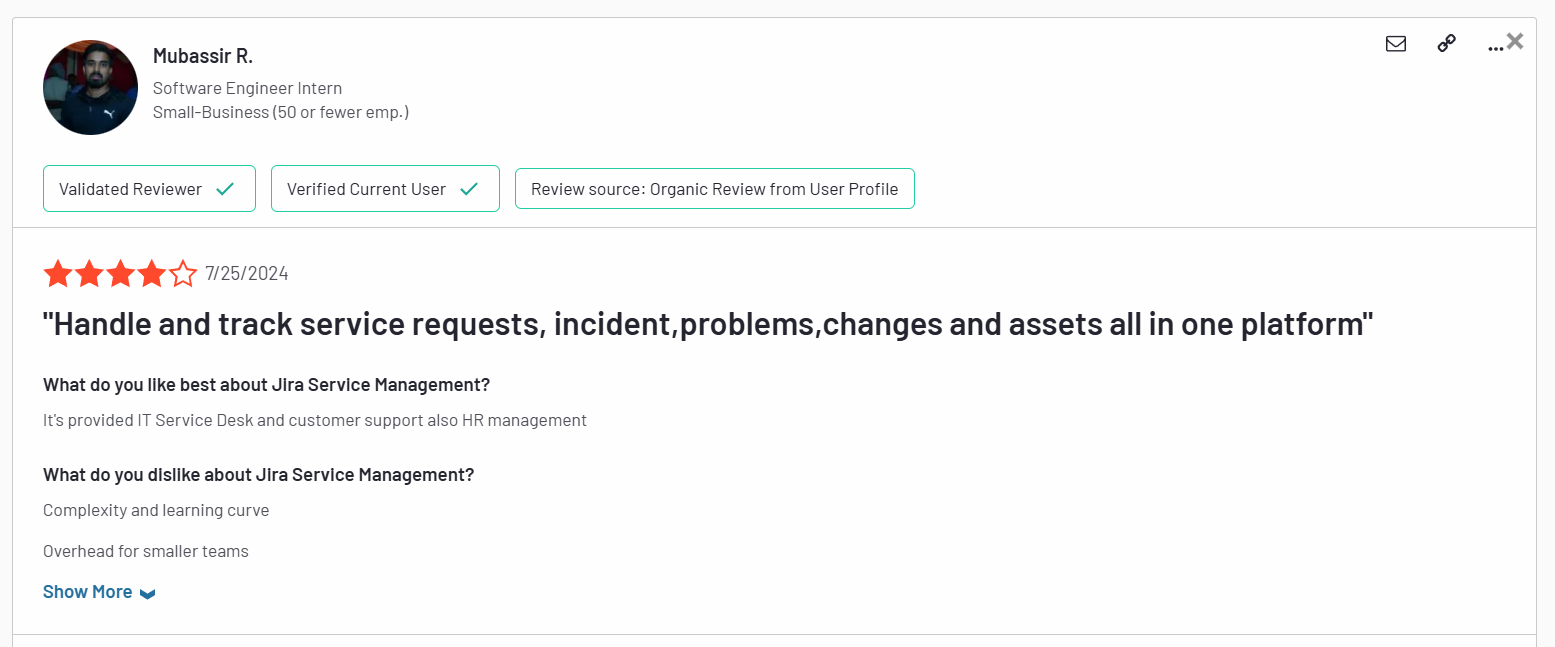
Complexity and learning curve. Overhead for smaller teams. – G2 Review
Most customers feel that its interface is very difficult to figure out, requiring lots of technical skill and time.

I think Jira’s weak point is ease of use. It is a tool that has a fairly slow learning curve and is not as intuitive for users who are not in the Technology environment. Added to that, their IT asset manager is not that good. – G2 Review
The overall impression of many users is that the platform seems unfinished and cluttered at the same time.
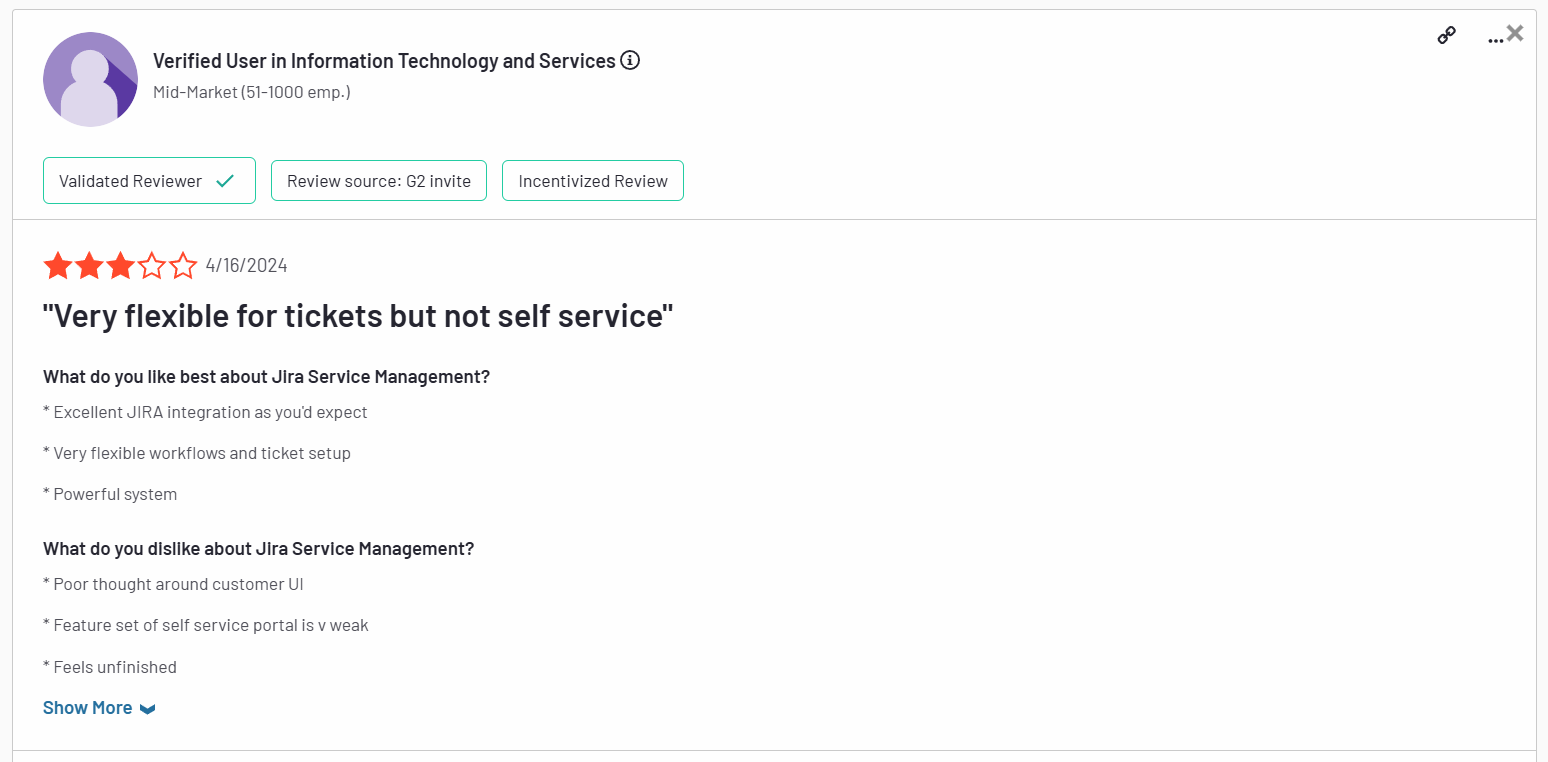
”Poor thought around customer UI. Feature set of self service portal is weak. Feels unfinished.” – G2 Review
2. Some key features are hidden behind a paywall
Although Jira Service Management has a free forever plan and a relatively affordable first paid tier, there’s a catch.
Some of its most useful features in the ITSM environment, such as asset management, real-time incident monitoring, virtual agents, etc., are available only on its Premium plan and above.
This makes the platform a far from ideal choice for teams with tighter budgets.
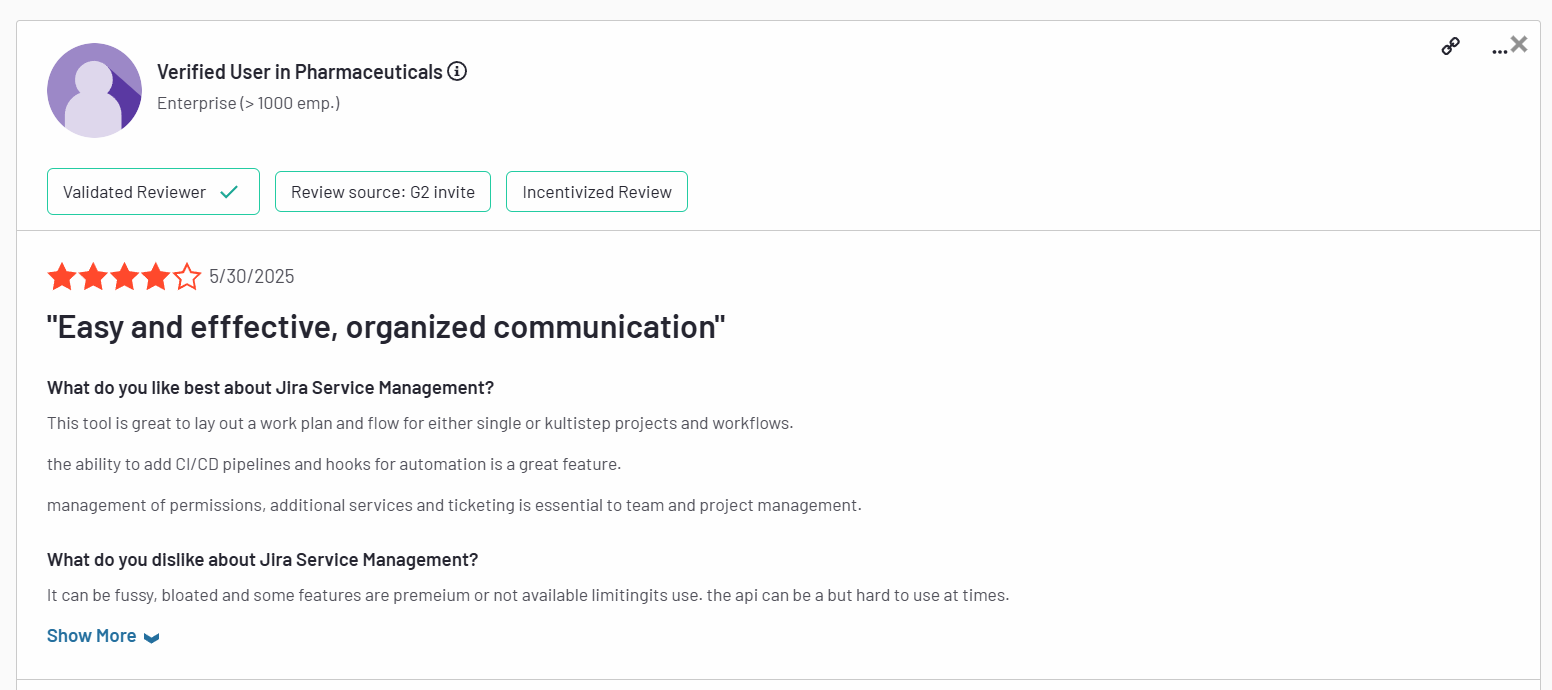
It can be fussy, bloated and some features are premium or not available limiting its use. The api can be a bit hard to use at times. – G2 Review
3. Complex set up and limited use cases
Finally, setting up and using Jira Service Management to its full capacity is riddled with challenges for most users.
In order to make the most of it, you need to set up and configure almost everything yourself, as the platform offers little in terms of ready-made solutions.
Moreover, since it’s part of the Atlassian suite, Jira Service Management shines the brightest when used with other Atlassian products.
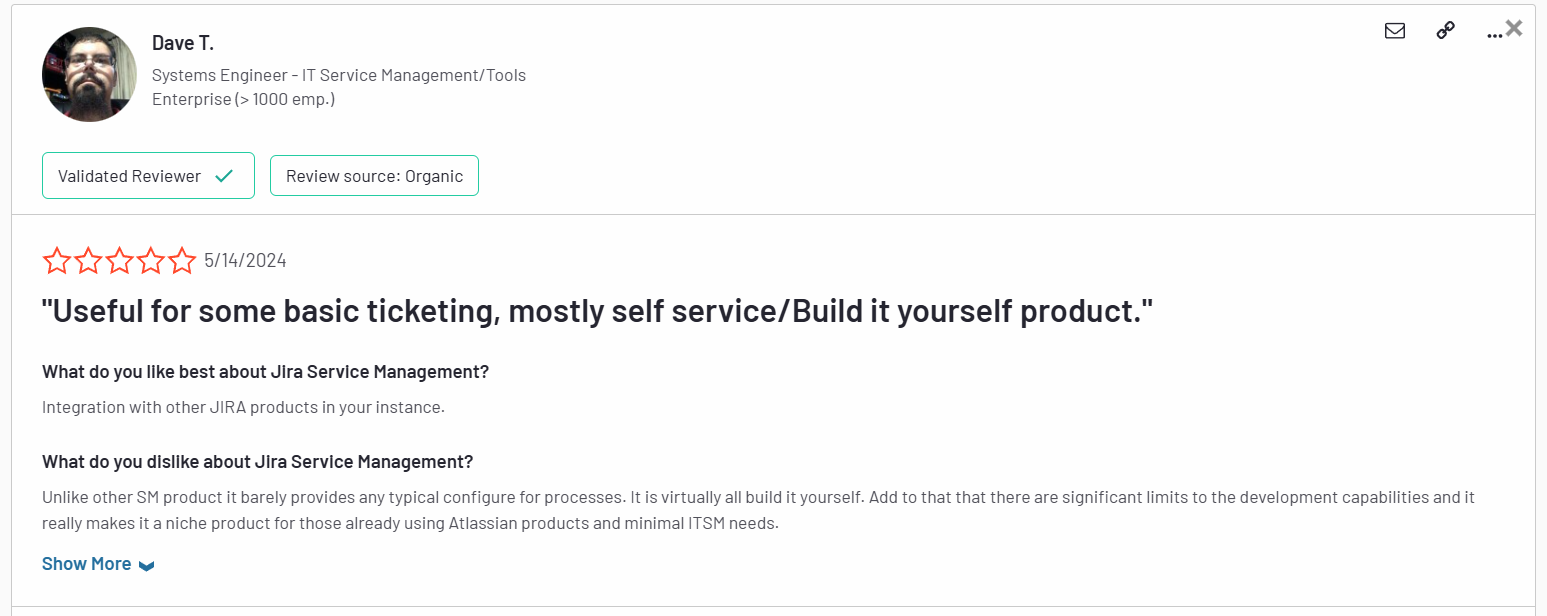
Unlike other SM products it barely provides any typical configure for processes. It is virtually all build it yourself. Add to that that there are significant limits to the development capabilities and it really makes it a niche product for those already using Atlassian products and minimal ITSM needs. – G2 Review
As a standalone solution, it leaves much to be desired.
What are the best Jira Service Management alternatives in 2025?
- SmartSuite – A no-code, all‑in‑one work management platform that seamlessly blends ITSM, project tracking, and team collaboration, perfect for teams who want flexibility without tool sprawl or breaking the budget.
- SysAid – A full ITSM suite with AI-powered ticketing, built-in ITIL workflows, robust asset management, and flexible cloud or on-premise deployment options.
- Freshservice – A cloud‑based ITSM tool praised for its strong automation and ITIL‑compliant knowledge base.
- Zendesk – Focused on omnichannel ticketing and customer support, offering an intuitive agent workspace with 1,500+ integrations.
- ServiceNow – The heavyweight enterprise ITSM solution with deep customization, broad third‑party integrations, and maturity for large-scale deployments.
- ManageEngine ServiceDesk Plus – Combines IT help desk, asset management, and change management in one platform, which is why it’s perfect for IT departments focused on assets and compliance.
- SolarWinds Service Desk – AI‑powered and user‑friendly, with strong incident and asset management features.
- Ravenna – A Slack‑native, AI‑powered help desk that learns from interactions and enhances JSM workflows.
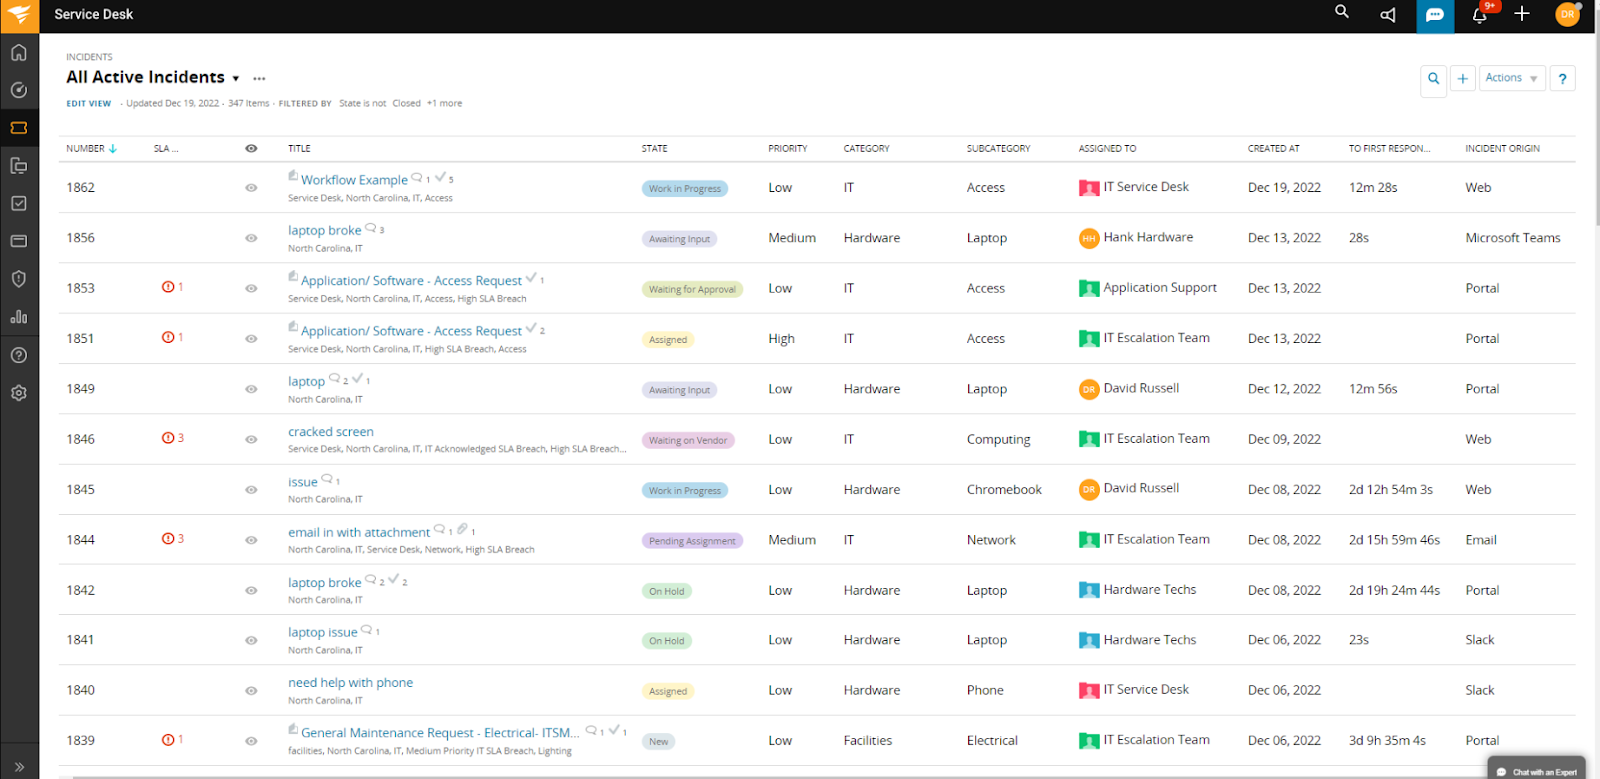
- Ivanti – An AI-powered ITSM platform offering self-healing automation, full ITIL support, and advanced CMDB and asset management for proactive, enterprise-grade service delivery.
- TOPdesk – A user-friendly ITSM platform offering ITIL-aligned incident, change, asset, and self-service management with fast deployment and strong customer support.
1. SmartSuite
Best for: Teams of all sizes looking for an intuitive, all-in-one ITSM platform with powerful no-code customization and fast time-to-value.
SmartSuite brings together ITSM, project tracking, asset management, and team collaboration in a single, highly flexible platform.
With pre-built ITSM templates, real-time dashboards, and powerful workflow automation, teams can quickly streamline work requests, incident management, asset tracking, and IT governance, all without complex setup or technical overhead.
Its user-friendly interface and transparent pricing make it a strong fit for both SMBs and larger organizations tired of rigid, bloated ITSM tools, such as Jira Service Management.
Let’s get a closer look into some of the features that make SmartSuite an ideal Jira Service Management alternative.
1. Unified, no-code ITSM platform that’s easy to set up
One of SmartSuite’s biggest strengths is how accessible it makes IT service management – even for teams with no technical background or dedicated IT administrators.
Unlike many traditional ITSM solutions that require weeks of configuration, custom coding, or external consultants to get up and running, SmartSuite’s no-code platform allows teams to build, customize, and launch workflows visually, without writing a single line of code.
Moreover, instead of forcing you to rely on multiple disconnected tools or developer-heavy configurations, SmartSuite allows you to build, manage, and optimize your service workflows entirely through an intuitive interface.
Every ITSM process from request intake to incident resolution lives in a single, flexible system that adapts to your team’s real-world needs.
That means faster implementation, easier scalability, and a platform that can evolve as your organization grows.
From one central workspace, SmartSuite enables teams to:
- Streamline IT workflows – Prioritize service requests, manage SLAs, and keep teams aligned with live dashboards that track every moving piece.
- Automatically prioritize tasks – Use built-in logic to dynamically escalate or reroute work based on urgency or resource availability.

- Track tickets & issues in real-time – Monitor help desk activity, resolve incidents quickly, and spot trends early to prevent disruptions.
- Manage IT assets & licenses – Stay on top of hardware, software, license renewals, and assignments, keeping both compliance and budgets in check.
- Run internal IT projects seamlessly – Plan, schedule, and deliver IT initiatives with full visibility into timelines, ownership, and progress.
- Elevate IT governance – Draft, publish, and maintain IT policies and audit documentation to strengthen security and ensure compliance.
- Monitor IT performance with real-time dashboards – Get instant visibility into tickets, incidents, SLAs, team workloads, and issue trends with fully customizable dashboards that help you spot problems early and keep operations running smoothly.

By bringing everything under one roof, SmartSuite helps teams eliminate process gaps, reduce manual effort, and deliver better, faster service without the headaches that often come with traditional ITSM platforms.
2. Seamless collaboration built directly into ITSM workflows
Effective IT service management isn’t just about tracking tickets. It’s about how teams communicate while resolving them.
SmartSuite embeds collaboration directly into the ITSM process, so teams can coordinate in real time, right where the work happens.
Instead of relying on endless email chains or switching between multiple apps, team members can:
- Start conversations inside tickets and records – Discuss incidents, requests, and tasks directly in the context of the work, eliminating back-and-forth confusion.
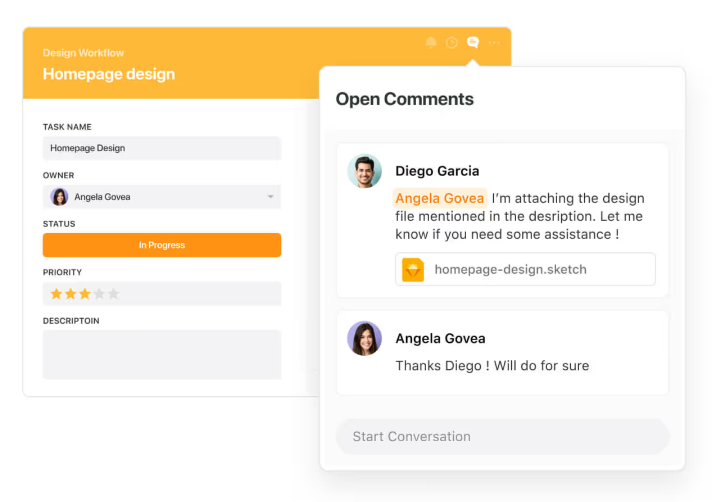
- Use @mentions and notifications – Instantly loop in the right people, escalate urgent issues, or assign follow-up actions without breaking workflow.

- Track activity history across incidents, changes, and assets – Gain full transparency into who did what and when, so there’s no more guessing or chasing status updates.
- Work on the go with SmartSuite’s mobile apps – Keep IT teams connected to critical tickets, asset info, and conversations from anywhere.
3. No-code automation to keep IT operations running smoothly
Managing IT service delivery often means juggling repetitive tasks, from routing tickets to notifying teams about status changes or upcoming renewals.
SmartSuite’s built-in no-code automation engine helps IT teams eliminate the busywork and keep operations flowing smoothly behind the scenes.
With simple, intuitive rule-building, teams can create custom automations in minutes, without writing a single line of code or involving developers.
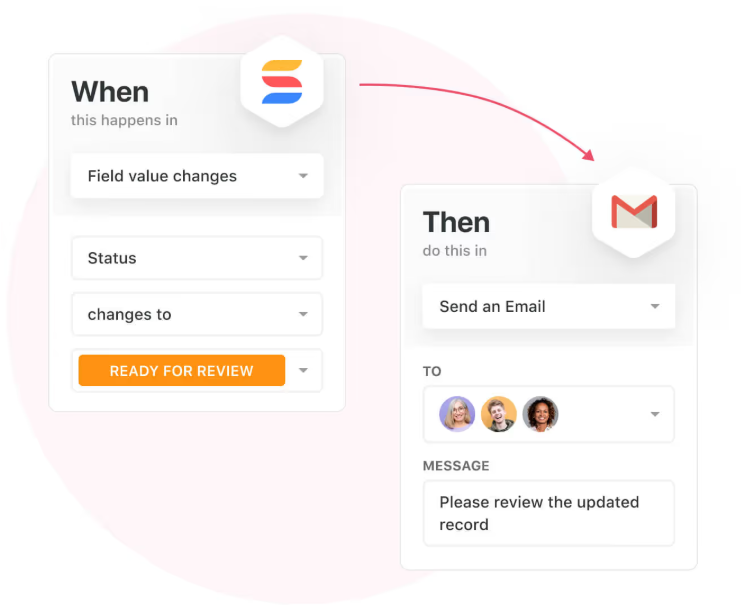
Triggers, conditions, and actions can be configured to handle everything from basic notifications to more advanced multi-step workflows.
For ITSM teams, SmartSuite automations can:
- Auto-assign tickets based on issue type, priority, or impacted department.
- Send instant alerts when SLA deadlines approach or incidents escalate.
- Trigger license renewal reminders before contracts expire.
- Notify security teams when policy violations are logged.
- Update asset records automatically as hardware or software moves between users.
- Escalate unresolved incidents to management after predefined timeframes.
By removing manual steps from IT service processes, SmartSuite allows teams to focus on resolution, not administration, helping them deliver faster, more reliable service with fewer resources.
4. Pre-built ITSM templates to jumpstart your setup
One of the biggest barriers with many ITSM platforms is the time and effort it takes to get fully up and running.
SmartSuite eliminates that pain with a full library of pre-built IT service management templates that cover every core process, allowing teams to launch quickly, customize easily, and start delivering value from day one.
Whether you’re building an internal help desk, managing assets, or overseeing IT governance, SmartSuite gives you a strong foundation with ready-to-go templates like:
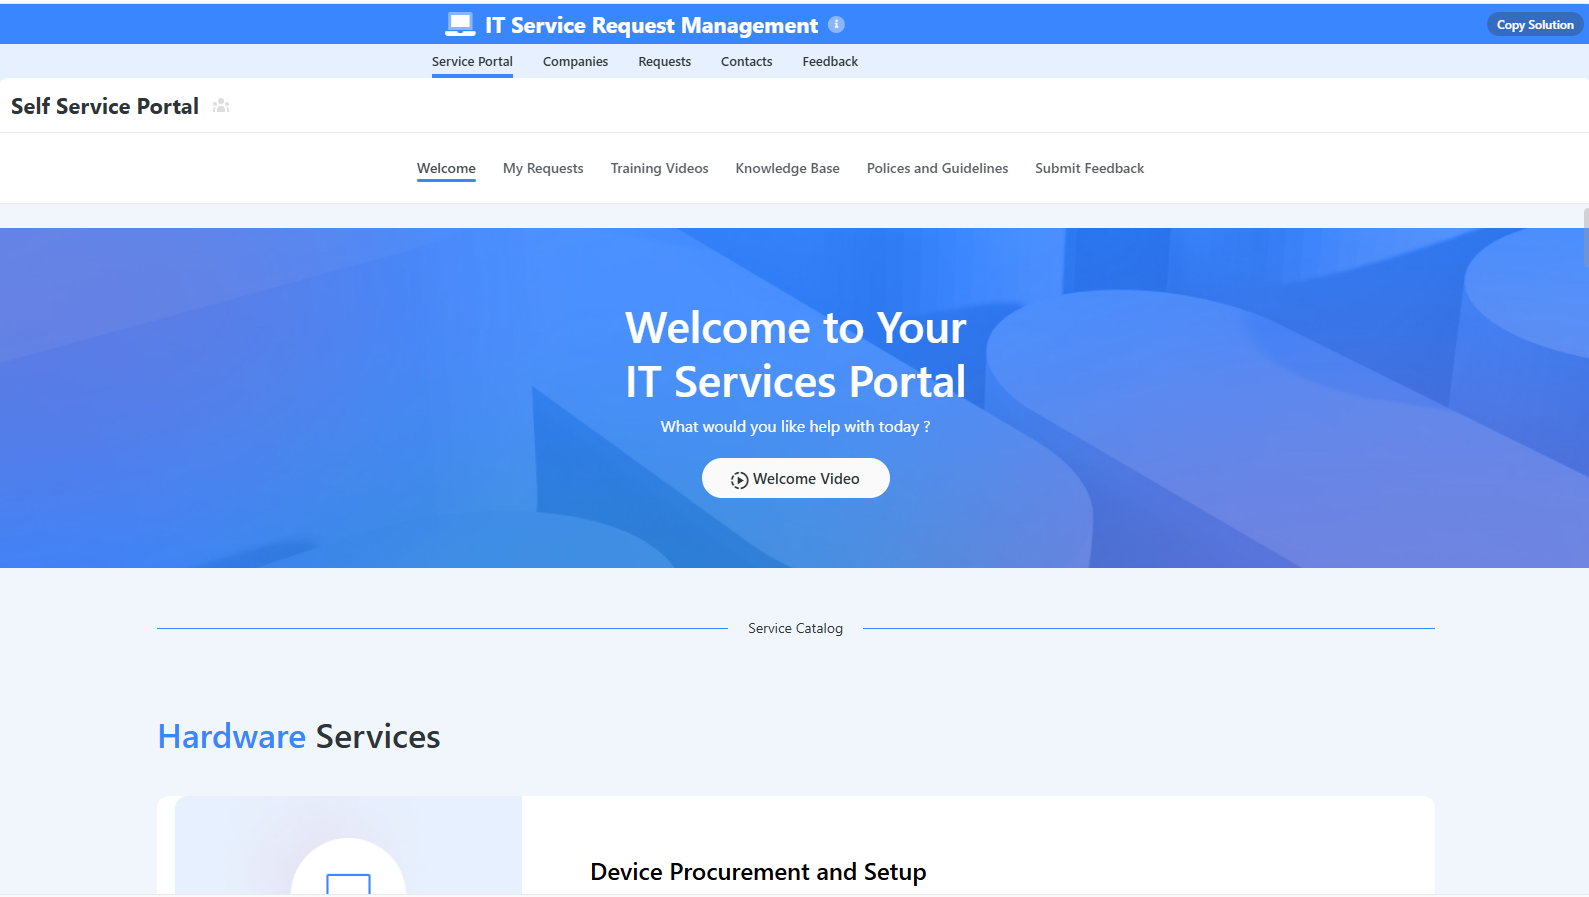
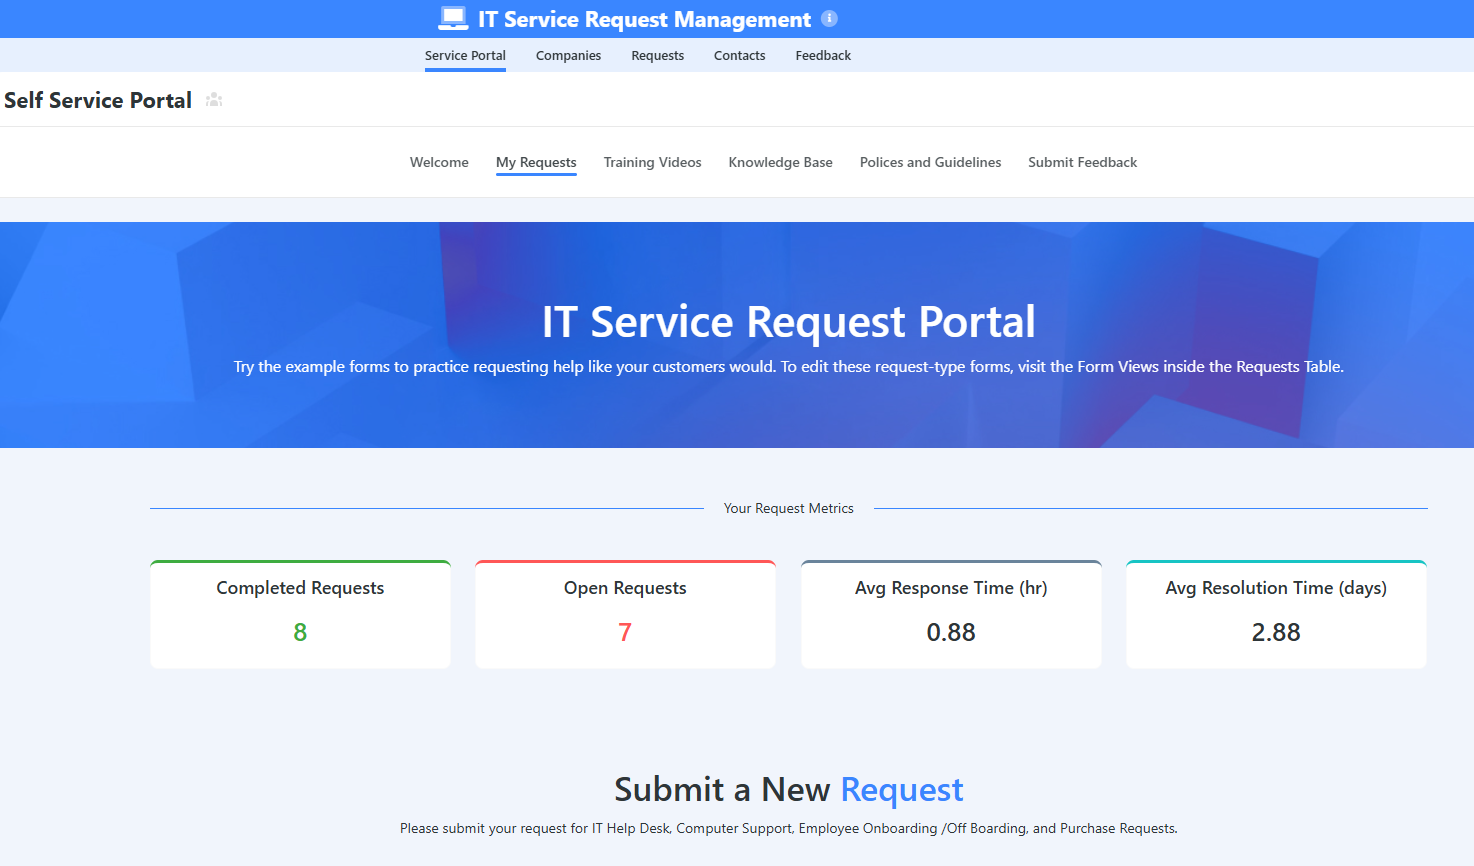
- IT Service Request Management – Capture and resolve internal tech issues across the organization with streamlined intake and resolution workflows.
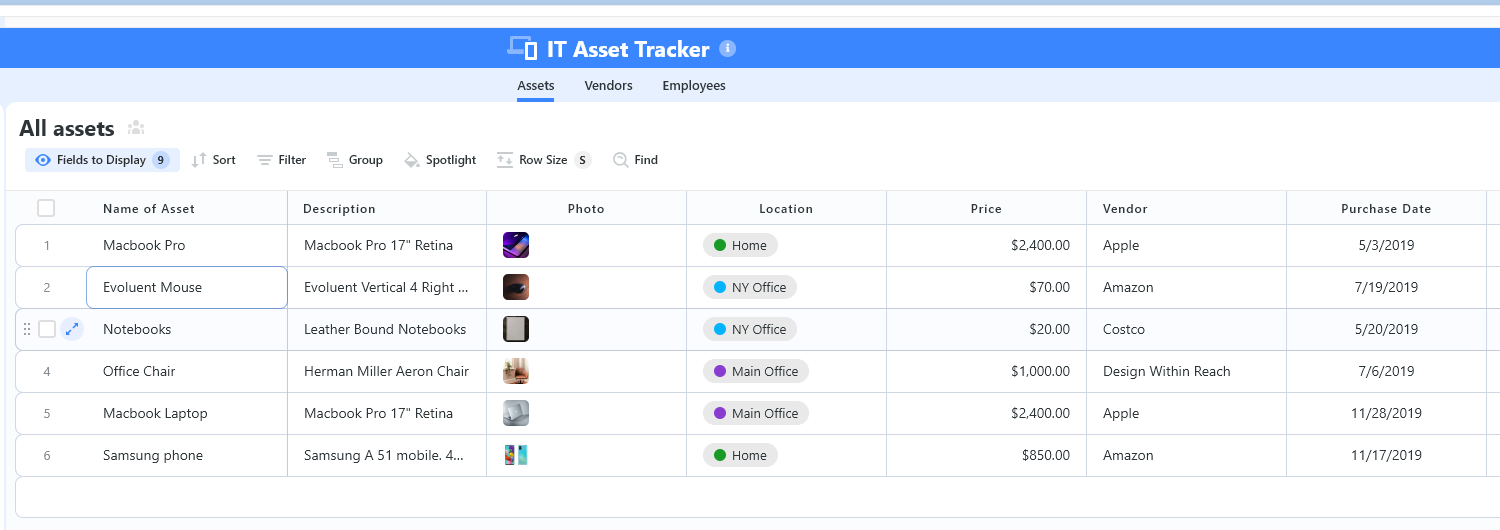
- IT Asset Tracker – Monitor hardware, software, license renewals, and asset ownership across your entire environment.

- IT Security Audits – Track audit findings, monitor adherence, and ensure your security processes are being followed.
- IT Asset Management – Automate the full lifecycle management of hardware, software, and cloud resources.
- Incident Management – Identify, triage, assign, and resolve incidents with full transparency into each step of the process.
These templates allow IT teams to skip the lengthy configuration phase and focus directly on delivering fast, reliable support, while still having full flexibility to tailor every workflow to their specific business needs.
Try one of our interactive templates for size and find out how easy they are to use and customize.
Pricing
SmartSuite has a free forever plan that provides access to its templates, dynamic dashboards, team collaboration features, 100 monthly automations, etc.
Moreover, each of SmartSuite’s paid plans includes unlimited users, making it ideal for growing teams.
There are four tiers to choose from:
- Team: $12/user/mo, includes everything in Free, plus unlimited users, Gantt charts, 5,000 automation runs, etc.
- Professional: $30/user/mo, includes everything in Team, plus two-factor authentication, Gmail & Outlook integrations, AI features, more automation runs, etc.
- Enterprise: $45/user/mo, includes everything in Professional and adds audit logs, data loss prevention, 50,000 monthly API calls, etc.
- Signature: A customized plan tailored to your organization’s needs and team size with no predefined limits.
The first three paid plans have a 14-day free trial – no credit card needed.
How does SmartSuite compare to Jira Service Management?
While Jira Service Management delivers plenty of power, it often comes with steep learning curves, complex setups, and key ITSM features locked behind higher-priced tiers.
Many teams end up needing dedicated admins, extensive configuration, and additional Atlassian products to unlock its full potential.
SmartSuite takes a very different approach.
It offers an intuitive, unified no-code platform where teams can manage ITSM processes, asset tracking, incident resolution, and IT governance all from one place, with minimal setup or technical expertise required.
With built-in automations, real-time dashboards, and pre-built ITSM templates, teams can get up and running fast, scale with ease, and focus on delivering better service, not managing their tools.
And unlike Jira Service Management, SmartSuite includes many advanced ITSM features, like asset management, SLA monitoring, and audit tracking, without forcing you into higher enterprise plans.
Simple pricing, powerful flexibility, and fast time-to-value make it a strong alternative for teams who don’t want the overhead Jira often requires.
Pros & Cons
✅ Intuitive no-code platform that’s easy to set up and customize.
✅ Unified ITSM, project management, and collaboration in one system.
✅ Pre-built ITSM templates to launch quickly without complex configuration.
✅ Real-time dashboards and SLA tracking for full operational visibility.
✅ Flexible, transparent pricing with advanced features available on lower tiers.
❌ Limited native integrations compared to some large, enterprise-only ITSM platforms.
2. SysAid
Best for: IT teams seeking a flexible, feature-rich ITSM platform with AI-powered help, robust asset management, and flexible deployment options.
SysAid offers a comprehensive ITSM solution available in cloud or on‑premises that combines advanced ticketing, asset management, automation, and AI.
It’s tailored for teams that need more than basic support tools but want configurable workflows without the complexity of enterprise-grade platforms.
Key features
- AI-powered service desk with “Copilot” and AI chatbots – Allows conversational ticketing, intelligent routing, and self-serve support.
- Advanced IT asset management & CMDB – Enables automated asset discovery, real-time tracking, and seamless integration into ticket workflows
- Workflow automation & customization – Provides no-code automation builder, configurable forms, dashboards, and third-party integrations that allow you to tailor the platform to your specific needs.
Pricing
SysAid doesn’t publish prices.
You can contact its team for more information.
Pros & Cons
✅ Flexible deployment (cloud or on-premise) suits varied infrastructure needs.
✅ Quick ITIL-compliant setup via built-in templates and AI help.
❌ Opaque pricing.
3. Freshservice
Best for: Growing IT teams that want an intuitive, ITIL-aligned ITSM platform with strong automation, asset management, and self-service capabilities.

Freshservice is a modern, cloud-based ITSM platform built to help IT teams streamline service delivery without the complexity of traditional enterprise tools.
It combines intuitive ticketing, AI-powered automation, strong asset management, and ITIL-aligned processes, making it a great fit for mid-sized organizations looking for power and simplicity.
Key features
- Incident, problem, change & asset management – Integrated modules help IT teams quickly log incidents, track underlying issues, plan changes, and manage hardware/software lifecycles.
- Workflow automator + Freddy AI – Automate ticket assignment, approvals, and recurring notifications, with AI help via chatbots and “Freddy Copilot” for smarter workflows.
- Self-service portal & knowledge base – Empower users to resolve common issues independently with a searchable portal and KB content.
Pricing
Freshservice has four pricing plans to choose from:
- Starter: $29/agent/month, includes multichannel support, incident, knowledge, and task management, etc.
- Growth: $59/agent/month, includes everything in Starter, plus SLA management, service catalog, etc.
- Pro: $119/agent/month, includes everything in Growth, plus problem, change, and release management, etc.
- Enterprise: Custom price, includes everything in Pro, plus sandbox, Freddy AI agent, AI insights, etc.
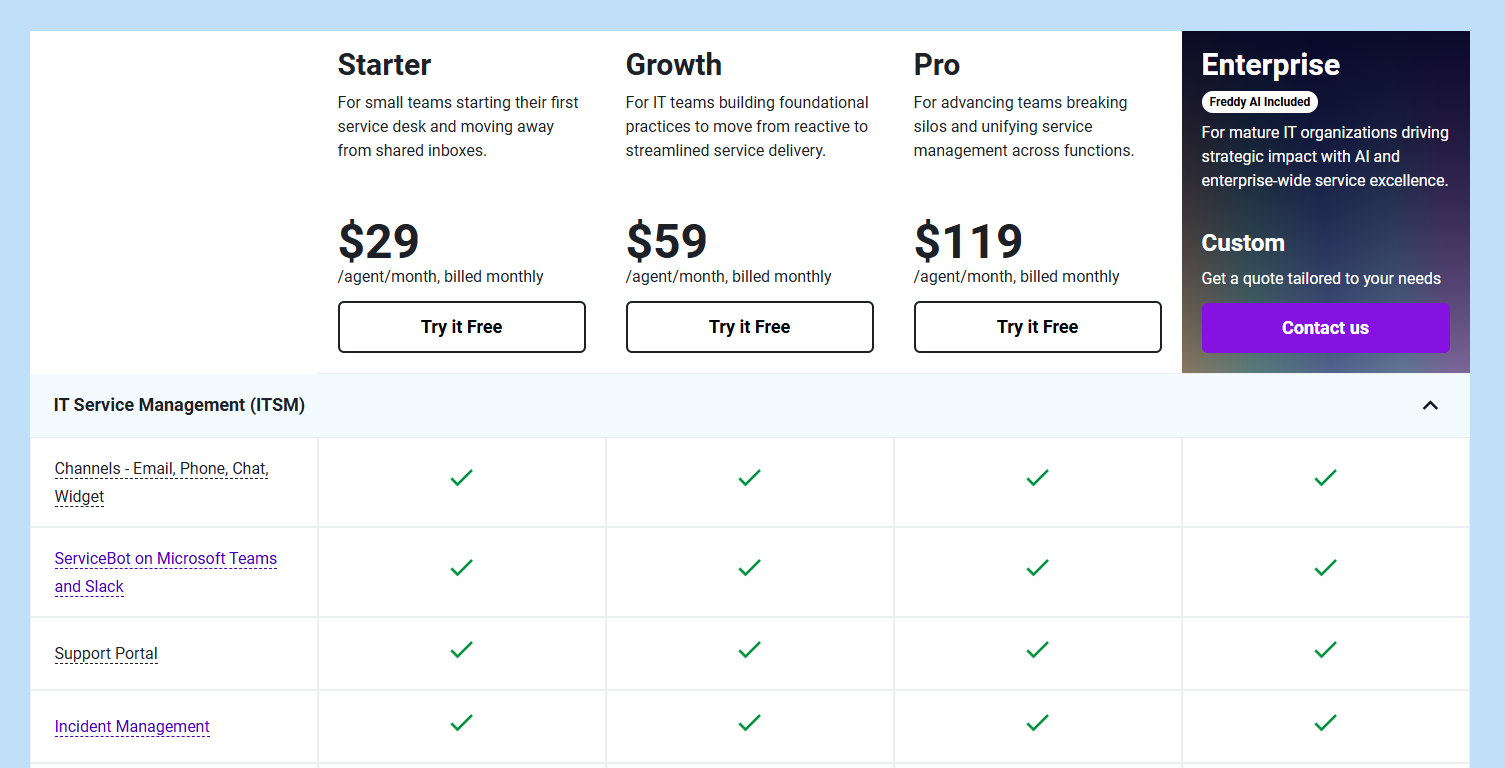
Each of these has a 14-day free trial.
You should note that Freshservice’s Freddy AI Copilot is available as an add-on only ($35/agent/month).
Pros & Cons
✅ Easy to adopt with a clean, intuitive UI that’s fast to set up.
✅ Strong automation and AI tools reduce manual work.
❌ Basic and limited automation features.
4. Zendesk
Best for: Customer support and IT teams that need omnichannel ticketing with powerful AI and automation, and want a seamless agent experience.
Zendesk is a unified support platform that brings together email, chat, voice, and social media into a single agent workspace.
It offers robust ticketing, powerful AI bots, and comprehensive automation, making it ideal for teams managing high volumes of requests across multiple channels.
Key features

- Omnichannel support hub – Consolidate requests from email, live chat, voice, social, and messaging into one interface for streamlined handling.
- AI-powered bots & automation – Use Zendesk AI agents to resolve common issues automatically, route tickets efficiently, and reduce manual workload
- Rich ticketing tools – Apply macros, triggers, custom fields, and skill-based routing to speed up resolution times and enforce SLA compliance.
Pricing
Zendesk has four essential pricing plans:
- Support Team: $25/agent/month, includes basic automations and insights, simplifying email support with ticketing, etc.
- Suite Team: $69/agent/month, includes everything in Support Team, plus omnichannel support, AI agents-driven automations, etc.
- Suite Professional: $149/agent/month, includes everything in Suite Team, plus team collaboration on closing tickets, smart routing, etc.
- Suite Enterprise: Custom price, includes everything in Suite Professional, plus sandbox for testing updates, custom permissions, change tracking, spikes handling, etc.
In addition to these, there’s a wide range of add-ons you can purchase on top, such as:
- AI Copilot: $50 per agent/month, billed annually, available on Professional and above.
- Zendesk Workforce Management: $25 per agent/month, billed annually, for organizations managing teams in Zendesk.
- Zendesk Quality Assurance: $35 per agent/month, billed annually, lets you automatically analyze 100% of conversations across human and AI agents, BPOs, channels, and languages.
- Zendesk Workforce Engagement Bundle: $50 per agent/month, billed annually, lets you enjoy the power of Zendesk Workforce Management and Zendesk Quality Assurance at a discounted bundle rate and lead your team to deliver superior CX.
- Advanced Data Privacy and Protection: $50 per agent/month, billed annually, supports your compliance and security policy obligations with an extra layer of protection and privacy.
- Contact Center: $50 per agent/month, billed annually, lets you power the world’s most complex contact centers with Zendesk’s ease of use and flexibility, available on all Suite plans.
Pros & Cons
✅ Extensive customization and app integrations enable adaptable workflows for diverse teams.
✅ Clean, modern UI that is easy to train new users on.
❌ More suited to customer-facing support than deep ITSM needs like asset or incident management.
5. ServiceNow
Best for: Large enterprises or IT organizations needing a high-end, full-scale ITSM solution with deep ITIL support, extensive automation, and a robust CMDB.
ServiceNow is a comprehensive, enterprise-grade ITSM platform that consolidates incident, problem, change, asset, and request management into a single unified system.
Its powerful AI and ML features, integrated CMDB, and advanced automation tools make it ideal for organizations with complex service workflows and compliance requirements.
Key features
- Full ITIL lifecycle support – Covering incident, problem, change, and service request management backed by ITIL best practices and built-in workflows.
- Robust CMDB & asset tracking – Automatically discovers assets, maps dependencies, and integrates asset data into incident/change processes.
- Intelligent automation & AI – Predicts incidents, automates routine tasks, and has virtual agents that serve as conversational ticket triage.
Pricing
ServiceNow doesn’t disclose prices for any of its products, including its ITSM product suite.
You’ll have to contact sales for details or check out our in-depth ServiceNow pricing guide.
Pros & Cons
✅ Robust and numerous integrations.
✅ Advanced AI features help streamline and optimize various processes.
❌ Steep learning curve and long implementation timeline.
6. ManageEngine ServiceDesk Plus
Best for: Mid-sized to large IT teams that need a full ITIL-aligned ITSM platform with strong ticketing, asset tracking, CMDB, and flexible deployment.
ServiceDesk Plus is a comprehensive ITSM solution that merges help-desk ticketing, asset management, change control, and CMDB into one system.
It supports both cloud and on-premise setups and includes AI-enhanced workflow automation and reporting.
Key features
- Integrated ITIL modules – Cover incident, problem, change, and release management with built-in best-practice templates.
- CMDB & asset management – Automated discovery, real-time asset tracking, and tight linkage between assets and tickets.
- Workflow automation & approvals – No-code workflow builder with auto-routing, SLA enforcement, and multi-level approvals.
Pricing
ManageEngine ServiceDesk Plus doesn’t share its pricing publicly, so it’s hard to give exact numbers upfront.
Based on its quote request form, pricing likely varies depending on factors like how many technicians you need and whether you choose cloud or on-premise deployment.
You’ll need to reach out to their sales team to get a custom quote tailored to your setup.
Pros & Cons
✅ User-friendly ticketing, dashboards, and CMDB deliver strong visibility and control.
✅ Extensive reporting options.
❌ Limited customization.
7. SolarWinds Service Desk
Best for: Medium to large IT teams looking for a full-featured, AI-enhanced ITSM platform with strong IT asset management and fast deployment.
SolarWinds Service Desk is a cloud-native ITSM solution built on ITIL best practices that combines ticketing, asset tracking, CMDB, and AI-powered virtual agents.
Designed for ease of use, it brings automation and centralized oversight to IT operations without the complexity of enterprise platforms
Key features
- Integrated IT asset management & CMDB – Lifecycle tracking, network discovery, license compliance, and asset-ticket associations in one comprehensive system.
- AI-driven self-service & virtual agent – Embedded chatbots and knowledge-base suggestions help resolve routine issues without human assistance.
- Change workflows & runbook automation – Provides structured change approvals, auto‑triggered actions, and playbook-driven orchestration to streamline IT updates.
Pricing
SolarWinds offers multiple product packages with different pricing models.
For ITSM specifically, there’s the Service Desk plan that starts at $39 per technician per month.
It’s recommended to request a custom quote to get exact pricing based on your team’s needs, though a 30-day free trial is available if you want to test it first.
If you’re also looking for incident response capabilities, those are sold separately under the Incident Response plan, starting at $9 per user per month.
Pros & Cons
✅ Robust asset management features.
✅ Simple setup and intuitive interface enable teams to be operational in days, not months.
❌ Limited integrations.
8. Ravenna
Best for: Slack-first IT teams looking for an AI-native internal help desk embedded directly in their chat tools.
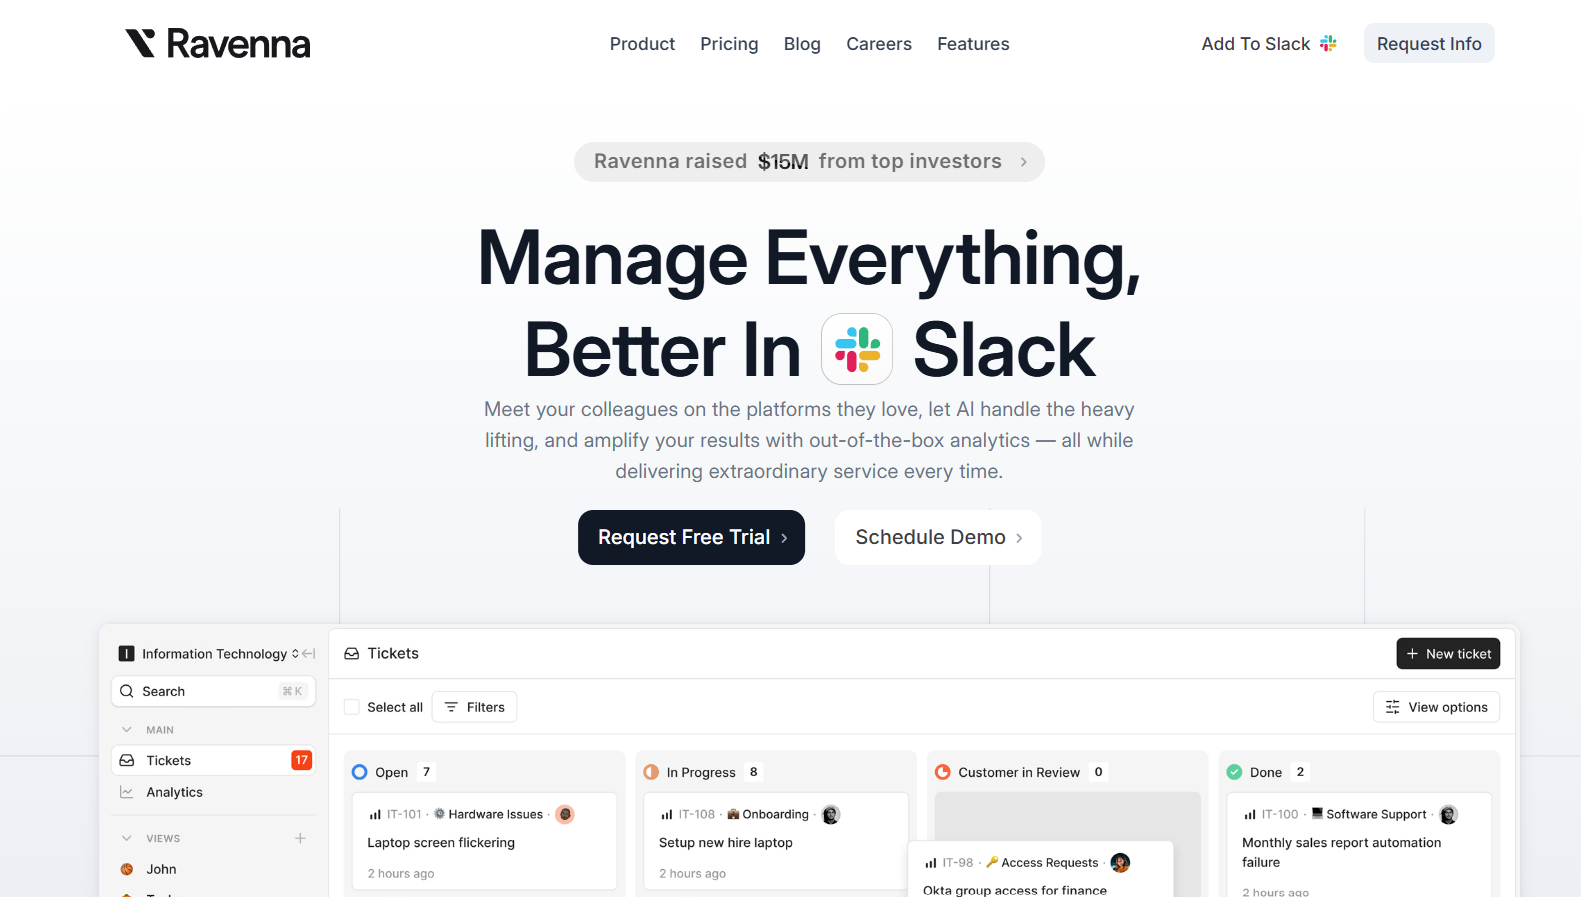
Ravenna is a modern, AI-powered internal help desk designed specifically for teams that work in Slack (with Microsoft Teams support coming soon).
It automates ticket deflection, prioritization, knowledge creation, and collaboration, all without ever leaving your messaging platform.
Key features

- Deep Slack integration – Create, manage, and resolve tickets directly in Slack, with no portals or context switching required.
- AI-driven ticket automation – Automatically classify, prioritize, and assign tickets based on conversation context and built-in rules.
- Automated knowledge base generation – AI can automatically generate new knowledge base articles from past conversations and resolved tickets.
Pricing
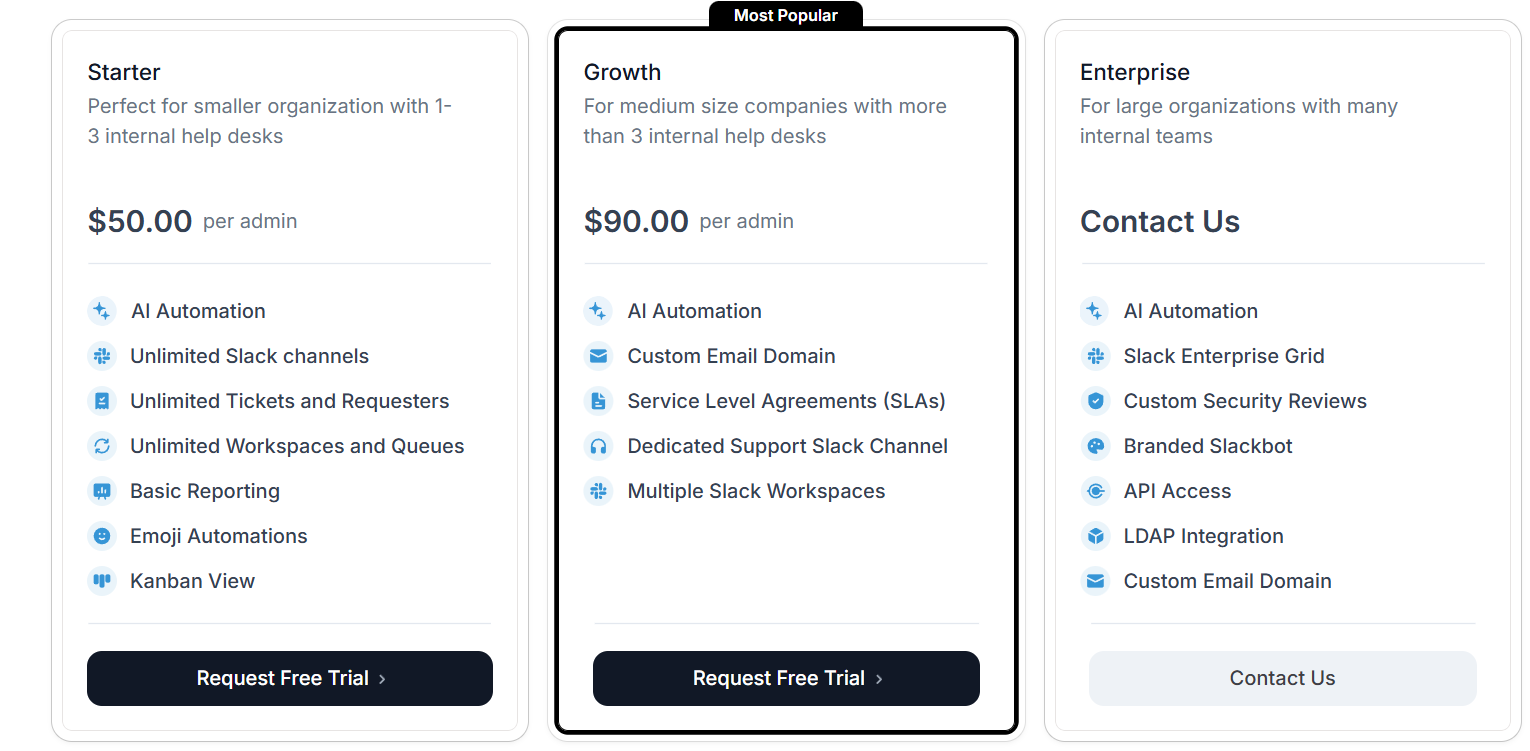
Ravenna has three plans:
- Starter: $50 per admin, includes AI automation, unlimited Slack channels, tickets and requesters, emoji automations, etc.
- Growth: $90.00 per admin, includes AI automation, custom email domain, SLAs, etc.
- Enterprise: Custom pricing, includes AI automation, Slack enterprise, branded Slackbot, etc.
If you want to add an additional intelligence layer to your workflows, you can purchase the Ravenna Intelligence add-on at $5 per employee, which includes conversational AI, knowledge ingestion and enrichment, metadata filtering, etc.
Ravenna’s paid plans come with a 14-day free trial so you can test their capabilities before committing.
Pros & Cons
✅ Revolutionary Slack-native experience—no external portal or tool switching .
✅ AI improves over time based on team usage and past resolutions, allowing for continuous refinement.
❌ Best suited for internal support use cases, as it lacks deep ITIL/asset management capabilities.
9. Ivanti
Best for: Enterprise and mid-market IT teams looking for a comprehensive, AI-augmented ITSM suite that proactively manages services, assets, and incidents.

Ivanti combines full ITIL-aligned service desk capabilities with AI-powered automation and self-healing workflows.
It offers a unified CMDB, proactive incident resolution, and highly customizable workflows that adapt to complex IT environments
Key features
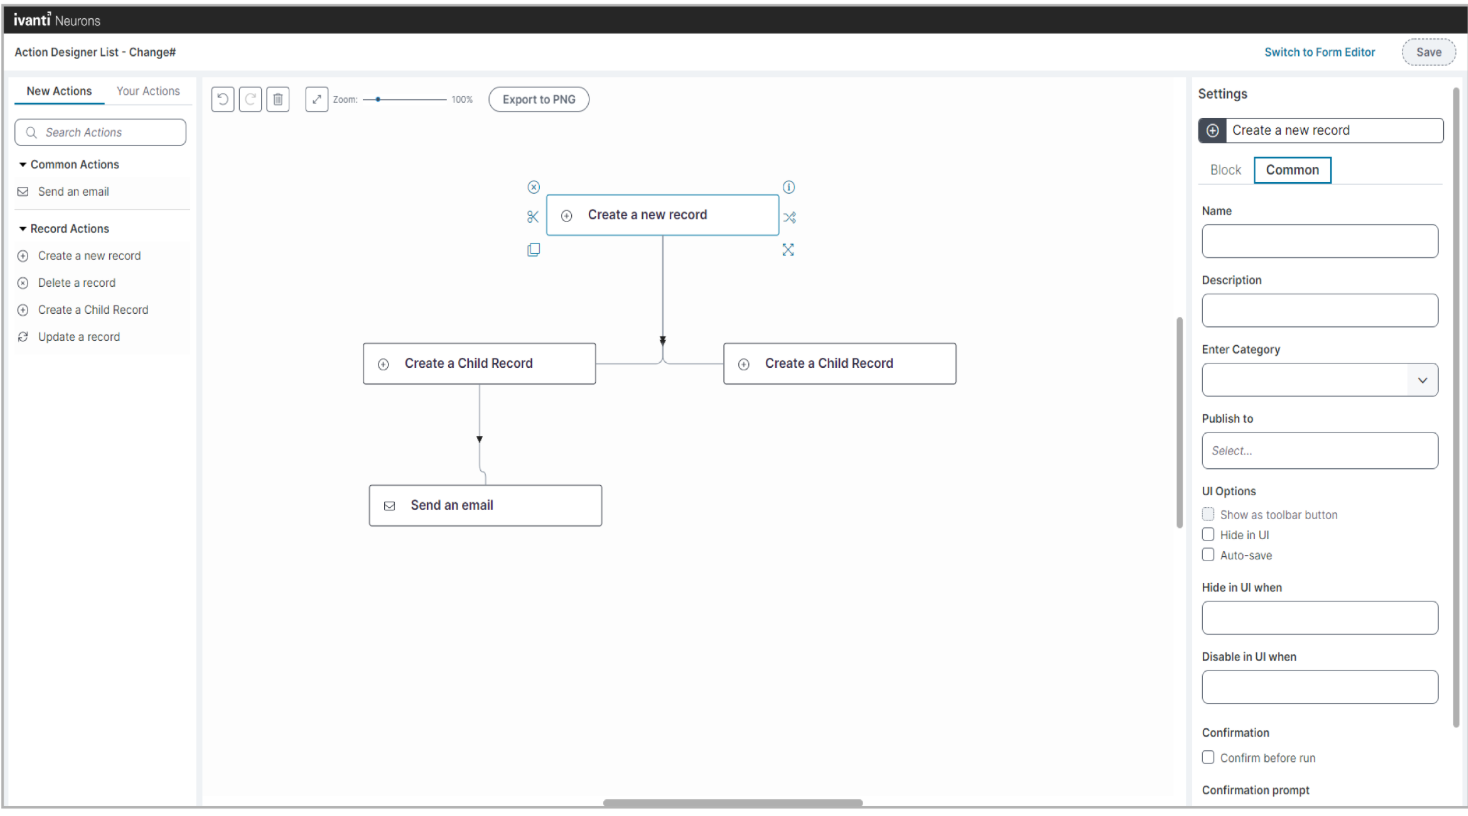
- AI-driven automation & self-healing – Detects recurring issues (e.g., disk-space alerts) and takes corrective action automatically before escalation.
- No-code workflow builder – Enables IT teams to build forms, processes, and approvals without custom code.
- Proactive incident handling – Uses AI and automation to detect and fix issues early, boosting uptime and reducing manual ticket resolution effort.
Pricing
Ivanti has for pricing plans:
- Professional: Includes service delivery, incident and change management, reporting dashboards, etc.
- Enterprise: Includes everything in Professional, plus HR service management, project and portfolio management, GRC, etc.
- Premium: Includes everything in Professional, plus AI guided ITSM, proactive service management, and digital experience focus (DEX).
- Enterprise Premium: Includes everything in Professional, Enterprise, and Premium packed into one.

However, Ivanti doesn’t publish fees for its packages, so you’ll have to contact its team for a quote.
Pros & Cons
✅ Highly flexible, no-code workflow creation that adjusts to your IT requirements.
✅ Comprehensive CMDB/asset management directly tied to service workflows.
❌ Some areas (e.g., reporting UI) may feel dated compared to modern SaaS tools.
10. TOPdesk
Best for: Mid-sized to large organizations needing a smart, out-of-the-box ITSM solution with strong incident, asset, change, and self-service management capabilities.

TOPdesk is a user-friendly IT service management platform that streamlines incident, problem, change, and asset processes.
Its intuitive self-service portal, modular design, and built-in ITIL support make it ideal for teams seeking fast deployment with full-featured ITSM workflows
Key features

- Incident, problem & change management – Provides structured workflows guided by ITIL best practices, with efficient escalation and resolution tracking.
- Self-service portal & knowledge base – End-users can submit tickets and access solutions, reducing help desk load and speeding issue resolution.
- Advanced dashboards & reporting – Provides real-time visual insights into ticket status, SLAs, asset usage, and IT performance
Pricing
TOPdesk has three pricing plans:
- Essential: $76 per agent per month, includes incident and asset management, self service portal, knowledge base, etc.
- Engaged: $109 per agent per month, includes everything in Essential, plus change management, SLA and contract management, etc.
- Excellent: $155, includes everything in Engaged, plus project management, webshop, live chat, etc.
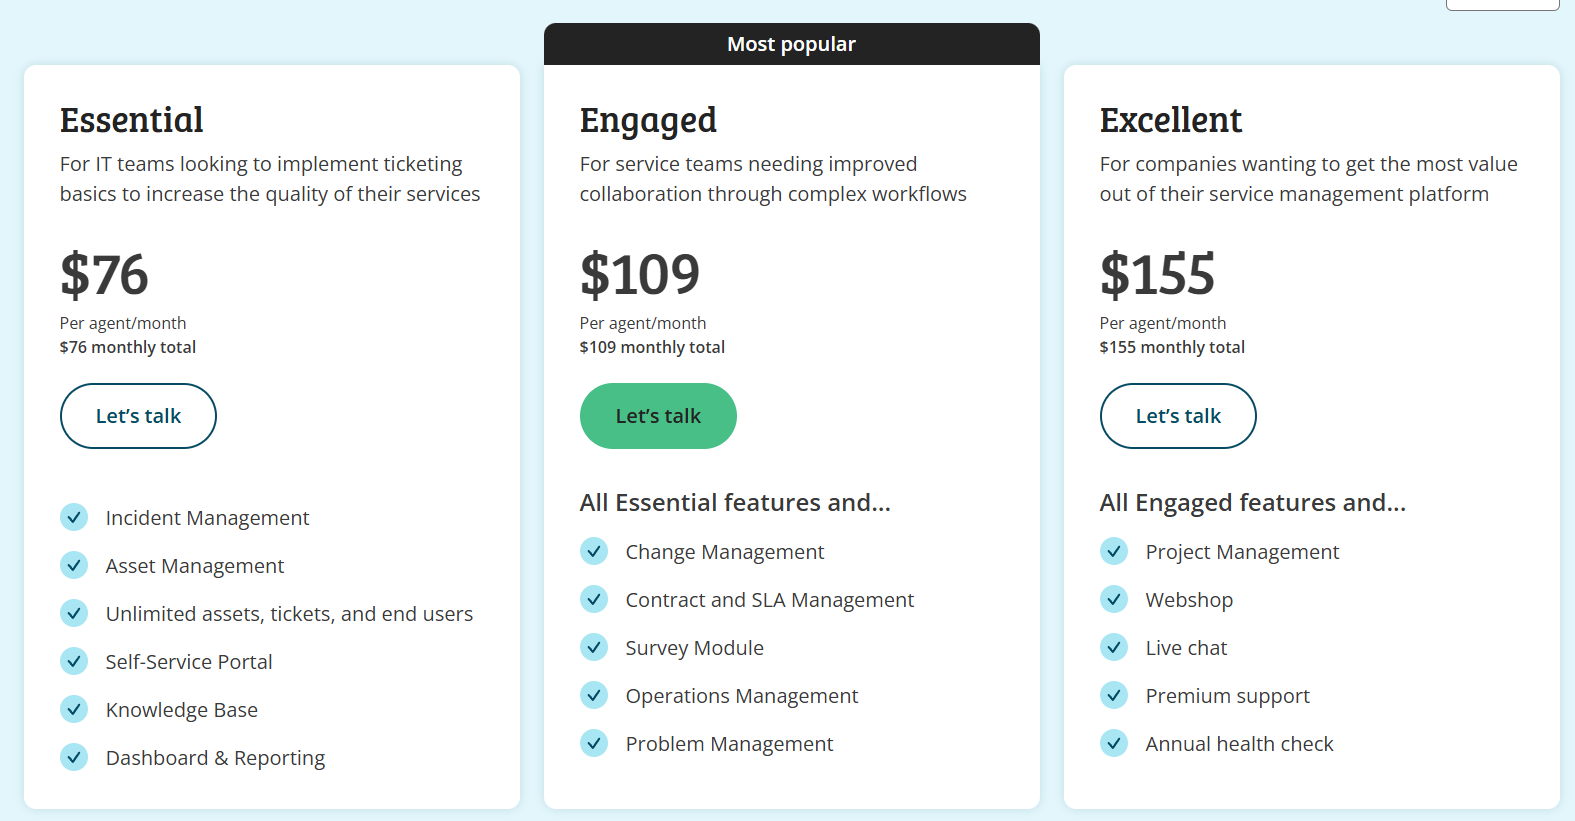
There’s a volume-based discount, too, meaning the price can go down if you onboard a higher number of users.
Pros & Cons
✅ Very user-friendly interface.
✅ Excellent customer support and continuous improvement through customer feedback.
❌ Limited customization of the self service portal and some other features.
Final thoughts: Choosing the right Jira Service Management alternative
Although Jira Service Management is a popular ITSM option, it’s not always the perfect fit for every team, especially if you’re looking for simpler setup, better pricing transparency, or more flexibility out of the box.
As you’ve seen, there’s no shortage of excellent alternatives in 2025, whether you need AI-powered automation, Slack-native ticketing, or enterprise-grade ITIL compliance.
However, if you’re looking for a solution that balances power with ease-of-use, SmartSuite is the perfect choice, as it delivers a unified, no-code ITSM platform that:
- Simplifies setup,
- Streamlines service operations, and
- Grows with your business, without the complexity or overhead of traditional tools.
Want to see how SmartSuite can help your IT team work smarter from day one?
Start your free trial and take it for a test ride today.
Or schedule a demo if you want our team to give you a personalized tour.
Read more
BMC Helix Pricing: Is It Worth It In 2025? [Reviewed]
Even though BMC Helix does not publicly disclose its pricing on its website, I was still able to find some pricing information from verified user reviews and insiders.
In this guide, I’ll cover everything that is known about BMC Helix’s pricing structure, including how they calculate their pricing and reported numbers.
➡️ I’ll also introduce you to a BMC Helix alternative that has a more affordable pricing structure, is quick to set up, and comes with premium customer support without having to pay 6 figures a year.
How Does BMC Helix Calculate Its Pricing?
BMC Helix uses a modular, user-based pricing model that varies by product suite (e.g., ITSM, AIOps, Knowledge Management), license type (named vs concurrent), and deployment model (on-prem vs SaaS).
The final cost will depend on:
- Which modules do you require? BMC Helix offers IT Service Management, Operations Management, AIOps, Virtual Agent, and Knowledge Management as separate or bundled services.
- The type and number of users: Licenses can be assigned as named (per individual) or concurrent (shared among users), with analyst licenses priced higher than self-service or requestor roles.
- Deployment preference: Prices are different between SaaS (Helix delivered via BMC cloud or AWS) and on-premise or hybrid deployments.
- Contract terms and volume: Discounts may apply for long-term contracts or enterprise-scale purchases. SaaS offerings also allow purchasing in credits (e.g., $10,000 worth of credits for a year, as you’ll see later).
- Use of AI add-ons like HelixGPT: AI features are bundled into some editions but require separate backend token usage charges (e.g., Azure OpenAI or GCP Vertex costs).
- Implementation, customization, and training: These services often range in cost.
Does BMC Helix Have A Free Plan Or A Free Trial?
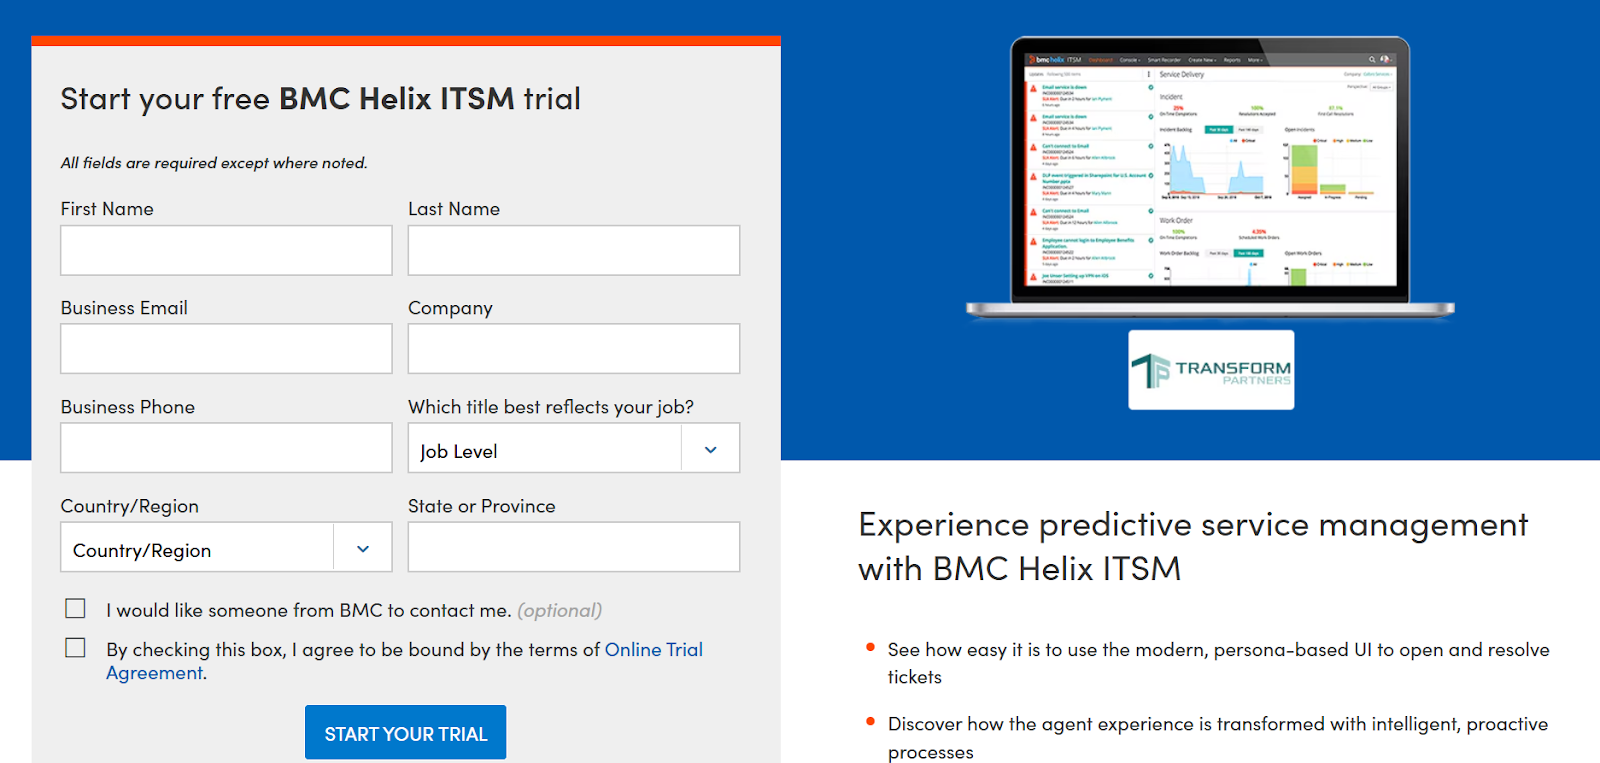
BMC Helix ITSM offers a free trial environment with no expiration date.
Your IT team can sign up to explore features, workflows, and dashboards.
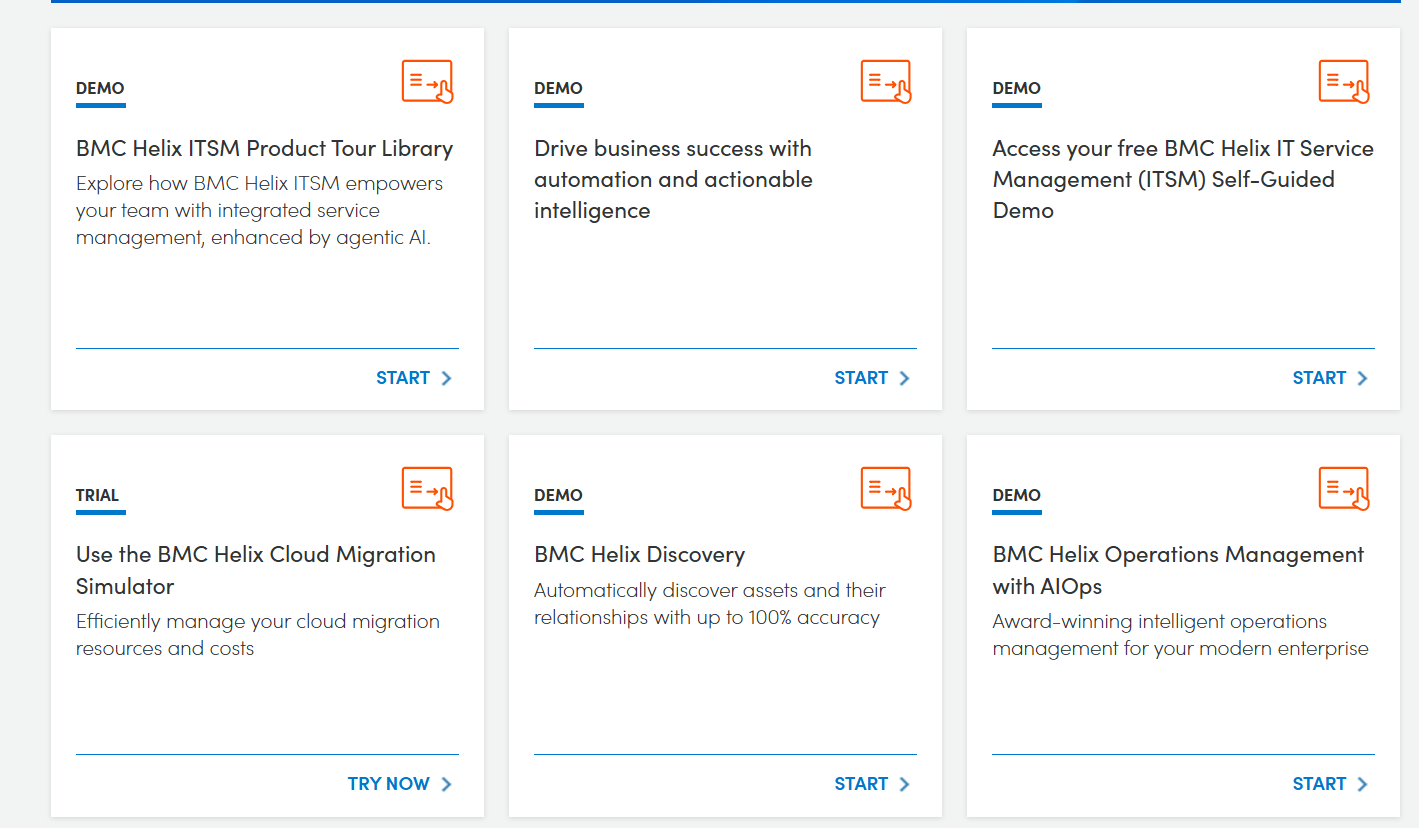
Other BMC Helix modules (e.g. Discovery, Control-M, Continuous Optimization) also provide free trials or guided demos, typically time-limited (e.g. 30 days) or focused on specific capabilities like cloud migration tools.
Apart from this, BMC Helix does not offer a free‑forever tier for small teams or long-term use.
All modules require paid licensing after the trial period. There’s no perpetual free usage tier.
How Much Does BMC Helix Really Cost?
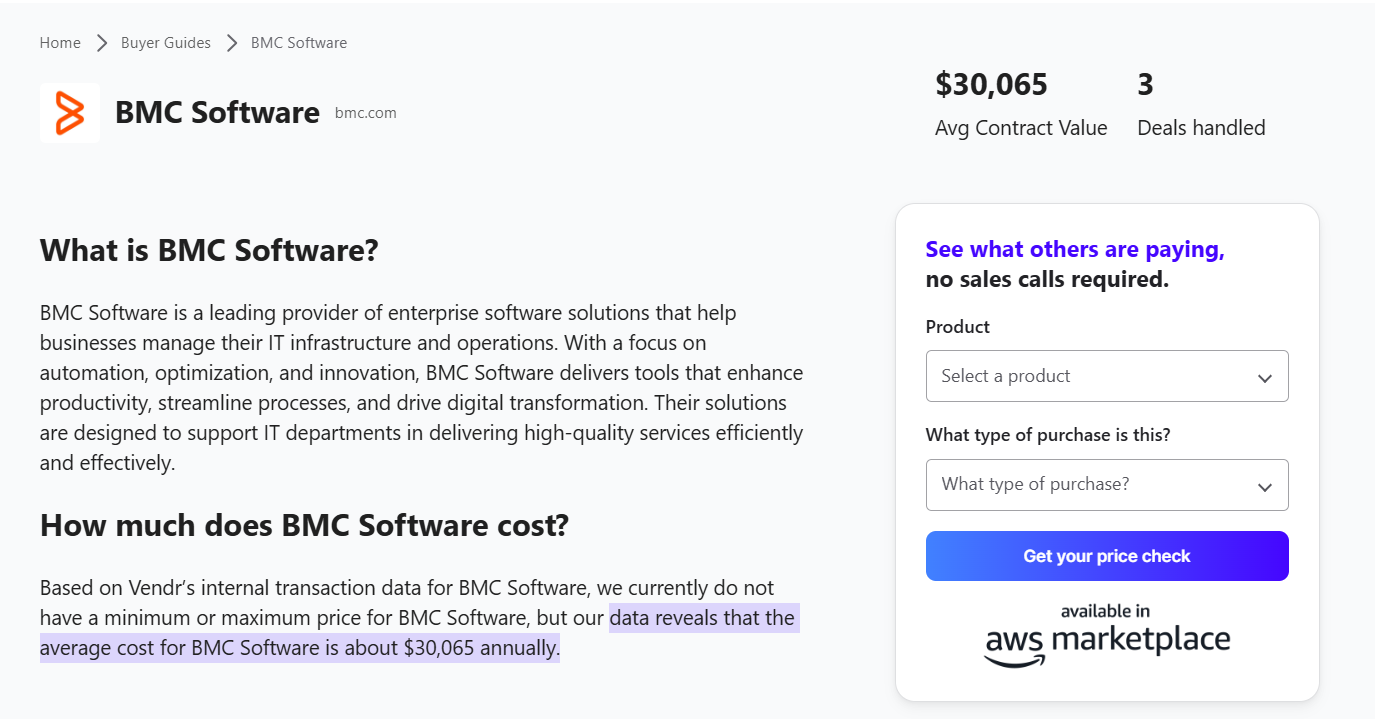
According to insiders from Vendr, BMC Helix pricing costs approximately $30,000 per year, based on data from three recent deals.
For teams looking at per-user pricing, the going rate for a named user (e.g., help desk analysts, asset owners, or admins) is $114.75/month, according to BMC Helix’s Salesforce AppExchange listing.
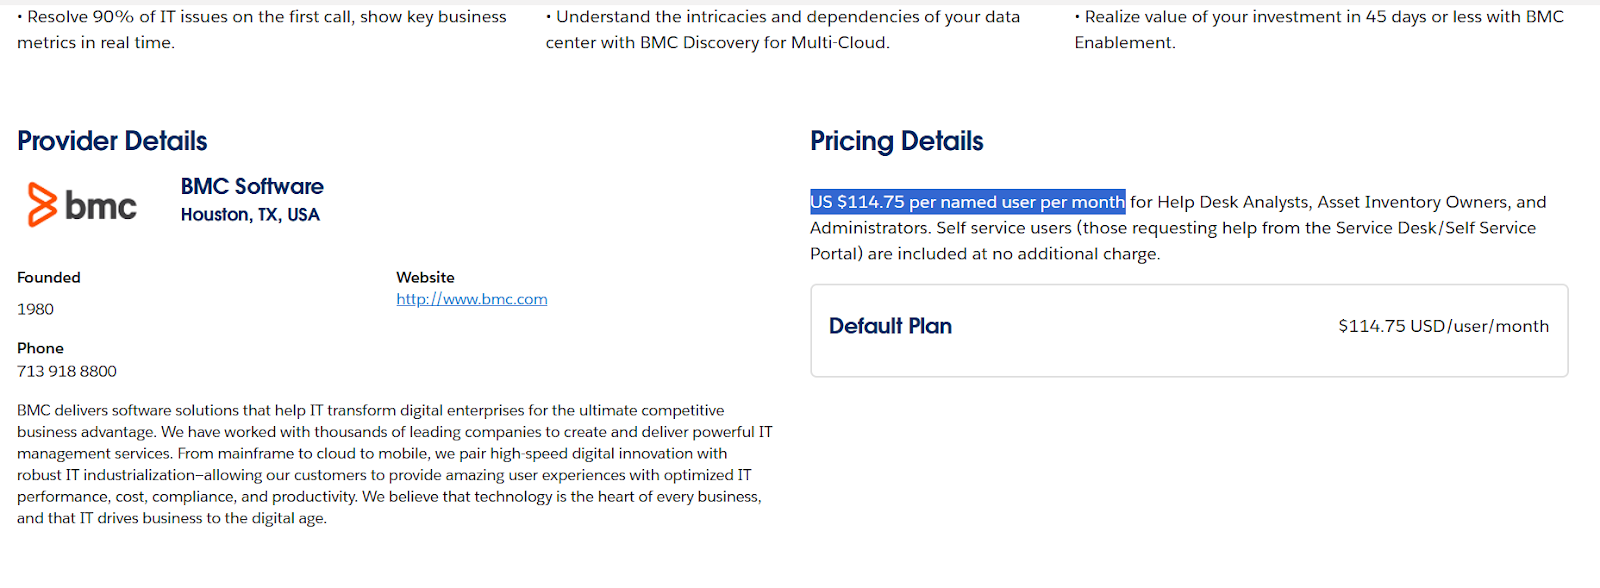
➡️ Self-service users (those simply submitting IT tickets or requests) are included at no extra cost in that offering.
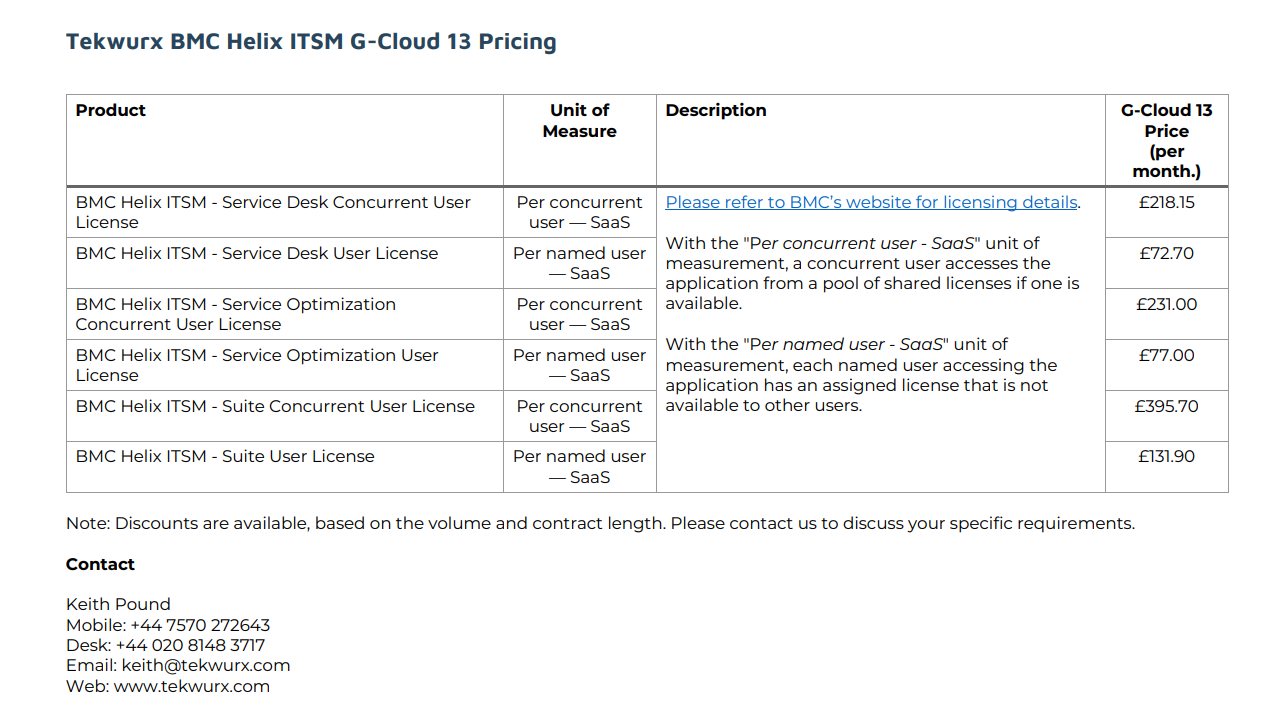
Another source, the UK Government’s Digital Marketplace, provides detailed SaaS pricing, including:
- £218.15/month per concurrent Service Desk user.
- £72.70/month per named Service Desk user.
- £395.70/month per concurrent user for the full Helix Suite.
- £131.90/month per named user for the full Helix Suite.
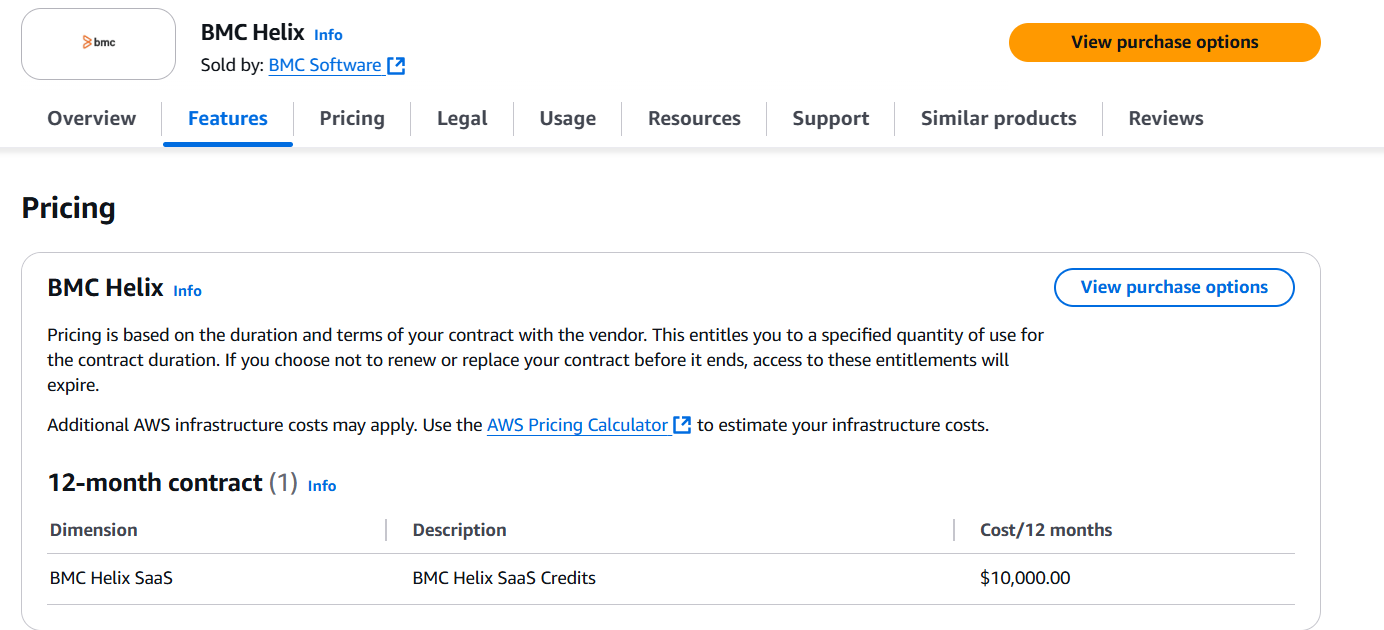
If you purchase BMC Helix via the AWS Marketplace, the platform also offers a $10,000/year SaaS credit bundle for 12 months.
These credits are pre-paid and applied against licenses or usage, with any overage billed separately.
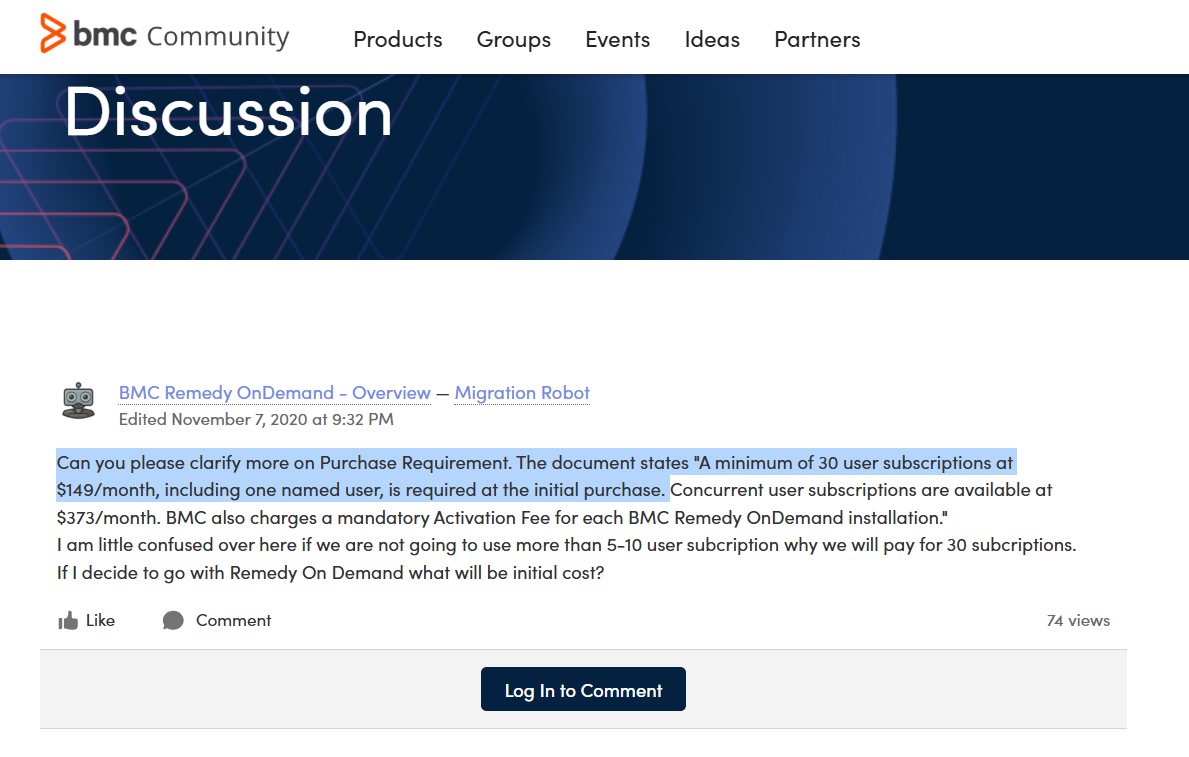
💡 According to a BMC forum post, BMC Helix Knowledge Management requires “a minimum of 30 user subscriptions at $149/month, including one named user” at initial purchase.
⚠️ Disclaimer: BMC Helix pricing is highly variable and customized based on your contract length, the modules you choose, the number and type of users, and whether you opt for SaaS or on-prem deployment. The prices above are representative, not definitive, and may shift depending on negotiations and enterprise scale.
Does BMC Helix Provide Good Value for Money?
Customers of BMC Helix are overall happy with its solution, including how they can automate and manage internal ITSM operations.

‘’Very modernized tool to automate and manage your operations. It helps in tracking tickets, tasks, changes, and data. Great support team. Integration friendly and gives options to customise as per your needs.’’ – G2 Review.
Despite this, there are many users on PeerSpot who expressed that BMC Helix ITSM is priced higher than other alternatives.

‘’The pricing of BMC Helix ITSM and its implementation costs are quite high, including subscription and maintenance costs per year.’’ – PeerSpot Review.
Looking For an BMC Helix Alternative?
All things considered, BMC Helix was designed for enterprises in mind. Users of the platform are happy with its functionality, but agree that the cost would be prohibitive for a small or medium-scale company.
ITSM leaders have been looking for BMC Helix alternatives not only due to the expensive pricing of the solution, but also because:
- The platform’s UI is not user-friendly and is rather outdated.
- The tool is difficult to configure and customize as the language is non-JSON, which makes it harder for developers to write.

‘’But UI is very old and needs to be changed. It is also very, very slow when switching between tabs and options.’’ – G2 Review.
SmartSuite (that’s us) offers the best BMC Helix alternative for ITSM with our modern, no-code project management software.
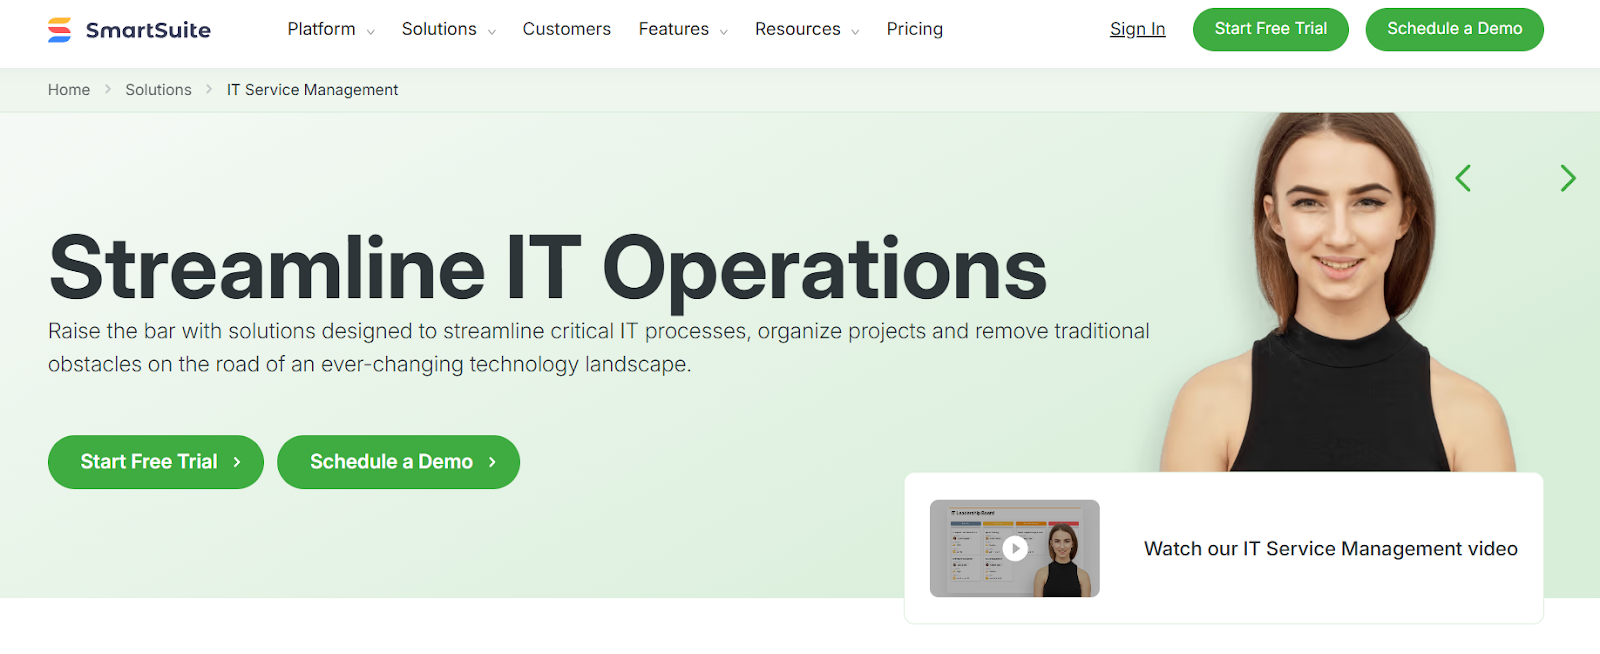
Our IT service management solution has been built to help you streamline critical IT processes, organise projects, and remove traditional obstacles in the tech landscape.
Here’s a quick walkthrough of the platform and our solution for IT teams:
[embedded content]
Let’s go over the features that make SmartSuite the best choice for teams looking for an BMC Helix alternative: 👇
All-In-One IT Service Management
SmartSuite lets you manage your IT processes, projects, and asset management all in one single solution.
Our no-code, easy-to-use solution enables IT teams to automate all technical processes with ease.
Here are the features and use cases that you’ll get with SmartSuite:
- Manage critical IT processes: Manage IT data and workflows in one place, from deploying help desk and issue management solutions to ensuring core business operations stay uninterrupted.
- Track tickets & issues: You can deploy help desk and issue management solutions to ensure your business operations are not interrupted.
- Manage your IT assets and licenses: Track all of your IT assets, to whom they are deployed to and what software versions are deployed.
- Manage internal IT projects: Plan deployments, schedule your teams, and monitor progress to ensure you deliver on time and under budget.
- Integrate with your existing systems: Our software lets you integrate with existing systems and data to consolidate and centralize your data.
- Automate for accuracy and efficiency: You’ll be able to remove inefficiencies and the chance for human error by automating repeatable workflows.
- Monitor and report on your work with customizable IT dashboards that help your team slice and dice data, track help tickets, work requests, and more in dynamic interactive dashboards.
Standardize Your Team’s IT Workflows
SmartSuite lets you streamline your IT request workflow with a centralized work request process.
You will be able to prioritize tasks, assign IT staff and ensure that you achieve service level agreements.

You can monitor your team with flexible reports and dashboards that keep you updated in real time.
Apart from that, SmartSuite’s no-code automation builder provides IT teams with a visual interface that makes it easy to respond to events and take action.
That means your team can customize your ITSM workflows without technical resources.
💡 Working from mobile? You can stay connected to critical IT information, tickets and device information with our native iOS and Android apps.
Your team can use our mobile apps to share files, images, updates and other feedback to resolve problems and close tickets.

Ready-To-Use ITSM Templates
Our team has prepared a bunch of ITSM templates for IT teams looking to get started right away, instead of building everything from scratch, such as an IT Help Desk.

Our ITSM template includes a:
- IT Service Request Management, where you can streamline work requests, automate repetitive tasks, and manage IT assets.
- IT Help Desk, which we built for internal IT departments looking to capture and resolve internal technology issues.
- IT Asset Tracker, where you can keep track of IT assets issued to employees or implemented in networks, facilities and workspaces.
You can customize our ITSM management templates here for various use cases, such as IT Security Policies, IT Security Audits, and IT Work Requests.
How is SmartSuite different from BMC Helix?
Unlike BMC Helix, SmartSuite offers a platform with:
- A modern solution with an intuitive interface that does not confuse your IT team or require extensive training.
- An affordable and transparent pricing model with a generous free plan to help you get started.
- Automated workflows that can help you build multi-step automations to trigger actions at the right time.
- Customer support and account management, which will help you with setting up the automations inside the platform.
💡 Case Study: Learn how MediaLab transformed operations, minimized risk, and saved $40,000+ per year by cutting software costs.
Pricing
Unlike BMC Helix, SmartSuite offers a free plan with access to 250+ automation actions, team collaboration, multi-dashboard views, and more.
There are four paid plans with a 14-day free trial (no CC required):
- Team: Starts at $12/user per month, including Gantt charts, timeline views, 5000 automation runs, and native time tracking.
- Professional: Starts at $30/user per month and adds two-factor authentication, Gmail & Outlook integrations, and unlimited editors.
- Enterprise: Starts at $45/user/month and includes access to audit logs, data loss prevention, and 50,000 monthly API calls.
- Signature: A customized plan tailored to your organization’s needs and team size with no predefined limits.
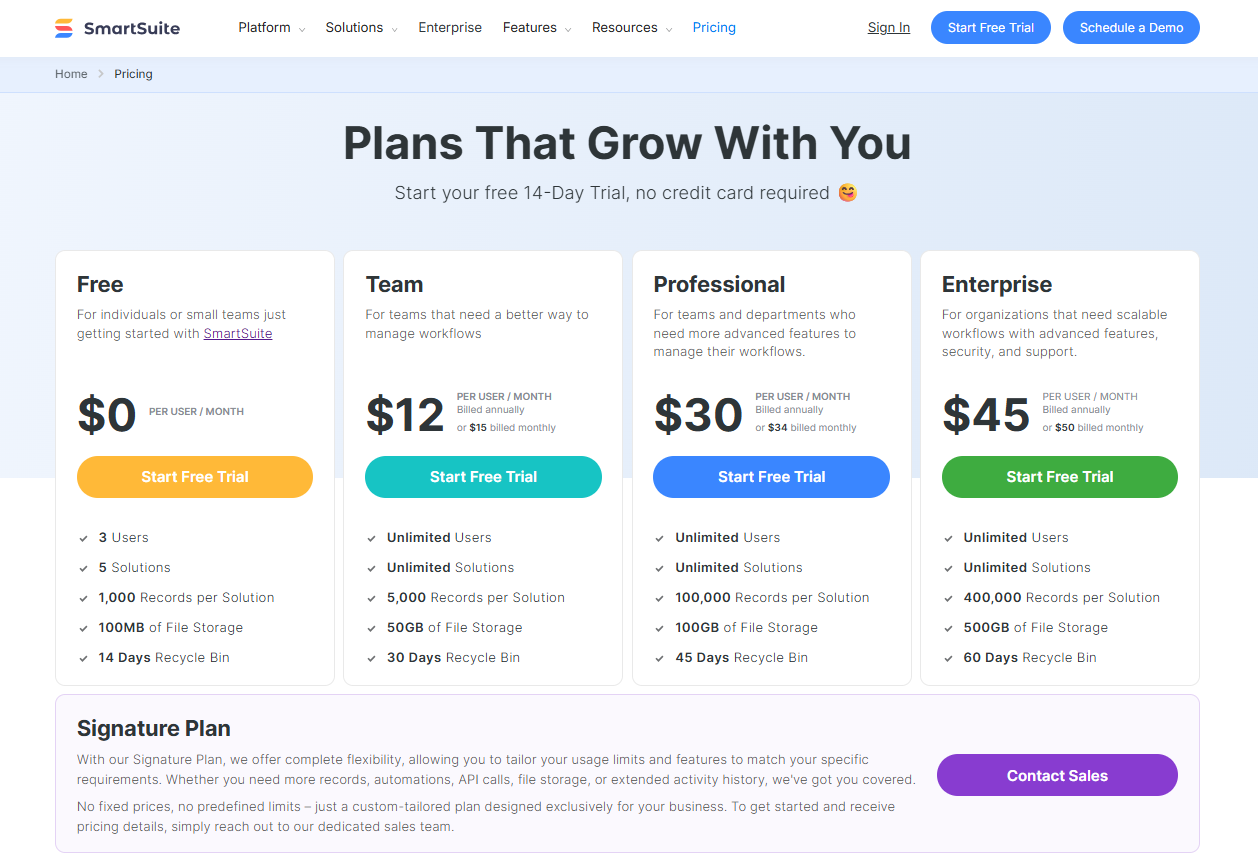
Next Steps For IT Teams: Get Started With SmartSuite & Our Templates For Free
If you’re an IT manager looking to build IT service management workstreams, you can give SmartSuite a chance with our free plan and ready-to-use ITSM templates.
SmartSuite’s platform offers just the right customization, native collaboration capabilities and a library of 200+ project management templates to help teams create and maintain a project management workflow.
Here’s what’s in it for your team when you try SmartSuite:
- Access to a free plan with features including multi-board views (Kanban, Chart, Map, Timeline, Card, and Calendar), 100 automations/month, and 40+ field types, including formula and linked record fields.
- No-code automation builder to set up to 500,000 trigger/action workflows.
- Built-in productivity tools, including time tracking, status tracking, and checklists.
- Team collaboration and planning tools such as whiteboards and SmartSuite docs.
- Resource management across projects and teams.
- 40+ field types, including the option to add your custom fields.
Sign up for a free plan to test the water or get a 14-day free trial to explore all its amazing features.
Or, if you’d like to talk to our team of experts, schedule a demo.
Read More
How we’re optimizing for AI search at Webflow (and what we’ve learned so far)

AI is undeniably changing the search landscape, but marketers are receiving mixed messages on how to respond.
Some experts are promoting specialized AEO (Answer Engine Optimization) strategies, while others insist this is simply good SEO with a new name.
Here’s the reality: LLMs like ChatGPT and Perplexity represent less than 2% of total searches. Meanwhile, Google’s AI Overviews (AIOs) are becoming more prevalent while reducing clickthrough rates by about 35%.
But there’s a silver lining. Many brands are seeing homepage traffic increase (likely related to LLM responses) — and the traffic that does manage to come through from AI searches tends to convert at higher rates.
As SEO Lead here at Webflow, I’ve seen this impact firsthand: AI search traffic is now a meaningful business driver, and trending up. As of June 2025, 8% of our total new signups now come from AI, compared to just 2% in October 2024.
This is the real-world impact of AI: our potential customers are using AI to research website platforms, and when the answers they receive lead them to Webflow, they’re well-informed and ready to sign up.
Our team believes that optimizing for AI search is becoming mission-critical as the ways people search, discover, and engage with content are shifting. The surfaces where we show up as a brand are expanding — and it gives us the opportunity to target more high-intent and engaged users.
Since AEO is an emerging channel with many open questions — and given that our platform empowers millions of users to build, manage, and optimize websites — we want to bring some clarity to the conversation.
So let’s take a look at how we’re improving our own brand’s visibility in AI search, and explore one specific content optimization strategy that’s already paying off.
Our strategy for showing up in AI search
Our approach to AEO has two main objectives: increasing Webflow’s earned visibility in AI search, and optimizing our owned content.
Goal #1: Increasing brand visibility
First, we want to show up more prominently when AI engines answer questions about our key market categories: website development platforms and content management systems (CMS). Increasing our brand visibility doesn’t just fall to SEO — it’s a full team effort.
To do this, our marketing team is working to increase brand mentions in the influential sources that AI and LLM tools rely on for training data and reference most in live searches: tech publications, Reddit, YouTube, and industry sites.
Goal #2: Optimizing owned content
Second, we’re also focusing on creating and optimizing quality content that aligns with the topics and content structures favored by LLMs and Google AIOs.
Since we can’t see the specific prompts people are asking AI chatbots, we can look at existing pages that drive AI search traffic and conversions now, to gather insights about the topics and content types that work best — helping us identify gaps, create new content, and optimize other pages to capture more visibility.
Optimizing our owned content for AI involves:
- Delivering meaningful, valuable content and avoiding fluff
- Answering search intent quickly and clearly
- Structuring content — including headlines, sections, and formats — for semantic parsing
- Breaking content into concise, relevant questions aligned with search queries
- Providing original value (like data, examples, and frameworks)
Sound familiar? Much of this all naturally overlaps with existing SEO best practices — especially since data shows a strong correlation between higher rankings in traditional search and inclusion in AI-driven search answers.
So we’re going to keep focusing on creating top-performing content, just like we’ve always done, but with an added lens of optimizing for AI agents in addition to human readers.
All of this helps our brand build not only editorial quality, but also authority and presence since trusted sources are more likely to earn citations. We ultimately want to optimize content that meets the searcher where they’re at.
To see what this all looks like in action, let’s examine one of our recent initiatives: using automation to scale our content optimization efforts.
Our strategy in action: optimizing existing content at scale
Our blog has over a thousand editorial articles that drive inbound traffic — so keeping this library updated and optimized is a pretty monumental task.
Typically, each article refresh required keyword research, competitor analysis, writing, editing, and manual CMS updates. With our current resources, we could only update about four articles per month — nowhere near the pace we need to stay competitive as search algorithms and AI capabilities keep changing.
Automating content optimization with AI
Perhaps ironically, we determined the best way to optimize content for AI at scale was using AI to optimize content.
After evaluating a few different tools, we partnered with AirOps to automate manual steps in our content refresh process:
- Conducting keyword and competitor research
- Generating targeted content improvements while maintaining brand voice and messaging
- Including human-review checkpoints and editorial review
- Pushing finalized updates through an integration with the Webflow CMS
Throughout the process, our team maintains full visibility and approval control for all content updates — making sure the automated recommendations always measure up to our high standards of quality.
After setting up our AirOps workflow, we’re able to refresh five times more content than before. We’ve progressed from manually refreshing fewer than 50 articles per year to automatically optimizing dozens every month. And within days, we saw a 40% uplift in total organic traffic for updated content.
Content optimization pays off — and it feels like a new superpower for our SEO team.
We’re all learning AEO together
So, is optimizing for AI search just another step in SEO? Yes.
Is it worth understanding and investing in? Also yes.
Our own journey with AI search optimization is just beginning, but early results show that strategic investment in AEO can drive meaningful results. Stay tuned for more learnings and best practices in the months to come.
Ready to learn more hands-on strategies to stay competitive in an AI-accelerated environment? Check out our webinar Architecting for AI: Strategies to drive AEO, conversion, and impact.
Adventures in text splitting: GSAP’s SplitText rewrite

When GSAP was acquired by Webflow, we knew SplitText would serve as a foundation for text effects, so we decided to completely rewrite it from the ground up.
To create engaging text animations where the letters or words or lines independently move, you either have to manually build the HTML structure by putting each letter/word/line into its own element which is quite cumbersome, or you need to use JavaScript to do it dynamically. SplitText is one of the most popular plugins for GSAP and it does exactly that.
We began with an ambitious set of goals:
- Cut the file size in half to minimize load times
- Add screen reader accessibility
- Add responsive re-splitting so that when fonts load or the element resizes and the text reflows onto different lines, it doesn’t cause funky line breaks.
- Allow a single inline element (like ) to get sliced up to fit inside multiple line elements.
- Add masking for easy reveal effects
- Allow certain nested elements to be immune from splitting
- Improve how complex characters like emojis and foreign language characters get split
- Make custom word delineation more flexible to accommodate special edge cases
- Make it possible to use SplitText apart from the GSAP core (standalone)
- Convert to TypeScript
In this article, I’ll share some of the technical challenges, solutions, and takeaways from the process.
Character splitting accuracy
At first glance, splitting text into separate characters might seem incredibly simple. For example, you may try using .split(“”) which works fine for simple letters:
"Easy".split(""); // ["E", "a", "s", "y"]But watch what happens when special characters like emojis are split like this:
"💚".split(""); // ['uD83D', 'uDC9A']Oops! That one emoji is actually a combination of 2 characters. And gets worse:
"👨👨👦👦".split(""); // ['uD83D', 'uDC68', '', 'uD83D', 'uDC68', '', 'uD83D', 'uDC66', '', 'uD83D', 'uDC66']That’s 11 characters for one emoji! There are certain foreign language characters that behave similarly.
Using Array.from() (introduced in ES6), works with some emojis but not more complex ones:
Array.from("💚").length; // 1
Array.from("👨👨👦👦").length; // 7The best solution is to use Intl.Segmenter():
[...new Intl.Segmenter().segment("👨👨👦👦")].map(s => s.segment); // ["👨👨👦👦"]But in older browsers that don’t support Intl.Segmenter(), a RegExp-based split() must be used as a fallback.
Takeaway: an “obvious” solution may fall apart with edge cases, so test against tricky scenarios. Be open to newer browser API’s that could be pressed into service, but have a fallback in place wherever possible.
Handling nested elements
Consider a nested … element that wraps onto two lines…
<p id="target">
What if a <strong>nested element
wraps onto multiple lines?strong>
p>
…to wrap each line inside its own
, we must break that into multiple elements (one for each line):
<p id="target">
  <div class="line1">What if a <strong>nested elementstrong>div>
  <div class="line2"><strong>wraps onto multiple lines?strong>div>
p>
That’s what the deepSlice feature in SplitText does for any nested element(s). When it senses a new line while recursively splitting text inside a nested element, it uses cloneNode() and reorganizes the contents.
Since this feature duplicates and restructures nested elements, it could affect CSS selectors (like p strong:first-of-type), so it was important for us to give users a way to opt-out (deepSlice: false). And since a key goal was keeping file size to a minimum, we had to consider whether or not the kb cost was worthwhile. In this case it was.
Takeaway: anticipate complicated edge cases and offer solutions that users can opt out of if they prefer not to have DOM elements duplicated/restructured. And if the solution is too costly (in terms of file size or performance), it may not be worthwhile.
File size reduction
Here are some of the strategies used to cut the file size by 50%:
- Replaced an extremely long RegExp for emoji-safe splitting with Intl.Segmenter() (for modern browsers) and a fallback to a simpler RegExp for legacy browsers.
- Ruthlessly eliminated redundancies, putting common functionality into helper functions, and made quite a few passes through the code to make everything as short and efficient as possible.
- Instead of concatenating all the elements into one big string like “
Sp
…” that gets shoved into .innerHTML, it now manipulates elements directly, like document.createElement(“div”). This required less code and was more flexible.
- Eliminated a few features that almost nobody used, like position: “absolute” which was a relic from the days when some browsers didn’t support the transform CSS property.
Takeaway: it often takes quite a few passes over a codebase to ruthlessly chop down the file size and make it as efficient as possible. Some of those efficiencies come at the expense of code readability, however, so you must decide what is most important in your particular project. In this case, tight file size was far more important than having readable code.
Automatic re-splitting
If only words and/or characters are split, those reflow naturally when the container resizes but if you split by lines, each line element encloses around a specific set of words/characters. If the container then resizes narrower or if the font loads after the split, for example, the text may reflow causing some of the words to belong in different lines (the last word in a line may shift down to the next). The only way to avoid strange line breaks is to re-split (restore the original innerHTML and have SplitText run its splitting logic again) so that the line elements enclose the proper words.
So for SplitText, we added an autoSplit: true feature that uses a “loadingdone” event listener on document.fonts as well as a ResizeObserver on the element to automatically revert and re-split when either of those events occur. To maximize performance, width change events are debounced so that re-splitting only occurs when they stop for 200ms or more. And it ignores height changes since those don’t cause text reflows.
Takeaway: always consider what will happen when the viewport resizes and give users the ability to react to those changes in a performant way (like debouncing).
Conversion to TypeScript
This was my first time coding a project completely in TypeScript. I see why many developers appreciate the protections it offers and the improved code hinting. It did make the file more verbose and it took a little longer, but I’m still inclined to use TypeScript more in the future. Much of the motivation comes from the fact that the rest of the Webflow team has a strong preference for TypeScript too.
Honestly, I can see valid arguments for and against using TypeScript but the two biggest deciding factors for me are:
- It did help more quickly identify potential errors in the code during development. It’s difficult to know for sure if it saved more time than it cost to add all the TypeScript information, but my guess is that it would do so at least in larger projects.
- Consistency with the rest of the Webflow team’s practices and preferences. Historically I haven’t needed to consider working on a team, so this is new to me but it seems important to have cohesive practices as a team.
Conclusion
I’ve skipped over a lot of the complexities for the sake of brevity in this article, but it’s difficult to appreciate all the little “gotchas” involved in effectively splitting apart text inside an element into characters, words, and lines until you try it yourself.
If you’d like to see how SplitText handles splitting compared to the most popular alternative, here’s a demo: https://codepen.io/GreenSock/full/VYwPVoB
I must admit it was very satisfying to cut the file size down by 50% while also adding about 14 new features and successfully converting it all to TypeScript. SplitText now feels ready to serve as a solid foundation for Webflow’s built-in text animation capabilities. And what’s even more exciting is that the SplitText plugin itself is now free for everyone, thanks to Webflow 🥳.
Driving customer-centric innovation at Xero
A customer-centric transformation through shared understanding
When millions of small businesses, and accountants and bookkeepers trust your software with their finances, every customer touchpoint matters. That’s what Xero, the small business cloud accounting platform, discovered as it scaled globally. Although the company’s teams shared the same goal, they were using disparate tools and were at different starting points with varying definitions of the customer journey.
That changed when Xero’s Service Design team used Miro to turn their disparate insights into a unified Customer Journey Framework (CJF) that now serves as one of the company’s keystone documents.
By building and hosting the CJF in Miro, teams at Xero were able to:
- Take an end-to-end customer-centric view of operating a small business and the support of accountants and bookkeepers
- Hold virtual workshops across timezones for both real-time and asynchronous collaboration
- Use a platform that felt more accessible felt more accessible, human and that teams were already using and familiar with
- Spot new opportunities faster by identifying gaps in the product offering
The CJF does more than just align teams. It’s created a shared understanding that’s helping Xero reshape the way it serves small businesses and their advisors, one innovation at a time.
The problem: Complexity slowing innovation
Xero’s global teams share a passion for customer success. But after a period of rapid growth different teams were using different ways to describe how customers interacted with the company’s products and services.
It was a complex task. Teams needed to map and understand the hundreds of ways customers ran their business – from storing documents and paying bills to claiming expenses – and how they intersected across Xero’s platform. But disjointed tools and unclear context meant teams spent too much time trying to understand customer needs before they could actually respond to them.
“We had teams working across a range of different tools, which created too much complexity. Projects were moving quickly, and there were so many dependencies on other teams, but we were spending more time getting aligned.”
Courtney Martyn, Head of Experience Strategy at Xero
What Xero needed was a common starting point – a shared taxonomy and hierarchy of the thousands of different jobs that customers wanted to do, understood through the eyes of a small business. With that in place, they could start to map the different journeys and individual user flows through its products and services, along with the dependencies between them. Most importantly, it had to transform how global teams collaborated – no small feat for an organization spanning multiple continents.
Developing this framework would be a monumental task. It would take significant effort across teams on different sides of the world to catalogue the various user flows and understand how to combine all that information in a way that would actually be useful to 4,000+ fellow employees. Then they had to build, test, roll out, and iterate on the tool itself.
The solution: Designing something for everyone

When Courtney Martyn, Xero’s Head of Experience Strategy, came onboard, one of her first decisions was to use Miro, not only to figure out what the framework should look like for everyone involved, but also to be the place that the Customer Journey Framework should live.
Some key considerations included managing both simplicity and depth, accounting for how each team would interact with the framework, the different formats and preferences, and ensuring it could be easily accessible for all. Making sure to involve key stakeholders up front, from all over the globe, Courtney kicked off the project with a series of workshops to define the parameters of the framework. As teams were located globally, asynchronous collaboration was key.
“We started using Talktrack right away,” says Courtney, meaning teams could leave a video voiceover next to their work to answer questions or provide extra context. “Before, we were having to build boards and have fake meetings just to record instructions. With Talktrack, we could do it directly in Miro and support our global team.” Sticky notes and comments provided even more ways to leave feedback and make sure that momentum never slowed.
The workshops resulted in a series of personas that shaped the delivery of the framework in critical ways. “If you think about an engineer, they gravitate towards a more tabulated view of information that they can manipulate. Whereas other people work better with a more visual representation,” explains Courtney. The framework needed to be suitable for everyone from senior leaders, those in the detail of the data, and all types of people across the business. Miro was chosen for employees who wanted, in Courtney’s words, something “more visual.”
With Miro chosen as the source of truth, Courtney was also able to strike a balance between simplicity and depth. Anybody arriving on the board would see the title of a customer job and a line or two of key information, with more detailed definitions available simply by clicking on the card. “We needed a level of information that wasn’t overwhelming when someone came into the board, but then they can drill down into the body of the card to view more detailed information,” she explains.
The Impact: Faster, Customer-centric innovation
What started as a small-scale test quickly became a company-wide rollout after a senior leader witnessed the framework’s power to drive consistency and fast-tracked it for organization-wide adoption. Finally, employees had a shared tool and understanding that bridged the gap between technical and product teams.
1. A living, breathing framework
The journey to create the CJF was intentionally iterative. Using Miro’s flexible canvas, Courtney’s team could seamlessly switch between unstructured brainstorming and structured outputs, while maintaining a single source of truth. The framework continues to evolve through quarterly updates, driven by research and employee feedback.
2. Beyond collaboration: Sparking innovation
The CJF delivered more than just improved communication – it became a catalyst for innovation and new possibilities. By mapping complete journeys from the perspective of the customer, including unexplored territories, the framework revealed new opportunities and sparked conversations about future prospects. “It highlights jobs that Xero could potentially get into and then we can identify gaps,” explains Courtney. “That becomes a spur for innovation because we’re asking ourselves if we’re going to do that better than anyone else, how would we do it?”
This collaboration transformed not just how some teams in Xero worked, but how they envisioned their future work, creating a more customer-centric cycle of product development that benefits both small businesses and Xero employees.
3. Enabling everyone to put customers’ experiences first
Teams at Xero now spend less time trying to understand the jobs to be done. It hasn’t just changed the way people work; it’s changed the way they think, expanded their perspectives and allowed them to see the customer journey as a whole. Like Miro, the CJF is now a part of life at Xero – and that’s a win for customers and Xero employees alike.
From months to minutes: How we rebuilt Webflow’s billing infrastructure
After spending months updating pricing logic, we knew something had to change. This post walks through how we rebuilt Webflow’s billing infrastructure, giving teams the flexibility to ship updates without engineering bottlenecks.
When a simple pricing update required three engineers and two months, it was clear our billing system had become a bottleneck. Routine changes turned into complex, error-prone work that slowed product development and frustrated teams across the company. This post shares how we rebuilt Webflow’s billing infrastructure from the ground up, turning multi-month projects into simple updates and freeing teams to ship features without engineering lift.
Problems with our billing infrastructure
Webflow’s billing infrastructure evolved organically over time. What started as a simple Stripe wrapper became a complex internal system that, while more robust, introduced friction that slowed product velocity.
After our latest pricing update took three engineers two months to complete, we saw our billing infrastructure needed an overhaul, as the upcoming needs were much more complex. We identified four key problems that were limiting our velocity:
#1: Simple pricing updates required deep engineering effort
Routine pricing changes like adding a plan or updating discounts required navigating brittle logic. Each change meant touching multiple systems, coordinating across teams, and managing a high risk of regressions. Engineers avoided these updates because they were slow, error-prone, and pulled focus from roadmap work. We couldn’t move fast on pricing strategy.
#2: Limited billing model flexibility prevented product iteration
We originally designed our billing infrastructure for simple subscription models, but Webflow had evolved far beyond that. Use cases like usage-based billing, tiered pricing, add-ons, and enterprise-specific features required complex workarounds. Each new billing requirement became a custom implementation instead of a natural extension of our system, creating maintenance overhead and technical debt.
#3: Billing bottlenecks threatened system reliability
As Webflow grew, our billing infrastructure struggled to keep pace. Our synchronization engine called Stripe for every subscription change, creating performance bottlenecks that became more pronounced with scale. Database queries for billing operations consumed notable resources, and our architecture couldn’t efficiently handle the volume of transactions our growing customer base required.
#4: Complexity and technical debt slowed development
Years of iterative updates without architectural improvements created a complex system that was difficult to understand, modify, and extend. Each pricing change required handling grace periods for existing customers, managing multiple plan versions, and ensuring backward compatibility. We built enterprise features as bolt-ons instead of first-class citizens, implemented through workarounds like beta flags and discount coupons instead of proper billing constructs.
These problems made it clear that incremental improvements wouldn’t suffice — we needed a fundamental rethinking of our billing architecture to restore development velocity and enable future growth.
Billing infrastructure principles
Despite our initial hesitation to depart from our familiar system, the benefits of adopting a robust billing solution quickly became clear. As we began evaluating alternatives, our selection criteria included:
- Scalability: The ability to handle 10x growth in billing operations with low-latency entitlement checks, persistent caching to minimize API calls, and reduced dependency on synchronous Stripe calls that created performance bottlenecks.
- Legacy pricing management: Maintaining compatibility with previous pricing and packaging while offering clear pathways to newer models. Our last solution lacked simple migration processes, forcing us to develop specialized code for individual pricing adjustments, which resulted in increased support requirements and accumulated technical debt.
- Flexibility: Ease of integration and the ability to update pricing and packaging.
- Zero-deploy entitlement updates: The ability to make entitlement changes through a user interface without engineering work or deployments. Updates are instantly reflected across the platform, replacing our static configuration file approach that requires code changes and deployments for every entitlement modification.
After extensive evaluations, we selected Stigg because it met all our criteria, especially the robust entitlement service key to our needs.
Proof of concept
We built a Proof of Concept (POC) to validate our hypothesis and evaluate core features. Our POC focused on three key success factors:
- Improving the team’s velocity in implementing pricing and packaging changes.
- Verifying that the entitlement system with appropriate caching could deliver fast response times.
- Ensuring successful implementation and management of enterprise plan subscriptions.
A small team built a focused integration that validated our core hypotheses around velocity, performance, and enterprise capabilities. After observing Stigg in a production-like environment, we confirmed it met our engineering and product-level key principles. The POC gave us confidence that this wasn’t just a technology swap — it was a fundamental improvement to how we could operate our billing system.
Migration process
Given the complexity of this undertaking, we decided to adopt the Strangler Fig approach to replace our in-house billing system to avoid downtime gradually. Here’s how we approached the migration:
- Initial integration and double write/update: We first implemented the billing service to start actively syncing with Stigg. During this phase, we performed double writes — updating our in-house billing system and, in parallel, sending updates to Stigg via a background job. This ensured consistent data across both systems during the migration process.
- Data migration: We then executed a one-time migration to export all existing subscriptions to Stigg. The double write process was crucial here, as it prevented any lapse in updates between the two systems during the export process.
- Handling Unexpected Scenarios: We developed a backfill mechanism to address unforeseen situations, such as backup restores, site clones, or system crashes. When specific errors like “ResourceNotFound” occur, we execute the backfill logic before retrying the function. Additionally, we created a diffing engine that detected and logged any inconsistencies between Stigg and our internal billing platform. This mechanism was crucial for diagnosing issues and sometimes triggered the backfill process to correct missing or incorrectly configured subscriptions and entitlements.
These steps gave us the confidence to transition to Stigg as our primary source of truth for billing, ensuring a smooth migration process with minimal disruption.
System architecture: Designing for gradual migration
The core challenge wasn’t just integrating with Stigg — it was doing so without breaking our existing system or forcing a risky big-bang deployment. We needed a way to gradually migrate workspaces (the primary organizational units where teams collaborate on sites) while maintaining full functionality for those not yet enrolled.
From our previous billing system implementations, we knew that directly coupling application code to third-party APIs creates brittle systems that are difficult to test and migrate safely. This time, we built a billing service layer that completely encapsulates Stigg from the rest of our application.
This abstraction layer gave us three key capabilities: centralized API access for simplified integration management, comprehensive logging and monitoring at a single point, and a unified interface that allowed the rest of our application to remain agnostic about the underlying billing provider. Most importantly, it enabled us to swap implementations without touching application code.
We organized our billing service into four core domains that map to our business needs:
- Customer Service for workspace lifecycle management
- Plan Service for pricing information
- Subscription Service for billing operations
- Entitlement Service for feature access control
Each service needed to support multiple implementations to enable our gradual rollout strategy.

Strategy pattern for zero-downtime rollouts
We implemented the Strategy Design Pattern across all our billing services to solve the gradual migration challenge. This pattern allowed us to maintain three different implementations of each service: a Stigg implementation for enrolled workspaces, a null no-op implementation for legacy workspaces, and a mock implementation for testing.
export function getEntitlementService(
  opts: ServiceFactoryOptions
): EntitlementServiceInterface {
  const loggerInstance = opts.logger ?? createDefaultLogger();
  const eventEmitterInstance = opts.eventEmitter ?? getEventEmitter();

  switch (serviceResolver(opts)) {
    case SERVICE_PROVIDERS.MOCK:
      return getTestingMockForService(StiggEntitlementService);

    case SERVICE_PROVIDERS.NULL:
      return new NullEntitlementService({
        logger: loggerInstance,
        eventEmitter: eventEmitterInstance,
      });

    case SERVICE_PROVIDERS.STIGG:
      return new StiggEntitlementService({
        logger: loggerInstance,
        eventEmitter: eventEmitterInstance,
        stigg: getConfiguredStiggClient(loggerInstance),
      });

    default:
      throw new Error('Unknown service type');
  }
}
The best part of this approach was that calling code remained oblivious to which strategy it was using — it calls the same interface and receives consistent behavior whether it’s hitting Stigg’s live API, a no-op implementation, or mock data:
const strategy = await getBillingServiceStrategy(workspaceId);
const service = EntitlementService(strategy);
const entitlement = await service.getBooleanEntitlement({
  workspaceId,
  featureId: CAN_LOCALIZE_CMS,
  siteId,
});

if (entitlement.hasAccess) {
  // has access to localize CMS
}
Each strategy implementation served a specific purpose. Our Stigg strategy handled the full integration with their API, including data transformation between their format and ours:
class StiggEntitlementService {
  async getBooleanEntitlement(params: GetBooleanEntitlement) {
    const entitlement = await this.stiggClient.getBooleanEntitlement(params);
    const transformed = stiggToWebflowEntitlementTransformer(entitlement);

    this.eventEmitter.emit('entitlement.get-boolean', transformed);
    return transformed;
  }
}
Our null strategy provided a safe no-op implementation that preserved monitoring capabilities:
class NullEntitlementService {
  async getBooleanEntitlement(params: GetBooleanEntitlement) {
    this.eventEmitter.emit('entitlement.get-boolean', params);
    return {};
  }
}
This pattern was essential for our migration success. It enabled zero-downtime rollouts, gradual workspace migration, comprehensive testing with mocks, and the flexibility to swap billing providers in the future by simply implementing new strategies.
Keeping two systems in sync
The strategy pattern solved our code organization challenge. However, we still faced a coordination problem: ensuring that workspaces enrolled in our feature flag rollout were properly enrolled on Stigg’s platform. This synchronization was key for maintaining data consistency as we handed over subscription management from our legacy system to Stigg.
The core challenge was that we had two independent systems making enrollment decisions. Our feature flag system determined which workspaces should use the new billing infrastructure, while Stigg needed to know which customers it should actively manage. A mismatch between these systems could result in billing inconsistencies or service disruptions.
We solved this with an enrollment synchronization function that runs whenever a workspace interacts with our billing system:
export async function isStiggBillingSyncEnabled(
  workspace: Workspace
): Promise<boolean> {
  try {
    return await getAndSetRolloutValue(workspace);
  } catch (err: Error) {
    if (shouldRunCustomerBackfill(err.message)) {
      try {
        await backfillMissingCustomer(String(workspace._id), err.message);
        return await getAndSetRolloutValue(workspace);
      } catch (backfillError: BackfillError) {
        logger.error('Error backfilling Stigg customer', err);
      }
    }
    return false;
  }
}

async function getAndSetRolloutValue(workspace: Workspace) {
  const isEnrolled = featureConfig.getFeatureFlag(FEATURE_FLAG);
  await ensureEnrolledInStigg(workspace, isEnrolled);
  return isEnrolled;
}
This function became our source of truth reconciliation. It detected mismatches between our feature flags and Stigg’s enrollment state, corrected them automatically, and cached the results to minimize performance impact.
Performance and reliability
The new billing system delivered notable performance improvements across the entire platform.
- By eliminating the synchronous Stripe API calls that previously blocked every plan change, we achieved a 95% reduction in sync operations for workspaces with large numbers of sites. This architectural change removed a notable bottleneck that caused timeouts and degraded user experience.
- In our entitlement system, we replaced a static capabilities config with dynamic, cached entitlement checks that provided centralized usage tracking—something we never had before. Previously, different features implemented their tracking methods (or didn’t track usage), creating inconsistencies and performance overhead. The new system improved page load times while reducing code complexity across the platform.
- The caching strategy we implemented eliminated redundant API calls, automatically detected and corrected data inconsistencies, and ensured the system remained functional even during external service outages. This resilience was key during the migration period when we needed to maintain service reliability while coordinating between multiple systems.
- We developed distinct error-handling strategies based on the criticality of each operation. We classified enrollment failures as critical to prevent billing inconsistencies, and logged less critical operations without interfering with user workflows. Additionally, we implemented comprehensive backfill logic to address edge cases such as workspace restores, site clones, and temporary system failures.
Throughout the rollout, we monitored performance closely with dedicated DataDog dashboards that tracked cache hit rates, API response times, synchronization failures, and enrollment mismatches in real-time. This monitoring proved invaluable for identifying and resolving issues before they could impact customers and gave us confidence to accelerate the rollout timeline.
Reflections on the migration
The migration to the new billing system has transformed how we handle pricing and packaging changes. What once took months of engineering effort has become a non-event, with product managers now able to update plans and entitlements with little to no engineering involvement. This shift has empowered teams to implement changes quickly and confidently.
The strategic design decisions and comprehensive documentation have also enabled feature teams to add new features and entitlements with minimal Subscriptions & Payments team guidance. While we continue to clean up the remaining sections of the legacy system, this has laid a strong foundation for future growth and innovation at Webflow.
Lessons learned
Migrating a key system like billing taught us valuable lessons that will inform future large-scale migrations:
1. Map all edge cases early, especially cross-system workflows. We missed accounting for site workflows like restores, snapshot reverts, and workspace transfers. These overlooked scenarios led to subscription discrepancies that required backfilling. We systematically catalog all workflows that touch the migration system before starting implementation.
2. Plan for rate limits and external API constraints from day one. Due to workspaces with numerous sites, we faced rate-limit constraints from Stigg’s API, leading to service disruptions. We worked with Stigg to increase limits and leverage an edge API backed by DynamoDB to reduce dependency on real-time external queries and provide better resilience.
3. Legacy cleanup is more complex than the initial migration. While the new system worked beautifully, removing legacy implementations proved more complicated than anticipated. Coordinating with feature teams to migrate to entitlements while avoiding performance degradation required careful sequencing and extensive testing. We learned to allocate more time for cleanup phases in future migrations.
4. Monitoring and observability are migration accelerators. Our comprehensive DataDog dashboards didn’t just help us catch issues — they gave us the confidence to move faster. Real-time visibility into cache hit rates, API response times, and system health allowed us to accelerate rollout timelines because we could identify and resolve problems before they impacted customers.
Conclusion
Rebuilding our billing infrastructure was a complex but necessary endeavor to support Webflow’s next decade of growth. This gave us a scalable and flexible foundation that reduces the engineering effort required to manage pricing and packaging changes while better supporting our future growth and customer expectations.
Among the key gains from this migration, we’ve dramatically improved the efficiency of our billing updates, allowing changes that once took months to be made in a fraction of the time. The new system enables us to introduce new features and pricing models without the heavy lifting previously required. It has been designed with scalability in mind, ready to support Webflow’s expanding user base without becoming a bottleneck. We’ve achieved notable latency improvements — eliminating the synchronous API calls that previously caused timeouts and delivering faster, more reliable billing operations across the platform. Another important outcome of this project has been the decision to encapsulate third-party tools behind an internal service layer. This pattern simplified the current rollout and ensured that we could swap out third-party providers in the future without requiring notable changes across our codebase.
Looking ahead, there’s still a lot to build. We’ve laid the foundation, but many of the most challenging and rewarding problems in billing, entitlements, and monetization are still ahead of us. If solving these kinds of challenges excites you, we’d love to hear from you—check out our open roles.
10 Best ArcherIRM Alternatives For GRC In 2025, Read more
Goodwill goes a long way: How building trust with our community fueled our viral GSAP relaunch
Since joining Webflow in 2023, I’ve had the opportunity to be a part of some truly incredible launches as our Chief Product Officer.
Bringing products to market are moments of magic because it’s when we are able to deliver on customer needs and experience their real-time reactions after months of coordinated efforts internally. And sometimes, these moments extend far beyond a single day.
At Webflow Conf in 2024, we re-introduced Webflow as a Website Experience Platform (WXP) to the world, helping our customers grow and transform their own brands with the launches of our Analyze and Optimize products. We also announced that we acquired GSAP, and saying our customers and partners were excited is probably an understatement. Our community rightfully assumed this was the first phase of a complete makeover of our interactions platform.
We welcomed GSAP into the Webflow family because we truly believe in the power of animations and interactions to create emotional bonds with your audience. We also knew that GSAP was not just an industry-leading JavaScript animation library, but also one that has a highly-engaged and talented community of creative developers, is home to incredible educational resources, and believes in helping their community deliver pixel perfection.
At the end of April, we announced GSAP is now 100% free for the entire web community. We wanted to remove any remaining friction from using the best animation library on the web, as well as roll out a series of improvements for GSAP developers and our shared Webflow customers, and we couldn’t be more humbled by the positive reception.
This launch was one of my favorite moments ever at Webflow, both for the incredible community response it received and because it captured something crucial about this moment in web development. As AI reshapes our industry, this initiative struck a chord with our audience’s complex feelings about how AI may transform — or threaten — their craft. The energy and enthusiasm around this rollout further confirmed our belief that creativity and bespoke animation are critical to brand differentiation and matter now more than ever.
So much went into this launch, making it one of our most successful initiatives to date. And today, I’m going to share our detailed playbook for how we assembled our go-to-market strategy — which continues to generate buzz five weeks later — and the exciting plans we have in store for the future.
We made a community-first product bet: Announcing GSAP is now 100% free
While GSAP was never super expensive, we knew any price was a point of friction. By absorbing the cost of maintaining and improving GSAP, Webflow was able to:
- Create marketing momentum: The announcement posts went viral among our community, as well as the new-to-Webflow community, the GSAP crowd. Across channels, these posts generated over half a million impressions, nearly 45,000 engagements, and a 27.5% engagement rate — a 1000+% increase compared to the industry average for engagement.
- Expand our creative developer base: In the first two weeks post-launch, thousands of sites on Webflow enabled GSAP for the first time. When comparing the five weeks pre- and post-launch, we’ve observed a 27% increase in week-over-week adoption of GSAP in Webflow. The halo effect of a superb launch for our product has been awesome!
- Go long on developer tools: This relaunch also created a halo around Webflow’s significant investment in “pro-code” tools for developers, and it was quickly followed by our Webflow Cloud launch just days later.
- Build trust with new community members that we were in it for the long haul: We understand why some members of the GSAP community had their doubts about our intentions post-acquisition. We always intended to continue investing in GSAP for the long haul — and were happy to share this intention publicly for the first time.
Pulling this together was a massive coordinated effort that took thoughtful planning. This included administering refunds for customers that had made a recent GSAP purchase because it was the right thing to do.
The result of this initiative was a tremendous outpouring of gratitude and energy from the GSAP community. I personally couldn’t stop reading all of the positive messages users were tagging us in online. Seeing the joy from both GSAP and Webflow communities was incredibly special to me and the whole team behind this launch.
We coordinated the rollout of several product features, specifically benefiting GSAP developers
The day prior to GSAP’s relaunch, we quietly launched our highly-anticipated Webflow site previews with custom code. This allows developers to preview custom code before publishing it on your Webflow site — including animations written with GSAP.
Additionally, we made it easier to use previously paid GSAP Club plugins in Webflow by making them, along with GSAP’s core library, directly available in and hosted by Webflow.
We also gave one of GSAP’s most popular plugins — SplitText — a massive glow up. Completely rewritten from the ground up, it now includes a significant number of exciting improvements designed with developers in mind — including a 50% reduction in file size, baked in accessibility for screen readers, and easy masking for advanced “reveal” effects.
By tethering these features together, we wanted to signal not just a thoughtful product rollout but also our commitment to GSAP developers — in both the JavaScript library and in Webflow. And by taking the time to invest in GSAP improvements, we wanted to offer the first of many proof points that we’re deeply invested in GSAP now and in the future.
We put our campaign in motion (literally) — and it drove record-breaking numbers
What’s an animation library announcement without a little…animation? Our Creative team knew the announcement called for their A-game, and they honed in on building a slate of highly-visual and animated promotion assets for this launch to not only highlight the heart of GSAP as a product feature, but to also engage and capture user attention. This launch was an overwhelming success, racking massive engagement numbers and breaking Webflow marketing records:
- A sizzle reel, accumulating 170,000+ views & 450 comments
- Webflow’s most engaged LinkedIn post of all time, which was reshared nearly 200 times
- Our second-most viewed blog post year-to-date
[embedded content]
This momentum also gave our team the opportunity to tease Webflow’s next-gen native interaction solution (coming soon!), and our Marketing team is able to use all of the high-performing creative and promotion assets in ongoing campaigns to sustain the energy and excitement in the following weeks and months.
No items found.
We centered our campaign around creators and authentic community engagement
Knowing this announcement would resonate most with the developers building in GSAP daily, we knew it was important to connect with them on a personal level. This meant enlisting Cassie Evans (@cassiecodes) and Keegen Leary (@webisbae) — members of our team the Webflow and GSAP communities already know and love — to talk shop during the announcement video stream. We also put spotlight on the incredible work of GSAP creators in this video, which also gave us an opportunity to showcase the limitless power of Webflow and GSAP.
[embedded content]
Additionally, we know how inspiring it can be when users can visualize what’s truly possible with a new product, tool, or feature. That’s why we tapped prominent, award-winning agencies like OFF+BRAND to create free cloneables and templates with GSAP to help lower the barrier to getting started, accelerating GSAP adoption in the process.
And to bring a little healthy competition and a hands-on element to this campaign, we hosted the Webflow x GSAP Community Challenge — in partnership with CodePen. The challenge consisted of four prompts over four weeks and gave creators a chance to design, build, have fun, and win big prizes. Partnering with CodePen ensured anyone — not just Webflow users — could participate, giving challenge participants the option of submitting a Webflow project or a CodePen demo.
We designed an episodic launch strategy to keep our community buzzing
We knew this announcement was a major announcement relevant not only with Webflow users, but the entire community of creative GSAP developers. This informed each part of our playbook: coordinating feature launches, building motion assets, and creating community engagement opportunities related to the launch.
With so many moving parts associated with this relaunch, sustaining momentum, energy, and excitement was critical. This was more than a singular marketing moment; it was a campaign spread across multiple weeks, anchored around a massive announcement.
Phase 1: GSAP is free announcement
We didn’t bury the lede: we shared the big news that GSAP was free with confetti and a full announcement post, provided updates about our improvements from GSAP and Webflow, and kicked off the community challenge. This gave us a launching point to promote our announcement video, which would stream on Webflow’s YouTube channel a week later.
Phase 2: Scheduled video stream
From there, our video stream provided our community with a full breakdown of what this relaunch means for creative developers, and allowed our team to preview what’s next on the Webflow Interactions roadmap —generating even more buzz than we could’ve anticipated. We created a short clip from the video previewing the completely reimagined Webflow interactions experience (centered on a horizontal timeline interface), which received the biggest reaction from the community and was reshared over 100 times across social. Anyone who missed the video stream received the recording via email, extending its life and ensuring the asset appeared in front of as many eyes as possible.
Phase 3: Community challenge
A new prompt in our community challenge dropped every week for four weeks, and we were able to select and celebrate both winners and honorable mentions publicly across our social channels every week for the entirety of the month, as well as feature winning projects on the challenge landing page. Additionally, we’ll be spotlighting winners in an forthcoming content piece, giving a peek behind the curtain on how they brought their creations to life.
This relaunch opened up so many creative possibilities for our community, and taking this sustained approach ensured it received — and continues to receive — the attention it deserves.
And what’s even more exciting is that we’re just getting started.
The next chapter of Webflow and GSAP
Since I know many of you have already caught onto what we’ve been teasing… we will be releasing next-gen Interactions in Webflow — powered by GSAP — soon! This will empower anyone — marketers, designers, developers, and agencies — to visually build expressive, smooth, performant animations that aren’t just for flair, but fuel conversions.
We hope this relaunch empowers more of the Webflow and wider creative developer community to build experiences that make a lasting impact. We’re always listening to your feedback and ideas to bring new products and features to life, and I’m incredibly grateful to our community for supporting us and championing our continued work to give development superpowers to everyone.
To stay up to date on the latest Webflow product updates, visit webflow.com/updates.

GSAP is now 100% free
GSAP is now completely free for the entire web community, giving developers more freedom to harness the full breadth of GSAP-powered motion.
Get started today
↗
GSAP is now 100% free
GSAP is now completely free for the entire web community, giving developers more freedom to harness the full breadth of GSAP-powered motion.
Get started today
↗
Get started today
Last Updated
June 6, 2025
Welcome! You are invited to join a webinar: Bi-Weekly Getting Started Workshop. After registering, you will receive a confirmation email about joining the webinar.
.circular {
position: relative;
top: 150px;
left: 50%;
height: auto;
width: 42px;
margin-top: -21px;
margin-left: -21px;
animation: loading-rotate 2s linear infinite;
}
.path {
animation: loading-dash 1.5s ease-in-out infinite;
stroke-dasharray: 90, 150;
stroke-dashoffset: 0;
stroke-width: 2;
stroke: #0E71EB;
stroke-linecap: round;
}
@keyframes loading-rotate {
100% {
transform: rotate(360deg);
}
}
@keyframes loading-dash {
0% {
stroke-dasharray: 1, 200;
stroke-dashoffset: 0;
}
50% {
stroke-dasharray: 90, 150;
stroke-dashoffset: -40px;
}
100% {
stroke-dasharray: 90, 150;
stroke-dashoffset: -120px;
}
}
How developers can accelerate scalability and innovation with a modern CMS
For decades, content management systems have promised developers control, flexibility, and speed.
Instead, they face a reality where basic tasks turn into resource-draining projects.
Need to add a contact form? Navigate a maze of outdated and insecure plugins. Want to update content? Spend lots of time testing across various browsers and devices. Time to scale your offering? Watch your site collapse under real-world traffic loads.
While content management systems (CMS) have evolved to meet these growing needs, they often create new problems that hinder collaboration. For instance, a no-code CMS empowers marketers to ship content independently, but customizing content becomes cumbersome. A headless CMS gives developers flexibility but leaves marketers completely dependent on the development team for simple updates.
Webflow’s visual-first CMS offers developers an alternative approach. It lets marketers safely create and publish content without introducing technical risks or sacrificing developer control — freeing up developers to scale and innovate.
What developers need from a CMS
A CMS is the technical backbone of a brand’s website, enabling marketing teams to test and optimize content. When choosing a CMS, teams must balance technical constraints (e.g., secure, scalable, and integrated with the rest of the tech stack) with marketing needs and capabilities (e.g., content management, campaign flexibility).
For developers to work efficiently, a truly effective CMS provides:
- Low maintenance burden: Developers want a CMS that doesn’t require constant upkeep and maintenance, such as installing regular security patches, updating legacy codebases, or fixing bugs from system conflicts.
- Easy integrations: To measure marketing effectiveness, teams must integrate their CMS with third-party martech tools (e.g., analytics software, CRM). Therefore, developers need a CMS that makes it seamless to implement these integrations.
- Enterprise-level scaling: As the brand scales, developers need a CMS that can handle increased traffic without compromising technical performance (e.g., site speed) or user experience.
Common challenges with today’s CMSs
Unfortunately, most CMSs fail to meet the above requirements. Instead, developers encounter constant maintenance demands, a fragmented integration landscape, and ongoing security and scalability issues.
High maintenance burden
Existing CMSs are often designed with rigid constraints that become increasingly problematic as technical needs evolve. Over time, this can result in technical debt, constant upkeep, and a brittle user experience. Common causes include:
- Legacy systems: Many CMSs are built on legacy systems (like PHP) and outdated standards, introducing technical debt. Removing these standards and making them customizable to add new features requires expensive rewrites, which results in developers spending more time working around existing code.
- Fragile, high-maintenance systems: CMSs rely heavily on plugins and integrations to extend basic functionality, creating brittle architectures where components don’t work well together. Plugin developers often abandon maintenance, leaving sites vulnerable to security issues, compatibility problems, and bloated codebases over time. When one element breaks — whether it’s an outdated plugin or a third-party integration overriding CSS — it can cascade through the system, causing bugs and broken user experiences. This forces developers into a constant cycle of updates, upgrades, and troubleshooting just to keep sites functional.
- Complex testing infrastructure: Many CMSs lack proper staging, device testing, and content versioning. As a result, they are stuck manually QAing their content, ensuring it works across every browser, device, and content scenario. This can introduce regressions that only surface when users report them, which, over time, can degrade the user experience and add maintenance overhead.
Integration complexity
Marketing teams often want to add third-party integrations (like CRM, analytics software, and automation tools) to launch and measure outcomes of new strategies. However, successfully adding these integrations, whether as plugins or APIs, requires navigating various technical hurdles, including:
- Data format inconsistencies: To ensure that the third-party system works effectively with the CMS, developers should verify that the data stored in the CMS maps how the third-party system expects to receive the information. Depending on the data definitions, this can result in significant custom work.
- Limited functionality: Plugins and APIs often don’t fully support the specific marketing use case. Therefore, developers are forced to write custom code or create workarounds to achieve the desired behavior. For example, your CRM might offer a CMS plugin, but if it doesn’t support custom events or field mapping, you’ll still need to write custom code to make the integration work properly.
- Security risks: Each integration introduces a security risk to your CRM, as it’s a potential entry point for attackers to compromise your system. Developers might need to evaluate the security risk and take the necessary precautions to reduce it.

Webflow named a Strong Performer
Learn why Webflow has been named a Strong Performer in a rapidly shifting CMS market and how Webflow is a best fit for price-conscious enterprise buyers.
Read now
↗
Webflow named a Strong Performer
Learn why Webflow has been named a Strong Performer in a rapidly shifting CMS market and how Webflow is a best fit for price-conscious enterprise buyers.
Read now
↗
Read now
Speed and scalability challenges
As developers add more functionality to the CMS through plugins, third-party integrations, and visuals, their websites become bloated and slow. Many CMSs don’t provide granular control over content delivery or performance configurations, making it difficult for developers to speed up their websites. Over time, this impacts speed metrics like Google’s Core Web Vitals and ultimately SEO performance.
A heavier site also impacts scalability. Bloated sites consume more CPU, memory, and bandwidth per user, which requires more servers to handle the same amount of traffic. Many CMSs have limited elastic scaling configurations, leading to outages during traffic spikes or as your site drives more traffic.
Security vulnerabilities
Every week, 32% of enterprises suffer a CMS-related security breach, making it a top-of-mind concern for developers. Many CMSs use open-source frameworks (easy for attackers to examine source code for vulnerabilities) or legacy systems/outdated frameworks (which often have common security exploits).
To counter this threat, developers need to stay up-to-date with the latest threats across the platform and any plugins or third-party integrations. In the case of a security vulnerability, developers must either install a patch or update (which could break existing functionality) or upgrade core systems (which could result in expensive rewrites). Over time, this results in a significant amount of time playing defense.
Webflow: A CMS built for modern development teams
Modern development teams struggle to balance empowering non-technical stakeholders to iterate quickly without compromising code quality, performance, and security. Instead of choosing between control and autonomy, Webflow lets you have the best of both worlds. Our visual interface lets marketing teams ship independently, while our robust development environment gives you complete control over your technical architecture. Other benefits include:
- Reduced technical debt: Everything lives in one integrated platform, eliminating the constant cycle of plugin updates, security patches, and compatibility fixes that plague traditional CMSs. Additionally, Webflow’s security program maps to existing security standards, like SOC2 and ISO 27001, to ensure robust security.
- Seamless and secure integration: Instead of navigating a maze of insecure and outdated plugins, developers can install apps from the Webflow Apps marketplace to quickly connect their CMS and marketing stack. To create a custom integration, use our developer-friendly headless CMS APIs.
- Developer-friendly workflows: With our component-based architecture, developers can build reusable elements once and use them everywhere. With approval workflows and staging environments, it’s a breeze to manage and test changes (or roll them back if there’s an issue).
- Clean, performant code: Webflow generates semantic, SEO-friendly HTML and CSS — no unnecessary wrappers or inline styles. You can add JavaScript and CSS when you need full control or build things visually when you don’t. Built-in performance optimizations like image lazy loading and a built-in global CDN help ensure fast page loads and performance.
- Marketing independence: Marketing teams can make layout and content changes safely in a visual editor, with tools to test changes before publishing. Developers can safely roll back problematic changes instantly if there are any issues in production.
- Enterprise-level scalability: Webflow Enterprise supports 100,000+ CMS items, so your site performance scales with your content. Our global hosting network easily handles traffic spikes, reducing outage risk.
Unlocking the power of your CMS
A CMS should help your team move faster — not slow things down with bugs, blockers, and tech debt. That’s exactly what Webflow’s CMS delivers by respecting both your technical requirements and your team’s workflow needs. You get enterprise-grade infrastructure, clean APIs, and performance optimization without sacrificing the flexibility to customize. Most importantly, you can give marketing teams content management autonomy without worrying about introducing technical debt or security vulnerabilities.
Ready to learn more about Webflow’s CMS? Take our course on the Intro to the Webflow CMS.
Last Updated
June 5, 2025
Navigating website development: The power of a website project plan

Website creation is an art, and every designer needs a vision.
Website development is a complex effort — it involves multiple design layers, strategies, and challenges. You can manage complexity by adopting a framework that guides the process. This is where website project plans come into play. These blueprints ensure that every design choice, content piece, and technical decision align and help transform abstract visions into tangible, engaging platforms.
What’s a website project plan?
A website project plan is a strategic roadmap that details every development step from the initial website idea and proposal to launch. This framework steers team members through each project phase by outlining specific tasks, roles, and deadlines, ensuring team alignment on expectations and deliverables. It also provides stakeholders with a clear view of the project’s evolution and anticipated milestones.
As website creation grows more advanced with responsive and high-performing sites, a structured plan provides a consistent and repeatable approach. This consistency provides optimal resource allocation by allowing you to forecast needs, allocate tasks based on expertise, and avoid redundant efforts.
Website project plans also split design and development into distinct stages. This approach allows team members to spot and address potential risks by strategizing contingencies for every phase, which helps maintain on-time and high-quality project delivery.
Scope of work and resources
Outline the project deliverables, any technical or creative constraints, and key milestones that define success. This helps your team and stakeholders maintain a shared understanding of what will be accomplished.
It’s also helpful to establish an approximate budget so you can track expenses and justify investments throughout the planning process.
Why use a project plan for website project management?
Project plans provide structure and help you navigate website development from ideation to launch. Here are a few more benefits of creating and using these plans:
- Improved communication. A central plan keeps everyone aligned on tasks, roles, and deadlines — reducing confusion and ensuring smooth collaboration.
- Efficient resource allocation. Organizing tasks, setting due dates, and assigning responsibilities helps you pinpoint the required resources for each task.
- Better risk management. You can anticipate potential setbacks early and form a plan B, which gives you flexibility when change arises.
This clarity allows you to mobilize the right team members, technology, and budget to optimize your output, ensuring timely project completion and website feature development.
Website project plan: 7 key steps for a successful build
Website project plans can differ widely depending on your brand and niche, but they typically follow the same structure. Here are some basic steps each website project plan should include:
1. Define the scope
Begin your website project plan by identifying the project’s goals, constraints, deliverables, and team roles. Goals and constraints — such as achieving a 10% increase in site visitors within three months and a limited budget or a strict timeline, respectively — set clear expectations and objectives to strive toward. Consider which teams or specialists (design, copywriting, development) you’ll enlist for each project stage so you can plan for resource and time commitments.A summary of deliverables, such as a responsive mobile design or user login feature, outlines the scope and determines what features the website will include.
After identifying the scope, set the stage by identifying team roles, such as project manager, team lead, and UX/UI designers. Specifying roles clarifies responsibilities and accountability throughout the design and development process, reducing the likelihood of overlapping duties or missed tasks.
2. Gather stakeholder requirements
Successful websites reflect the vision and needs of the brand and its stakeholders. For example, you might need to prioritize a bilingual feature for a global audience or want a specific color scheme to align with your brand identity. You can glean this information by conducting stakeholder interviews, surveys, and interactive feedback sessions to ensure project alignment.
Harnessing this feedback early on not only strengthens relationships between team members by building trust and open communication but also guarantees that teams are on the same page from the onset. When all the involved stakeholders and teams feel heard and see their input being integrated, they’re likely to view you as a partner. This collaborative environment can expedite decision-making from all parties, reducing misunderstandings and leading to a more cohesive final product that genuinely reflects the brand’s identity and goals. During feedback sessions, decide how often you’ll meet and which channels (e.g., email, video calls, or project management tools) you’ll use for updates. This ensures everyone remains informed and can quickly address any changes.
3. Plan the site design and layout
Wireframes and mockups are blueprints that outline website features such as sidebar menus and homepage carousels. They serve as visual guides that outline the website’s structure and define elements like layout, navigation, and overall design. Beyond providing a framework for team members to build off of, these prototypes also allow stakeholders to visualize potential changes and enhancements before any development actually begins. This preemptive visualization saves significant time and resources, further reducing the likelihood of costly revisions during the later development stages.
These prototyping tools also foster collaboration and help gain early consensus. By defining key design aspects and a unified vision, you help team members transition from the idea phase to tangible action and streamline the website design process.
4. Schedule development phases
Segmenting development into stages and sprints makes tasks more manageable and promotes a focused, structured approach. Starting each phase with a specific objective, like creating a page layout or designing a static homepage, provides your team with clear direction by setting out tasks and responsibilities. After your team finishes each phase or sprint, concluding with a review session encourages immediate feedback and allows you to effectively make iterative improvements. When scheduling development phases, consider mapping tasks onto a simple Gantt chart or timeline to visualize progress and spot any overlapping deadlines.
As sprints progress, implementing more sophisticated functionalities and features — such as advanced interactive elements and tool integrations — ensures the website offers a comprehensive user experience that evolves with the project’s growth and user demands. This also aligns every addition with the project’s need and scope, helping you stay within budget and preventing scope creep.
5. Create and integrate content
Content drives visitor engagement. Establishing a solid content strategy guarantees that all materials — text, images, and multimedia — are relevant, engaging, and serve users’ needs. Assigning clear roles, like having a dedicated copywriter or a graphic designer, ensures specialization and quality output.
Prioritize search engine optimization (SEO) techniques, such as keyword optimization, during content creation and integration to increase the website’s search engine visibility and drive organic traffic. This approach helps the site remain user-centric while achieving its content goals.
6. Test and review site performance
Before site launch, you must test and analyze your site’s performance to identify bugs and align the final product with user expectations and project goals. Start your review with internal teams, as their intimate project knowledge lets them rapidly identify glaring issues or bugs before moving on to external user testing. The fresh perspective that external testers offer sheds light on user experience aspects that development teams potentially overlooked, such as navigation issues, that you can rectify before launch.
7. Launch and monitor site analytics
After launching, regularly review performance metrics and user interactions. Tools like Google Analytics give you insight into how visitors navigate and engage with your site. By keeping tabs on user behaviors, trends, and feedback and adjusting where needed, you ensure the website remains user-friendly and aligned with business objectives.
Implement your website project plan with Webflow
Once your plan is in place, put it into action with Webflow’s visual development platform. Build each element as outlined in your plan, maintaining brand consistency, accessibility, and responsiveness with minimal friction. If you’re looking for design tips or best practices as you build, explore our free Webflow University lessons to speed up your progress. Explore inspiration from professionals in the Webflow community who’ve built stunning sites without coding habits slowing them down.
SVG files: Choosing SVGs over traditional image formats

If you zoom into a logo or icon that stays perfectly sharp, you’re likely looking at an SVG.
SVG, which stands for scalable vector graphics, is a file format that displays crisp visuals at any size. Unlike JPEGs or PNGs, SVGs are code-based, meaning they’re smaller in file size and scale beautifully on any screen. You can even animate or style them with cascading style sheets (CSS).
Given their many benefits, it’s worth considering how to use SVG files for your website. Read on to understand what they are and how to implement them.
SVG files explained
Not all image files are built for web browsers, but SVGs are. SVG files are lightweight, resolution-independent, and perfect for modern browsers. They’re an image format based on XML, a markup language similar to HTML. Instead of using pixels like JPEGs or PNGs, vector graphic formats use mathematical shapes and paths to describe images.
That means they can scale up and down without losing quality, making them ideal for responsive design. You can use SVGs for logos, icons, and illustrations on your web design and remain confident that they’ll look great on every screen.
4 benefits of using SVG files in web design
SVG images look sharper, but they also overcome design and performance roadblocks on the web. Here’s a closer look at their benefits.
1. Clarity
Pixel-based images, like JPEGs or PNGs, can look blurry or distorted when scaled, especially on high-resolution displays like retina or 4K screens. SVG formats, on the other hand, scale perfectly without losing sharpness, whether they’re tiny icons in a menu or full-screen illustrations.
This is especially useful for icons, logos, and other design elements that need to look sharp across devices. Using an SVG means you don’t need to create multiple versions of an image for different screen sizes.
2. Versatility
You can style and manipulate SVG images as you would HTML elements, which gives you more creative control over your site’s design. For example, you can target them with CSS for color changes or animations and use JavaScript to make them interactive.
Instead of exporting dozens of image versions for different colors, hover states, or sizes, you can work with a single SVG format and control its appearance through code. This means fewer files to manage and faster updates.
3. Smaller file sizes
SVGs are text files that describe how to draw an image. They’re often much smaller than bitmap formats like PNG or JPEG, especially for simple or flat graphics.
Faster websites directly improve user experience, search engine optimization (SEO) rankings, and conversion rates. Smaller file sizes mean snappy page loads, which satisfy visitors who want information quickly. Page loading speed also influences bounce rates because visitors will likely explore sites that respect their time.
This matters even more for mobile users who may be on slower connections. You can improve performance across the board by replacing bulky image formats with lightweight SVGs. SVGs also compress well, keeping your website fast without compromising image quality.
4. Accessibility and inclusivity
Accessibility is essential to building inclusive websites. Unlike raster images (which use pixels to make up a larger image), SVGs contain semantic information like titles, descriptions, and ARIA labels in the file. Screen readers and assistive technologies can interpret this information to describe visuals to people with low or no vision.
Accessible SVGs ensure that as many people as possible can understand your content. Accessible design makes a major difference in how users navigate and engage with your site. It’s especially important for icons, data visualizations, and interactive elements with minute details — all elements you want users to understand clearly.
It also future-proofs your site against accessibility audits and meets Web Content Accessibility Guidelines (WCAG) standards, which many organizations are now legally required to meet. Designing with accessibility in mind supports a broader audience and shows that you value thoughtful, user-centered design.
How to create and use SVG files
Generally, you can create SVGs manually using vector design tools or by converting raster images like JPEGs and PNGs. Here’s how it works.
Creating SVG files manually
In this method, you design original graphics using vector-based software like Figma, Adobe Illustrator, or Inkscape. These tools allow you to create shapes, lines, icons, or illustrations using vectors, which you can export as SVG files.
Manual creation gives you complete control over the visual style and technical quality of your SVGs. You can edit the design to be as simple or detailed as you want while keeping file sizes small without sacrificing clarity and scalability.
How it works
Start with a blank canvas in a design tool and build the graphic using scalable shapes instead of pixels. Once you’re done, you export the design as an SVG.
For example, you might create a custom set of navigation icons for your website using Figma. Build them manually as vectors, then export each as an SVG. This way, you control the exact line weight, corner radius, and spacing of each image. You can also change the icon color using CSS instead of uploading multiple image versions later.
Converting existing images into SVGs
This approach involves turning raster formats into vector images using auto-tracing tools. These tools analyze the shapes and colors in a bitmap image and recreate them using scalable vector paths.
Sometimes, you might not have access to the original vector file for a logo or graphic. Converting an image to SVG lets you take an existing asset and make it web-friendly. It’s handy to preserve a design without remaking it from scratch.
How it works
A conversion tool scans the image and generates vector-based paths based on color and contrast. While the result isn’t always perfect, especially with complex or detailed photos, it works well for simple graphics like logos or icons. You can refine the converted SVG afterward to clean up any unnecessary elements and make it more efficient for web use.
For example, you might have a company logo saved as a high-resolution PNG. Instead of designing it all over again, you can upload it to a tool like Adobe Illustrator and use the trace feature to convert it into an SVG. Then, you can resize the logo freely for headers, footers, or even print without it looking blurry.
Top 3 programs to open and edit SVG files
The right tools can make SVG-related work fast and flexible. Here are three Webflow apps that make it easier to open, edit, and style SVG files directly within your site.
1. SVG Import
SVG Import is a third-party app by Flowcraft designed for Webflow. It allows you to paste raw SVG code directly into your site and render it as a native, fully editable element within the SVG document object model (DOM). This lets you easily manipulate and style SVGs using standard web design tools.
Webflow has a default 10,000-character limit on SVG files. SVG Import removes the limit, making it easier to use detailed images like illustrations, layered logos, or animated graphics. It also ensures full fidelity to preserve your original styles and structure.
Features:
- Supports all valid SVG formats, including gradients and animation-ready paths
- Binds CMS colors to SVG shapes for data-based visuals
- Maintains a clean, editable DOM structure that you can style with CSS
2. SVGFlow
Fine-tuning SVGs usually means jumping between design software and your site editor. SVGFlow, by Azwedo, lets you adjust the appearance of SVG icons directly inside Webflow’s visual design platform. You can change the colors, size, and stroke width without external design tools.
For example, you can match icons to your brand colors without reexporting or reuploading elements. It provides more design flexibility, which is especially useful when working on responsive or component-based layouts.
Features:
- Edit SVGs in real time directly inside your Webflow project
- Support for multicolor icons and logos
3. Icon Drop
Finding, customizing, and organizing icons can be time-consuming, especially when working across multiple projects. Icon Drop is a third-party app from Saddle designed with Webflow. It provides access to over 20,000 SVG icons from open-source libraries, with one-click insertion and editing directly within Webflow.
You can browse icon sets, paste SVGs directly from Figma, and edit inner paths or colors inside Webflow. This makes it excellent for websites that need quick updates. You can even animate paths or target specific elements within each icon, making your web design more interactive.
Features:
- 20,000+ icons from eight open-source libraries
- Filter between icon styles (line, solid, etc.)
- Share and reuse icon sets across Webflow projects
How to add SVG files to Webflow projects
Adding SVG files to your Webflow project gives you full control over how graphics render on your site. Once uploaded, SVGs behave like any other asset in Webflow, and you can easily drop them into your layout, adjust their position, and style them to fit your design.
If your SVG contains interactive elements or needs animation, you can embed the raw SVG code directly using the Embed component. Then, you can animate paths or apply hover states using Webflow’s Interactions panel.
Courses like “Webflow 101” and the “Interactions & animations course” on Webflow University provide in-depth tutorials on embedding and animating SVGs. You can also learn how Figma works with Webflow if you’re looking to further refine your design process.
Shape your web design with scalable SVGs
SVGs offer excellent flexibility and performance without compromising your website’s aesthetic. With images looking sharp on every device and loading quickly thanks to compressed file sizes, you can improve the user experience with relatively low maintenance.
You can enhance your web design’s visuals even more with Webflow. From uploading and embedding SVGs to customizing them with in-house tools, you have complete control over how your graphics appear and behave in Webflow.
Start designing responsively and creating standout websites — all in one platform.
Static vs. dynamic websites — what’s the difference?

When you’re creating a new website, deciding between a static or dynamic setup is one of the first choices you’ll encounter.
In 2025, it’s still common to use a mix of static and dynamic elements — whether you’re building a personal site, an online portfolio, or a robust eCommerce experience.
To make the right decision, you need to understand the difference between the two.
The main difference between static and dynamic websites is the way they display content. A static website displays the same content to all visitors, while a dynamic website can personalize content based on the user, time, or other factors.
Let’s explore the concepts of static and dynamic websites, learn the pros and cons of each, and discuss what concept is better to follow when you build your website.
What is a static website?
The word “static” is typically used to describe something that is lacking in movement, action, or change. A static website is a website made up of a collection of static pages, or pages that don’t change, created by HTML, CSS, and Javascript. In its simplest form, each web page is represented as an HTML file visitors access while browsing a website. Static websites appear the same for every visitor who accesses them, and the only way to change this is to modify the source files.
Though the term “static website” might give you a false impression that this kind of website doesn’t have any interactive elements — static websites can have interactive elements like web forms, although those elements cannot be tailored per individual user.
Static websites can still include forms or simple interactive elements, but these elements typically won’t adjust content for each user.
Static websites generally work for smaller websites with a limited number of pages and don’t require frequent content updates. Examples of static sites include a personal portfolio, a company brochure site, and a product promo page.
Below is a short recap of the top pros and cons for static vs. dynamic websites in one place for quick comparison.
Pros and cons of a static website
Most avengers of static websites come from their relative simplicity:
- Ease of creation. Static websites don’t require creating any logic for content loading from a database. Today, anyone can create a static website using an online website builder.
- Good performance. Static websites require minimal back-end processing. Because all content is predetermined, it’s possible to optimize it to offer better performance. For example, web designers can use caching so the content will be delivered without delays.
- Better level of security. Since static websites require much fewer tech building blocks to perform, they are generally less affected by security issues.
But static websites have a few downsides, too:
- Manual content updates required. Be sure any new content or design changes are reflected across all pages, since static sites don’t separate layout from content in the same way a CMS does.
- Poor scalability. If you need to add 100 new pages to your website, you will need to create all 100 pages manually, and every page will be built as a separate entity. The faster your website grows, the harder it will be to manage it.
- Unable to offer tailored experience. Static websites allow limited or no personalization and customization for visitors. It’s possible to provide only limited real-time tweaks based on user behavior. As a result, static websites might not work for eCommerce sites, for example, because it’s impossible to tailor the shopping experience to customers.
If your site relies on user interactions or frequent content updates, dynamic pages are typically more flexible. However, if you only need basic pages or rarely change content, static pages save time and reduce hosting overhead.
What is a dynamic website?
Dynamic websites generate content on the fly, loading it from a database. The dynamic content on pages can be tailored to the visitor’s needs (based on visitor behavior). This means a dynamic site can present different information to different visitors. Dynamic websites typically have a content management system (CMS) or a web framework like Ruby at its core, and they work best for websites that require frequent content updates.
Examples of dynamic websites include content-heavy portals (i.e., news resources like CNN), websites with user-generated content (i.e., social media platforms like Twitter), and various online services with user-driven content (i.e., online entertainment platforms like Netflix that offer recommendations based on viewing habits).
Many static site generators and CMS platforms now provide partial or optional dynamic features. This middle ground suits projects that require occasional updates without building an entirely dynamic solution.
Pros and cons of a dynamic website
The list of advantages of dynamic websites include:
- Ease of content management. Dynamic websites make it much easier to manage content on a website. Changes can be done in one place and applied across all pages. For example, a site owner can update company contact information and be sure that the relevant information is displayed across the entire website.
- Easy to update the visual design. Since content and design on dynamic websites are separate, it’s easier to introduce changes to a page’s layout. If a website uses a CMS, it’s possible to use a different visual theme. It allows web creators to stay current with the latest visual design trends.
- Better visitor experience. It’s possible to use mechanisms like user location and cookies to offer tailored experiences to visitors. For example, when you design a property booking website, you can use the visitor’s location to show them offerings in their area.
- Personalized content. Dynamic websites enable you to curate an online experience for your visitors that can not only elevate their user experience, but improves website engagement and conversions.
Because dynamic websites are more complex than static websites, they also have disadvantages:
- More complex web design process. When you create a dynamic website, you must invest time in creating business logic. You will need to define rules on how content will be organized in a database (content structure) and accessed by visitors (define rules on how to display the content).
- Higher cost of creation. Dynamic websites have a higher cost of creation because they are typically more hardware demanding (i.e., dynamic websites require database insurance) and require technical expertise (i.e., you need to know how to use a CMS or have coding skills).
- Performance and security problems. Dynamic websites can be affected by various performance and security issues. Since dynamic websites have more technical components, each component can affect the performance and be vulnerable to a security breach.
Consider hosting requirements. Static sites can be served from simple storage solutions, while dynamic sites demand back-end infrastructure — think databases or server-side rendering.
Should I design a static or dynamic website?
Blending static and dynamic pages can make your site more flexible. For example, you can keep a few static pages for information that rarely changes, and use dynamic pages for content that updates frequently.
There is no single correct answer to this question. The nature of your content and the experience you want to offer to your audience should define the type of website you want to build. If you’re starting to develop a new website, it’s safer to begin by creating a static one because it will help you launch faster and better understand how to effectively organize your information. Once you see how visitors interact with your website, you will know what content they want to see.
If you anticipate frequent updates or require personalized user experiences, a dynamic website may be the better option.
Many websites today mix static and dynamic elements, so you don’t have to follow just one approach. Hybrid websites have a set of static web pages (content that doesn’t change very often), as well as a set of dynamic web pages. For example, you can blend some static and dynamic functionality on your company’s website with a set of static pages (i.e., “About us,” “Our mission,” etc.), as well as dynamic ones (pages where content changes frequently, such as a blog or a private user space where users can track the status of their requests).
You can keep some pages relatively fixed, like an ‘About Us’ page or a product showcase, while building dynamic sections for frequently changing info such as blog posts or announcements.
Compare factors like maintenance effort, personalization needs, and expected traffic when deciding between static and dynamic pages.
Getting started on your site
Whether you choose to build a dynamic or static site, it’s important to make sure that on both the frontend and backend, it is well designed and works well for your specific business needs. Webflow’s ultimate web design course offers hands-on lessons to help you confidently launch a static, dynamic, or blended site.
LogicGate Pricing: Is It Worth It In 2025? [Reviewed]
Despite the fact that LogicGate’s pricing is not disclosed on their website, I still managed to find some numbers and verified user reviews to help you find out whether it’s the right tool for you, cost-wise.
In this guide, I’ll discuss LogicGate’s pricing structure, going over how they calculate their pricing, and include reported numbers.
➡️ I’ll also introduce you to a LogicGate alternative for governance, risk, and compliance (GRC) that offers a more affordable pricing structure, is quick to set up, and has premium customer support without having to pay 6 figures a year.
How Does LogicGate Calculate Its Pricing?
LogicGate calculates its pricing based on 3 main factors:
- The number of Power User licenses* that you’ll need for your.
- The different applications that you’ll need for your GRC program, meaning that you wouldn’t pay for features you won’t need.
- The additional services that you’ll need to get your platform up and running such as implementation, integration, and consulting services.

➡️ Power User licenses in LogicGate are for individuals who are going to be managing their GRC program inside LogicGate’s Risk Cloud.
Other user licenses for non-administrators are at no additional cost (e.g., reviewers).
According to a G2 review from an Enterprise client of LogicGate, it can get costly to get the full set of modules that your compliance team needs.
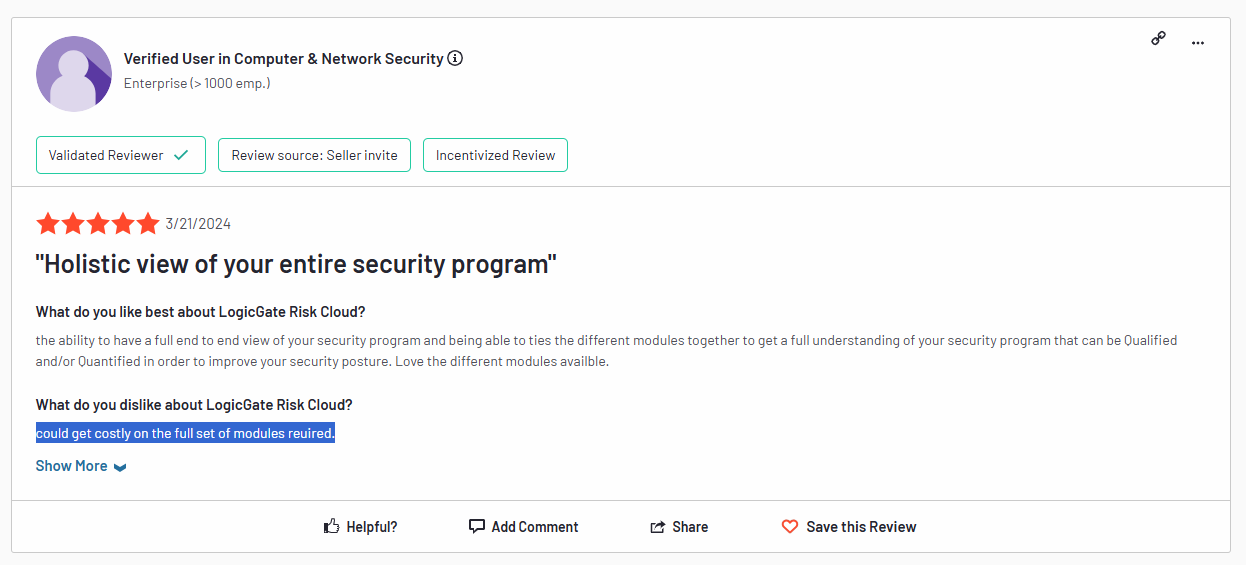
‘’Could get costly on the full set of modules required.’’ – G2 Review.
Does LogicGate Have A Free Plan Or A Free Trial?
As of June 2025, LogicGate does not offer a free plan or a free trial of its solution.
Users of the platform are not happy with the fact that they were not able to try the product at no cost or get access to a free trial.

‘’Not having a free trial period is a crucial missing aspect of the platform, also not having a free version is a serious missing point too.’’ – Capterra Review.
How Much Does LogicGate Really Cost?
The median LogicGate buyer pays $52,567 per year for the platform, based on data from 17 purchases from Vendr.
According to Vendr, the entry threshold for the platform can be as low as $13,765/year, while for an enterprise-grade solution, it can cost up to $130,041/year.
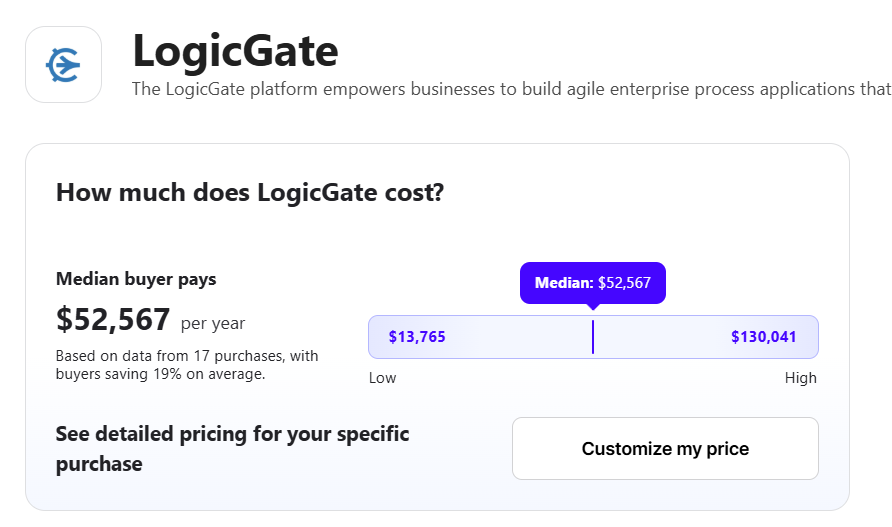
Does LogicGate Provide Good Value for Money?
According to an enterprise client of LogicGate, the platform may be a serious step up in price in comparison to alternatives, but at least, your team can select the functionality that they’ll need, so you won’t pay for features you won’t need.
The user goes on to mention that the platform is ideal for organizations looking for a highly customizable GRC platform to centralize their whole program.
However, if you’re looking for a more simplistic solution for a few tasks, perhaps it might not be the right option for you.

‘’It’s a step up in price from other privacy platforms, but it comes down to what your company needs. If you need a highly customizable platform to centralize your whole program, it’s the right call. If you need a simple application for a few tasks, maybe it’s not.’’ – G2 Review.
Any Surprises At Contract Renewal?
There are multiple instances of customers of LogicGate receiving a 15% increase in their pricing when they had to renew their contracts with the platform.
However, the platform was willing to negotiate lower prices or to cap their percentage increase in the contract.
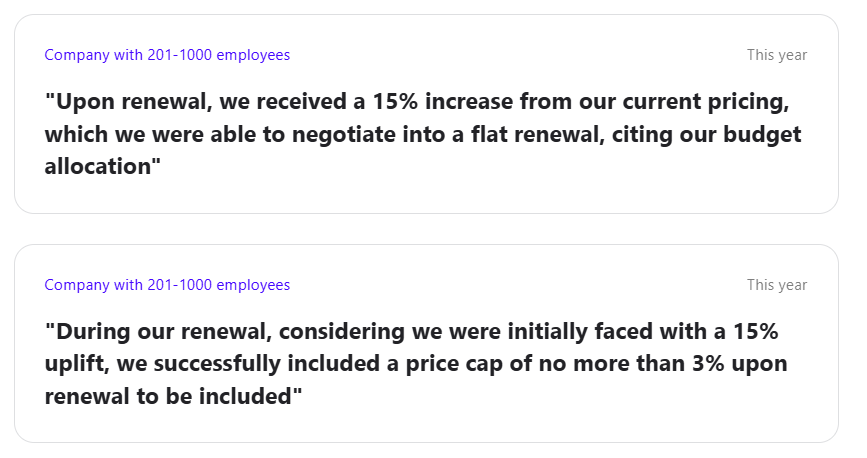
What’s more, LogicGate seems to favor long contracts, which is why the platform was willing to set a flat price in exchange for a 2-year commitment.

Looking For A LogicGate Alternative?
People have been looking for LogicGate alternatives not only due to the expensive pricing of the tool, but also because the platform’s UI is outdated, it has a confusing interface, and a steep learning curve.
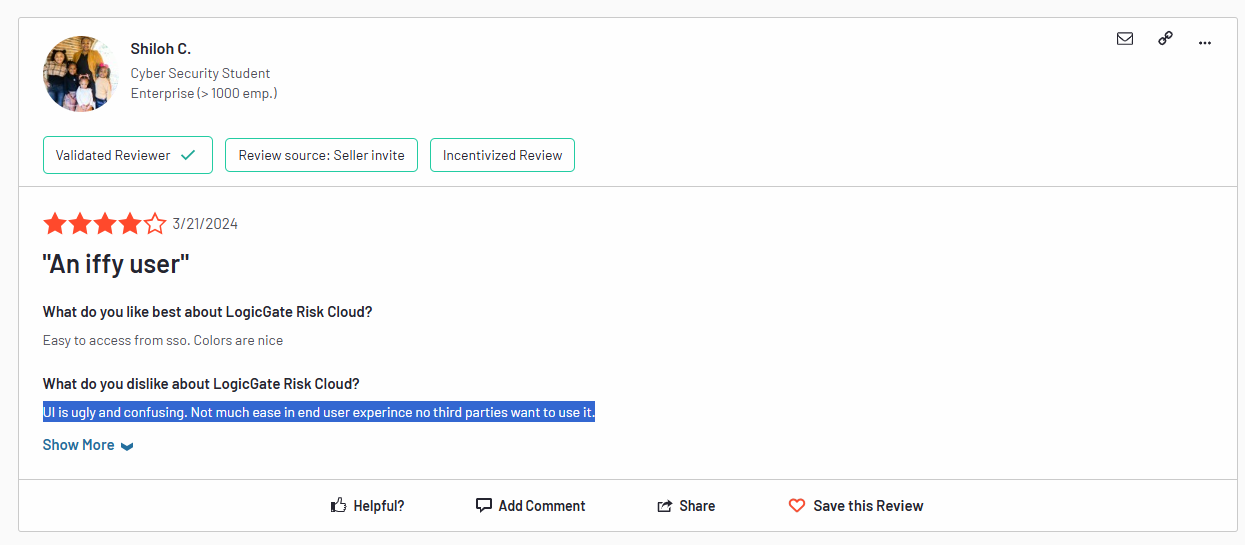
‘’UI is ugly and confusing. Not much ease in end user experience, no third parties want to use it.’’ – G2 Review.
SmartSuite (that’s us) offers the best LogicGate alternative for compliance teams in 2025 with our modern, no-code work management platform that simplifies complex regulatory requirements.
Our GRC software lets you streamline and automate policy creation, approval, and control assessments within one place.
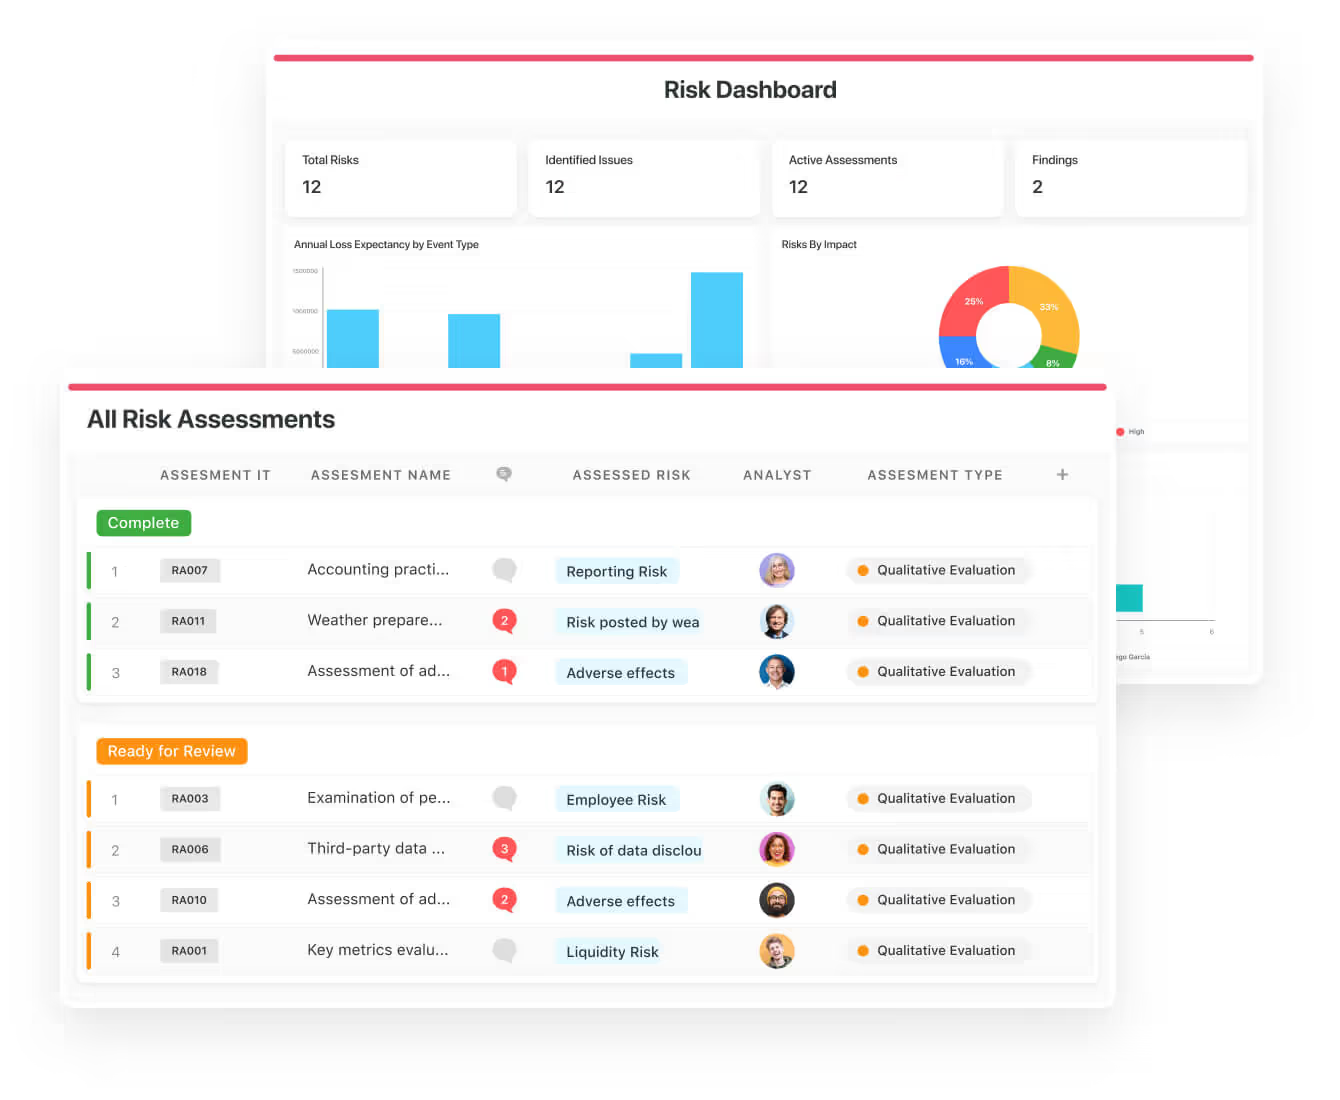
SmartSuite helps your compliance team move faster, manage policies smarter, and adapt easily, without having to hire expensive consultants or sign up for training to see how the solution works.
💡 We have recently partnered with the Cyber Risk Institute to deliver a CRI profile for U.S. Banks’ compliance needs.
Let’s go over the features that make SmartSuite the best choice for teams looking for a LogicGate alternative: 👇
All-In-One Risk Management & Compliance Platform
I believe that compliance should be simple, automated, and accessible to all financial institutions, regardless of their size.
Our easy-to-use platform empowers compliance managers and CISOs to automate all GRC processes with ease.
Here’s how teams are using SmartSuite:
- Risk Management: Identify, assess, score, and monitor enterprise risks.
- Compliance Management: Track regulatory requirements, controls, and evidence.
- Audit Management: Manage audits, findings, and remediation workflows.
- Policy Management: Publish, distribute, and track acknowledgement of policies.
- Third-Party Risk: Evaluate and monitor vendors’ risk and compliance posture.
- Incident Management: Log, triage, and resolve compliance and risk events.
SmartSuite helps compliance leaders achieve and maintain compliance without the expense and complexity of adapting legacy GRC solutions like LogicGate to accommodate new compliance requirements.
Here are the features and use cases that you’ll get with SmartSuite:
- Create reports and dynamic dashboards: You can monitor executive views into your organization’s overall risk profile with powerful charting and metrics widgets.
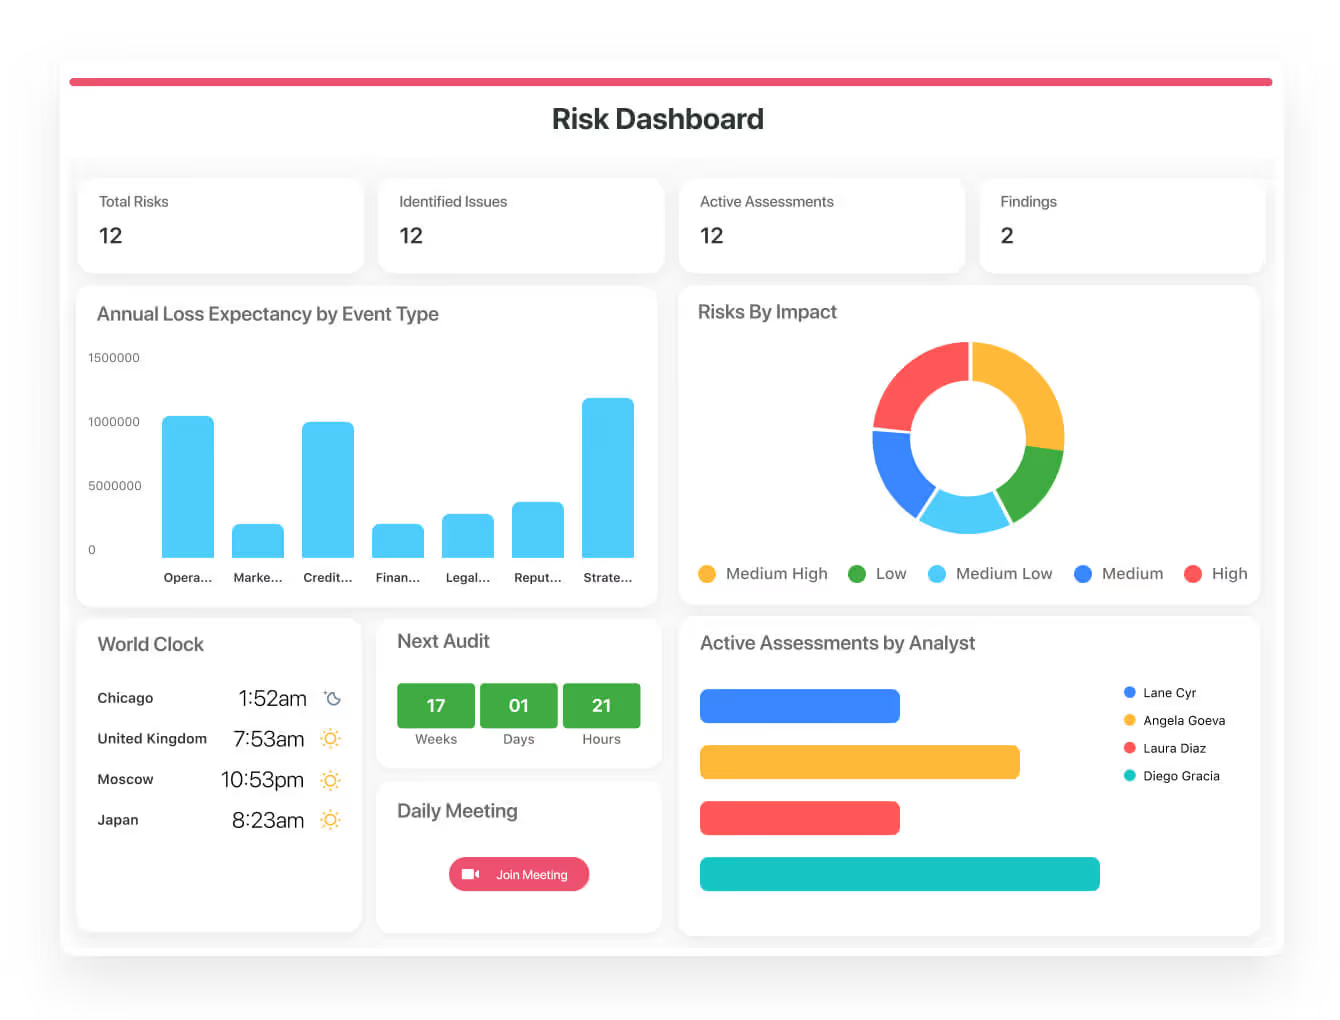
- Collaborate and respond to risks in real-time: It’s possible to instantly engage key stakeholders in a real-time discussion of potential threats or vulnerabilities.
Our solution will also let you get immediate updates when critical information is available.

- Streamline policy creation, in real-time approval, and control assessments: Streamline risk management by building an integrated program on a single platform.
- Keep risk and compliance data secure: Define your teams and manage access to information across all GRC practice areas.
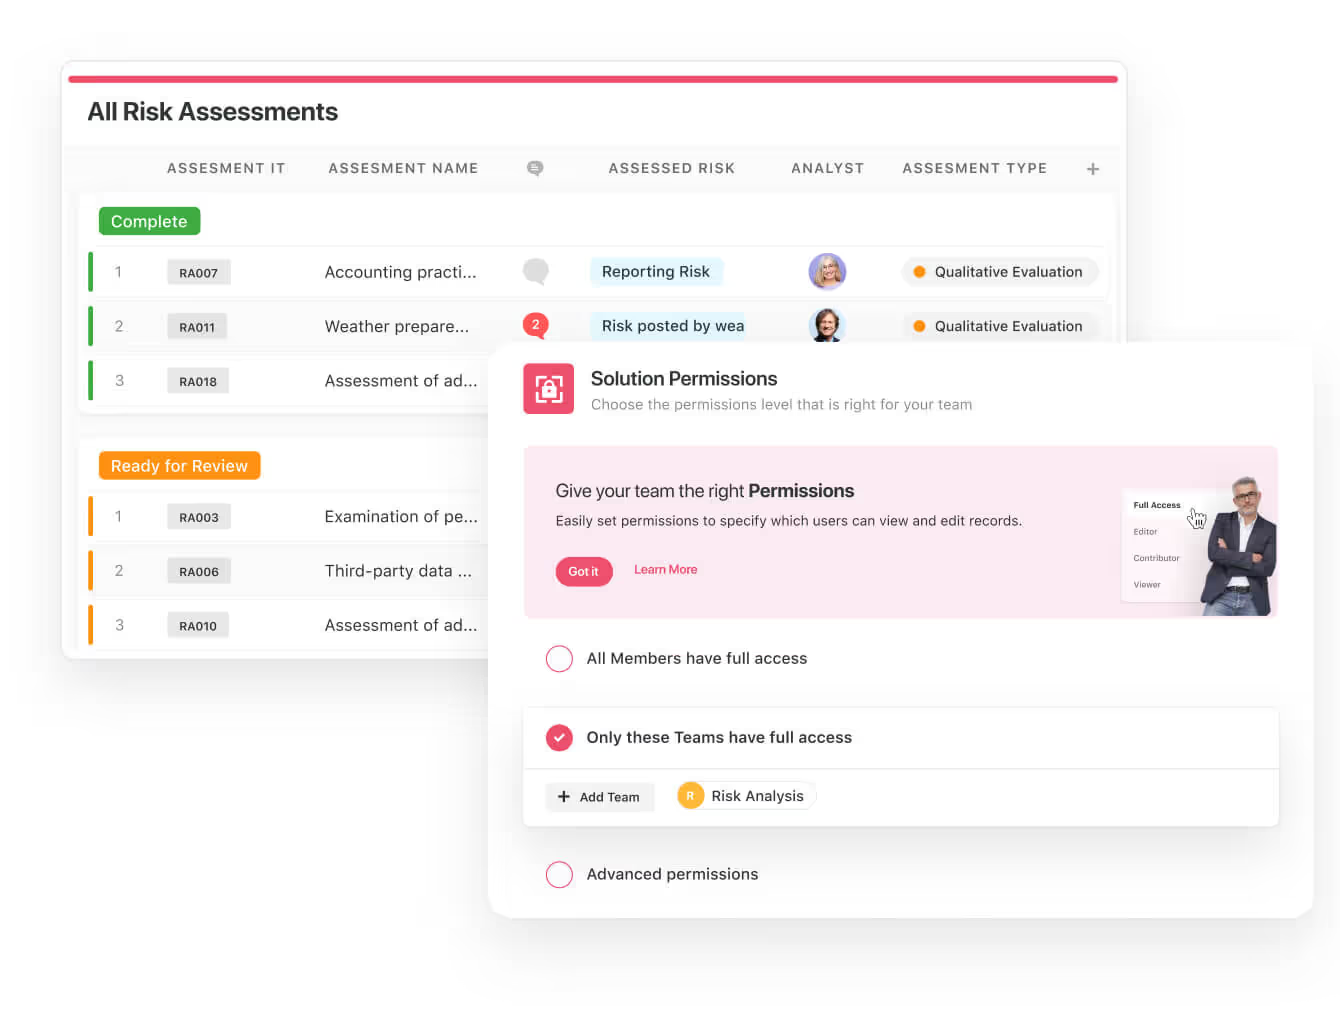
- Integrate with your existing systems: Our GRC software lets you integrate with existing systems and data to consolidate and centralize your data.
- Automate for accuracy and efficiency: Remove inefficiency and the chance for human error by automating repeatable workflows.
SmartSuite’s no-code automation builder provides organizations with a visual interface that makes it easy to respond to events and take action. That means you can customize your GRC workflows without technical resources.
- Monitor, measure and score: Create your own risk calculations and metrics to evaluate every aspect of organizational risk.
You can generate risk scores and evaluate key indicators with SmartSuite’s powerful calculation capabilities.

- Policy management: Establish a strong foundation with streamlined and flexible policy management. Simplify the entire process, from authoring to review and release.
You’ll be able to assign ownership, manage revisions, and ensure your policies consistently align with key business initiatives and regulatory requirements.
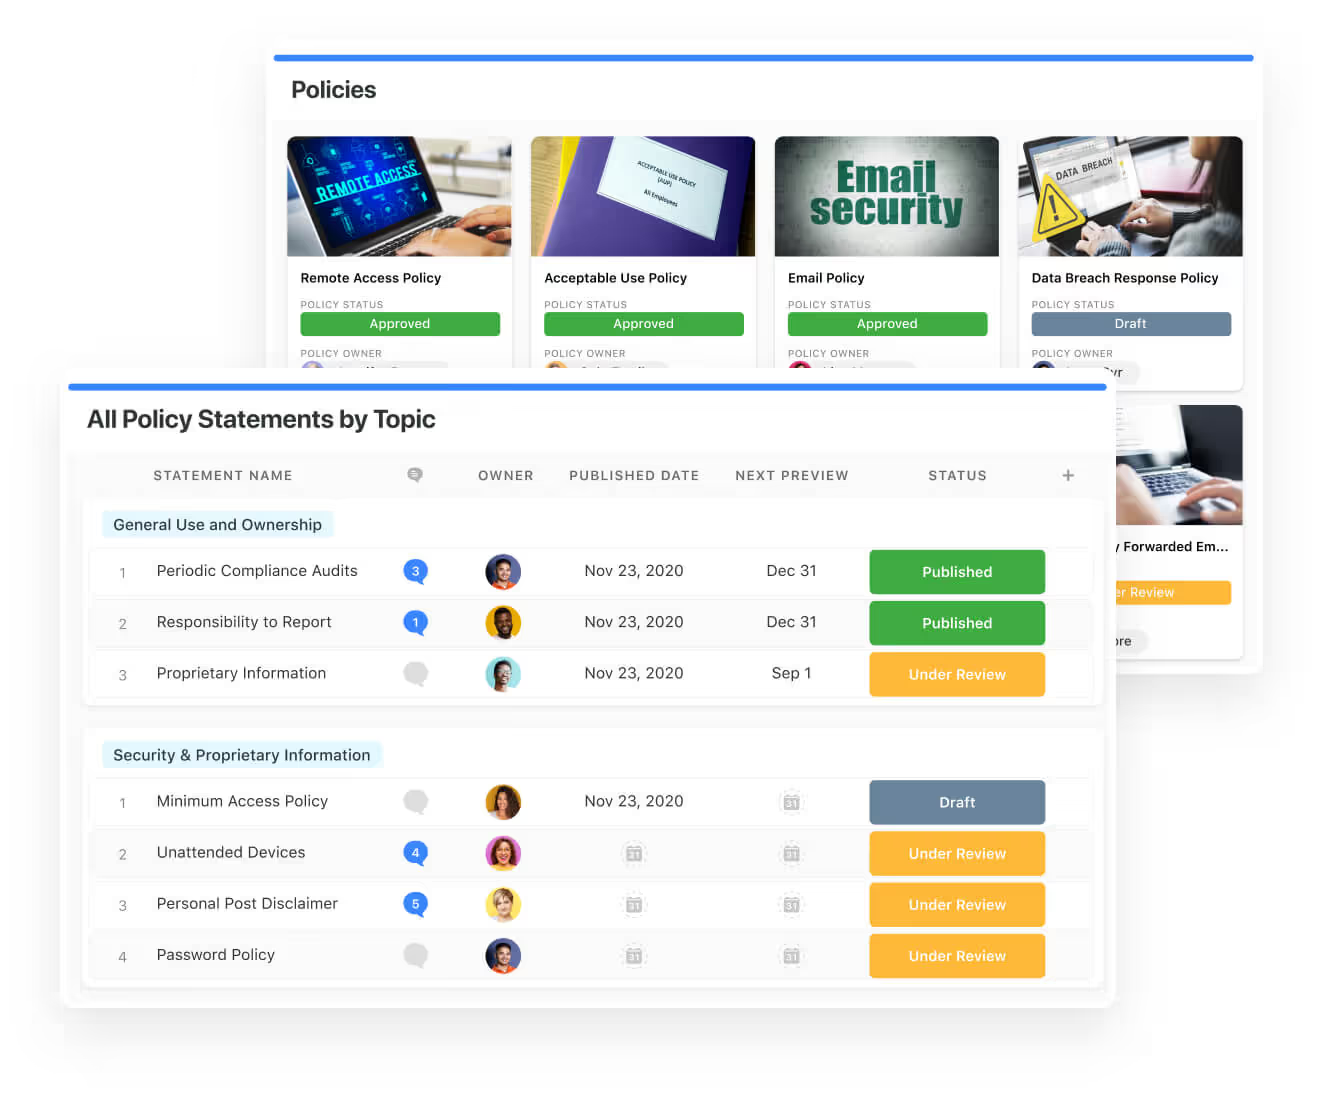
- PSTOS Compliance Tracker: Designed for regulatory compliance and built on SmartSuite.
This solution focuses on data security as the core of compliance frameworks with services such as compliance readiness, virtual CISO, and IT security implementation.
Learn more about it from our CEO, Jon Darbyshire, who held a webinar on the topic:
[embedded content]
Prioritize & Mitigate Risks
Our platform lets you create a centralized Risk Register to help you effectively identify potential risks to your organization.
You will be able to assess threats and establish risk mitigation strategies inside SmartSuite.
You can also ensure that the appropriate controls are in place and measure their effectiveness by evaluating risk indicators and displaying results in SmartSuite’s rollup reports and dashboards.
💡 Pro Tip: Teams love our platform because they can use automation to move tasks through defined workflow stages that comply with their policies and procedures.
I know how important threat management is and the need to respond quickly to incidents.
Our platform lets you centralize incident response and threat mitigation by linking incidents to assets and organizational data to offer context during your investigations.
You can also set up automations with our no-code automation builder to escalate critical events to make sure that your team is aware of active risks to your organization.

Pre-Built GRC Templates
We built GRC templates for teams looking to get started right away, instead of building everything from scratch.
Our general risk management template includes a:
- Risk register, where you can break down the risks, the risk owner, the annual loss expectancy, risk event category, risk type, volatility, and status.

- Issue assessments, where you’ll be able to see a comprehensive breakdown of each risk.
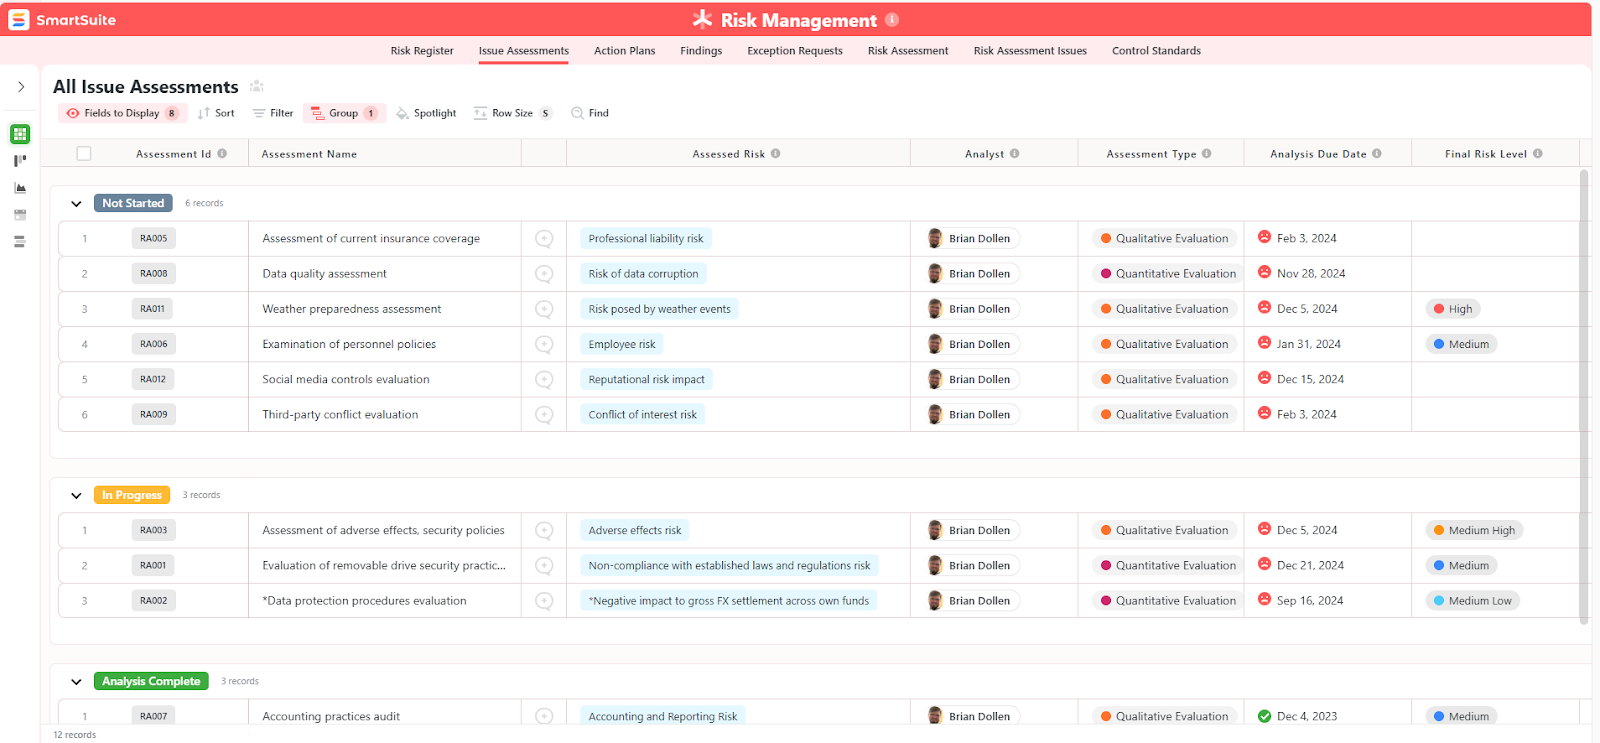
- Action plans, where you can describe the actions (best practices) to mitigate the risks.

- A separate tab for control standards, your findings, exception requests, risk assessment by type, and risk assessment issues.
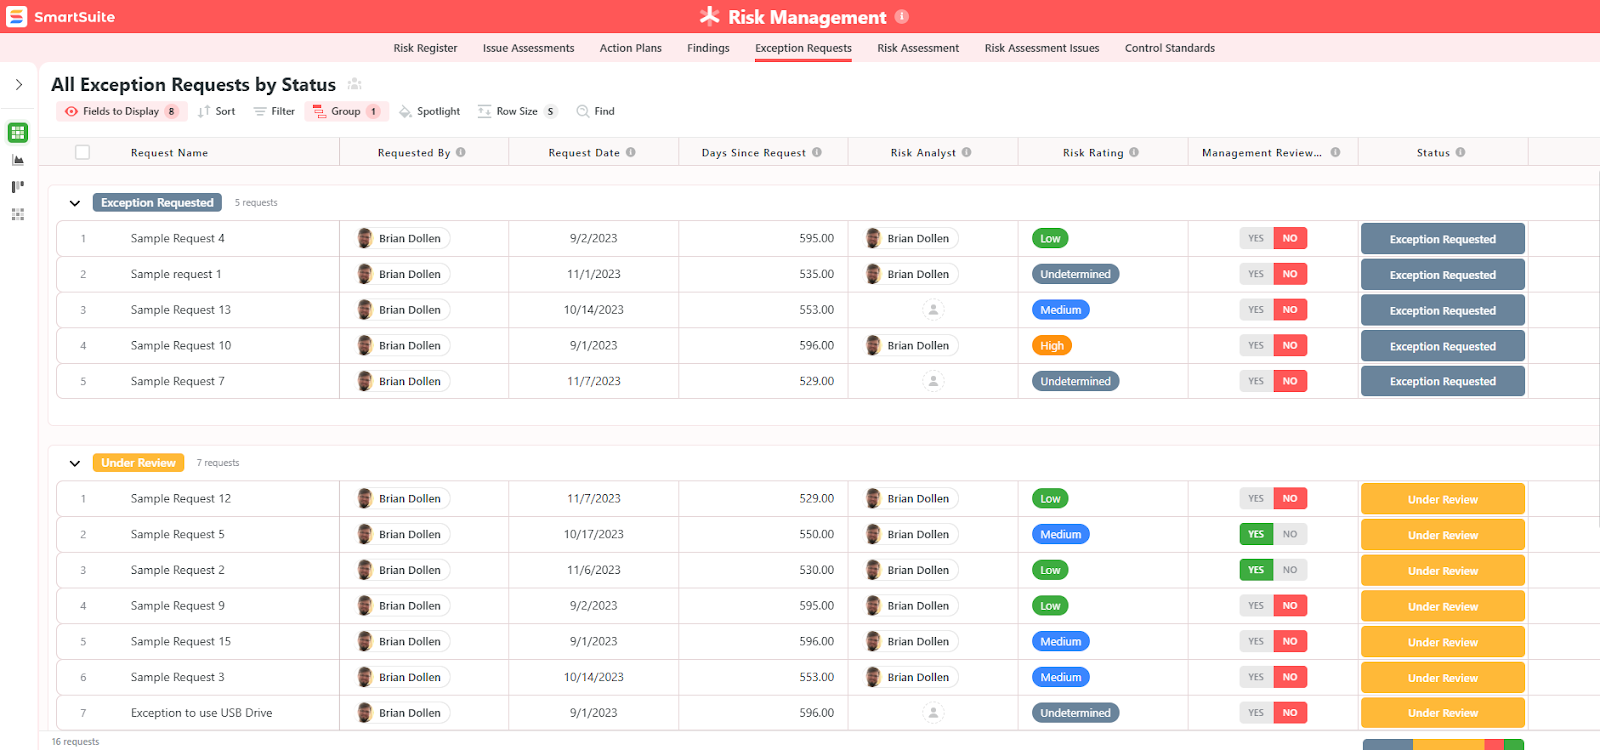
You can customize our risk management template here.
Alternatively, check out and customize our 14 other risk management templates for various use cases, such as contract management, policy management, and incident management.

How is SmartSuite different from LogicGate?
Unlike LogicGate, SmartSuite offers:
- A modern solution with an intuitive interface that does not confuse your team or require training.
- An affordable and transparent pricing model, as well as a generous free plan to help you get started.
- Automated workflows that can help you build multi-step automations to trigger actions at the right time.
- Best-in-class customer support and account management that will help you with setting up the automations inside the platform.
💡 Case Study: Find out how MediaLab transformed operations, minimized risk, and saved $40,000+ per year by cutting software costs.
How is SmartSuite’s Pricing Different From LogicGate’s?
Unlike LogicGate, SmartSuite offers a free plan with access to 250+ automation actions, team collaboration, multi-dashboard views, and more.
There are four paid plans with a 14-day free trial (no CC required):
- Team: Starts at $12/user per month, including Gantt charts, timeline views, 5000 automation runs, and native time tracking.
- Professional: Starts at $30/user per month and adds two-factor authentication, Gmail & Outlook integrations, and unlimited editors.
- Enterprise: Starts at $45/user/month and includes access to audit logs, data loss prevention, and 50,000 monthly API calls.
- Signature: A customized plan tailored to your organization’s needs and team size with no predefined limits.
Next Steps For Compliance Teams: Get Started With SmartSuite & Our Templates For Free
If you’re looking to build GRC workstreams and prioritize and mitigate risks, you can give SmartSuite a chance with our free plan and ready-to-use GRC templates.
Our platform offers just the right customization, native collaboration capabilities and a library of 200+ project management templates to help compliance teams create and maintain a project management workflow.
Here’s what’s in it for your team when you try SmartSuite:
- Access to a generous free plan with features including multi-board views (Kanban, Chart, Map, Timeline, Card, and Calendar), 100 automations/month, and 40+ field types, including formula and linked record fields.
- No-code automation builder to set up to 500,000 trigger/action workflows.
- Built-in productivity tools, including time tracking, status tracking, and checklists.
- Team collaboration and planning tools such as whiteboards and SmartSuite docs.
- Resource management across projects and teams.
- 40+ field types, including the option to add your custom fields.
Sign up for a free plan to test the water or get a 14-day free trial to explore all its amazing features.
Or, if you’d like to talk to our experts, you can schedule a demo.
Read More
UX wireframing 101: How to use wireframes to perfect site designs
UX wireframes provide the scaffolding for all your layouts, user flows, and interfaces, creating an outline for your design process.
Website design requires significant forethought to plan layout, interfaces, and visual components. To streamline this planning process, designers use user experience (UX) wireframes that trace layouts in high or low fidelity, enabling them to fill in outlines with all the visual details and functionality a web page needs.
Knowing when to start wireframing and how to use wireframing tools can make all the difference for the final version of your site design. Learn how to use a low-fidelity wireframe to create a basic outline and a high-fidelity one to create a usable prototype.
What’s a wireframe?
A UX wireframe is a layout sketch consisting of line drawings and mockups of user interfaces. After you’ve created several for the same webpage, you then link these wireframes together to outline the user flow through your website or app.
Determining if you need a wireframe
Any remotely complex page layout can benefit from some visual forethought, and wireframing is the best way to plan these elements at scale. Wireframes help communicate your design ideas to clients and fellow developers who need to understand what you have in mind before approving the project or taking it to the next stage.
Depending on what you’re designing, you’ll likely use the following types of wireframes:
- Low-fidelity wireframes: A starting point for your design process that consists of simple sketches, often handwritten, that outline the basic layout of web pages.
- Mid-fidelity wireframes: Modestly detailed sketches that add more information about what will go in each layout, such as CTA buttons or the types of images.
- High-fidelity wireframes: Highly detailed visualizations that show how a finished UI will look so designers can prototype them with users.
Benefits of using UX wireframes in your design process
Wireframing can significantly enhance your UX design process because it gives you space to explore the user experience, conduct testing, and gather feedback before committing to hours of design work. Here are some of the key benefits of creating UX wireframes:
Discovering possibilities
A low-fidelity sketch of your UI design is easy to improve upon, leaving you open to try new ideas on a whim. For example, you might start with a simple F-pattern website design and discover through wireframing that a more unique page layout would be better at communicating your ideas.
Communicating visual design
UX designers often work with external stakeholders who don’t understand industry terminology without a visual representation. Sketching your UI design and intended user experience can help you better communicate your ideas to clients and developers.
Prototyping
Wireframing tools like Figma, Sketch, and Photoshop can quickly turn high-fidelity wireframes into testable prototypes. This usability testing provides crucial feedback that’ll help you optimize your user interface before launch.
The wireframing process in 5 steps
Here’s a step-by-step process you can use whenever you need to create a wireframe of any level of fidelity.
1. Define each page’s goals
Clearly describe the desired functionality on every page. Think of this as a mission statement, like “Engage leads and drive them to convert to paying subscribers” or “Inform interested visitors and build hype for a new product.” This statement should guide every decision you make for the page’s wireframe.
2. Choose the appropriate fidelity level (low, mid, or high)
Determine whether you need to start with a low-fidelity wireframe or if you’re ready to move directly to a high-fidelity one. You can use a premade wireframe UI kit to create a high-fidelity prototype immediately. If you’re starting from scratch, begin with a rough outline on paper or a digital whiteboard to do some low-fidelity wireframing that’ll help you explore your design ideas.
3. Start sketching basic elements like navigation and layout
To build a strong foundation, begin your wireframing with the most essential UI elements that your web page needs. Navigation menus, CTAs, and sign-up forms are all good candidates for design elements to sketch out before moving on to other parts of the interface.
4. Iterate and refine
Once you have a mockup that outlines all the essential UI elements, play with its organization until you find a sensible layout. Incorporate new details like spaces for visuals, expanded functionalities, and custom animations. As you fold in each new detail, re-examine your wireframe mockup to ensure you follow the mission statement you set for yourself in the first step.
5. Gather feedback from stakeholders
Clean up your wireframes to ensure they’re readable and reach out to peers or your client for feedback. Ask them questions that will give you actionable answers, like “What attracted your attention the most?” or “What’s the first thing you’d click on this page?” Use this feedback to determine the strengths and weaknesses of your design ideas and refine them again until you get the answers you’re after.
Wireframed interface design examples
Before you start wireframing your design ideas, you must identify the fidelity you need. Each level of detail provides different benefits. Here are examples of low-, mid-, and high-fidelity wireframes to help you decide which level is appropriate for your project.
Low-fidelity wireframe
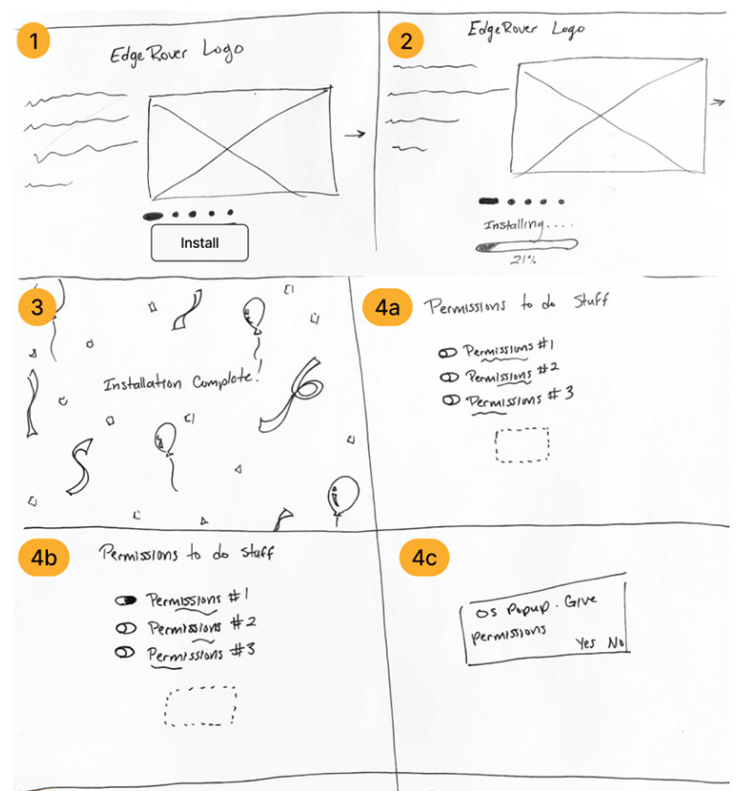
This low-fidelity wireframe created by Sarah Lauchli showcases how rough sketches can help you plan your UX designs. Each box shows how individual page layouts lead from one to the next while also visualizing the general spacing of design elements. Basic shapes indicate where important visuals will go, and scribbles indicate where text belongs. This rough outline gave Sarah a clear plan to follow in the next steps of her design process, and it all started with a pen and a piece of paper.
Mid-fidelity wireframe

From those low-fidelity sketches, Sarah was able to craft these mid-fidelity wireframes in Figma that offer a bit more detail. Basic shapes still indicate where design elements belong, but now it’s all laid out using the screen resolution, fonts, and reusable components that might ultimately find their way into the product.
High-fidelity wireframe
A high-fidelity wireframe is essentially a pixel-perfect prototype, like this completed onboarding flow. Compare this set of wireframes to the last two, and you can see the evolution this user experience took with each iteration. Along the way, rough shapes became detailed graphics, scribbles became blocks of text, and placeholders became consistent UI elements. At this point, a developer can take these wireframes and turn them directly into functioning software, with no guesswork left.
Tools for wireframing
While you can create your wireframes using paper and pencil, experimenting with a digital whiteboard is often faster and easier. With a digital tool, you can drag and drop design elements, create reusable components, and change everything instantly. Here are a few popular wireframing options:
Figma
Figma is a UI/UX design tool that offers an intricately customizable digital whiteboard that multiple designers can work on simultaneously. You can draw UI elements and easily move them around to create wireframes that visualize user flow. It also has interactive design tools that help turn your mockups into fully functional prototypes, allowing you to collect testing data before launch.
Sketch
Sketch is a wireframing tool that supports all the same features as Figma, plus real-time prototype creation that updates as you refine your UI designs. It’s exclusively available for macOS, with a browser preview and a companion app to send prototypes to people on other devices. If you plan to use it to create UX wireframes, all the designers on your team will need to be on macOS to collaborate.
Adobe Photoshop
Photoshop is primarily an image editing tool, but you can use the same functionality for wireframing. Learning Photoshop from scratch is much more daunting than Figma or Sketch, but if you’re already an Adobe virtuoso, you’ll find that it offers more than enough features for UX/UI designers. However, when it comes to transferring your designs into an actual prototype, Adobe doesn’t offer the compatibility and flexibility that you get from other tools.
Elevate your design process with effective UX wireframes
Developing mockups, experimenting with them, and building prototypes lets you fine-tune your user interface to achieve the best possible structure for your web design. And if you’re using Figma, your wireframes will transfer directly to your web design platform thanks to integrations like the Figma to Webflow plugin.
To learn more about how to streamline designing and prototyping with Webflow, check out Webflow University, where you can learn how to use Webflow to meet every client’s design needs.
10 Best LogicGate Alternatives For GRC In 2025 [Reviewed]
Are you searching for LogicGate alternatives to effectively manage your GRC workflows?
LogicGate, a modern and flexible GRC platform, helps automate your workflows, quantify risks, and collaborate using data-driven insights.
However, some customers of the platform are not happy with its pricing model, outdated interface, and steep learning curve.
In this article, I’ll go over the 10 best LogicGate alternatives for government, risk, and compliance in 2025 that can help you manage your organizational policies, track compliance efforts, and ensure regulatory alignment.
Why are some companies looking to switch from LogicGate?
Now, I’m not saying that LogicGate is a horrible tool that needs to be switched from.
Hundreds of satisfied users are more than happy with the tool, as it has helped them reduce manual effort through the tool’s AI-powered capabilities.
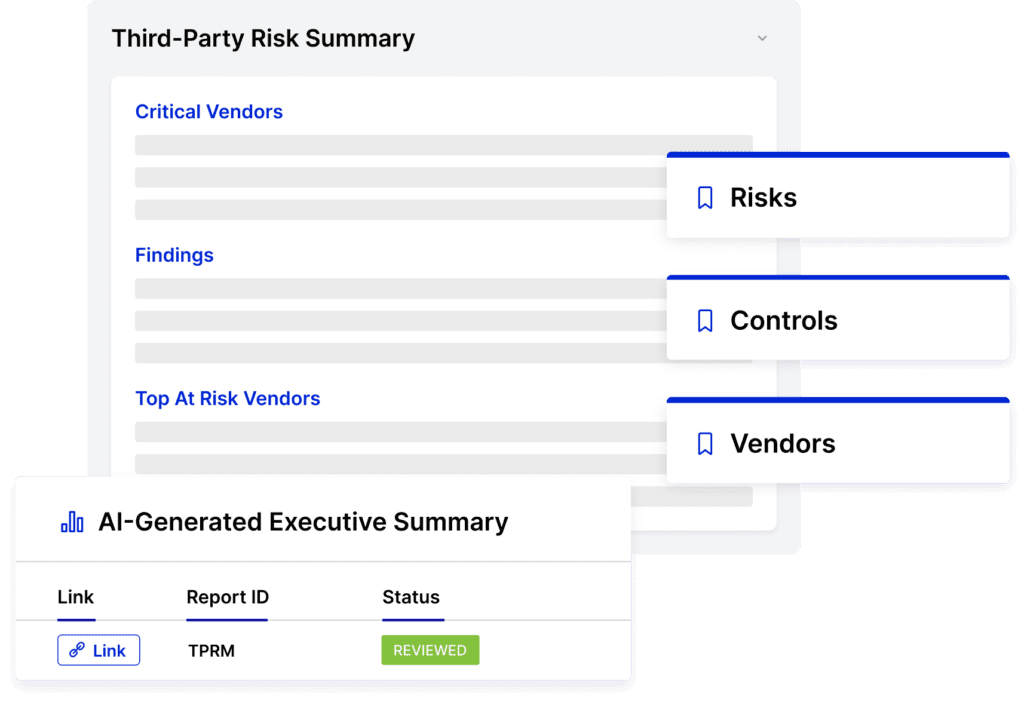
Despite this, some customers have been dissatisfied with the platform for several reasons:
#1: The platform can get expensive, even for Enterprises
LogicGate may not disclose its pricing on its website, but 3rd party data from Vendr shows that the average cost for the tool is $52,567/year out of the 17 deals they have handled for them.
Considering that you’ll have to pay for the use of different models, not for all features, Enterprise-grade users of the platform mention that it can get expensive if you want to get the full product suite.
‘’Could get costly on the full set of modules required.’’ – G2 Review.
#2: Outdated and confusing user interface
Next up, verified users of the tool mention that the user interface is outdated and that it can be complicated.
One of the issues with this is that, as the user mentions, third parties like subcontractors, auditors, and suppliers will not want to use it.
‘’UI is ugly and confusing. Not much ease in end user experience, no third parties want to use it.’’ – G2 Review.
#3: There’s a steep learning curve
Lastly, customers of the platform mention that LogicGate was daunting for them at first, and they have to complete a ‘’power user training’’ to learn how to use their platform.
➡️ Nowadays, I’m seeing more and more companies switch from traditional GRC solutions like LogicGate, which are expensive with outdated UIs, to modern solutions that have an intuitive interface and are easy to set up and use.
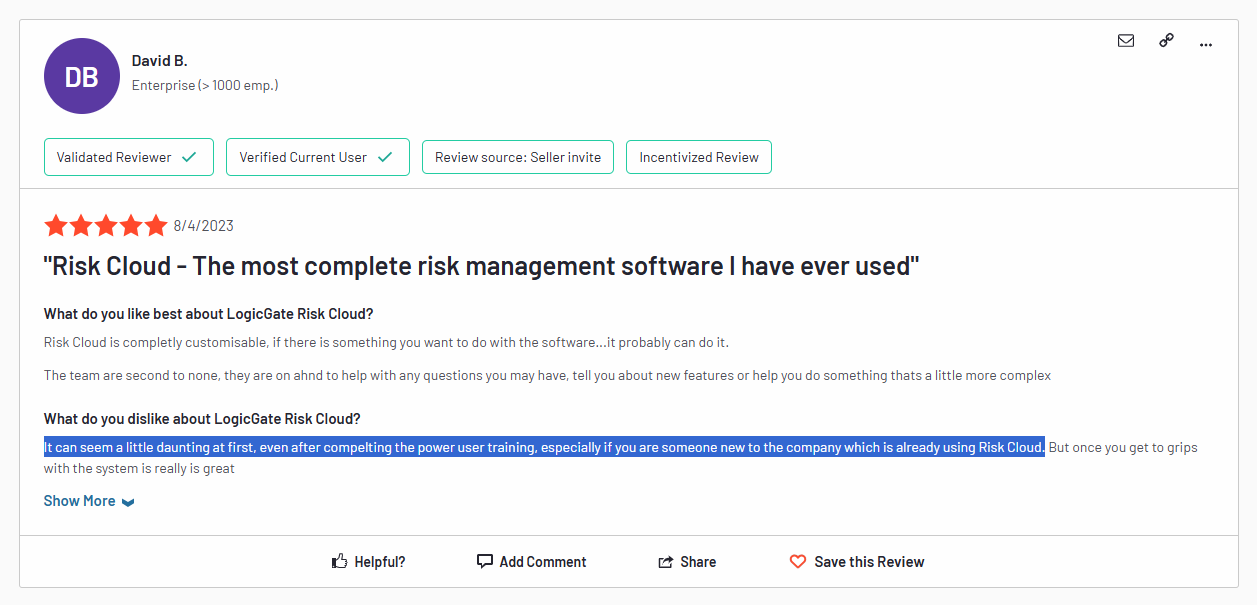
‘’It can seem a little daunting at first, even after completing the power user training, especially if you are someone new to the company, which is already using Risk Cloud.’’ – G2 Review.
What are the best LogicGate alternatives for GRC in 2025?
Here are the 10 best LogicGate alternatives on the market for government, risk, and compliance after reviewing 30+ platforms:
#1: SmartSuite: Best for companies looking to launch GRC workflows in days. Our platform lets you manage policies, audits, risks, and compliance in a unified, customizable platform.
#2: OneTrust: Good for companies looking to automate framework compliance and gain enterprise-wide visibility into technology risk.
#3: ArcherIRM: Ideal for managing policies, controls, risks, assessments, and deficiencies from a single platform.
#4: ServiceNow: Best for companies looking for integrated risk management and compliance automation.
#5: MetricStream: Good for enterprises looking for a unified platform to manage governance, risk, and compliance (GRC) across international operations.
#6: AuditBoards: Ideal for compliance teams looking to unify audit, risk, and compliance functions with automations and connected workflows.
#7: StandardFusion: Best for organizations looking for proactive risk oversight and strategic alignment across all GRC activities.
#8: SAI360: Good for enterprises looking for a comprehensive, customizable platform with preconfigured modules and advanced analytics.
#9: Apptega: Ideal for teams looking to continuously manage cybersecurity compliance across multiple frameworks.
#10: Monday.com: Best for smaller compliance teams looking to create custom, real-time dashboards that monitor risk levels by category.
#1: SmartSuite
SmartSuite offers the best LogicGate alternative on the market for compliance teams with our modern, no-code work management platform that simplifies complex regulatory requirements.
Originally built for Banks and Credit Unions, our GRC software lets you streamline and automate policy creation, approval, and control assessments, all in one place.
SmartSuite helps your team move faster, manage policies smarter, and adapt easily, without having to hire expensive consultants or sign up for training to see how the solution works.
💡 We have recently partnered with the Cyber Risk Institute to deliver a CRI profile for U.S. Banks’ compliance needs.
Let’s go over the features that make SmartSuite the best choice for compliance teams looking for a LogicGate alternative: 👇
All-In-One Risk Management & Compliance Platform
We at SmartSuite believe that compliance should be simple, automated, and accessible to all financial institutions, regardless of their size.
Our no-code, easy-to-use platform empowers compliance managers and CISOs to automate all GRC processes with ease.
Here’s how teams are using SmartSuite:
- Risk Management: Identify, assess, score, and monitor enterprise risks.
- Compliance Management: Track regulatory requirements, controls, and evidence.
- Audit Management: Manage audits, findings, and remediation workflows.
- Policy Management: Publish, distribute, and track acknowledgement of policies.
- Third-Party Risk: Evaluate and monitor vendors’ risk and compliance posture.
- Incident Management: Log, triage, and resolve compliance and risk events.
SmartSuite helps compliance leaders achieve and maintain compliance without the expense and complexity of adapting legacy GRC solutions like LogicGate to accommodate new compliance requirements.
Here are the features and use cases that you’ll get with SmartSuite:
- Create reports and dynamic dashboards: You can monitor executive views into your organization’s overall risk profile with powerful charting and metrics widgets.
- Collaborate and respond to risks in real-time: It’s possible to instantly engage key stakeholders in a real-time discussion of potential threats or vulnerabilities.
Our solution will also let you get immediate updates when critical information is available.
- Streamline policy creation, in real-time approval, and control assessments: Streamline risk management by building an integrated program on a single platform.
- Keep risk and compliance data secure: Define your teams and manage access to information across all GRC practice areas.
- Integrate with your existing systems: Our GRC software lets you integrate with existing systems and data to consolidate and centralize your data.
- Automate for accuracy and efficiency: Remove inefficiency and the chance for human error by automating repeatable workflows.
SmartSuite’s no-code automation builder provides organizations with a visual interface that makes it easy to respond to events and take action. That means you can customize your GRC workflows without technical resources.
- Monitor, measure and score: Create your own risk calculations and metrics to evaluate every aspect of organizational risk.
You can generate risk scores and evaluate key indicators with SmartSuite’s powerful calculation capabilities.
- Policy management: Establish a strong foundation with streamlined and flexible policy management. Simplify the entire process, from authoring to review and release.
You’ll be able to assign ownership, manage revisions, and ensure your policies consistently align with key business initiatives and regulatory requirements.
- PSTOS Compliance Tracker: Designed for regulatory compliance and built on SmartSuite.
This solution focuses on data security as the core of compliance frameworks with services such as compliance readiness, virtual CISO, and IT security implementation.
Learn more about it from our CEO, Jon Darbyshire, who held a webinar on the topic:
[embedded content]
Prioritize & Mitigate Risks
SmartSuite lets you create a centralized Risk Register to help you effectively identify potential risks to your organization.
You will be able to efficiently assess threats and establish risk mitigation strategies inside SmartSuite.
What’s more, you can ensure that the appropriate controls are in place and measure their effectiveness by evaluating risk indicators and displaying results in SmartSuite’s rollup reports and dashboards.
💡 Pro Tip: You can also use automation to move tasks through defined workflow stages that comply with your policies and procedures.
I know from experience how important threat management is and the need to respond quickly to incidents.
SmartSuite lets you centralize incident response and threat mitigation by linking incidents to assets and organizational data to offer context during your investigations.
You can also set up automations with our no-code automation builder to escalate critical events to make sure that your team is aware of active risks to your organization.
Pre-Built GRC Templates
We have prepared GRC templates for teams looking to get started right away, instead of building everything from scratch.
Our general risk management template includes a:
- Risk register, where you can break down the risks, the risk owner, the annual loss expectancy, risk event category, risk type, volatility, and status.
- Issue assessments, where you’ll be able to see a comprehensive breakdown of each risk.
- Action plans, where you can describe the actions (best practices) to mitigate the risks.
- A separate tab for control standards, your findings, exception requests, risk assessment by type, and risk assessment issues.
You can customize our risk management template here.
Alternatively, check out and customize our 14 other risk management templates for various use cases, such as contract management, policy management, and incident management.
How is SmartSuite different from LogicGate?
Unlike LogicGate, SmartSuite:
- Offers a modern solution with an intuitive interface that does not confuse your team or require training.
- Offers an affordable and transparent pricing model, as well as a generous free plan to help you get started.
- Has automated workflows that can help you build multi-step automations to trigger actions at the right time.
- Includes best-in-class customer support and account management that will help you with setting up the automations inside the platform.
💡 Case Study: Learn how MediaLab transformed operations, minimized risk, and saved $40,000+ per year by cutting software costs.
Pricing
Unlike LogicGate, SmartSuite offers a free plan with access to 250+ automation actions, team collaboration, multi-dashboard views, and more.
There are four paid plans with a 14-day free trial (no CC required):
- Team: Starts at $12/user per month, including Gantt charts, timeline views, 5000 automation runs, and native time tracking.
- Professional: Starts at $30/user per month and adds two-factor authentication, Gmail & Outlook integrations, and unlimited editors.
- Enterprise: Starts at $45/user/month and includes access to audit logs, data loss prevention, and 50,000 monthly API calls.
- Signature: A customized plan tailored to your organization’s needs and team size with no predefined limits.
Pros & Cons
✅ The free plan includes access to advanced features.
✅ 15 pre-built GRC templates for various use cases.
✅ Dynamic dashboards and reporting that are easy to navigate.
✅ Integrated document and file management.
✅ Automate risk scoring, compliance tracking, audits, and vendor reviews.
✅ Modern and intuitive user interface.
❌ Fewer native integrations when compared to other alternatives on the market.
#2: OneTrust
Best for: Companies looking to automate framework compliance and gain enterprise-wide visibility into technology risk.
Similar to: ArcherIRM, ServiceNow.
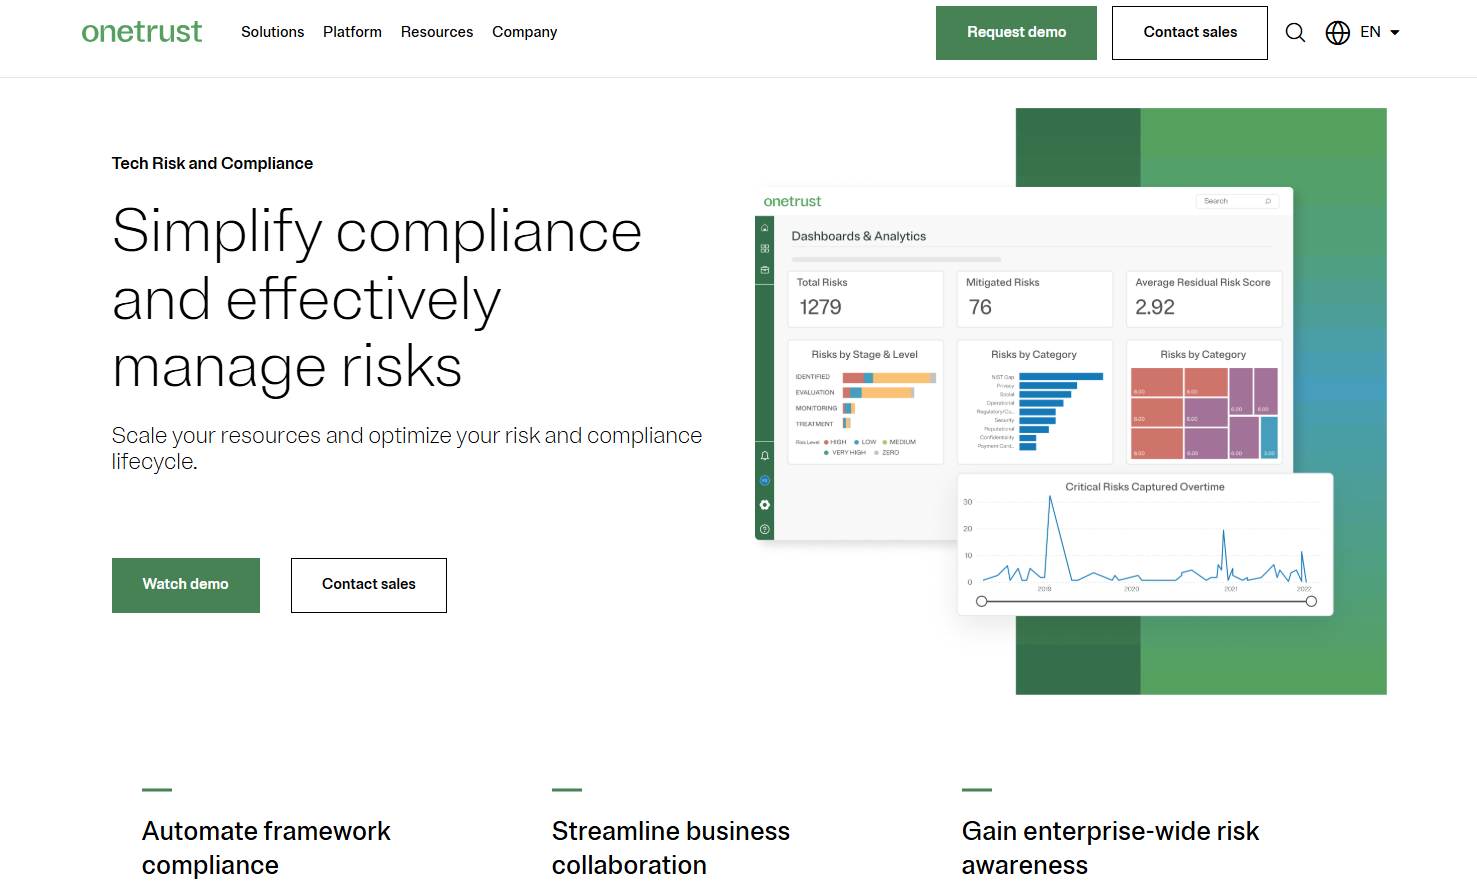
The OneTrust platform simplifies compliance and optimizes the entire risk and compliance lifecycle by automating controls, evidence collection, and reporting.
The platform is a viable LogicGate alternative for enterprises looking for ready-to-use frameworks, extensive integrations, and dynamic dashboards.
Features

- Streamline compliance with 55+ ready-to-action frameworks, prescriptive content, and evidence requirements broken down into measurable tasks.
- Connect teams via a user-friendly portal, automated workflows, and 200+ pre-built integrations.
- Map systems, data, and risks in one unified view: Prioritize action with dynamic scoring and strategic impact insights.
- Automatically generate required controls and evidence tasks across 300 jurisdictions.
Standout Feature: Proprietary Shared Evidence Framework
What stood out to me about OneTrust is that you can collect evidence once and comply across 50+ frameworks with OneTrust’s shared evidence framework to eliminate duplicate data requests.
Pricing
OneTrust has different pricing plans for its 5 product lines, all of which have custom pricing:
- Consent & Preferences: Capture and activate consent, preferences, and first-party data across your user touchpoints.
- Privacy Automation: Simplify compliance, improve operational efficiency, and help your business better use personal data.
- Third-Party Management: Third-party risk management and the ability to fully manage your third-party lifecycle.
- Tech Risk & Compliance: Scale governance, risk, and compliance, and mature your risk program.
- AI Governance: Gain visibility and control over your AI technology and empower risk-based decisions.
Pros & Cons
✅ Collect evidence and comply across 50+ frameworks with OneTrust’s shared evidence framework.
✅ Good range of integrations when compared to other competitors in this list.
✅ You can monitor and manage your program with dynamic dashboards.
❌ The price can be an issue for smaller companies, as it’s expensive.
❌ The user interface has been described as outdated by G2 reviews.
#3: ArcherIRM
Best for: Managing policies, controls, risks, assessments, and deficiencies from a single platform.
Similar to: MetricStream.

Archer provides enterprises with a holistic, integrated risk management solution that helps them manage policies, controls, risks, assessments, and deficiencies.
The platform is a proper enterprise-grade LogicGate alternative for organizations looking to effectively manage risk and ensure compliance.
Features
- Centralized management of policies, controls, risks, assessments, and deficiencies on one GRC platform.
- Integrated risk management across multiple dimensions, including IT, operational, and third-party risk.
- A customizable solution that can adapt to your internal functions and extended third-party ecosystems.
- Streamlined compliance management to efficiently consolidate standardized reports, audits, and assessments.
Standout Feature: Archer Evolv
ArcherIRM’s Archer Evolv functionality lets you track regulatory developments from all over the world and creates visibility into all requirements for better control over policies.
Pricing
ArcherIRM does not disclose its pricing structure, so you’d have to contact them to get a product demo and a quote.

Pros & Cons
✅ Real-time cyber risk intelligence capabilities.
✅ Good analytics and real-time reporting.
✅ An AI-powered analytics tool that can be used for predictive risk identification.
❌ Enterprise-grade pricing, which starts at approximately $55,000/year, according to info collected from insiders.
❌ The software seems to have an outdated interface that is not very intuitive, similar to LogicGate.
#4: ServiceNow
Best for: Companies looking for integrated risk management and compliance automation.
Similar to: MetricStream, ArcherIRM.
ServiceNow offers a GRC solution that provides you with a unified approach to governance, risk, and compliance by helping you integrate data and workflows across security and IT teams.
The platform is a good alternative to LogicGate as it automates manual processes and delivers AI-driven insights for real-time risk mitigation.
Features

- Single data model: The platform helps you eliminat silos by centralizing enterprise risk and compliance data into one source.
- No-code workflow automation: Lets you enable cross-functional risk response and compliance management without having to hire consultants or programmers.
- The GRC suite operates on ServiceNow’s Now Platform, which enables seamless data sharing and real-time collaboration across all GRC products.
- Third-party risk management: You’ll be able to identify and mitigate risks from external vendors and partners.
Standout Feature: AI-Powered Actionable Insights

ServiceNow offers AI-powered actionable insights that accelerate decision-making with predictive analytics and process optimization.
Pricing
ServiceNow’s pricing is not disclosed, so you’d have to book a demo with their team.
I was able to find ServiceNow customer and public reviews, which show that the average cost of ServiceNow contracts can range between $50,000 and $500,000 annually.
The pricing structure depends on the number of licenses, features, and other configuration requirements.
Pros & Cons
✅ Sophisticated risk, audit, and compliance management features.
✅ Real-time risk monitoring and prioritization that helps you make better decisions.
✅ Integrations with other tools and centralized management of alerts and tickets.
❌ Steep learning curve and complexity, unlike some ServiceNow alternatives.
❌ Training, skills development, and ongoing support can be costly.
#5: MetricStream
Best for: Enterprises looking for a unified platform to manage governance, risk, and compliance (GRC) across international operations.
Similar to: OneTrust, ServiceNow.
MetricStream offers a GRC software platform that centralizes risk, compliance, audit, and third-party management to help you transform data into actionable intelligence.
The platform is a proper LogicGate alternative for compliance teams looking to break down organizational silos, automate workflows, and deliver real-time insights to their leadership team.
Features
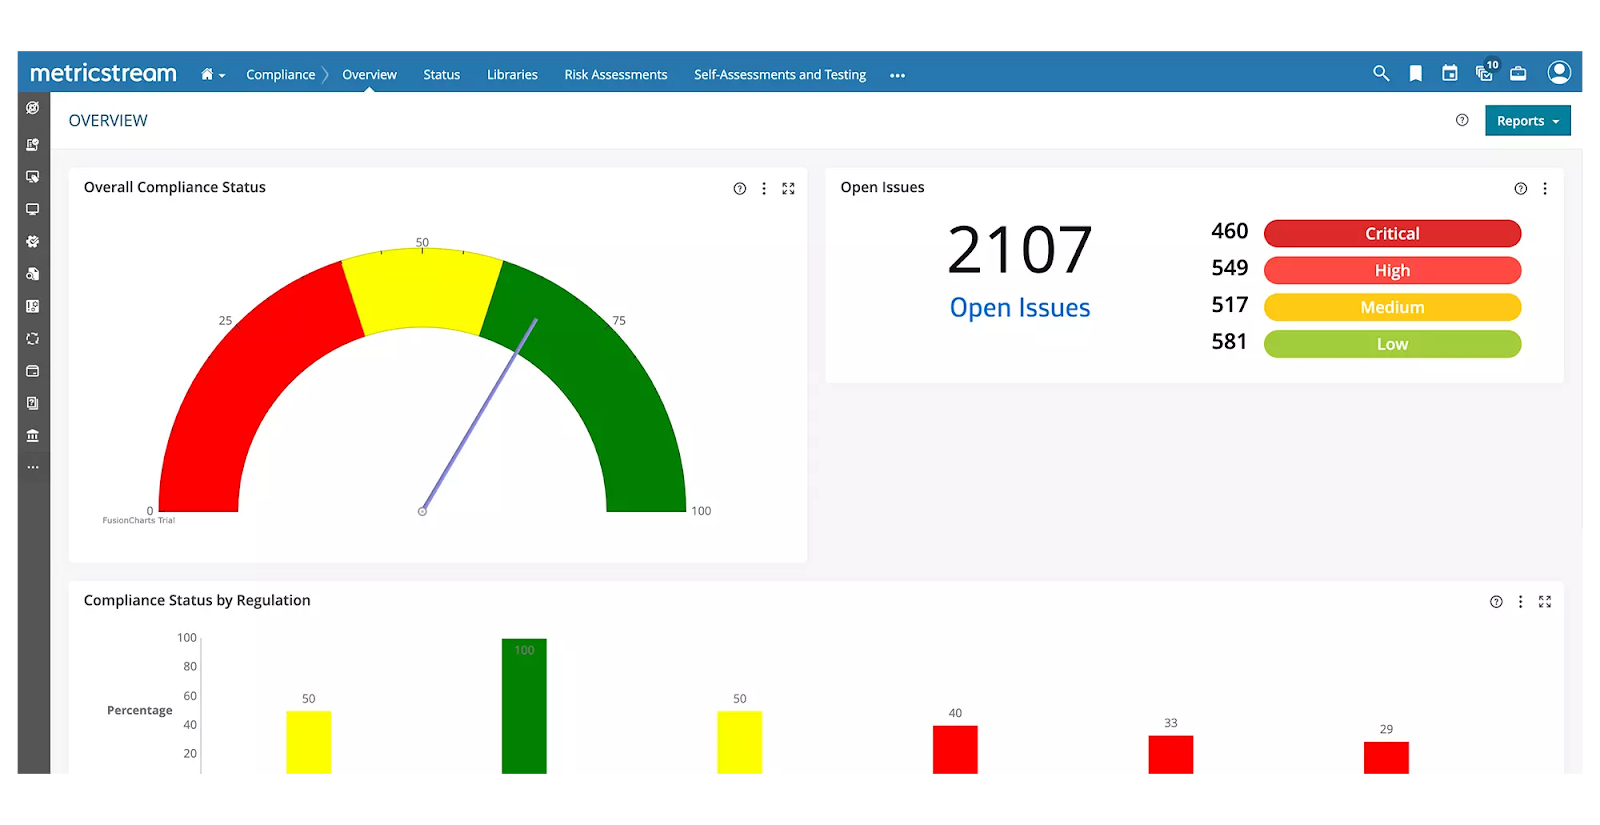
- Enterprise-wide risk management framework that comes with advanced analytics and real-time reporting.
- Automated compliance management, which includes regulatory change tracking, policy alignment, and impact assessments to minimize compliance violations.
- Real-time cyber risk intelligence and unified IT risk management to help you proactively address threats and ensure regulatory adherence.
- Centralized third- and fourth-party risk management, which includes performance tracking and business continuity risk assessment.
Standout Feature: AI-powered insights (AiSPIRE)
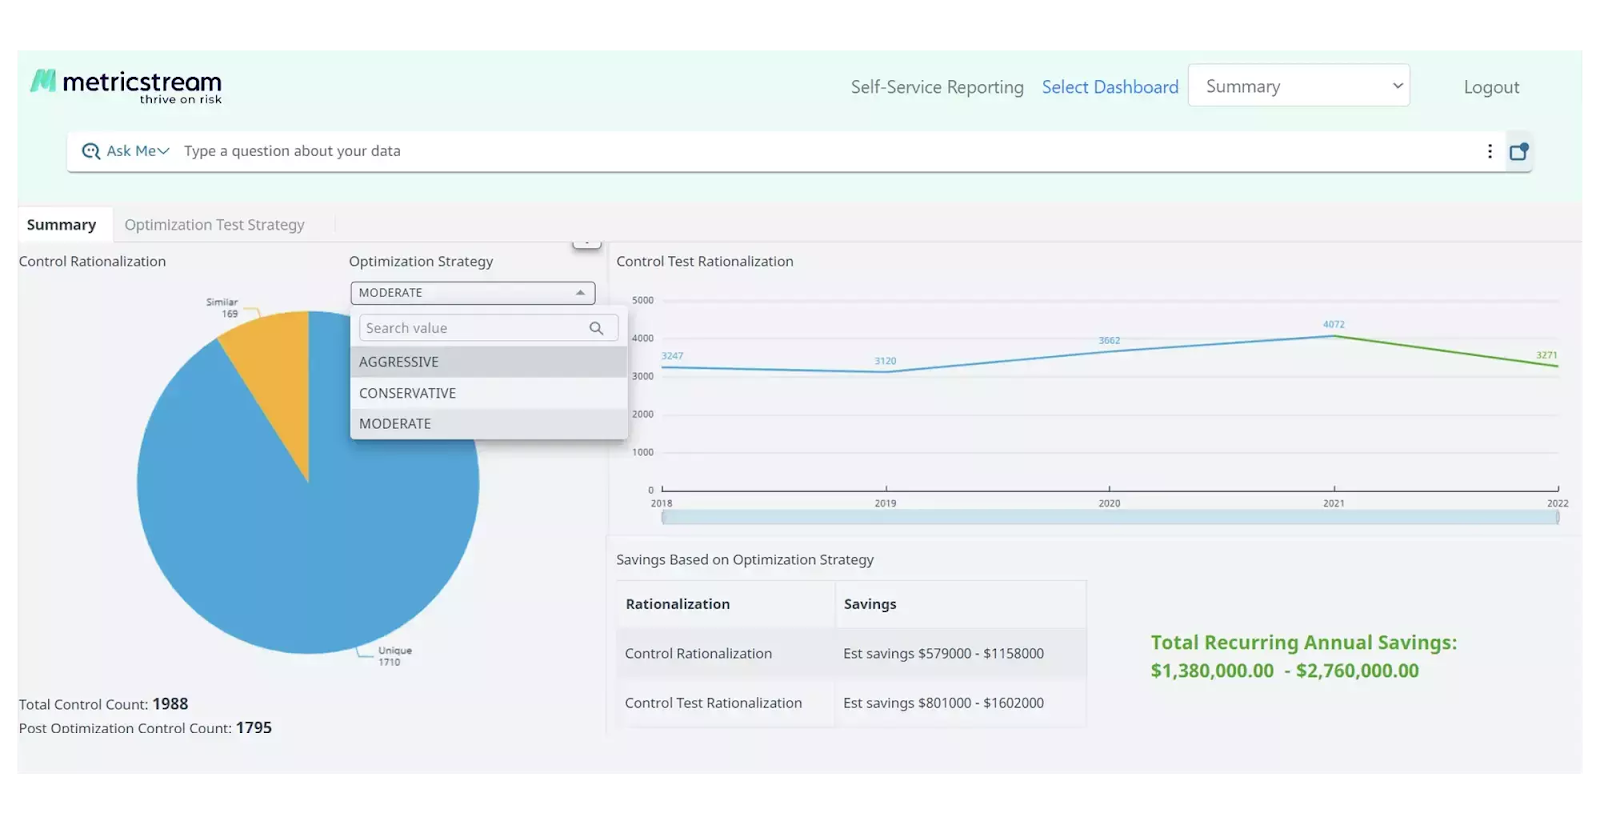
Similar to LogicGate, MetricStream also has an AI-powered insights tool, AiSPIRE, that can be used for predictive risk identification, duplicate control detection, and cognitive recommendations.
Pricing
MetricStream does not disclose its pricing structure, so you’d have to contact them to get a product demo and a quote.
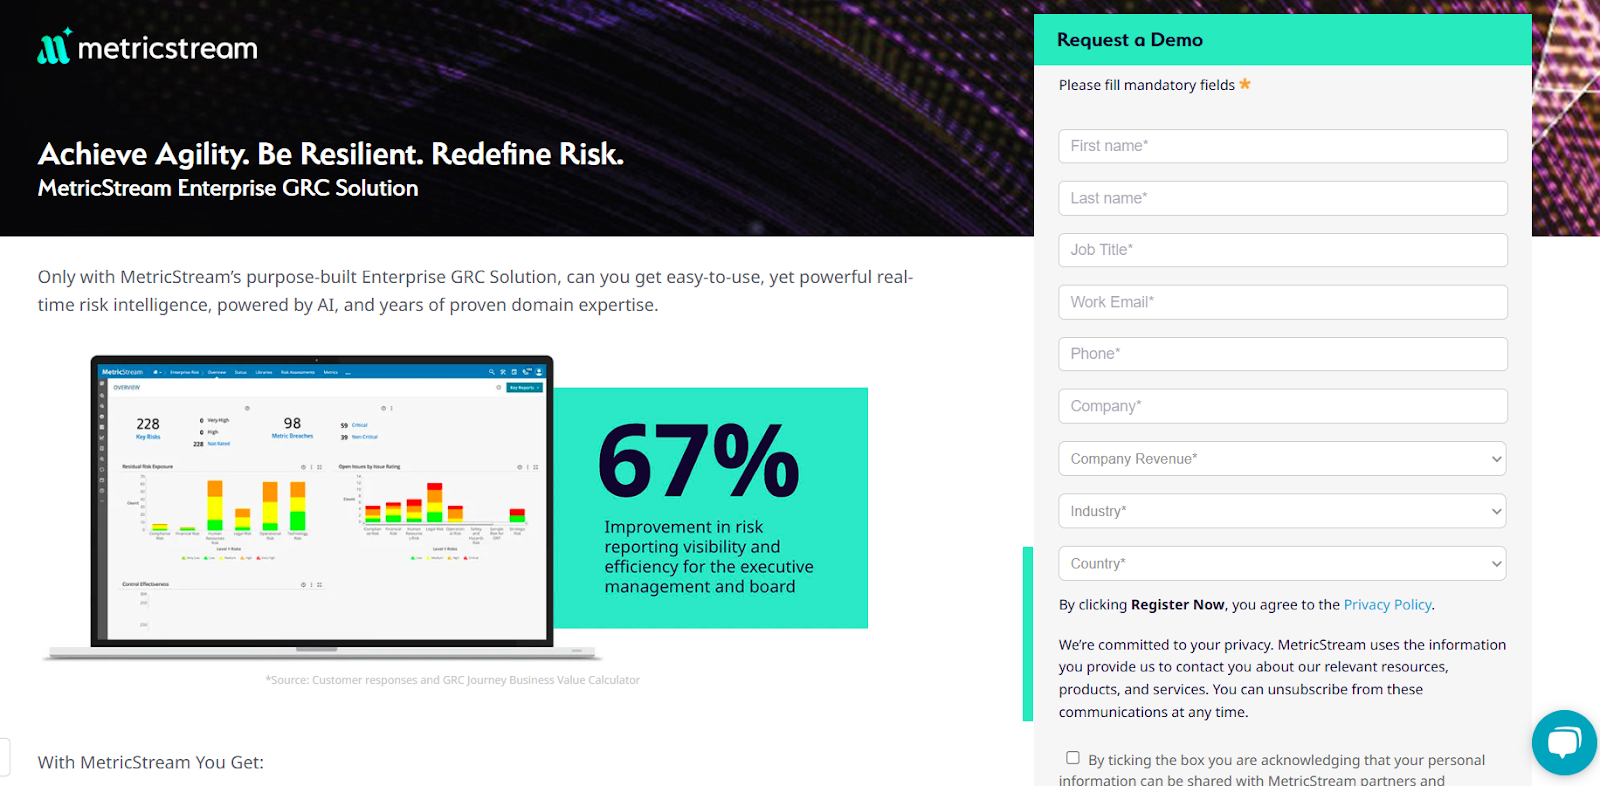
Pros & Cons
✅ Real-time cyber risk intelligence capabilities.
✅ Advanced analytics that cover the weaknesses alongside real-time reporting.
✅ An AI-powered insights tool, AiSPIRE, that can be used for predictive risk identification.
❌ The platform’s pricing structure is not SME-friendly, according to G2 reviews.
❌ The tool has an outdated interface that can be hard to navigate.
#6: AuditBoards
Best for: Compliance teams looking to unify audit, risk, and compliance functions with automations and connected workflows.
Similar to: ArcherIRM, ServiceNow.
AuditBoard offers a GRC solution help you break down silos between audit, risk, and compliance teams to help them to build resilience and improve operational efficiency.
The platform is a viable alternative to LogicGate as it uses AI and integrated workflows to transform risk data into actionable insights.
Features
- Unified risk platform: Connects audit, risk, and compliance teams for a single, in-depth view of organizational risk.
- AI-powered insights: Automate workflows, deliver data-driven insights, and optimizes risk and compliance models.
- Flexible reporting and dashboards: Customizable reports and out-of-the-box dashboards that help uncover insights, track trends, and support data-driven decisions.
- Integrated workflows and APIs: Streamline data collection and task management through integrations.
Standout Feature: Preloaded Library of 30+ Frameworks
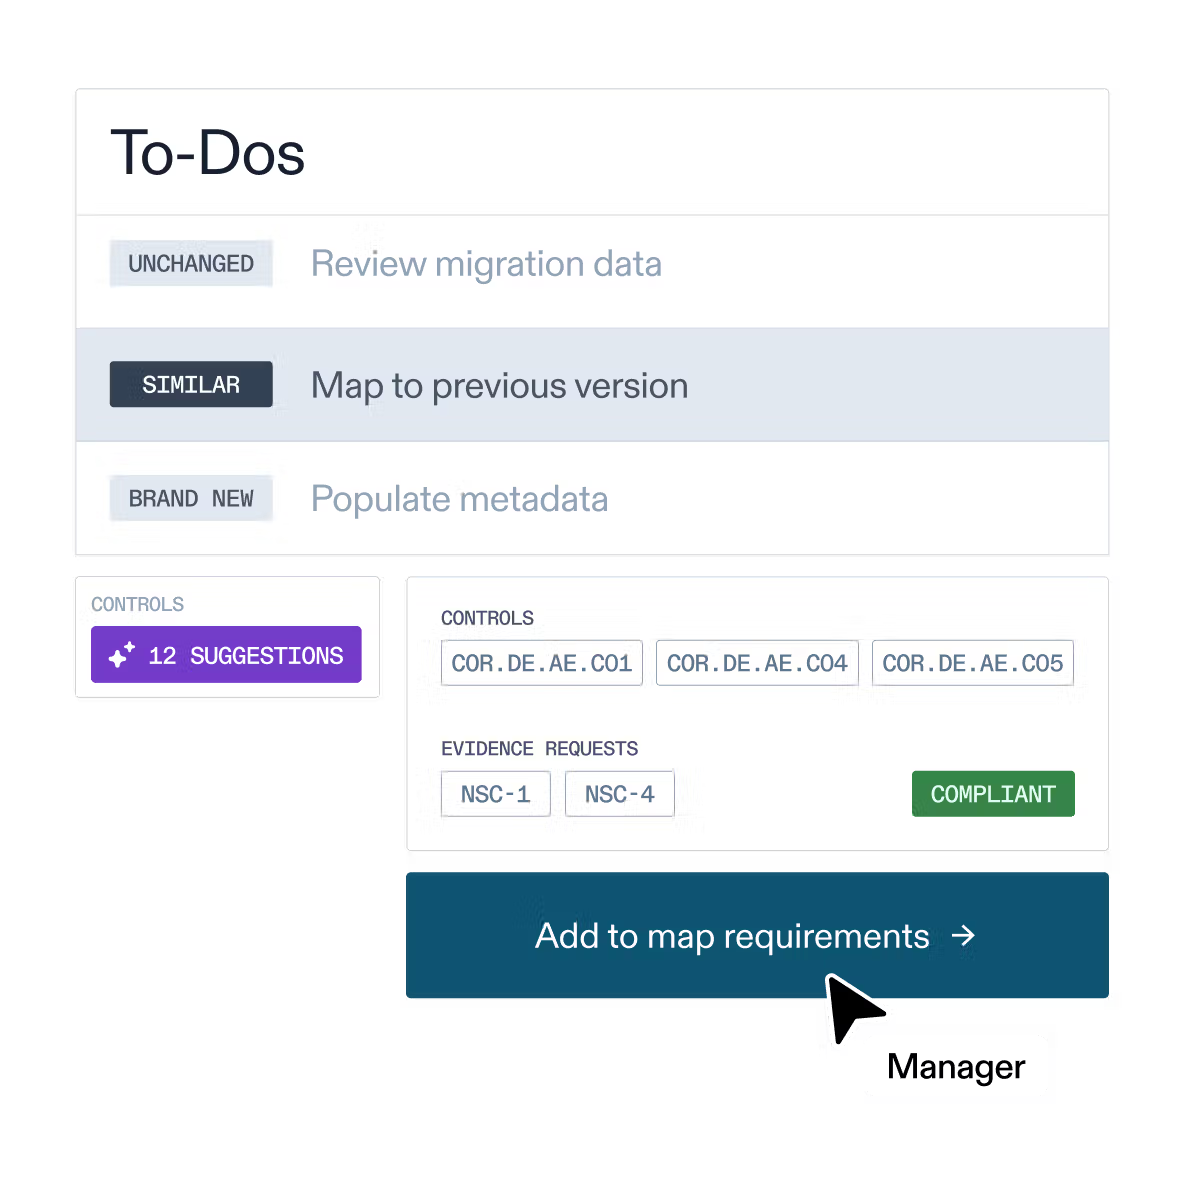
AuditBoard offers access to its preloaded library of 30+ frameworks (including SOC 2, ISO 27001, and GDPR) to help you stay audit-ready as your organization scales.
Pricing
AuditBoard has not disclosed its pricing, so you’d have to contact them to book a demo and get a quote.
Pros & Cons
✅ Access to a single view of organizational risk.
✅ Modern interface with good AI capabilities, unlike LogicGate.
✅ Access to a preloaded library of 30+ frameworks to help you stay ready for audits.
❌ The median contract value of the tool is around $42,775/year, according to insiders.
❌ Some users of the platform find it difficult to use, with some of them requiring special training.
#7: StandardFusion
Best for: Organizations looking for proactive risk oversight and strategic alignment across all GRC activities.
Similar to: Apptega.

StandardFusion’s GRC Platform consolidates enterprise risk, compliance, audit, policy, vendor, and privacy management into a single system.
The platform is a good alternative to LogicGate for teams looking for proactive risk oversight and strategic alignment across all GRC activities.
Features

- Centralized GRC ecosystem integrating risk, compliance, audit, policy, vendor, and privacy management into one platform.
- Enterprise Risk Management integration that helps you guide all GRC activities for strategic decision-making and risk mitigation.
- Centralized data and analytics for monitoring internal controls.
Standout Feature: Automated Workflows
StandardFusion offers automated workflows that aim to streamline your GRC processes and reduce system complexity.
Pricing
StandardFusion does not disclose its pricing structure, so you’ll have to reach out to them to get a product demo and a quote.
Pros & Cons
✅ User-friendly interface that is easy to navigate, according to G2 reviews.
✅ Comprehensive control, monitoring, and risk management features.
✅ Consolidates multiple compliance frameworks (e.g., ISO 27001, SOC 2, GDPR, HIPAA, NIST) in one platform.
❌ Recurring task management and tracking can be difficult.
❌ The tool’s annual price increases are a concern for smaller businesses.
#8: SAI360
Best for: Enterprises looking for a comprehensive, customizable platform with preconfigured modules and advanced analytics.
Similar to: ArcherIRM, MetricStream.

SAI360 offers a unified GRC platform that comes with preconfigured modules, advanced analytics to help you proactively manage risk and ensure regulatory alignment.
Its cloud-based, AI-powered platform is a good alternative to LogicGate for teams looking to enhance security and streamline workflows.
Features
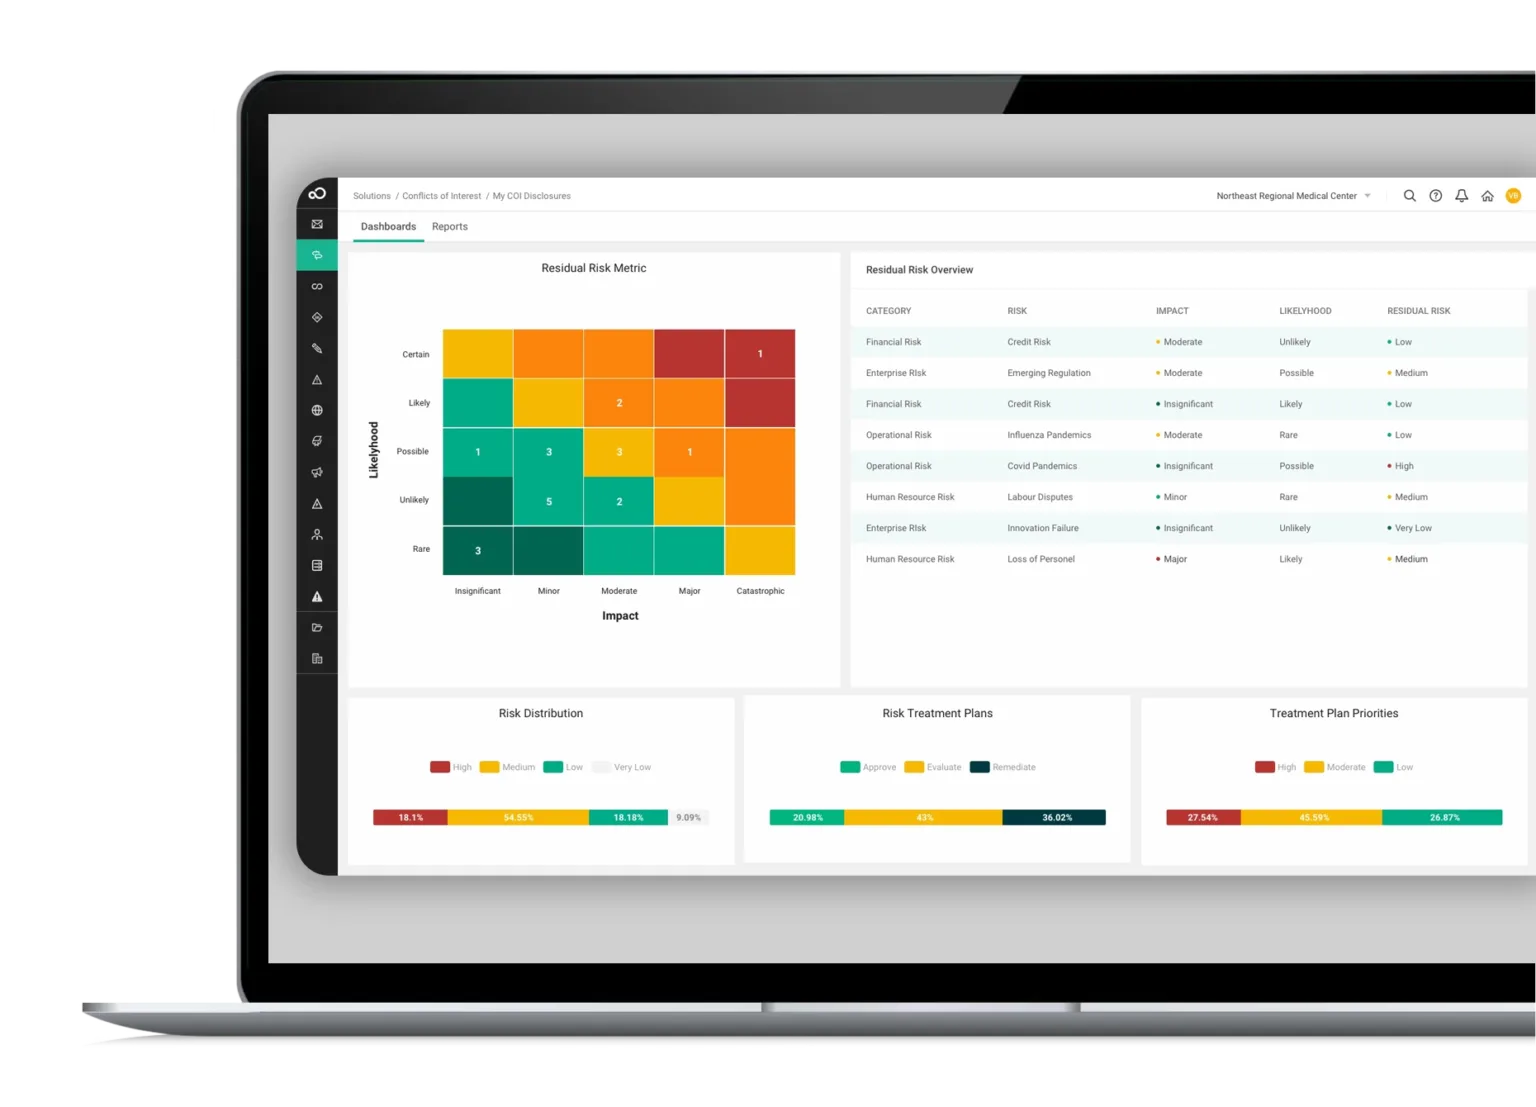
- 20+ preconfigured GRC modules that include enterprise risk, IT risk, third-party risk, internal audit, business continuity, policy, and incident management.
- Leverages AI to enhance reporting, risk assessment, and operational efficiency.
- Built-in eLearning, which ensures employees are well-prepared to meet regulatory demands.
- Pre-mapped frameworks and controls aligned with international regulations for faster deployment and easier compliance.
Standout Feature: Integrated GRC from Every Angle
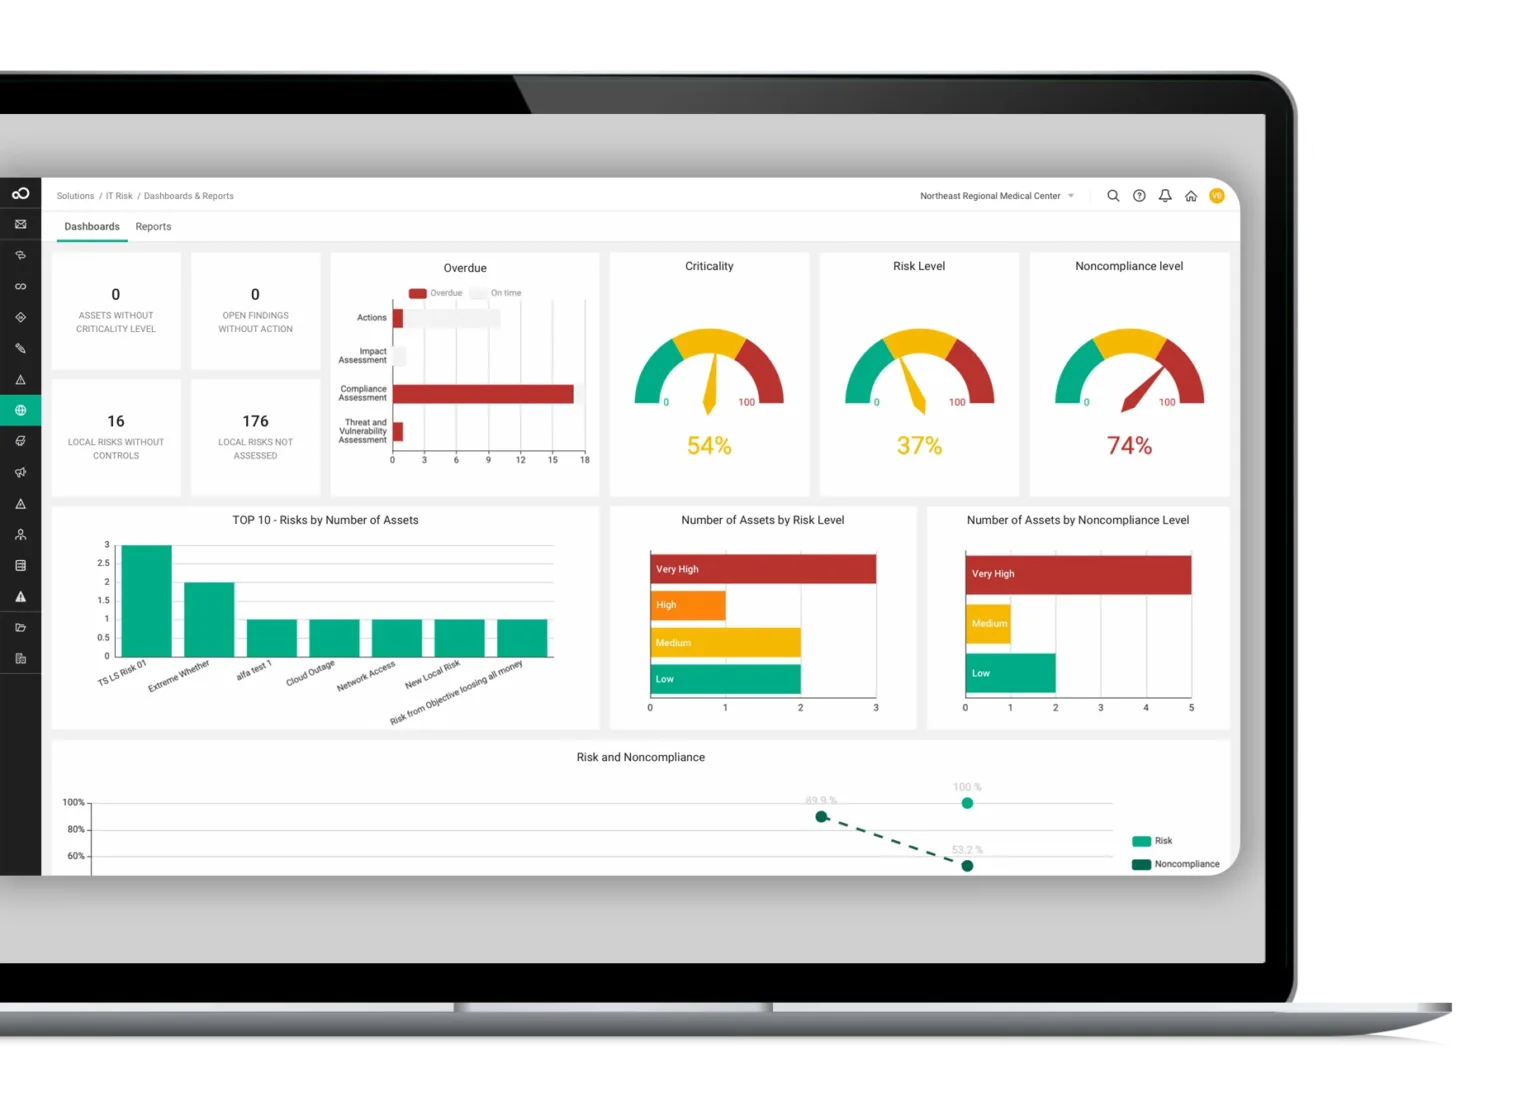
What stood out to me about SAI360 is that it offers a holistic, enterprise-wide approach that helps you unify risk, compliance, and ethics management into one customizable system.
Pricing
SAI360 does not disclose its pricing, so you’d have to contact them to get a product demo and a quote.
Pros & Cons
✅ AI-powered reporting, risk assessment, and operational efficiency.
✅ A holistic approach that helps you unify risk, compliance, and ethics management.
✅ 20+ preconfigured GRC modules.
❌ The platform is described as outdated and difficult to manage by G2 reviews.
❌ Admins are not able to easily modify fields or workflows.
#9: Apptega
Best for: Teams looking to continuously manage cybersecurity compliance across multiple frameworks.
Similar to: LogicGate, SmartSuite.
Apptega’s platform simplifies compliance management by consolidating security measures and regulatory requirements into one unified system.
The platform is a viable alternative to LogicGate as it streamlines evidence collection, task automation, risk scoring, and cross-framework alignment to help you reduce manual effort and improve visibility.
Features

- Assessment Manager with questionnaire-based templates for 30+ frameworks (e.g., NIST, SOC 2, PCI DSS) to help compliance teams identify risks and unmet controls.
- Risk Manager for scoring, ranking, and reporting on risks with actionable insights to improve security posture.
- Audit Manager for accelerated evidence sharing, control validation, and audit preparation.
Standout Feature: Real-Time Dashboards

Apptega’s real-time dashboards and reporting functionality are useful for providing instant visibility into compliance progress, security posture; with stakeholder-ready insights.
Pricing
Apptega might not disclose its pricing, but at least the platform lets you get a free trial of its Starter plan.
You can play around with 1 workflow, its Risk Manager, and custom reporting to see if the platform is a good fit for your needs.
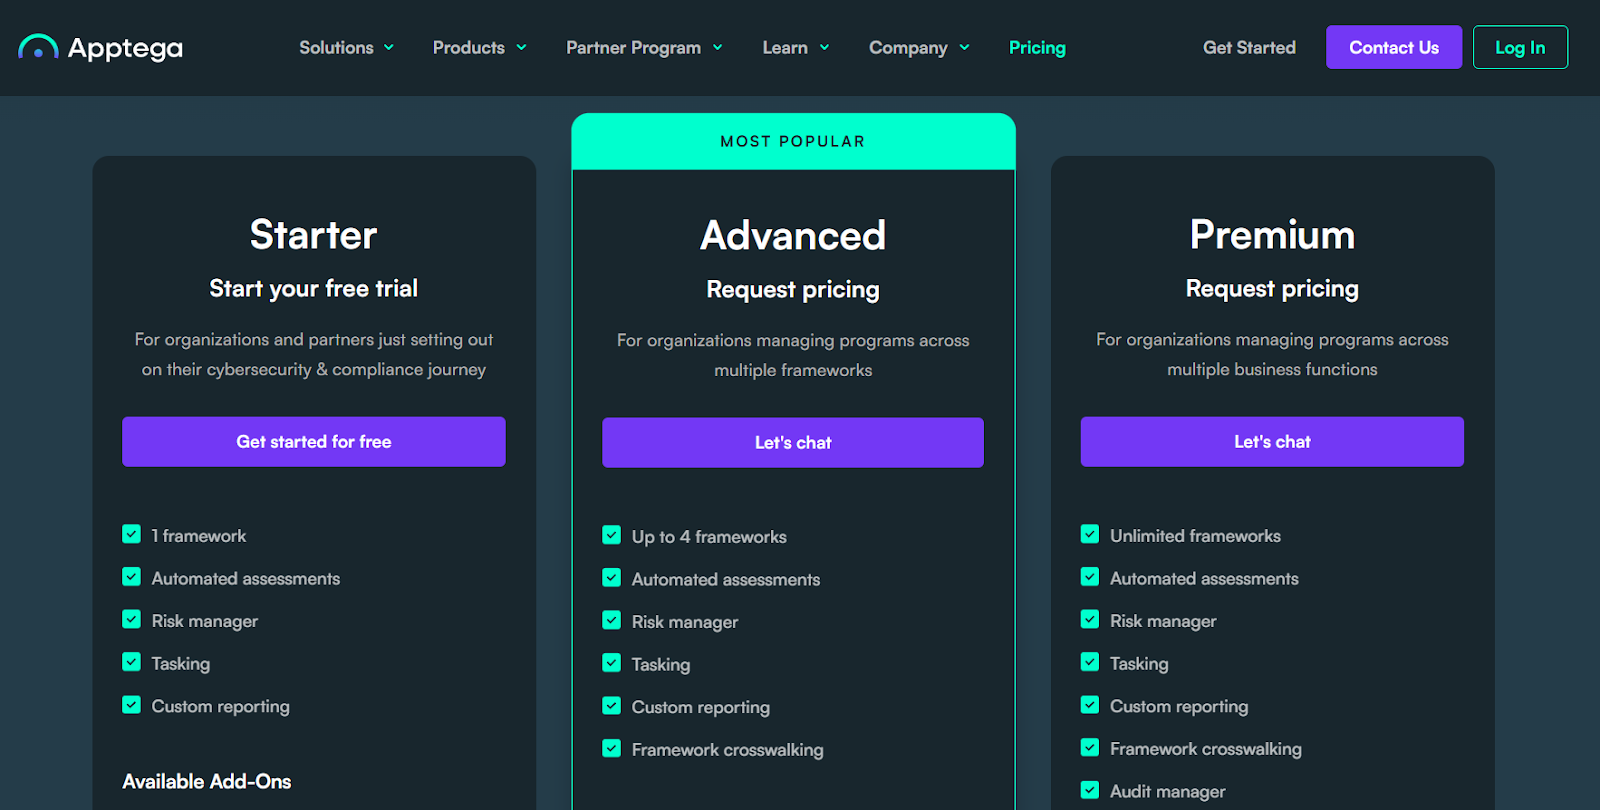
Pros & Cons
✅ Built-in frameworks, such as NIST, CMMC, and ISO.
✅ Automated tracking boosts governance and risk management.
✅ Excellent customer service and a dedicated onboarding team.
❌ The user interface feels outdated, occasionally impacting the speed of operations, according to user reviews.
❌ Large enterprise customers find the platform too simplistic for their needs.
#10: Monday.com
Best for: Smaller compliance teams looking to create custom, real-time dashboards that monitor risk levels by category.
Similar to: ClickUp, SmartSuite.

Monday.com is an all-in-one project management platform, similar to Asana and ClickUp, that offers a good range of features for compliance teams, such as dashboards and automations.
It’s a proper alternative to LogicGate for lower-budget teams that are looking to create a comprehensive real-time risk management dashboard.
Features
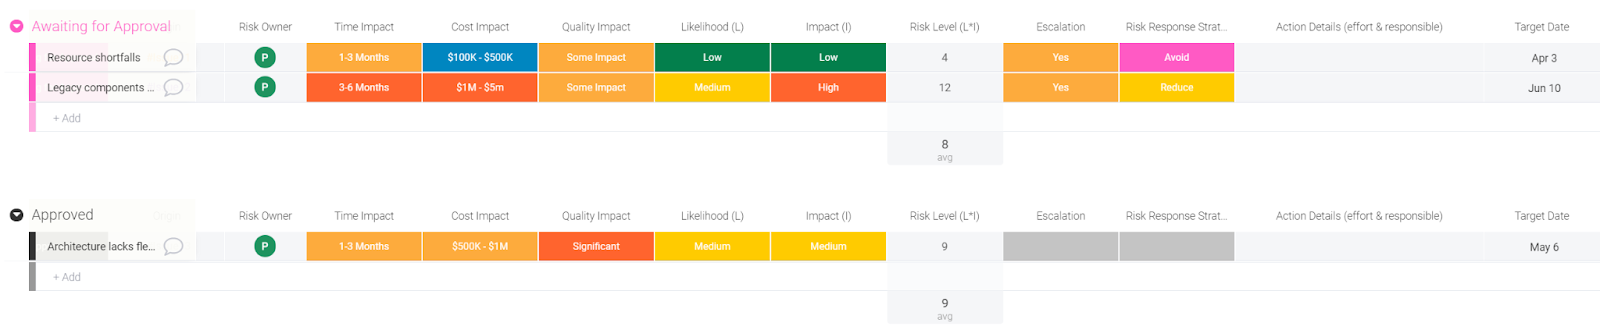
- Risk identification and description: Capture the details of the risk, the description of the problem, and categorize it.
- Risk assessment and response: Assess the impact and probability of the risks by building Time Impact, Cost Impact and Quality Impact columns.
- Risk action plan: Initiate the action plan in the Risk Log. The columns will then collect the general status of the risk mitigation action.
➡️ Find out more about Monday and its other project management features in our in-depth Monday review.
Standout Feature: Real-Time Risk Management Dashboard
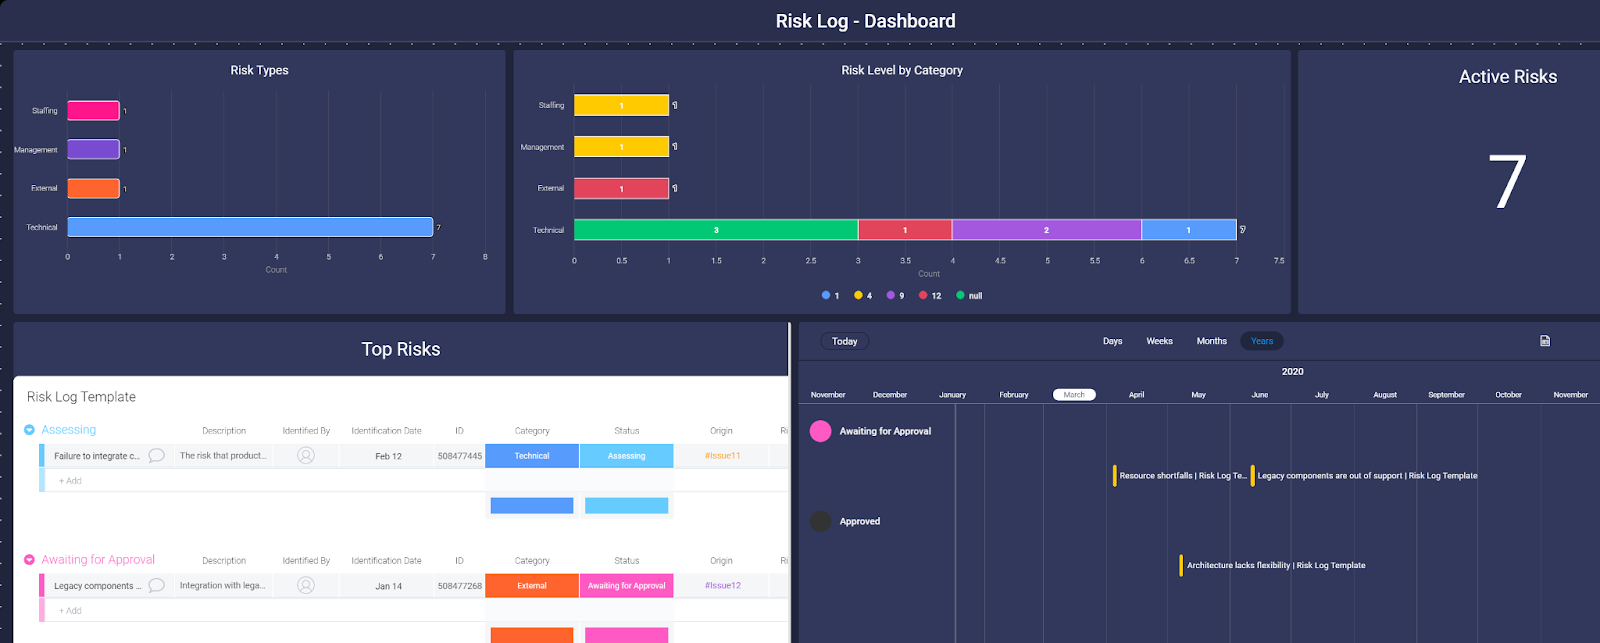
Compliance teams can monitor the risks directly in the task management software with a custom dashboard by incorporating the risk log in Monday.
Pricing
Monday.com offers a free plan for up to 2 seats, where you can test out the tool’s basic project management features.
💡 In our guide on Monday’s pricing, we dive deeper into whether the platform’s pricing offers good value-for-money.
To access the platform’s advanced features, you’d need to be on one of their four paid plans:
- Basic: Starts at $17 per user/month and adds Kanban board view and unlimited users with view-only access.
- Standard: Starts at $20 per user/month and adds 250 automated actions/month, 3+ dashboard views, and Zoom integration.
- Pro: Starts at $32 per user/month, and adds all five dashboard views, time tracking, and 2-factor authentication.
- Enterprise: Custom price, which adds a dedicated customer success manager, enterprise-level reporting, and administration control.

Pros & Cons
✅ Advanced reporting and analysis at the project and portfolio level, which is ideal for smaller and larger teams.
✅ 200+ integrations across apps you’re probably already using, including communication and productivity.
✅ Build custom dashboards to monitor risks in real-time.
❌ Plan upgrade available in set increments of 5 and 10 users.
❌ Automation features are gated to the more expensive plans, which is why some teams have been looking for alternatives to Monday.
Next Steps For Compliance Teams: Get Started With SmartSuite & Our Templates For Free
Well, that was it: our list of the 10 best LogicGate alternatives on the market in 2025.
If you’re looking to build governance, risk, and compliance workstreams and effectively prioritize and mitigate risks, you can give SmartSuite’s free plan and ready-to-use GRC templates a chance.
Our platform offers just the right customization, native collaboration capabilities and a library of 200+ project management templates to help compliance leaders create and maintain a project management workflow.
Here’s what’s in it for your team when you try SmartSuite:
- Access to a generous free plan with features including multi-board views (Kanban, Chart, Map, Timeline, Card, and Calendar), 100 automations/month, and 40+ field types, including formula and linked record fields.
- No-code automation builder to set up to 500,000 trigger/action workflows.
- Built-in productivity tools, including time tracking, status tracking, and checklists.
- Team collaboration and planning tools such as whiteboards and SmartSuite docs.
- Resource management across projects and teams.
- 40+ field types, including the option to add your custom fields.
Sign up for a free plan to test the water or get a 14-day free trial to explore all its amazing features.
Or, if you’d like to talk to our team of experts, schedule a demo.
Read More
How to build a website disaster recovery plan: a 5-step guide

Downtime and service degradation cost Global 2000 companies $400B annually.
When disaster strikes and your website goes down, the consequences are severe: orders stop processing, customer support requests go unanswered, critical information becomes inaccessible, and your brand reputation suffers with each passing minute.
Without proper planning, companies of all sizes face existential risks when their digital presence suddenly vanishes. Creating an effective website disaster recovery plan (sometimes called a DRP) doesn’t require enterprise-level resources — just thoughtful preparation and the right strategies.
This guide will walk you through the essential steps to build a robust website disaster recovery plan to protect your business when the unexpected occurs.
What is a website disaster recovery plan?
A website disaster recovery plan is a strategy that outlines how an organization will restore its web presence after a disruptive event. Putting in place these parts should make a disaster feel less like a chaotic scramble and more like a controlled process:
- Thorough risk assessment identifying potential threats and vulnerabilities specific to your web infrastructure
- Recovery time objectives (RTOs) defining how quickly different website functions must be restored
- Recovery point objectives (RPOs) that establish the maximum acceptable data loss measured in time
- Detailed backup strategies for all parts of your website, including content, databases, configurations, and code
- Step-by-step recovery procedures tailored to different disaster scenarios
- Clear assignment of roles and responsibilities for the recovery team
- Regular testing protocols to verify the plan’s effectiveness
Why your organization needs a website disaster recovery plan
Most organizations significantly underestimate the likelihood of website disasters and the potential impact across all parts of their business. Investing in proper disaster recovery planning delivers returns far beyond technical resilience, touching every aspect of your organization’s health and competitive position, such as:
- Financial health: Beyond the loss of immediate conversion, brief outages can waste your marketing investments as paid traffic lands on non-functioning pages. Frustrated customers may turn to competitors when your website is down, impacting revenue and long-term reputation. Research shows that 88% of online customers are less likely to return to a site after a bad user experience.
- Operational continuity: Key business functions like order processing, customer support, and resource scheduling may grind to a halt without functional web infrastructure.
- Competitive advantage: Organizations that quickly recover from outages while competitors remain offline can capture market share during critical moments. More importantly, a reliable website builds the trust that underpins customer loyalty.
- Regulatory compliance: Many industries, such as healthcare, financial services, and e-commerce, must meet specific regulatory requirements regarding data protection and service availability or they’ll risk compliance penalties.
Understanding website disaster risks
Understanding the risks that could impact your website allows you to prepare targeted response strategies rather than attempting a one-size-fits-all approach. Website disasters typically fall into four main categories, each requiring different preventive measures and recovery procedures.
- Technology failures: Website disasters can originate from physical hardware failures that corrupt databases, network outages affecting connectivity despite functioning servers, or third-party service disruptions that disable core website functions like APIs, payment processing, and hosting.
- Human errors: Misconfigurations of critical systems (like servers and security settings) or human error (such as accidental file deletions) create the perfect environment for improper code deployments that introduce bugs or security vulnerabilities.
- Security threats: Your website faces constant security threats, such as ransomware and malware infections, that often serve as launching points for attacks that flood your website with malicious traffic. Additionally, data breaches frequently expose customer information, which results in lost customer trust and high regulatory penalties.
- Environmental disasters: Hurricanes, earthquakes, and floods can cause extended outages and regional internet disruptions that impact content delivery networks and DNS services.
Creating your website disaster recovery plan: 5 steps
1. Assess the risks
Risk assessment forms the foundation of any effective disaster recovery plan by identifying vulnerabilities before they can cause failures. Start with a thorough website infrastructure audit, including four key parts:
- Map all frontend and backend components (including servers, databases, content delivery networks, and third-party integrations) to identify potential points of failure
- Categorize the components by their importance to core operations
- Determine appropriate recovery time objectives (RTOs) for different website functions to maintain acceptable business operations
- Establish recovery point objectives (RPOs) for each data component, specifying the maximum acceptable data loss per time intervals
2. Document your procedures
Develop step-by-step disaster recovery procedures for each potential failure scenario, with clear instructions that any team member can follow. Here are some additional tips to keep in mind when crafting your documentation:
- Create system architecture diagrams that show connections between all website components and provide visual guidance during high-stress recovery situations.
- Document all configuration settings for web servers, databases, load balancers, and security appliances, so it’s available and accessible no matter the situation.
3. Backup important data
Implement regular backups of all aspects of your website, including code repositories, databases, media assets, and configuration files, with schedules aligned with your established RPOs. Store multiple backup copies in different geographic locations with onsite, offsite, and cloud storage to protect against regional disasters. To ensure that your backup strategy is effective, regularly test restorations to confirm data recovery processes. Teams that use Webflow benefit from automatic backups and knowing that infrastructure and hosting don’t have downtime, with Webflow engineers working 24/7.
4. Implement redundancy
To prevent regional disasters from impacting your website’s hosting environment, set up additional hosting environments in different geographic locations or cloud regions. Consider utilizing content delivery networks (CDNs), which cache your website content globally to maintain partial availability, even when origin servers fail. To round it out, configure DNS failover systems that quickly redirect users to backup infrastructure when primary systems become unreachable.
5. Test and validate
Conduct regular recovery simulations using realistic scenarios based on your identified risks, and test complete recovery procedures under different scenarios from partial to complete system failures. Treat these as formal experiences by measuring actual recovery times against established objectives, and use the discrepancies to identify improvement opportunities and bottlenecks in your process.
Key team members and responsibilities
With a website recovery plan in place, make sure you have the right team to execute it.
Core disaster recovery team
- IT leadership makes critical decisions about resources and priorities based on business impact.
- Web developers implement the actual recovery procedures, restoring code and verifying functionality across the recovered website.
- System administrators manage infrastructure recovery, including server restoration and security implementation.
- Database administrators ensure data integrity through database restoration, transaction verification, and consistency checks that prevent information loss during recovery.
Extended support
Communications and customer service employees need to be aware of any outages, so they can proactively contact affected customers, provide status updates, and manage inquiries during the recovery process. Designate individuals, like product managers, to communicate updates and manage expectations with these key stakeholders. They should also keep external vendors and service providers in the loop as needed.
Management and oversight
Ensure the executive leader (or group of leaders) secures appropriate funding, staffing, and priority within the organization. These folks should also be held accountable by regularly reporting on recovery readiness.
Best practices for website disaster recovery planning
- Automate where possible: Implement automated monitoring systems that detect issues and trigger alerts before users report problems. Also, consider automated testing tools that can validate your recovery environment’s functionality without manual involvement.
- Regularly review and update your plan: Schedule quarterly reviews of your disaster recovery plan to evaluate changes in your website architecture, business priorities, and threat landscape. Update documentation, objectives, and team responsibilities, and keep them accessible in project management software so they’re available even when primary systems are down.
- Train and prepare teams: To ensure new and former employees are up-to-date on changes, develop disaster and response training programs for technical and non-technical staff. Spin up testing environments, so teams can test failure response in controlled settings before a real disaster occurs.
- Create digital quick-reference materials with key recovery steps for different scenarios that team members can access during emergencies.
Securing your website’s future
Website disasters are not a matter of if but when. Following the five-step approach above will help your team thrive, not just survive, through the disaster.
Building and maintaining a website recovery plan can seem daunting, but it doesn’t need to be. Take it one step at a time, and you’ll have a robust website disaster recovery plan in no time. The time invested now in creating and maintaining your plan will pay dividends when disruption inevitably occurs.
Why legacy system migration matters and how to do it (7 strategies)
Upgrading to advanced system infrastructure maintains your website’s performance to meet increasing demands.
As your web platform scales, your current system might need more speed and capacity for efficient operation. This can lead to longer load times, reduced performance, and poor user experiences. Even in 2025, many organizations will face significant operational challenges if they haven’t modernized their underlying systems. Outdated systems also increase technical debt by accumulating postponed updates and hidden costs that eventually require more resources to fix.
Shifting to a more capable system infrastructure keeps your website delivering the fast, reliable service users expect. This not only improves customer satisfaction but also introduces new features and services that can further differentiate your brand in the market.
However, system migration can be a complex process that requires careful planning and execution for a smooth transition. Below, we’ll dive into how and when you should migrate your applications, data, workflows, and more from your old system to a new one.
What is legacy system migration?
Legacy system migration is the process of shifting outdated or obsolete platforms, software, or hardware to a modern environment so they can meet current and future business demands.
The problems with legacy systems
Web systems — the combination of hardware and software that power your website or web application — collectively handle key tasks such as data storage, processing, user content delivery, and security. Their performance directly impacts your site’s ability to serve information swiftly and reliably.
Legacy systems, however, often become obstacles in rapidly evolving online environments and hinder growth due to their inability to scale, insufficient security, and lack of adaptability. Let’s dive into specific problems these outdated systems pose.
Maintenance costs
Older systems can’t handle the increased load that comes with business growth. They can slow down, experience extended page load times, or fail to complete processes, leading to poor user experiences.
For example, if you’ve implemented on-site servers when first building your website, the increased traffic, processing, and interactions from business growth might slow or even incapacitate your initial setup. In such cases, moving to scalable hosting solutions like Amazon Web Services (AWS) or Webflow helps in effectively managing the increased server load and positions you to handle future traffic and complexity increases.
Compatibility and integrations
Modern businesses often integrate with various tools and services for communication, project management, and customer relationship management (CRM). Legacy systems might not support these integrations due to outdated software and hardware, limiting your organization’s ability to implement new features or improve existing ones to stay competitive.
Security concerns
Third-party security providers may no longer support legacy systems or lack the defenses to counter modern cyberthreats. These security gaps can lead to data breaches, damaging your business reputation and reducing user trust. As cybersecurity evolves, older systems become more challenging to protect due to their static nature.
Does your business need to migrate its legacy system?
Businesses often reach a point where their systems become outdated and hinder growth. For seamless scalability and growth, it’s vital to evaluate whether your legacy system needs migration.
System migration involves moving to new hardware and software systems and can be an intricate process, sometimes causing website or application downtime that impacts customers. Modernization, which updates your system while retaining its core structure, is an alternative. It’s often more cost-effective and less disruptive and is suitable when your system’s foundation remains solid but needs technological enhancements. If budget or time constraints are limiting factors, modernization is worth considering.
However, if your legacy system is obsolete and can’t be updated or modernized to meet your current needs, you must migrate to a new system. To determine whether migration or modernization is necessary, consider the following:
- Performance issues. If users encounter frequent slowdowns or errors and your website faces long load times, migration may be required to improve the user experience.
- Security vulnerabilities. Evaluate whether your system’s at risk of security breaches. Outdated systems often lack defenses against advanced security threats, like denial-of-service (DOS) attacks, making migration essential to protect sensitive data.
- Scalability. Assess whether your system can handle business growth and traffic increases. If scaling issues like seasonal traffic surges significantly slow down your operations, it’s necessary to move to a more robust platform capable of scaling with you.
- Vendor support. Make certain your system receives adequate support and updates from third-party service providers. Without it, migration might be your only option to keep proper functionality and adequate security.
- Integration. Check if your legacy system integrates smoothly with new technologies and tools. Difficulty integrating new tools can impede business operations, indicating a need for migration.
- Compliance requirements. Confirm that your system meets current regulatory and industry compliance standards, such as the European Union’s General Data Protection Regulation (GDPR), which focuses on data protection, and the Payment Card Industry Data Security Standard (PCI DSS), which helps maintain secure financial transactions. Noncompliance presents significant legal, financial, and business ramifications, making migration necessary.
- Maintenance costs. If maintaining your legacy system becomes too expensive or labor-intensive, migration could be a cost-effective solution in the long run.
Migrating to a new environment is part of broader IT modernization, enabling smoother workflows and more scalable infrastructure.
Below, we explore proven approaches to upgrading your systems while minimizing risk and disruption.
Migrate your site to Webflow
Unlock your site’s potential with Webflow. Migrate to a visual web platform, powerful hosting, and unmatched performance.
Get started today
↗
Migrate your site to Webflow
Unlock your site’s potential with Webflow. Migrate to a visual web platform, powerful hosting, and unmatched performance.
Get started today
↗
Get started today
7 legacy migration strategies
Before migrating systems, selecting the right migration strategy is crucial. This choice heavily influences operational continuity, user satisfaction, and financial investment. Here are seven common migration strategies to consider.
1. Lift-and-shift
This approach moves your legacy system to a new environment without any changes. It’s fast and cost-efficient but may not fully leverage the new system’s capabilities. If you require access to core customer data from your legacy system, lift-and-shift migration helps maintain its accessibility throughout the migration. For example, you can use this strategy to transfer core customer data to a cloud environment without changing it so your team retains access.
2. Replatforming
This strategy transfers your system to a new platform while preserving the existing code and functionality, allowing you to maintain essential features while gaining some benefits of the new environment. It’s a balanced choice between migration and modernization. Replatforming is best suited for businesses that need to update their technology stack but still want to retain their investment in their legacy system.
If your legacy system is robust and stable but lacks the capabilities required to meet new market demands or technical standards, replatforming adds modern features without needing to rebuild from scratch.
3. Re-architecture
Re-architecture involves redesigning and rebuilding your legacy system from the ground up. While this is an extensive and resource-intensive process, it lets you use modern technologies fully, future-proofing your operations.
For example, if you’re migrating a CRM system to the cloud, you can redesign the underlying architecture of its core functions and data to optimize it for the new environment. You might modify how it stores and accesses data to best leverage the increased computing power or alter the codebase to integrate with cloud-native analytic services for deeper customer behavior and preference insights.
4. Big bang
This all-at-once approach means completely abandoning your legacy system in favor of a new one. It offers a clean break but also carries high disruption risks since you’re starting over from scratch. The big bang approach is best for small to mid-sized companies with less complex systems that can afford short downtime periods. It’s ideal if your organization needs to move away from an obsolete system quickly and when the benefits of the new system significantly outweigh the risks involved in a sudden migration.
5. Phased migration
Phased migration breaks the process into steps by gradually moving components from the old system to the new. This helps minimize risk and downtime but also increases complexity and extends the migration period. Imagine you’ve developed several custom features specific to your business over the years. Instead of moving these all at once, a phased approach lets you carefully redevelop and transfer these features to the new environment one by one to help maintain seamless operation and integration.
6. Parallel migration
Here, both systems operate simultaneously until the new system is fully operational. This provides a reliable safety net and lets you return to your old system if issues arise during migration.
Imagine running a new cloud-based system in parallel with your legacy system. Doing so lets your team get accustomed to the new features and interface while preserving the data and functionality of your old one.
7. Hybrid migration
This flexible strategy combines different approaches tailored to your specific needs and objectives for a bespoke approach. For example, you might use lift-and-shift to move less critical systems, like internal reporting tools, without affecting core services. Then, to provide continuous customer support, you can leverage parallel migration to run your new customer service system alongside your legacy one. This lets your team get used to the new system while maintaining service quality.
Hybrid migration best serves businesses that operate around the clock and can’t afford significant downtime. It’s also suited for complex environments where different systems have varying levels of modernization and integration capability.
In addition to minimizing risk, this approach allows for iterative testing and optimization while maintaining business operations throughout the migration process.
How to run a legacy system migration: 6 steps
Running a successful legacy migration involves transferring existing data, applications, and infrastructure to a new platform. Here are six steps to streamline your transition:
- Align team members and stakeholders. Initiate the migration process by clearly defining the objectives to your team and getting buy-in from stakeholders. Foster a collaborative atmosphere by assigning clear roles and responsibilities to make certain team members work toward common goals.
- Develop a data strategy. Assess and categorize data slated for migration. Securely back up all data to safeguard against any potential loss or corruption during the migration process.
- Determine resource requirements and scope. Evaluate the necessary resources — including time, technical expertise, and budget — to create a realistic and achievable migration plan.
- Craft a detailed migration roadmap. Develop a structured systems migration plan detailing each phase of the process, designated responsibilities, and established timelines. This plan helps maintain consistency and clarity for all team members and serves as a communication tool to manage stakeholder expectations.
- Assess and mitigate risks. Create a structured legacy system migration strategy that identifies potential pitfalls — like data loss, compatibility issues with the new platform, and business operations disruptions — and outlines appropriate mitigation tactics. This helps you avoid unnecessary complications and helps maintain a smooth transition.
- Implement testing and continuous improvement. Before fully committing to the new system, implement testing protocols, like security, performance, and component testing, to confirm its operational capabilities. Following the migration, conduct regular checkups to refine your system’s performance and troubleshoot problems that arise.
Adopting new methods for progress and reliability
Change isn’t always comfortable, especially in the form of new systems. However, doing so is essential for your business to stay relevant and competitive, and enables you to meet evolving customer demands and leverage the latest technological advancements.
But you don’t need to do this alone. Partnering with an experienced web development platform can help you in the legacy system migration process. Just consider the success story of Wave’s migration to Webflow — a perfect example of how Webflow’s robust migration tools and support help streamline the process and provide a smooth transition to a more advanced, user-friendly platform.
Explore how Webflow Enterprise has been instrumental for businesses like Wave in upgrading their online presence, managing migrations effectively, and minimizing the complexities involved with such transitions.
Updating legacy technology is a practical step toward stronger performance, better security, and the flexibility you need to stay competitive in today’s marketplace.
Build with Webflow
Break free from the constraints of traditional platforms. Migrate your site to visual-first platform that combines design flexibility with powerful CMS capabilities.
Contact sales
↗
Build with Webflow
Break free from the constraints of traditional platforms. Migrate your site to visual-first platform that combines design flexibility with powerful CMS capabilities.
Contact sales
↗
Contact sales
Last Updated
May 29, 2025