• Skip to primary navigation
  • Skip to main content
software stack logo

Software Stack

Get your Software Stack together

  • Knowledgebase
    • All Categories
    • Accounting Software
    • Automation & Workflow Software
    • Customer Relationship Management
    • E-Commerce Shopfronts & Payments
    • Marketing Automation
    • Online Courses & Membership
    • Project Management
    • Surveys & Forms
    • Web Hosting
  • Home
  • About Us
  • Contact Us
  • Show Search
Hide Search

Teachable

Best ChatGPT Alternatives for Creators and Entrepreneurs in 2025

Software Stack Editor · April 29, 2025 ·

The rise of generative AI has transformed how creators and entrepreneurs approach content, strategy, and workflow efficiency. Generative AI is now by far the most popular form of AI tool, with 51% of businesses using it. While ChatGPT pioneered this revolution, it certainly has limitations that are causing some creators and entrepreneurs to look elsewhere. So, let’s explore leading ChatGPT alternatives and how they complement platforms like Teachable to empower creators and entrepreneurs in 2025.

ChatGPT vs Alternative AI Tools Crossroads street sign graphic

The AI Landscape

When ChatGPT debuted in November 2022, it redefined what AI could achieve, sparking widespread adoption among writers, marketers, and innovators. Its ability to generate text on demand made it a go-to tool for overcoming creative blocks. However, its success also highlighted gaps in specialization. Enter the era of ‘AI copilots’: purpose-built tools designed to tackle specific challenges, from SEO-optimized content creation to CRM automation.

These niche solutions cater to professionals who need more than generic outputs. For example, marketers require brand-aligned messaging, educators demand curriculum-building efficiency, and entrepreneurs rely on seamless integration with existing tools. While ChatGPT remains a versatile starting point, its broad-stroke approach often falls short in scenarios requiring domain expertise or platform-specific workflows. The result? A thriving ecosystem of alternatives that prioritize precision, customization, and reliability.

The Pros & Cons of ChatGPT

The Pros

As the most prominent and popular Generative AI LLM, or large language model, there are a lot of pros to its use. Just the nature of its popularity, as there are many guides and experts out there who can help you use it effectively. It’s also one of the most frequently updated models, with new capabilities end efficiencies being rolled out regularly. 

It’s become highly adept and popular for generating text, analyzing data, and even producing images, especially when using the hyper-advanced models accessible by the paid tiers ($20 per month for ChatGPT Pro). Its popularity as a sort of ‘baseline’ for LLMs and generative AI means there are many integrations and plugins developed for it, making it quite an adaptable piece of kit.

The Cons

But despite its popularity, there are some downsides.

While ChatGPT offers a free tier that lets content creators experiment with prompt-based writing without upfront investment, it can oversimplify nuanced topics, occasionally producing over-generalized or generic prose. Many entrepreneurs appreciate how quickly it can produce outlines, email drafts, and code snippets, but this rapid generation sometimes sacrifices depth and factual accuracy. 

In addition, ChatGPT’s standard models can have quite small context windows, making it challenging to maintain coherence in longer-form content without frequent prompt engineering, which can push you towards the premium models.

The popularity of ChatGPT is a double-edged, as people are growing more adept at spotting text it generates due to common, recurring turns of phrase. Ever noticed how many articles you see online start with something like “in the rapidly evolving business landscape” since ChatGPT hit the market? 

And while ChatGPT has functionality for direct integration into applications, this often requires selecting separate API pricing plans and navigating fixed subscription tiers, adding complexity and integration overhead that many creators would rather avoid. 

Let’s not forget the infamous hallucinations. While things have improved, ChatGPT is still known for confidently offering plausible-sounding information that can be incorrect or misleading, an issue that poses real risks when teaching or marketing requires factual precision. 

Taken together, these trade-offs are leading many creators and entrepreneurs to investigate purpose-built AI alternatives that offer specialized workflows, tighter integrations, and higher reliability.

Best ChatGPT Alternatives

Google Gemini

Google Gemini has emerged as a powerhouse for entrepreneurs deeply embedded in the Google ecosystem. Integrated across Workspace apps like Docs, Gmail, and Slides, it streamlines tasks such as drafting emails, summarizing meeting notes, and generating presentation outlines. Its ability to pull data from Google Drive and Calendar reduces context-switching, enabling users to transition from brainstorming to execution seamlessly. 

Google offers a variety of packages for Google Gemini use. On the one hand, this means you can be selective and pay for what you actually need, but on the other hand you’ll need to do some research on the different models, pricing tiers, and what you need Gemini for to know what you should purchase. 

Perplexity AI

Perplexity AI distinguishes itself as a research-focused tool, delivering concise, citation-backed answers by scouring live web data. Its ‘Deep Research’ mode mimics an expert’s workflow, analyzing multiple sources to generate comprehensive reports, which makes it ideal for fact-checking or competitive analysis. The free plan includes unlimited quick searches, while the Pro tier ($20/month) offers advanced models, more in-depth searches and file-upload analysis for deeper dives.

Claude

Anthropic’s Claude excels in generating natural, human-like text, thanks to its Constitutional AI framework. With much larger context window than ChatGPT’s free models, it can maintain coherence across long-form content, making it perfect for summarizing reports or drafting detailed narratives. The free version suits casual users, while Claude Pro ($20/month) unlocks priority access to updates and higher usage limits.

Microsoft Copilot

For teams reliant on the Microsoft Suie, Copilot embeds AI across Word, Excel, and Teams, automating tasks like data visualization, meeting summaries, and email drafting. While basic features are free for subscribers, the Pro suite ($20/user/month) includes collaborative ideation tools and custom agent creation via Copilot Studio, positioning it as a holistic productivity enhancer.

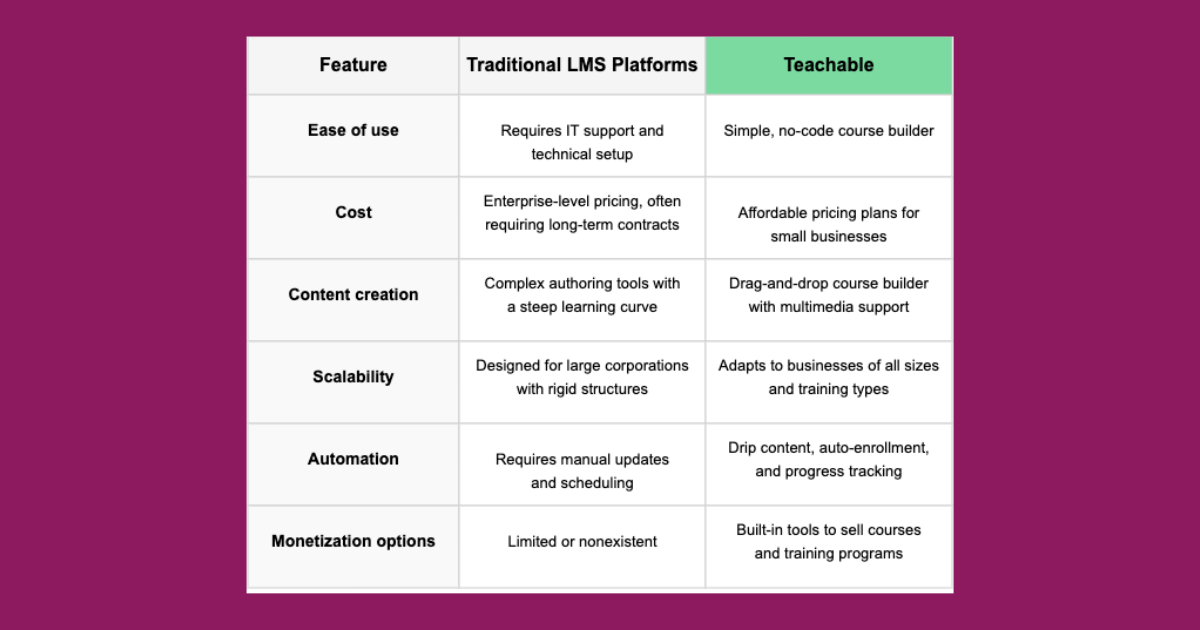
Teachable AI, Easy to Use With ChatGPT Alternatives.

Teachable can complement these ChatGPT alternatives, while also embedding no-code AI directly into the course-building workflow, which reduces the need to context-switch. 

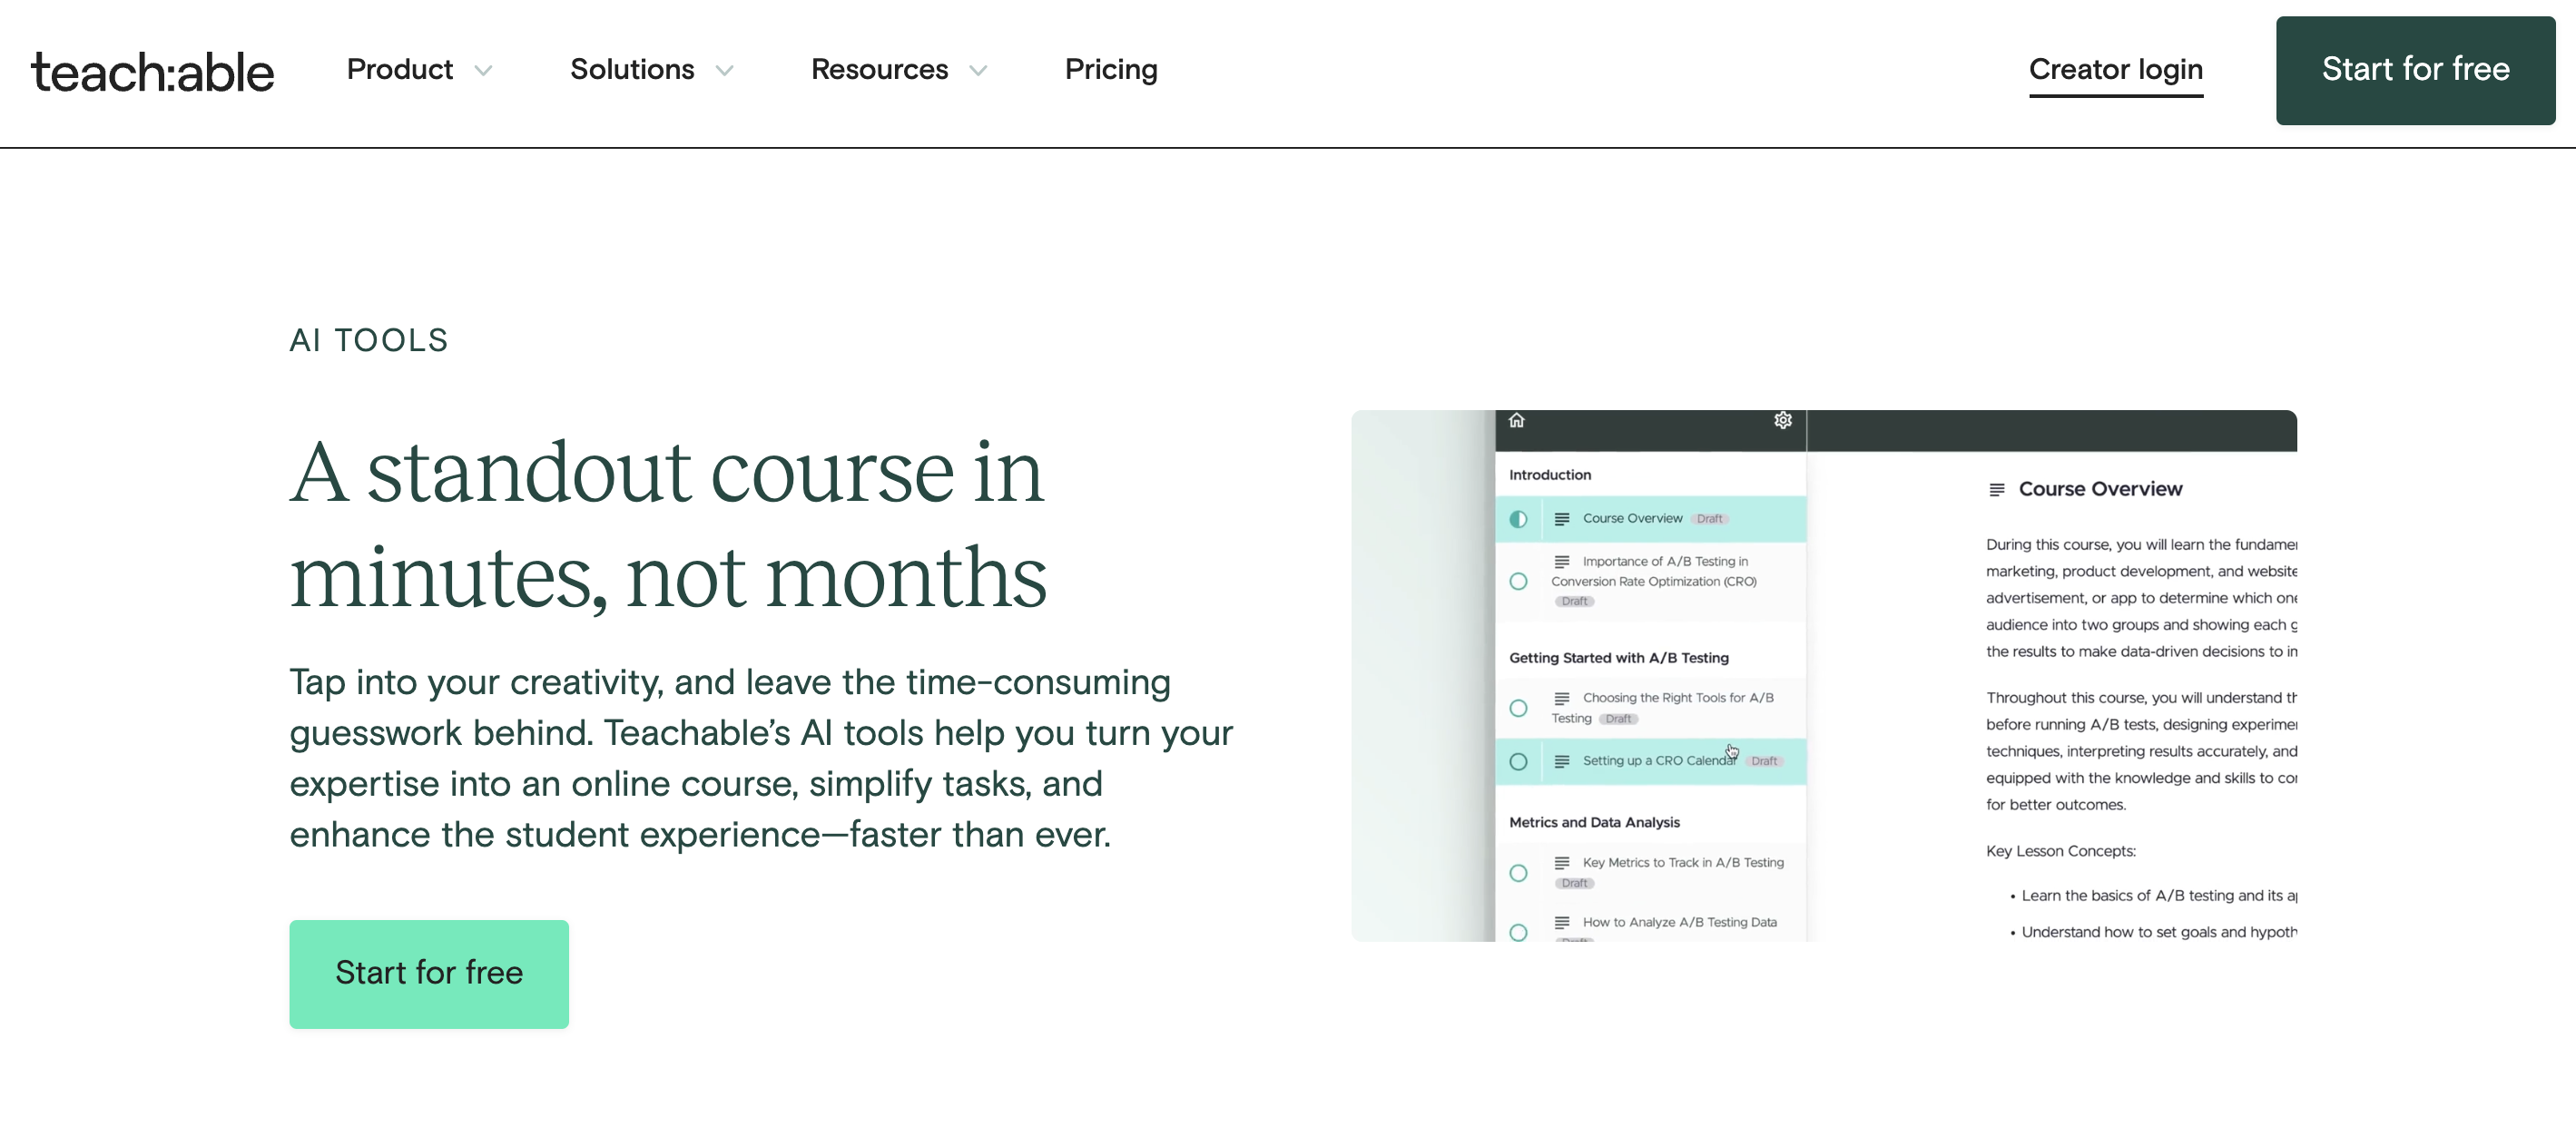
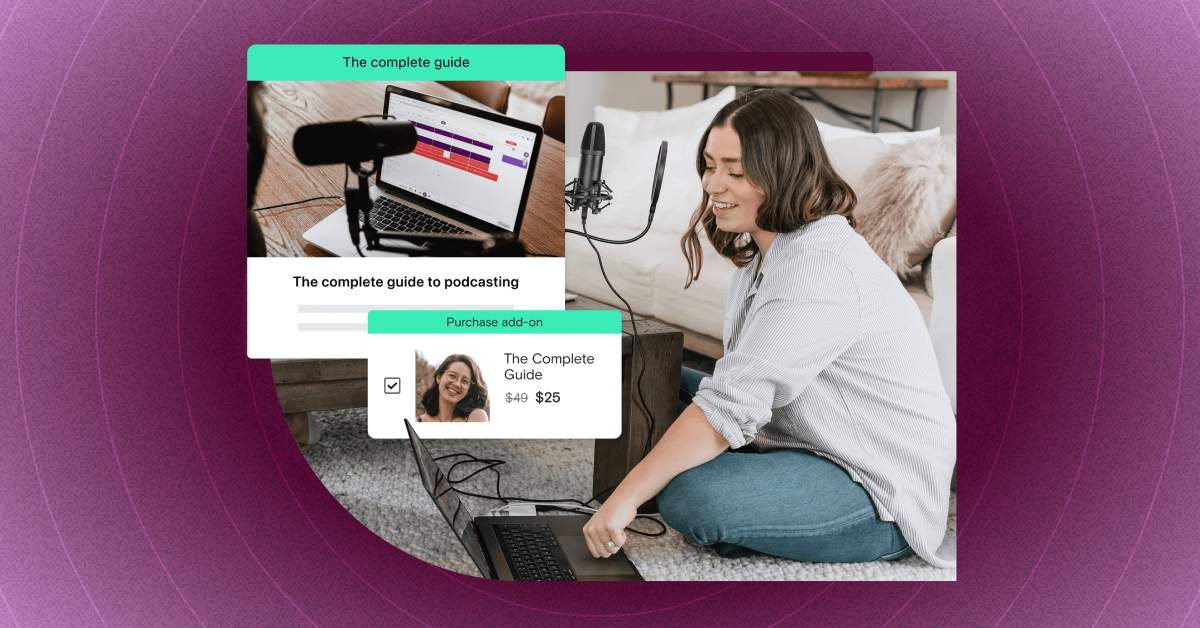
For example, the Teachable AI Course Curriculum Generator allows you to input a course title and description and receive a full outline in seconds, including sections, lessons, and even sales-page copy. You can then combine these materials with ChatGPT to produce marketing materials like social media posts and email campaigns to promote the course.

For creating the lessons themselves, you could combine Perplexity AI’s deep research, or Claude’s long form content capabilities with Teachable’s AI Hub to craft lecture scripts, which can then be used to produce quizzes and summaries using Teachable’s AI capabilities, like the Teachable AI Quiz Generator.

Meanwhile, Gemini and Copilot’s integrations with the Google and Microsoft Office suites allow for adaptability in working across those suites, allowing you to plan lessons and courses with integrations across your calendars and email inbox.

This is just the start. Teachable’s extensive AI features and how they complement CHatGPT alternatives makes it ideal for creators and entrepreneurs developing courses and learning materials. 

Final Thoughts

Selecting the right AI tools hinges on your workflow’s unique demands. The ChatGPT alternatives out there all have specific strengths that make them suited to different needs, so you need to think hard about what you’re trying to achieve to guide your choice.

Once you’ve chosen the tools you need, Teachable’s AI capabilities are ready to supercharge all your course and learning materials creation. Once you find the most effective, AI-driven workflows, these tools will become more than just productivity boosters, they can be strategic partners. 

AI should help you grow your business, especially for internal processes. See how Teachable AI tools can power your next project.

FAQs concerning ChatGPT alternatives

1. How do I decide which AI tool is the best fit for my business needs?

Start by mapping your most critical workflows and identifying bottlenecks.

  • If you need research depth, Perplexity AI may be best.
  • If you work heavily in the Google ecosystem, Gemini integrates seamlessly with your existing tools.
  • For long-form content or course creation, Claude’s expanded context window outperforms other models.
  • If you need broad team-wide productivity enhancements, Microsoft Copilot could be ideal.

No matter which tool you choose, Teachable’s built-in AI features complement these systems by streamlining course-building, automating quizzes, and accelerating marketing material production, all critical tasks for creators scaling their businesses. 

2. Can I use multiple AI tools together with Teachable, or do I have to pick just one?

You can (and should) combine tools strategically.Think of Teachable as the central hub for your course and coaching business. Tools like Gemini, Copilot, and Perplexity can be used to feed research, outlines, and marketing ideas into Teachable’s AI-powered course builder, sales page generator, and quiz creator. This “stacked AI” approach saves time, reduces manual admin, and ensures your content is higher quality and more aligned with your brand, without needing heavy technical expertise.

3. What are the risks of using ChatGPT or alternatives for creating educational content?

The main risks include:

  1. Inaccuracy or “hallucinations” (false information presented as fact).
  2. Generic outputs that lack your brand voice or audience specificity.
  3. Over-reliance on AI at the expense of original insights or personalization.
    ‍

Teachable’s AI tools help mitigate these risks by offering structured, guided workflows that keep you in control of the final product. Combining generative AI outputs with your expertise ensures your course material remains credible, customized, and impactful.

4. How does Teachable’s AI compare to standalone AI tools like Gemini or Claude?

Teachable’s AI is purpose-built for creators and entrepreneurs. While Gemini, Claude, and others are versatile generalist tools, Teachable’s AI is embedded directly into course creation, sales page writing, quiz generation, and content repurposing workflows.

5. Will Teachable continue expanding its AI features in the future?

Yes. Teachable is actively investing in enhancing its AI Hub, with a strong focus on helping creators and entrepreneurs:

  • Automate more administrative tasks (e.g., student communications, progress tracking).
  • Expand content creation capabilities (e.g., video scripts, marketing funnels).
  • Integrate more seamlessly with external AI tools to create even smoother, cross-platform workflows.

In short: as AI evolves, Teachable’s platform will evolve with it, giving you more tools to save time, grow your audience, and future-proof your business in an increasingly competitive creator economy.

Automate Online Course Sales with Teachable, Manychat & Zapier Integration

Software Stack Editor · April 24, 2025 ·

Many online course creators are juggling a lot at once – launching new offers, onboarding new students, engaging existing students, and staying on top of their marketing channels. You may wonder – how do all these content creators manage to handle it all?

The truth is that most successful creators aren’t doing many of these tasks manually. Instead, they use smart automation to build systems in their business that allow them to sell, support, and scale – even while they sleep.

Teachable + Manychat + Zapier integration is one of the most potent automation tools for online course creators, and it can save you hours of your precious time every week without compromising your earning potential. In fact, it may even allow you to increase your revenue. 

If you’re curious to learn more about how Zapier automation for course creators with Manychats can help transform your business, read on.

Teachable + Manychat + Zapier integration: what it solves

Before we dive into the “how,” let’s first get clear on the “why.” So, why would you, as an online course creator, bother to connect Manychat with Teachable through Zapier?

Well, Teachable is your online classroom while you’re the teacher running the show. Every teacher needs a good assistant. That’s where Manychat comes into play – it can be your virtual assistant that chats with leads and students on Messenger, Instagram, via texts, or more.

Consistently nurturing your warm leads, attracting cold leads, and engaging with your existing students is a key to success for your online course business. But doing all of it manually is a lot for one person, and that’s why Manychat is so handy – it can handle many repetitive tasks so you can focus on other parts of your business.

You may wonder – what does Zapier have to do with any of it? Zapier is the tool that bridges the gap between Teachable and Manychat by allowing these two platforms to share information automatically.

Together, this integration helps you:

  • Auto-enroll new students and send them personalized welcome messages via Messenger, text, or WhatsApp.
  • Warm up leads and answer any questions they may have about your products.
  • Send online course updates, reminders, and bonus content so your students are always engaged.

And that’s just the tip of the iceberg of what this integration can help you do to enhance your business while also saving you time and effort.

How to connect Manychat to Teachable: a step-by-step walkthrough

Here’s how to build a simple automation step-by-step. No coding experience required.

Prerequisites

You’ll need to have a Teachable Pro account (or higher) and an active Manychat Pro account to set up this automation. You can set this up with the basic Zapier plan (free), which allows up to 100 actions per month (meaning your school has up to 100 enrollments per month). If you need more than 100 actions per month, then you want to upgrade to one of Zapier’s paid plans.

Step 1: Create a Zapier account

If you don’t already have a Zapier account, create one. It only takes a couple of clicks.

‍

‍

Step 2: Create a Manychat Pro account

Next, you’ll want to set up your Manychat Pro account if you don’t have one already. The process takes about 10 minutes.

‍

‍

Step 3: Connect Teachable

Now that you have Zapier and Manychat set up, it’s time to connect your Zapier to Teachable’s platform.

Go to your school’s dashboard on Teachable’s platform and find the App Hub.

‍

‍

Scroll down until you find Zapier. Click the Set Up button in the top right corner of your screen.

‍

A new window will pop up. Here, click on View All to see all the integrations available through Zapier.

‍

‍

You’ll be taken to the page where you can search for the Manychat app.

‍

‍

Another window will pop up, where you need to click the Connect These Apps button in the middle.

‍

‍

Immediately, you’ll be taken to your Zapier dashboard, where you can create your Zap.

‍

‍

Step 4: Set up the Trigger

‍

So, let’s say you want to use this Teachable Manychats Zapier integration to boost student engagement. At the end of each lecture, you have a graded quiz that allows your students to test their knowledge. But that’s not enough – you want to take it a step further.

‍

Set up the Trigger event to be a New Graded Quiz Result.

‍

‍

Step 5: Set up the Action

Next, you need to set up an Action that follows whenever the Trigger is activated.

So, to engage your students whenever they finish a graded quiz in your course, choose Send Content to User. This will allow you to set up a message to any students who did the quiz with content in it.

‍

‍

In the User field, you can choose when the student qualifies to receive a message from you. So, for example, if the student aced the quiz, you can set up to send an automated message like: “Congrats on passing the quiz! Here’s the link to your next module.”

‍

‍

Step 6: Test your new flow

‍

Zapier allows you to test your new automation flow to ensure that every step works as intended. So, take the time to test every part of your automation to ensure a good experience for your students.

Use cases for business creators

With this integration, you’re not only automating tasks – you’re unlocking new ways to serve your audience, close more sales, and keep your existing students engaged across different platforms. Here’s how pro creators are using Manychat and Teachable to grow their businesses:

Flash sales funnel

Let’s say you’re running a 48-hour flash sale on one of your online courses. Here’s how this integration can help you optimize your sales funnel.

With the help of Manychat, you can build a Messenger or Instagram DM campaign to promote the sale – in all of your social media promo posts, invite your audience to comment or DM a word related to this flash sale.

Everyone who does it will receive an automated message from Manychat with all the information about the sale. That includes things like countdown timers, bonuses, links to the sales pages, and urgency-driven CTA’s.

With the help of Zapier, you can set up an automation where when someone clicks the “Buy Now” button on your sales page and completes the purchase on Teachable, you can instantly enroll them into the course, send them a confirmation message in Messenger, or send them a text and tag them at the back end with a useful tag that will help you determine the success of your flash sale.

No one falls through the cracks with this setup. You build real-time momentum, automate delivery, and segment your students to know what to upsell to them next at a later date. The best part? You do this all without lifting a finger in real time – you only need to set up the automation once.

Waitlist to enrollment funnel

For high-ticket courses and cohort-based course launches, building a waitlist is key – and Manychat comes in handy here.

Manychat allows you to create a conversational opt-in flow, something along these lines: “Want to be the first to sign up for [Course Name]? Click a link here to join the exclusive waitlist.”

Then, you use Manychat to nurture those people who signed up to be on the waitlist with sneak peeks, behind-the-scenes content, or limited-time offers to keep the list engaged all the way until the launch date.

Once the launch day approaches, Zapier can help you set up an automation that seamlessly organizes the students who enroll through the special link. They’re automatically enrolled into the course, removed from the list for further promos on Manychat, and moved into a post-purchase flow of onboarding, next steps, and community invites.

This flow allows you to capture warm leads and turn them into excited students without messy spreadsheets or manual tagging. Students receive world-class experience, and you save time and prevent additional stress from getting everything right manually.

Event follow-up campaigns

When you host a live webinar or Instagram Live to build a buzz around the upcoming product launch or a topic you may be testing out for a potential course, you want to capitalize on the momentum and do it fast.

Manychat allows you to capture opt-ins during the live event. You can automate a message that entices people to DM their emails to you so you can send a freebie on a topic related to them. The emails are then automatically added to your list and tagged, and people receive the freebie without you having to lift a finger.

If you have a free online course on Teachable, you want to promote it with a live event, and Zapier can help enroll every person who attends the event in your course. Manychat then sends personalized messages with login links and support details to everyone who’s enrolled.

This automation lets you turn attention into action and gives you an opportunity to reward engagement with immediate value without wasting any time and missing out on the opportunity window.

Tips for optimization

Once your Zap is up and running, it’s time to optimize. These pro-level tweaks help you improve performance and scale smarter:

  • Use tagging logic strategically: Zapier helps you automatically tag users with Manychat, but if this feature is used without a strategy, it can become useless. Use tags for things like tracking which courses users purchased, segment your leads by interests, and trigger relevant follow-up sequences.
  • Monitor drop-off points: Manychat has analytics that gives you an in-depth look at how people interact with your flows and at what point they stop interacting with you. This data is valuable–monitoring the drop-off points allows you to improve your flows and learn exactly what works with your audience.
  • Always A/B test for better conversions: The best way to create an automation flow that converts is to test what works with your audience. With Manychat, create two versions of your automation, split the traffic 50/50, and see which performs better (clicks, replies, enrollments). Use the winner as your main sequence, and move on to testing other parts of the flow, such as CTAs or bonus content, to nail down what brings the best results.

Save 5+ hours a week with automation

Manual follow-ups and onboarding don’t have to take up your best creative hours. Connect Teachable, Manychat, and Zapier so you can:

  • Engage your students in all parts of their journey
  • Capture more cold leads and turn them into warm leads with less effort
  • Direct your energy into tasks that matter most for your business–content creation

FAQs

Can I use this integration with my existing email marketing platform (e.g., ConvertKit or Mailchimp)?

Yes. Zapier allows you to create multi-app workflows. You can set up automations that not only connect Teachable and Manychat but also integrate with tools like ConvertKit or Mailchimp to send follow-up emails, segment users, or deliver drip content.

How do I track the ROI of my automation setup?

You can track ROI by tagging users through Manychat, monitoring conversion events in Teachable (like enrollments), and reviewing click-throughs and interactions in your Manychat analytics dashboard. Set benchmarks such as enrollment rate, open rate, and time saved weekly to measure impact.

What happens if a student unsubscribes from Manychat or Messenger?

If a student opts out of Messenger, they won’t receive further messages via that channel. However, you can use fallback channels like SMS or email (also integrated via Zapier) to keep them in your communication loop. Always diversify channels to ensure consistent touch points.

Sign up or upgrade your Teachable plan to Professional (or higher) and set up your first automation today. 

‍

What Creators Should Know About Dopamine and Productivity

Software Stack Editor · April 23, 2025 ·

All entrepreneurs know that motivation is slippery. Some days, you’re in the zone, ideas are flowing, your to-do list practically checks itself off, and you’re high on creative energy. Other days may not look as good. You’re staring at the blank screen, juggling a million tabs, and wondering why your brain feels like running on 3%.

You know the feeling, right?

Here’s the good news: it’s not just you. There’s a powerful chemical in your brain – dopamine – that plays a huge role in how motivated, focused, and productive you feel every day. Understanding how dopamine works can help you harness its power to build better habits, get more done, and even enjoy the process.  

So, let’s dig into the science of dopamine and productivity so you can learn exactly how to make it work for you, not against you.

Dopamine 101: The brain science behind motivation

Dopamine is a neurotransmitter that helps transmit nerve impulses related to pleasure and reward. When we shop or eat chocolate, our dopamine release system is triggered, and we experience a “dopamine rush.”

This feel-good neurotransmitter is responsible for reinforcing behaviors. Meaning that if something feels good, our brain encourages us to return for more (hence why we can’t stop at one piece of chocolate and it’s so easy to eat the whole bar).

While dopamine is often called the “feel-good” hormone that’s all about pleasure, it’s much more than that. “This chemical evolved in you for one simple reason – to make doing hard things feel good,” explains neuroscientist TJ Power.

For hundreds of thousands of years, humans exerted a lot of effort to find food by hunting and foraging and stay safe by exploring new lands with better living conditions and building shelters. Dopamine was the key chemical that drove our ancestors to achieve their goals, and that’s still relevant to this day.

Unfortunately, the modern lifestyle has a negative effect on our dopamine pathways and, in turn, hijacks our motivation. Unhealthy diets, social media scrolling, online shopping, and other similar things that are so easy for us to engage in cause quick dopamine spikes that are followed by sharp dopamine falls, which reduce motivation and may even make us feel depressed.

When our dopamine system is balanced, though, we feel like we’re “on it” – flowing from one task to the next with clarity and energy. That’s why balancing the dopamine release in our brains should be done by everyone who wants to increase their productivity.

Why creators should care about dopamine

As we discussed, dopamine fuels goal-directed behavior, and we can experience pleasurable dopamine spikes when we finish a project, hit a business milestone, or check off a task on our to-do list.

For this reason, dopamine is a key player for creators and solopreneurs who juggle creative work, admin tasks, marketing, and sales every week while running a business. Understanding the way dopamine works in your brain can help:

  • Prioritize tasks based on the expected reward
  • Boost focus and motivation to pursue the right goals
  • Form habits that help you be more productive

At the end of the day, as a creator, your brain is your most valuable asset. So, keeping it healthy and sharp is the key to productivity and successful long-term business.

Align dopamine with your workflow

Not all tasks in your business are created equal. Creative work tends to be high-dopamine because it’s novel, challenging, and highly stimulating. But admin work? Customer emails? Not so much.

By evaluating how you feel, and which tasks in your business spark dopamine in the positive way can help you structure your days to maximize the dopamine release in your brain so you can get much more quality, productive work done instead of spending hours procrastinating.

Delegate low-dopamine tasks

Once you identify tasks that drain your energy and dampen your motivation, consider outsourcing them or learning to utilize automation tools to help make them as easy and effortless as possible. Freeing up your brain for high-value tasks will help you be much more efficient with your time and efforts.

Set “success routines” that trigger dopamine

Once you understand how to optimize your dopamine release and make it consistent, you’ll soon notice a positive shift – instead of craving a cookie during your mid-afternoon slump to help you get through the day, you’ll start craving deep work sessions and tick off tasks on your to-do list.

How to make dopamine work for you

Now that you understand the “how” and the “why,” it’s time to talk about the strategies and tactics to help you harness the power of dopamine to optimize your productivity. Here’s how to use dopamine to your advantage and build your personal sustainable motivation engine:

Morning protocols that prime your brain

The way you start your morning sets the tone for the whole day. To promote a slow dopamine release that will keep your productivity and motivation stable throughout the day, implement these habits into your morning routine:

  • Avoid looking at your phone immediately after waking up to avoid the quick spike of dopamine.
  • Make your bed immediately after waking up.
  • Brush your teeth and wash your face before you check your phone.  
  • Spend 5-10 minutes meditating while bringing your focus and awareness to your body while you breathe.
  • Take a cold shower.
  • Get outside your house to move your body (even for a short walk) and to get some sunlight onto your face (even if it’s cloudy)
  • Choose a healthy, well-balanced breakfast that’s full of protein to help promote slow dopamine release and avoid glucose spikes from sugary foods first thing in the day.

These easy-to-implement, low-cost morning habits can absolutely transform your day.

Dopamine detox

Dopamine detox has been gaining popularity in the recent years, with many prominent entrepreneurs promoting dopamine detox as a way to transform your life. Technically, there’s no such thing as a dopamine detox. However, we can reset the way dopamine is released in our brain which can greatly improve our mood and productivity.

Here’s how to reset your dopamine for better productivity:

Step 1: Do a digital detox

Choose a half-day or a full day when you can unplug from all the digital “junk stimuli” to reset your brain. That means no social media, no YouTube, Netflix, or other streaming services, and, ideally, no phone.

Ideally, you want to spend that time with your loved ones, simply spend quality time with yourself at home, or go for a walk to clear your mind and move your body. It will feel uncomfortable at first, especially if you find yourself feeling bored. Push through that feeling – it’s only temporary, and it’ll pass.

Step 2: Avoid quick dopamine hits

Quick, unnatural dopamine-promoting activities throw our whole dopamine system out of whack and take us on a rollercoaster of emotions. To minimize that rollercoaster and to rewire the way your brain releases dopamine, avoid these quick dopamine hits:

  • Refined, sugary snacks
  • Watching short videos on TikTok, Instagram Reels, YouTube Shorts
  • Mindless scrolling on shopping apps
  • Playing mobile games
  • Tapping through Instagram Stories
  • Drinking alcohol and taking drugs
  • Watching porn

Step 3: Engage in low-stimulating activities

Once you have done the digital detox and cut out or minimized all the quick dopamine-hit activities, it’s time to start introducing low-stimulating dopamine-releasing activities to help you slowly rewire your brain and what forms of stimuli release dopamine. Do things that naturally increase dopamine, such as:

  • Every morning, make your bed properly
  • Spend time walking outside to get sunshine (60 minute walk is enough for your brain to start releasing dopamine)
  • Learn new information
  • Take cold showers
  • Cook healthy food at home
  • Journal and reflect
  • Meditate
  • Engage in deep work
  • Spend time every day reading

Soon, you’ll notice how much clearer your mind feels and how much more stable your mood becomes.

Step 4: Keep your home tidy

Funny thing, but cleaning your home, changing sheets, and making your bed are all activities that may sound tedious (and make you want to avoid them at all costs), but all of them release dopamine in your brain.

As you clean your home and experience that satisfaction at the end of having accomplished that, you train your brain to seek our hard, unpleasant tasks (cleaning) in pursuit of that sense of accomplishment that will extend far beyond your home.

Batch tasks and pair with rewards

Task batching is an effective tool to help you be more productive, and combined with effective reward system, it can be even more effective. So, how do you do it?

Group similar tasks – like emails, client calls, editing, etc. – in one chunk to reduce the mental costs of switching tasks. Then, pair the batch with a small reward to boost your motivation:

  • Do a batch of emails → go for a 30-minute walk.
  • Spend two hours answering social media comments and DMs → grab a coffee from your favorite coffee shop.
  • Do three hours of deep work filming videos for your online course → read a book for 30 minutes.

This kind of positive reinforcement trains your brain to crave productivity.

Tools & habits that keep the dopamine flowing

Okay, it’s time to bring the tools and dopamine-friendly habits together to create fool-proof systems that help you thrive in your business:

Automate the energy drainers

What tasks in your business are making you feel drained and unmotivated and always cause procrastination? Identify these tasks and find ways to automate them within your business to remove the friction. Less friction means more energy and creative flow for the stuff that actually moved the needle.

Teachable has an array of features, like an AI quiz creator, that allows you to automate your quiz creation process quickly. All you have to do is click a couple of buttons, and the platform will automatically create a quiz to test your students’ knowledge based on your course material.

Also, Teachable offers Zapier integration that lets you quickly connect to your email providers to make communication easier, marketing tools to make marketing effortless, and much more. Make sure you’re taking advantage of these tools to maximize your productivity.

Time-block around peak energy

Your brain isn’t equally productive all day. Each of us is different – while one may be more productive during the morning, others may prefer to do deep work in the afternoons. It’s important to know what works for you.

Track your energy patterns for a week, and figure out when is your most productive time of the day. Block off your high-energy hours for your most important work and tailor your slow dopamine-releasing habits around those hours to maximize your productivity.

Adopt a “create once, sell forever” mindset

Motivation and productivity aren’t just about quick, fast wins, aka “dopamine hits” – it’s all about long-term motivation when you see progress toward meaningful goals unfold over time. That’s where the “create once, sell forever” mindset comes in.

When you build evergreen assets like digital products, online courses, or blog content that drives traffic for years to come, you’re creating a system that provides ongoing rewards from a single burst of creative effort. This way, your brain gets a consistent source of dopamine over time.

So, focus on creating content and products that will continue to bring in the results for years to come, such as:

  • Digital downloads
  • Online courses
  • Evergreen YouTube videos and blog posts
  • Webinars

Also, make sure you’re tracking the performance, recording the small wins along the way, and celebrating them to keep the motivation going.

{{trial-component=”/blog-shortcodes/blog-cta”}}

Work with your brain, not against it

Sustainable motivation isn’t about willpower. It’s about understanding your brain chemistry and creating systems that help you support it.

When you start noticing your habits and behavior patterns and how they affect your brain activity and capacity, you can build a more productive work life, which will help you build a long-term successful business that doesn’t just look good on paper but also feels good to run.

Don’t wait for the motivation to magically strike. Set yourself up to win by using these slow dopamine-release strategies and tips to maximize your productivity and ensure you always feel your best. When you feel good and your business runs well because of it, you’ll become unstoppable. 

‍

7 insights for building a resilient creator career from a few of Teachable’s top creators

Software Stack Editor · April 17, 2025 ·

image

The future of creator success isn’t about Numbers. It’s about depth.

In 2008, Kevin Kelly’s idea of building a business with just 1,000 true fans felt revolutionary. For creators, it offered clarity: You didn’t need to reach millions, just the right few who’d support your work year after year.

But fast forward to today’s creator economy, and that benchmark feels like a relic.

Creators aren’t just contending with platform algorithms and audience fatigue, they’re now competing with AI-generated content that can replicate surface-level expertise in seconds. In a world where anyone can manufacture a personal brand, what actually builds a resilient creator career is deeper: character branding, authentic storytelling, and intentional community-building that algorithms and AI simply can’t replicate.

As Terry Rice shared in a recent conversation on Teachable’s I Don’t Want a Life I Need to Escape From video, “Personal branding is going out because it’s so easy to manufacture with AI. Character branding — revealed through your stories and your actions — is what really matters.”

This article unpacks the top seven insights from that conversation, giving you a blueprint to build a sustainable, resilient creator career that’s rooted in authenticity, not follower counts.

[embedded content]

1. Character branding over personal branding

In a world saturated with highlight reels and AI-curated personas, character branding is what truly cuts through. Unlike personal branding, which can be easily constructed with the right filters and captions, character branding is rooted in your consistent actions, values, and stories.

Colin Rocker framed it best: “Character branding is revealed through your stories and your actions, not your brand.”

Action Step:

  • Reflect on three pivotal moments in your life. What did they teach you? How can those values show up in your content, offers, and brand voice?

2. Vulnerability fosters real connection

Your most painful moments may just be your most powerful. Terry Rice spoke candidly about battling addiction and losing close family members. These experiences fortified his brand. Why? Because they established what he calls “unimpeachable authority.”

When you speak from lived experience, you build trust fast. People follow character, not perfection.

Action Step:

  • Choose one story you’re scared (but ready) to share. Draft it into a post or a story script. Lead with what you learned, not what you lost.

3. Do things that don’t scale

Want to build a strong community? It starts with showing up in the smallest, most unglamorous ways. Think: hosting five-person coffee chats, curating guest lists manually, or writing hand-written thank-you notes.

As Brett Dashevsky puts it: “You’re going to have to do things that don’t scale and you got to be consistent.”

Action Step:

  • Host a micro-event or live call with 5-10 people from your community. Make it invite-only. Focus on depth.

4. Revisit and expand beyond 1,000 true fans

The 1,000 true fans model is incomplete. Terry and Brett both emphasized that creators today need hybrid strategies: part community, part partnerships.

In fact, many creators earn more from strategic brand partnerships than from direct fan support.

Action Step:

  • Audit your income streams. Are you over-relying on fans? Could you introduce a course, partnership, or licensing deal?

5. Mindfulness is the antidote to AI

AI tools like ChatGPT and Claude can help structure your thoughts, but the original ideas, metaphors, and stories have to come from you.

As Terry said: “AI is only useful when you start with natural intelligence.”

Action Step:

  • Start a daily creator journal. Ask: “What did I experience today that could become a story?”

6. Build trust offline to scale online

Real-life events are quickly becoming the highest form of proof that a creator is trusted. From mixers and dinners to panel talks, taking your audience offline leads to stronger, long-term bonds.

Colin shared how he’s using in-person events to build not just community, but also his speaking and product ecosystem.

Action Step:

  • Plan a live workshop or event, even if it’s in a coffee shop or your own backyard.

{{trial-component=”/blog-shortcodes/blog-cta”}}

7. Play the long game (with anti-goals)

The most overlooked part of creator strategy? Clarity on what you won’t do. Anti-goals are just as critical as goals. Brett emphasized the importance of knowing who shouldn’t be in the room and what events aren’t worth your energy.

Long-term success is all about integrity.

Action Step:

  • Write your creator anti-goals: What won’t you do, even if it’s popular? Who won’t you serve?

Resilience is a practice, not a destination

True fans matter but your character matters more.

Building a resilient creator career means leading with story, not strategy; showing up with consistency, not convenience. It’s about depth, vulnerability, and connection.

And it’s entirely within your reach.

Ready to turn your stories into sustainable income? Start with Teachable today and create courses, coaching programs, or digital downloads that build a career you don’t need to escape from.

‍

How to improve your personal brand

Software Stack Editor · April 16, 2025 ·

image

Your personal brand speaks for you long before you enter the room. But what happens when that personal brand hasn’t been updated in years…or worse, doesn’t represent who you are today?

The truth is, most creators aren’t starting from zero; they’re starting from messy. Maybe life got busy, your priorities shifted, or your content hasn’t kept up with your skills. You’re not alone.

The good news is that it is never too late to improve your personal brand. And with the right strategy, rebuilding can actually position you as more relatable, trustworthy, and human than ever.

At Teachable, we believe that your lived experiences and expertise deserve a digital home that evolves with you. Whether you’re a course creator, coach, or solopreneur, our platform gives you the tools to build an online presence that reflects your best self, no matter where you’re starting from. Learn more about building your personal brand with Teachable.

Here’s why it is never too late to improve your “character” or personal brand

Most people wrongly believe personal branding has to be consistent from the beginning. In reality, some of the most respected creators have rebuilt their brands after career pivots, long hiatuses, or public missteps. The difference is that they decided to take back control of their narrative.

[embedded content]

Terry Rice went corporate layoffs and rehab to a savage storyteller

Terry Rice transformed his career after being fired from corporate jobs at companies like Facebook and Adobe. Facing alcohol addiction, he literally wrote his business plan while in rehab. Within a year and a half, he was making $20,000 a month. He embraced his adversity and the audacity to tell his story as being the most unique things about him, leading to a powerful “anti-hero persona” that resonates deeply with his audience.

Now a business coach, keynote speaker, and author, Terry helps people live and tell better stories, leveraging his own struggles with getting fired, battling alcoholism, and personal loss to inspire and connect with others. He emphasizes authenticity, vulnerability, and the courage to share one’s true self, leading to opportunities and recognition.

Why improving your personal brand is worth It (especially now)

In 2025:

  • Trust is the new algorithm.
  • Vulnerability beats virality and
  • Authenticity drives connection, especially when your story isn’t linear.

A dormant or even “damaged” personal brand can become one of your biggest assets. It signals growth, resilience, and experience. With the right intention, you can reshape perception and build an identity that aligns with your current goals and values.

Step 1: Audit your existing personal brand

Before you can improve your personal brand, you need to understand where it stands right now, messy middle and all.

You are auditing your current brand stance for clarity. You can’t move forward if you don’t know what people currently see, feel, and assume about you online.

What to look for during your personal brand audit

1. Google yourself

Search your name in incognito mode and see what comes up on:

  • Social platforms
  • Old blogs or projects
  • News mentions or reviews
  • Images, videos, or quotes

Tip: Using site search operators like quotations will help you fine-tune your search. Example: “your name” or site: example.com “your name”

Ask: Is this the story I want people to find first?

2. Review your social media presence

Go platform by platform:

  • Look at your bios — are they clear and current?
  • Check pinned posts or highlights — do they represent you?
  • Audit your most-engaged content — what are people responding to?

3. Evaluate your content tone & visuals

Is your style outdated? Does your voice align with who you are today?

Action Step:

  • Archive or update content that feels off-brand or irrelevant.
  • Keep vulnerable or imperfect posts that show growth (remember: authenticity builds trust).

4. Ask for feedback

Reach out to trusted friends, collaborators, or followers and ask:

  • If you described me to someone who didn’t know me, what would you say?
  • What kind of work or content do you associate me with?

Look for patterns. These are clues to what your current personal brand is communicating.

Tools to help:

  • Google Alerts — Monitor future mentions of your name or brand.
  • Namecheckr — See which platforms have your name available for consistency.
  • Incogni — Data privacy tool that helps keep your personal brand only as public as you want

Step 2: Clarify your brand identity

Once you’ve audited where your personal brand stands, it’s time to decide what you want it to stand for moving forward. Without clarity, you risk blending in, sending mixed messages, or attracting the wrong audience.

Think of this step as your personal brand GPS; it guides your decisions on content, partnerships, platforms, and even tone of voice.

Core brand identity questions

Ask yourself:

  • What do I want to be known for?
  • What transformation do I help others create?
  • What values do I consistently stand by?
  • What makes my approach or story different?

Write down 3–5 bullet points that describe who you are and who you’re becoming.

Create your personal brand statement

A personal brand statement helps keep your messaging consistent and focused. Try this formula:

I help [who you serve] do [what you help them achieve] through [your unique method or experience].

Example:

I help new course creators turn their expertise into revenue by simplifying marketing and building sustainable launch systems.

Keep it short enough to fit in your bio, but deep enough to anchor your content strategy.

Define your brand voice and tone

Are you more analytical or emotional? Direct or playful? Motivational or instructional?

Clarity here helps you:

  • Write stronger bios
  • Choose the right language in posts
  • Create consistency across platforms

Tip: Choose three adjectives that describe how you want your brand to feel to others (e.g., grounded, empowering, approachable). Think of this as the personality of your brand.

Action Step:

Draft your personal brand statement and post it somewhere visible (your wall, desktop, or phone notes). It should guide every piece of content or messaging you put out moving forward.

Step 3: Refresh and Align Your Online Presence

Now that you’ve clarified your brand identity, it’s time to bring it to life—visibly and consistently—across every platform where you show up. This is where your personal brand gets real, not just internal.

A refresh doesn’t mean a total wipeout. Don’t worry. You’re not erasing your past; you’re aligning your public presence with your current vision. The goal is to build consistency, across platforms and channels, that builds recognition and trust, even at a glance.

Start with the Big 3: Bio, Profile Photo, and Links

These are the first things people see when they land on your page. Make them count.

  • Update your bio with your new brand statement or a version of it that fits the platform.
  • Choose a current photo that reflects the tone you want to project—professional, creative, bold, etc.
  • Use a link-in-bio tool to centralize where you want traffic to go (e.g., your Teachable school, newsletter, booking page).

Audit and Clean Up Old Content

Go through your top-performing platforms and:

  • Archive content that no longer fits your values or niche
  • Add updated captions or context to older posts that still have value
  • Repurpose high-performing posts to reflect your current brand voice

Bonus: Don’t delete everything. Past content can show evolution, which builds authenticity—especially when you own the growth.

Make Your Brand Visually Consistent

Visuals matter more than ever, especially when someone is scrolling quickly.

  • Choose a core color palette or editing style
  • Align highlight covers, backgrounds, or post templates
  • Update banner images (LinkedIn, YouTube, etc.) with your new message or offer

Align Your Website or Landing Page

Whether it’s a full website, a Teachable school homepage, or just a Notion site, it should:

  • Clearly state who you are and what you offer
  • Reflect your tone and visual identity
  • Lead people to action (subscribe, enroll, book, etc.)

Action Step: Choose one platform today and give it a 20-minute brand refresh. Update your bio, profile image, and/or links to reflect your current identity and direction.

Step 4: Rebuild trust through consistency

Once your brand is refreshed, the real work begins: showing up consistently.

Consistency is the most undervalued (and most effective) strategy for rebuilding a personal brand, and life, especially if you’ve been inactive, inconsistent, or need to repair trust.

Consistency signals reliability. It shows your audience, and potential customers, that you’re here for the long haul, not just a one-off comeback post.

How consistency actually looks in 2025

Consistency creates a predictable rhythm your audience can trust.

It can look like:

  • A weekly newsletter that provides value (even short thoughts or curated links)
  • Posting twice a week on your primary platform (Instagram, LinkedIn, TikTok)
  • Showing up in Stories or behind-the-scenes content in real time
  • Hosting a monthly live workshop, Q&A, or webinar

Underpromise and overdeliver.

Three ideas to rebuild trust and momentum

1. Name the pivot publicly

I know this is scary for a lot of people. However, a simple post or video that says,“here’s where I’ve been, here’s where I’m headed, and I’d love for you to be part of it,” humanizes you and invites people into your next chapter.

2. Start a 30-Day consistency challenge

Commit to one small action every day for 30 days:

  • Publish a short-form video
  • Share a quick insight or lesson learned
  • Engage in 5 meaningful comments with others in your niche

Document the process. People love a “building in public” story arc.

3. Deliver value before selling

Rebuilding trust often means giving more than you ask for (at least at first).
‍

Focus on:

  • Thought-leadership content
  • Transparent stories
  • Audience-first engagement

Over time, trust turns into loyalty, and loyalty turns into conversions.

Pro Tip: Batch your content creation. (Teachable creators often pre-schedule content around course launches or product drops for this exact reason.)

Step 5: Common mistakes to avoid when rebuilding your personal brand

Rebuilding your personal brand is powerful, but it’s also easy to overthink, overcompensate, or overcorrect.

Here’s what to avoid so your efforts feel genuine, not forced.

Mistake 1: Pretending nothing happened

Ignoring the gap, the pivot, or the misstep doesn’t erase it. Your audience appreciates transparency over perfection.

Simple is best:

“I’ve grown. I’ve learned. Here’s what’s next.”

Owning your evolution builds trust faster than pretending your old content never existed.

Mistake 2: Over-explaining or over-apologizing

While acknowledging the shift is important, don’t dwell or spiral into justification mode. Most audiences don’t expect a press release — they just want clarity on where you’re headed.

Focus on service and value, not self-critique.

Mistake 3: Inconsistency across platforms

This one breaks trust fast. If your Instagram bio says you’re a “business coach” but your LinkedIn still says “freelance graphic designer,” it sends mixed signals.

Tip: Update your bios, links, and messaging everywhere your audience might find you — even smaller platforms like Pinterest or YouTube banners.

Mistake 4: Trying to rebrand everything overnight

Rebuilding is a process, not a sprint. Start with the platforms and content that matter most to your current audience.

Consistency over time is more effective than a rushed aesthetic overhaul.

Mistake 5: Creating without listening

A personal brand is a two-way conversation.

Ask questions. Poll your audience. Invite feedback.

Some of your best positioning ideas will come from real interactions, not brainstorming alone.

Pro Tip: Avoid revamping your personal brand with overly polished stock images or unedited AI-generated content. If your visuals or words don’t sound like you, or reflect what you want to be known for, they’ll create a disconnect with your audience.  Edit and filter AI tools through your own lens, values, and voice.

Improving your personal brand is a level up

The best personal brands aren’t built in a straight line. They’re revised, refined, and reimagined over time. Whether you’ve been quiet, inconsistent, or off-course, there’s no expiration date on showing up with clarity and purpose.

What matters most isn’t your past. It’s the intention you bring to your next step.

Rebuilding your personal brand is reconnecting with who you are now, aligning your digital presence with your values, and earning back trust, with yourself and others.

You’ve got the blueprint. Now it’s time to build.

Ready to bring your personal brand back to life?

Whether you’re sharing your expertise through a course, launching a digital product, or building a creator-led business, Teachable gives you the tools to turn your personal brand into something that works for you—24/7. Start building your brand’s next chapter with Teachable.

‍

‍

‍

‍

3 Ways to Pivot Your Online Business In Economic Downturns

Software Stack Editor · April 10, 2025 ·

image

The headlines are loud, the economy feels shaky, and forecasts are packed with more questions than answers.

If you’re a business owner, creator, or online entrepreneur, it’s hard not to feel the pressure right now. The cost of goods is climbing. Consumer confidence is shaky. Big players are pulling back. And everyone—from Amazon to Shopify—is adjusting their strategy in real time.

So the question becomes: How should you respond?

We know you might be feeling on edge right now. Maybe you’re wondering what this means for your 2025 income goals or if you should change the date of your next product launch.

You’re not alone—and you don’t have to figure it out all by yourself. You also don’t need to overhaul your whole business or go quiet on socials until things blow over.

In this post, we’ll give you the gist of current market events and three practical, proven moves to future-proof your business without burning out. Let’s break them down.

What’s going on with the market right now?

Before we dive into strategy, here’s a quick pulse check.

  • The U.S. scheduled sweeping new tariffs: 10% on all imports, and up to 25% on countries like China and Mexico—initially set to take effect the week of April 7, 2025.
  • Just days later, on April 9, the White House reversed course, issuing a 90-day pause on all country-specific tariffs with the exception being China, which now faces a 125% tariff, effective immediately. The proposed 10% tariff on all imports, irrespective of country of origin, is still scheduled to take effect.
  • The end of the de minimis exemption means creators selling physical goods—especially drop-shipped or DTC products—face steeper costs and slower fulfillment.
  • Ad spending is down. Consumer uncertainty is up. And supply chains are wobbling again.

If it feels like the rules are shifting daily, it’s because they are. And that back-and-forth only makes long-term planning harder. The good news is that whether you’re a team of one or one hundred, you can pivot, adapt, and protect your business with smart, strategic shifts.

What this means for online business owners

Let’s zoom out for a second: When things get uncertain, people don’t stop spending money altogether—but they do start scrutinizing their discretionary spending.

That means fewer impulse buys and more long-term ROI decisions. Less “this looks cool” and more “this helps me grow.” When people feel pressure, they look for tools, skills, and support systems that make them feel capable and in control again. 

Which is precisely where creators, educators, and online entrepreneurs come in.

And history backs this up.

In 2008, during one of the most turbulent financial periods in modern history, a wave of educators, creators, and YouTubers rose from the noise. 

They didn’t have fancy studios or million-dollar brands—they had knowledge, a camera, and a desire to help. Audiences flocked to find free entertainment, but many also turned to YouTube for educational content. 

Why? Because when the job market collapsed, people turned to upskilling and self-employment as a way forward.

So while markets shift and costs climb, the demand for transformation doesn’t go away. If anything, it sharpens. People want traction. They want to feel like their next move matters. 

Online entrepreneurs and creators are in a rare position to deliver that—right now.

What pivots should you be making?

1. Invest in your business and diversify your income with digital products

If your business depends on a warehouse, a shipping lane, or someone else’s supply chain, you may be exposed to delays, disruptions, and rising costs.

That doesn’t mean you need to abandon a physical product business altogether. 

Many creators and entrepreneurs will absolutely bounce back, especially those with loyal audiences and great products. 

But diversification is what gives you options. Adding digital products to your business can allow you to continue delivering value, even when supply chains slow or costs spike.

Your knowledge, your story, your process—those are resources you can package and deliver no matter what’s happening in the world.

When done right, digital products can become freedom engines. They’re low-overhead, scalable, and 100% yours. 

In an economy where consumer trust is shaky, digital products deliver the things people always spend on: education, skill building, connection, and transformation.

How to make the shift:

  • Ask your audience what they’re struggling with—use polls, DMs, or email replies to collect themes.
  • Spot the patterns—look for one specific, repeatable problem you can help solve.
  • Decide how to solve it—choose a format that fits their needs (course, digital download, coaching, etc.) based on how your audience says they learn best.

Example: A wellness creator pivoting from only offering DTC supplements to a $27 “Wellness Entrepreneur Starter Kit” with templates, sales scripts, and a Notion planner.

Adding effective digital products to diversify your income isn’t about jumping on a quick trend. When all is said and done, you want to build something that lasts. Something that you own, that scales with you, and that delivers lasting value to your audience.

2. Offer low-ticket products that meet people where they are

Not everyone’s ready for a $500 course or $2,000 program—especially when budgets tighten and uncertainty creeps in. But that doesn’t mean they’re not looking for help. In fact, this is when small, specific offers shine brightest.

Low-ticket digital products lower the barrier to entry. They give your audience a quick win, build trust, and open the door to future sales. More importantly, they prove your value—fast.

And for you? They’re scalable, evergreen, and easy to build. They don’t require 50 email sequences or a team to manage them. They just need to solve one problem well.

How to make the shift:

  • Repurpose what’s already working—take your best freebies or checklists and add depth to turn them into a paid product.
  • Focus on distinct, clear results—solve a small but meaningful pain point your audience faces regularly.
  • Keep it lean and fast—choose a format that delivers value in under an hour (guide, workshop, swipe file, etc.).
  • Price it accessibly—test price points between $9–$97 to find your entry-level sweet spot.
  • Use it as a funnel primer—introduce it as a “starter kit” or tripwire to build your email list and qualify leads.

Example: A business coach creates a $19 “Client Onboarding Toolkit,” including email templates, checklists, and scripts to help new entrepreneurs streamline their client intake process.​

Low-ticket doesn’t mean low-value. It means meeting your audience where they are, especially in seasons when people are cautious but still committed to growth. In tight markets, the path to your high-ticket offer starts with trust. And trust starts with a low-stakes yes.

3. Be a voice your audience can relate to and rely on

When the noise gets louder, people notice who stays grounded. In turbulent times, your presence—more than your polish—is what keeps people around.

This isn’t the time to disappear or pretend everything’s fine. It’s the time to be honest, steady, and human. You don’t need to have all the answers. But you do need to be someone your audience can trust through the noise.

How to make the shift:

  • Talk about the hard stuff—acknowledge the uncertainty, name what’s shifting, and say what you’re seeing.
  • Share your process, not just your finished product—show how you’re navigating change alongside your audience.
  • Prioritize congruency in character over perfection—drop a weekly insight, reflection, or voice note they can rely on.
  • Ask more than you tell—use polls, questions, surveys, and lives with your audience to create a two-way relationship.
  • Reflect before you pitch—anchor your offers in empathy, not urgency.

Example: A business coach replaces her usual promo post with a story about why her first product launch flopped—and invites followers to share what they’re struggling with this month.

In uncertain times, relevance is resilience. Creators who create with their people—honestly, consistently, and empathetically—earn attention and trust. And trust is what sustains you when algorithms shift, markets dip, or momentum stalls.

Conclusion

There’s a lot you can’t control right now—but there’s even more you can. And no matter what changes in the market, we’re here to help.  

The creators who stay steady, listen closely, and adapt wisely will weather the storm—and may even expand through it.

You don’t need to predict the market. You need to be responsive to your people.

The most resilient creators aren’t the loudest. They’re the ones who stay close to their community, make intentional moves, and build offers rooted in real need.

How to Sell B2B Offers Without a Big Audience (and Land 5-Figure Deals)

Software Stack Editor · April 9, 2025 ·

image

Let’s rip off the Band-Aid, you do not need a massive following to make serious money online. You don’t need a verified blue check, 10K followers on Instagram, or a viral Reel that sends people sprinting to your DMs.

You need one thing, a crystal-clear solution to a real business problem.

That’s it.

Forget what the creator economy told you about chasing brand deals or selling $27 digital downloads on repeat. There’s a quieter, more profitable lane that doesn’t rely on reach—it relies on relevance. It’s the B2B creator lane.

B2B creators are 2x more likely to earn over $10K/month than B2C creators. (Teachable, 2025)

You already have the expertise. You just need to package it in a way businesses understand, value, and are willing to pay for.

Let’s talk about how to go from free content to 5-figure B2B deals, even if your audience is smaller than your group chat.

{{trial-component=”/blog-shortcodes/blog-cta”}}

Why B2B is the creator economy’s best-kept secret

[embedded content]

You’ve probably spent the past few years selling to individuals. Maybe you’ve launched a few digital products, built a course, or tried to get your evergreen funnel running on autopilot. Cool.

But here’s what most creators are missing: businesses already have the budget for the thing you’re selling.

They’re already spending money on:

  • Training
  • Onboarding
  • Strategic support
  • Done-for-you systems

They just need to know your solution exists. The issue isn’t will they buy—it’s do they know you’re an option?

B2B vs. B2C: Why businesses buy differently

When you stop marketing like a content creator and start positioning like a business solution, the game changes. And if you’re still playing by B2C rules in a B2B space, you’re leaving serious money on the table.

Consumers buy based on emotion. They’re asking themselves:

  • “Can I afford this right now?”
  • “Will this make my life easier?”
  • “Do I feel like buying this today?”

It’s all vibes, timing, and whatever’s left in the bank account. Totally valid, but a world apart from how businesses make purchasing decisions.

Businesses, on the other hand, are all about function. Logic. ROI. They’re thinking:

  • “Will this save us time?”
  • “Will this help us hit our goals faster?”
  • “What’s the return on this investment?”

They aren’t asking if they personally have $47 to spare. They’re asking if that $5k package is going to move the needle in their operations. If your offer saves them time, increases team output, or prevents costly mistakes? That’s a no-brainer purchase.

They also aren’t thinking in “per unit” pricing. An individual might hesitate to buy a $97 training for themselves. But a business? They’re comparing it to:

  • The cost of hiring a full-time employee
  • The time wasted on inefficiencies
  • The loss they’re taking from outdated systems or lack of training

To them, your offer isn’t an expense. It’s a shortcut. A safeguard. A strategic advantage.

And when you start selling it that way? Everything changes.

Reminder: Businesses already budget for software, consultants, professional development, and team training. Your offer isn’t an “extra.” It’s a business expense with measurable returns.

You don’t need a big audience, you need a big result

Still think you need a massive following to land big B2B deals?

Here’s what businesses actually care about:
✔️ Can you solve their specific problem?
✔️ Do you have proof that your approach works?
✔️ Can you articulate the value clearly?

Notice what’s missing?
Your follower count.

Most buyers don’t care how many likes you got on your last post. They care if you can help their team hit their goals faster and smarter. That means your content doesn’t need to go viral. It needs to be valuable.

What makes a B2B offer work?

To land higher-ticket B2B deals, your offer needs to check these three boxes:

1. Solves a specific, costly problem

Not just “helps people grow on Instagram.” Think “Helps in-house marketing teams reduce time spent on content by 40% using plug-and-play templates.”

Businesses are looking for efficiency, savings, and growth. Tie your offer to those outcomes.

2. Delivers a fast, tangible win

Don’t promise a complete brand transformation in six months. Start smaller. Your offer should give them a measurable win in days or weeks.

Think “In 7 days, your team will have a complete onboarding plan they can utilize immediately.”

3. Is packaged for business buyers

If you want to sell to businesses, you need to think like a business. That means removing friction and making your offer feel like a no-brainer operational decision,not a personal splurge.

Make it easy to say yes:

  • Provide an invoice (so it fits neatly into their expense tracking)
  • Offer a team license instead of individual access
  • Include plug-and-play resources like SOPs, checklists, or toolkits
  • Frame the outcome as saving time or improving performance—not just “learning” something new

Business buyers aren’t buying information. They’re buying implementation. They want to know your solution can plug into their workflow, get their team results, and make them look good in the next meeting.

Real B2B offers you can start selling now (even with a small audience)

Ready to get out of the free-content hamster wheel? Here are a few offer formats that sell, without needing a giant following:

Team training bundle

Package your course or product as a solution for a team, not just one person. Offer a group license or onboarding system they can roll out immediately.

Example: A $97 email marketing course → A $2,500 package for agencies training new hires.

Consulting + digital product combo

Use your digital product as the foundation, and layer in consulting support for customization.

Example: Package your $47 workshop template (they don’t need to know the standalone price) with three strategy calls, and sell it as a $1,500 implementation offer for a small business owner.

White-labeled resources

Let a business rebrand and reuse your materials internally or for their clients.

Example: A VA license your Notion systems to offer as their own client deliverable.

Done-with-you sprint

Offer a short-term, high-touch experience designed to get a specific result fast. Perfect for businesses that don’t have time to figure it out themselves but still want to be involved.

Example: A systems strategist runs a 5-day Client Workflow Sprint where agency teams co-build their internal SOPs with her guidance. $3,000+ package with zero long-term commitment.

Internal resource vaults

Bundle your existing tools, templates, and trainings into a branded “vault” businesses can give their team access to—no handholding required.

Example: A designer curates a vault of brand guidelines, editable templates, and Canva tutorials for marketing teams. Sold to startups and marketing departments as a $5,000+ internal design support system.

How to sell B2B offers (without second-guessing yourself)

You don’t need a fancy pitch deck, a perfectly polished portfolio, or a LinkedIn bio that reads like a Forbes 30 Under 30 submission.

You need proof.

Businesses don’t buy because you sound smart. They buy because you make it easy to see the value. So instead of talking about what you can do, show them what you’ve already done.

Use case studies instead of a pitch deck

Forget the slide transitions and corporate fluff. If you’ve helped someone get a result, you already have what you need to sell B2B offers.

Break it down simply:

  • What the client needed – “They were onboarding 5 new team members with no documented process.”
  • What you delivered – “I created a plug-and-play training system with email templates, video SOPs, and an internal wiki.”
  • What happened after – “Time-to-productivity dropped by 40% and they licensed the system for future hires.”

That’s it. That’s your sales pitch. No fluff. Just facts that connect your offer to real business outcomes.

Haven’t sold it yet? Start here.

Here’s how to build trust anyway:

  • Borrow proof from adjacent wins – Personal results, past clients, or even one-off help you’ve given? That counts. Frame it as experience, not a maybe.
  • Sell a beta version – Invite a few businesses in early, call it a test round, and collect feedback and testimonials.
  • Lead with the transformation – Even if it’s your first sale, you can still clearly explain the problem you solve, how you solve it, and what life looks like after.

Business buyers want clarity, not complexity.

They want to know:

  • What’s the problem you solve?
  • How quickly can we see results?
  • Why should we trust you over the next Google search?

If your offer answers those questions—clearly, confidently, and with even one proof point—you’re ahead of the game.

Because at the end of the day, the best B2B sales strategy isn’t about being the loudest or the most polished. It’s about being the clearest.

So drop the pressure to “look” like an expert. Start showing people what you can do.
The right people will get it. And they’ll pay for it.

What if you don’t have leads yet?

You don’t need a CRM full of decision-makers to start. You just need a clear offer and a few smart ways to get it in front of the right people.

Here’s where to start:

  • Collaborate with adjacent service providers (who already serve your dream clients)
  • Write a blog post that answers a key B2B question and optimize it for search
  • Post 3x/week on LinkedIn with insights and results tied to your offer
  • Send personal outreach DMs to small business owners you admire (not slimy, helpful)
  • Use a lead magnet to grow your list, then upsell your B2B offer via email

Even one strong connection or collaboration can lead to a 5-figure opportunity. You don’t need a stadium, just the right seat at the table.

Your next step

Want help turning your idea into a polished, pitch-ready B2B offer?

Join our free One-Day Launch Challenge to map out your product, price it for profit, and launch it fast—no audience required.

👉 bossproject.com/launch

You already have the expertise. Now it’s time to get paid like it.
You don’t need a massive platform, you need a smart offer.
Businesses are already looking for what you have. Let’s make sure they find it.

52 Lead Magnet Ideas for Online Business Creators, Coaches, and Consultants

Software Stack Editor · April 2, 2025 ·

image

In Teachable’s 2025 Business Creator Shift Report, 22% of established creators cited lead generation as their most urgent challenge. This isn’t because they aren’t creating content, but because that content isn’t turning into new revenue. It’s a pain point even large companies have. A well-built lead generation system doesn’t begin with a lead magnet that sits passively on your site. The best lead magnets function as a strong lead qualifier, a value test, and a first step toward meaningful, scalable monetization. 

Lead magnets are a positive-sum game. You get a qualified lead email. Your lead gets a valuable piece of content or tool that helps them solve an immediate problem.

Email remains the most cost-effective channel in digital marketing, outperforming ads, SEO, and social media on return. According to HubSpot, email still brings in $36 for every $1 invested. This statistic only tells part of the story. Email is effective when your audience is qualified, focused, and ready to move toward a deeper engagement.  

For creators already earning and ready to scale, including coaches, consultants, and other knowledge-driven businesses, lead magnets help you:

  • Build a direct communication channel independent of social platforms
  • Connect each subscriber to a structured journey towards your core offer
  • Attract people who engage, rather than click once and disappear

What follows is a curated list of 52 lead magnet formats/examples designed for revenue-conscious creators. Each idea is ready to apply, easy to build from your existing materials, and aligned with long-term business outcomes.

Pro-tip: Combine these ideas with your own expertise, then use the following AI prompt to kickstart the creation of a powerful lead magnet:

When I give you my topic and content, run the sequence below.

*sequence*
You are a lead generation strategist helping [your audience type, e.g., online coaches, consultants, or course creators] create a lead magnet that attracts qualified prospects who are ready to [desired outcome, e.g., scale their business, improve conversion rates, or prepare for a premium coaching program].

The lead magnet will be in the form of a [format: e.g., diagnostic quiz, mini-training, workbook, template, checklist, etc.].Write it to achieve the following goals:
*Qualify leads by identifying if they are ready for [your paid offer type: e.g., coaching, online course, membership, service].
*Deliver immediate value and position me as a trusted expert.

Naturally bridge into a next step such as a discovery call, free trial, or purchase of my main offer.

My niche is: [insert your niche].
My audience's biggest pain points are: [list top 2-3]. 
My audience’s current stage of business: [briefly describe: e.g., generating $5k+ monthly but struggling to scale].

Please create:
*An engaging lead magnet title.
*A brief description of its purpose and what it helps with.
*A detailed outline or draft of the lead magnet content.
Suggested CTA to naturally transition into my main offer.

{{aiprompts-component=”/blog-shortcodes/blog-popup”}}

52 lead magnet ideas

1. 6-Figure offer planner

Format: PDF Workbook or Interactive Notion Template
Purpose: Help prospects design and structure a premium course, program, or coaching offer

Where to Use It:

  • As a follow-up to free webinars or workshops
  • Exit intent pop-up for coaches, consultants, and educators
  • Lead-in to a mini-course on course creation

Examples:

  • Coach: “Design Your Signature Coaching Program” defines the path to a $5K+ offer.
  • Course Creator: “Flagship Course Builder” walks through structuring a course worthy of premium pricing.
  • Consultant: “High-Ticket Offer Blueprint” helps structure done-for-you or hybrid offers.

This planner walks prospects through mapping out a high-ticket offer, defining transformation, pricing, deliverables, and packaging. It pushes them to elevate from underpriced services or content to scalable, high-value offers.

2. Discovery call script

Format: Fillable Google Doc, PDF, or CRM-integrated template
Purpose: Guide conversations that qualify leads and align services with business outcomes

This resource provides a structured approach to your first call with a potential client. Rather than improvising, the script ensures you ask the right questions in the right sequence, revealing readiness, budget, pain points, and implementation capacity. It also helps filter non-buyers before they enter your pipeline.

Use this lead magnet to show prospects you’ve already built a process. That positions your service as a structured investment, not a casual offer.

Where to Use It:

  • Opt-in before booking a consultation
  • Included in a “Working With Me” starter kit
  • Paired with a lead qualification checklist

Examples:

  • Sales Coach: “Consultation Flow Framework”, a script that highlights goals, objections, and buying timelines
  • Web Development Agency: “Website Discovery Call Template”, questions around functionality, user flows, and scope validation
  • Marketing Consultant: “Revenue-Focused Discovery Script”, evaluates conversion goals, historical performance, and KPI clarity

This tool functions as both a positioning asset and a conversion tool. It shortens your sales cycle and raises the perceived value of your service before the proposal ever lands.

3. Intake form template

Format: Google Form, Notion doc, Typeform, or Airtable template
Purpose: Automate onboarding and gather essential data to qualify, segment, and scope effectively

An intake form creates structure before the work begins. It filters out misaligned prospects, surfaces key project details, and reduces back-and-forth in the sales process. For consultants and creators offering services, this tool doubles as both a pre-sale screener and a post-sale onboarding system.

Used correctly, your intake form isn’t just for organization, it shapes how prospects view your professionalism, process, and capacity. It also creates a natural handoff to client-facing deliverables.

Where to Use It:

  • Embedded in a booking flow for coaching or consulting sessions
  • Sent automatically post-opt-in using Teachable email or a connected CRM
  • Linked from your services page as a pre-qualification filter

Examples:

  • Content Strategist: “Pre-Engagement Brief”, covers content goals, current platforms, brand voice samples, and traffic sources
  • Business Operations Consultant: “Workflow Audit Intake”, maps out team roles, SOP status, and tool usage
  • Design Studio: “Creative Kickoff Questionnaire”, covers visual direction, project timeline, asset inventory, and revision expectations

Well-structured intake forms save time upfront and lay the foundation for high-quality delivery. When used as a lead magnet, they also function as filters, bringing in only those clients ready to move forward.

4. Diagnostic quiz

Format: Scored quiz via Typeform, ScoreApp, Interact, or custom-built inside a course platform
Purpose: Segment leads by skill level, readiness, or problem type to tailor your follow-up offers

A diagnostic quiz gives prospective clients a self-assessment that delivers instant clarity while giving you actionable data. This format works especially well when you offer multiple programs, coaching tiers, or consulting paths. It acts as a filter and recommendation engine at the same time.

The strongest diagnostic quizzes don’t just assign scores, they frame the results as a starting point for further transformation. Each score category should point to a specific product, offer, or consultative next step.

Where to Use It:

  • Promoted in your bio link or pinned social post
  • As an embedded opt-in on your services page
  • At the start of a product funnel as a segmentation tool

Examples:

  • Productivity Consultant: “Where Are You Losing Time?”, segments business owners into operational bottlenecks (workflow, delegation, tech)
  • Mindset Coach: “Decision Fatigue Diagnostic”, identifies decision-making blocks and recommends a planning tool or 1:1 session
  • Brand Strategist: “Brand Consistency Scorecard”, evaluates tone, visuals, and content alignment across platforms

This tool positions your service as custom-fit rather than one-size-fits-all. It gives the prospect a result they can use now, and sets up your deeper solution as the next step.

5. Before/After transformation roadmap

Format: One-page PDF, slide deck, or annotated visual framework
Purpose: Visually show the transformation your client or student will experience across clear milestones

This resource outlines the full customer journey, starting from the most common pain points and moving through key phases of change. It helps future clients understand what they’re investing in and when they can expect results. It also positions you as a guide with a defined process.

Use it to demystify your offer, reduce hesitation, and set expectations before a call or course signup.

Where to Use It:

  • As an opt-in from a waitlist page or webinar
  • Sent in your email funnel before a sales page
  • Delivered post-lead magnet to upsell a higher-tier offer

Examples:

  • Fitness Coach: “Strength Progression Map”, 12-week journey from baseline metrics to peak performance
  • HR Consultant: “Hiring Process Maturity Model”, five phases from reactive hiring to a fully integrated recruitment system
  • Art Instructor: “Creative Skill Builder Timeline”, tracks visual improvement from beginner sketches to portfolio-ready illustrations

A roadmap shifts the focus from features to outcomes. When prospects see the entire arc laid out, they’re more likely to commit to the full journey.

6. 7-day self-assessment challenge

Format: Daily prompts delivered via email or hosted inside a course module
Purpose: Build habit formation and daily engagement while qualifying your most committed leads

A short, time-boxed challenge invites participation while also segmenting your audience by behavior. Those who engage consistently are more likely to convert. It also gives you multiple touch points across a week to demonstrate your framework, tools, and guidance style.

Each day should introduce one core question, reflection, or action. At the end, offer a clear path into your program or service for those who completed the challenge.

Where to Use It:

  • Evergreen email sequence triggered by opt-in
  • Embedded in a free course preview inside Teachable
  • Paired with a downloadable workbook or progress tracker

Examples:

  • Workflow Consultant: “Inbox to Zero in 7 Days”, daily audits of systems, tools, and priorities
  • Photography Instructor: “Composition Skills Assessment”, a photo prompt each day, plus scoring rubric
  • Mindfulness Coach: “Focus Reset”, daily behavioral check-ins to track attention, triggers, and reflection practices

Challenges create rhythm and urgency. They also identify your most engaged subscribers, giving you a strong base for follow-up.

7. Mini training: “What to do before hiring a coach”

Format: 10–20 minute video or short-format mini course
Purpose: Prequalify leads and answer objections before they enter your funnel

This training creates alignment before a sales conversation. It gives potential clients the clarity they need to approach coaching with the right expectations, logistics, mindset, outcomes, and scope. It also educates them on your methodology, so you spend less time justifying your process later.

The goal is to reduce the time between interest and enrollment by providing the answers they’re already searching for.

Where to Use It:

  • Linked in your social bio or onboarding email
  • Offered as a post-lead magnet upsell or unlock
  • Shared in a webinar funnel before a pitch

Examples:

  • Career Coach: “Goal Clarity & Commitment Prep”, guides prospects through planning, reflection, and role exploration
  • Public Speaking Coach: “Session Prep Video”, shows how to select a speech, assess a room, and clarify intent
  • Health Coach: “Coaching ROI Calculator Walkthrough”, walks viewers through common outcomes and expectations from coaching engagement

This format handles education and positioning at the same time. It also frames your offer as a thoughtful partnership, not a commodity.

{{aicurriculum-component=”/blog-shortcodes/blog-cta”}}

8. PDF: Top 10 mistakes in your niche

Format: Curated PDF or short-form guide with annotated commentary
Purpose: Demonstrate expertise by highlighting common pitfalls and offering actionable corrections

This asset identifies the most frequent missteps your ideal clients make before they work with you. It offers quick wins through correction while framing your service or product as the logical next step for deeper support. This format is especially effective for drawing a line between casual learners and high-intent buyers.

The most effective mistake guides don’t just list problems, they contextualize them, show the cost of leaving them unresolved, and preview your methodology for fixing them.

Where to Use It:

  • As a lead magnet in a blog post or social campaign
  • In a paid ads funnel to attract mid-funnel leads
  • Offered as a bonus resource inside a free training or webinar

Examples:

  • Marketing Consultant: “Top 10 Launch Mistakes That Flatten Revenue”, focuses on targeting, offer positioning, and pre-launch sequencing
  • Sales Coach: “10 Proposal Errors That Kill the Deal”, addresses unclear ROI, scope confusion, and follow-up missteps
  • YouTube Strategist: “10 Growth Mistakes New Creators Keep Repeating”, covers algorithm signals, pacing, and viewer retention

This asset positions you as a pattern recognizer, someone who sees what others miss, and knows exactly how to correct course.

9. Proposal template

Format: Fill-in-the-blank document in Google Docs or Notion, editable and brandable
Purpose: Equip leads with a ready-to-use structure to pitch or price their own work, or understand your process

A proposal template acts as both a utility and a soft sales tool. It allows your audience to streamline how they communicate value, while simultaneously showing how you scope and price your services. For B2B consultants or creative professionals, this magnet draws in high-intent prospects who need structural clarity before making purchasing decisions.

Include example language, pricing logic, and formatting guidance to increase perceived value.

Where to Use It:

  • Embedded in your service page or LinkedIn call-to-action
  • Sent as a bonus in your email nurture sequence
  • Shared with prospective clients before your discovery call

Examples:

  • Web Developer: “Website Redesign Proposal Template”, sections for scope, timeline, deliverables, and payment structure
  • Business Consultant: “Client Pitch Proposal Kit”, includes ROI framing, process stages, and service bundles
  • Trainer or Facilitator: “Team Development Proposal”, builds out session plans, learning outcomes, and onboarding flow

This resource allows your prospects to immediately apply your thinking. It also lowers friction when they’re deciding whether to hire you, or follow your process themselves.

10. Objection-handling script

Format: Script PDF or worksheet broken down by objection type and use case
Purpose: Equip your audience, or your own sales team, with calm, confident responses to the most common buying hesitations

This lead magnet is built for direct application. It reduces friction in the sales process by preemptively answering objections around pricing, timing, results, or decision-maker buy-in. Whether used as a self-coaching tool or shared with teams, the script reinforces your authority while showing how to maintain integrity under pressure.

Objection-handling scripts are especially powerful for coaching, consulting, and service providers where conversions hinge on live or one-to-one interaction.

Where to Use It:

  • Lead magnet from a sales-focused blog post or video
  • Mid-funnel asset inside an email automation series
  • Add-on to a discovery call or pricing page

Examples:

  • Career Coach: “Salary Negotiation Script”, handles counteroffers, scope increases, and timeline objections
  • E-commerce Consultant: “Cost, Time, and Tech Objections Toolkit”, addresses startup hesitation and platform fatigue
  • Strategic Advisor: “Budget Conversation Flow”, clarifies value, urgency, and investment risk

This tool helps your audience speak with confidence. It also reinforces the clarity and structure of your offer before they even reach your pitch.

11. First lesson free (Hosted on Teachable)

Format: One unlocked lesson inside your Teachable course
Purpose: Offer a clear preview of your teaching style and course value before purchase

Instead of sharing your entire outline or making abstract claims about transformation, show the process in action. Offering the first full lesson for free demonstrates your delivery, structure, and value while building comfort and familiarity with your platform.

This approach is especially useful for course creators who want to lower the barrier to entry while maintaining perceived value. Prospects aren’t downloading a PDF, they’re stepping into your system.

Where to Use It:

  • Embedded in your course sales page as a “try it now” experience
  • Shared in launch announcements or email warmups
  • Linked in your content as a proof point or soft pitch

Examples:

  • Finance Educator: “Budgeting Mindset Reset”, teaches foundational terms and shifts decision-making habits
  • SEO Specialist: “Keyword Strategy Foundations”, walkthrough of basic research setup using real data
  • Watercolor Artist: “Getting Started with Materials”, live video setup showing brush types and basic color blending

This format builds trust through real interaction. It’s also an easy entry point into your paid curriculum, without discounts or delayed delivery.

{{trial-component=”/blog-shortcodes/blog-cta”}}

12. Mini Course or Workshop

Format: 30–60 minute training hosted on Teachable or embedded as a gated video series
Purpose: Offer a focused, outcome-specific experience that previews your deeper curriculum or consulting method

A mini course is structured to solve one problem in one sitting. It establishes your credibility, demonstrates your process, and creates enough transformation to open the door to a higher-ticket offer. Unlike generic webinars, this format is outcome-driven and directly connected to your primary offer.

Use this lead magnet to segment serious learners from passive browsers. Treat it as both a teaching tool and a sales qualifier.

Where to Use It:

  • As a front-end funnel to a paid course or membership
  • Bonus opt-in for your email newsletter
  • Standalone free product inside your Teachable school

Examples:

  • Public Speaking Instructor: “Your Elevator Pitch in 30 Minutes”, script, record, and practice a high-impact intro
  • Productivity Coach: “Time-Blocking for Creators”, build a working schedule from scratch
  • Designer: “Typography Basics”, interactive walkthrough of font pairings and layout principles

Mini courses work best when paired with automated follow-up that leads into your next offer. They attract learners looking for transformation, not just content.

13. PDF workbook excerpt-only

Format: Select pages from your full course workbook or client-facing materials
Purpose: Let prospects sample your methodology while positioning the full version as the logical upgrade

This magnet works well for creators who already have a workbook or curriculum in place. By sharing a high-value excerpt, you give prospects something tangible to work through while raising interest in your complete offer.

The goal is not to give away the entire system, but to showcase the clarity and utility of your teaching.

Where to Use It:

  • Opt-in on a course landing page
  • Shared via email prior to a live cohort launch
  • Downloadable preview inside a free module

Examples:

  • Yoga Instructor: “Mobility Tracker Workbook”, includes daily logs and movement sequences
  • Business Coach: “Quarterly Planning Toolkit”, shares vision-setting and reverse-engineering templates
  • Illustration Educator: “Sketch Development Pages”, practice exercises and ideation tools

This format invites engagement without overwhelming the user. It also builds credibility by showing your content isn’t theoretical, it’s immediately useful.

14. Cheat sheet for your main course

Format: One-page reference guide formatted as a printable or digital resource
Purpose: Give students or prospects a fast-access tool they’ll return to repeatedly, reinforcing your expertise

Cheat sheets distill your core framework into a format that’s quick to review and easy to apply. They work well as a teaser for a full course, or as an opt-in that introduces your approach without requiring hours of content.

These assets also create high visibility, prospects often print or save them, keeping your brand in regular view.

Where to Use It:

  • As a pop-up opt-in on a blog post or course info page
  • Inside a welcome sequence as a bonus
  • Shared during a webinar as a real-time reference

Examples:

  • Content Marketing Educator: “Content Frequency Guide”, lists optimal post cadence by platform
  • Speech Coach: “Pre-Talk Prep Sheet”, body language, vocal warm-ups, and pacing cues
  • Baking Instructor: “Ingredient Ratio Quick Chart”, helps students adjust recipes with confidence

Cheat sheets become part of the student’s workflow. They also act as a reminder of the larger system you teach, and why the full course might be the next best step.

15. Study guide

Format: Structured document summarizing key concepts, frameworks, or terms for review and retention
Purpose: Help your audience master foundational material while introducing your educational model

Study guides serve creators in technical, skills-based, or academic niches. They function as reference points before, during, or after a deeper training experience. When used as a lead magnet, they support comprehension while previewing the depth of your core product.

This format works well when your teaching involves terminology, models, or sequential learning.

Where to Use It:

  • Prerequisite material for your course or workshop
  • Downloadable asset from a blog post or YouTube video
  • Follow-up gift after a webinar or live Q&A

Examples:

  • Digital Ads Instructor: “Facebook Ads Metrics Guide”, defines CTR, ROAS, AOV, and more
  • Life Skills Coach: “Mindset Shift Frameworks”, summarizes models for thought reframing and behavior change
  • Language Teacher: “Grammar Reference Sheets”, rules, sentence structure, and common errors

This magnet builds trust by providing real instructional value. It also sets the tone for what kind of structure, support, and specificity prospects can expect in your full offer.

16. Flashcards (Downloadable or Printable)

Format: Pre-formatted PDF or digital tool (e.g. Anki, Quizlet, Notion)
Purpose: Offer a repeatable, low-friction way for learners to reinforce terminology, frameworks, or concepts

Flashcards work best for content-heavy or memory-based subjects where repetition builds confidence. They’re simple to create, quick to use, and effective for long-term retention. This format signals a commitment to structured learning and supports your credibility as a methodical educator.

Flashcards also serve as high-utility micro-content, something learners can return to regularly, even after they enroll in a full course.

Where to Use It:

  • Bonus download from a YouTube tutorial or podcast episode
  • Pre-course opt-in asset to introduce key terms
  • Offer during a webinar or workshop as a takeaway

Examples:

  • Coding Instructor: “HTML & CSS Syntax Flashcards”, tags, attributes, and visual examples
  • Nutrition Educator: “Macro & Micro Nutrient Flashcards”, food group breakdowns and functional benefits
  • Music Teacher: “Music Theory Cards”, intervals, chord names, and key signatures

These work well when your content lends itself to pattern recognition or terminology. When done right, they signal to your audience that you’ve thought about how they learn, not just what you’re selling.

17. Pre-course checklist

Format: One-page checklist (printable or digital) with optional calendar or goal-tracker integration
Purpose: Prepare leads for success by showing them exactly how to get ready before they start your course or coaching program

This checklist helps subscribers organize logistics, gather tools, or mentally prepare for the structure and demands of your full offer. It can also prevent unnecessary drop-off by resolving uncertainty before it shows up.

This format doesn’t just improve onboarding, it also increases perceived value. When a creator has a prep checklist, they demonstrate process, clarity, and professionalism.

Where to Use It:

  • Delivered immediately after lead magnet opt-in
  • Linked from your course sales page or email nurture sequence
  • Presented as part of a “Getting Started” bundle

Examples:

  • Self-Publishing Coach: “Book Launch Readiness Checklist”, from manuscript finalization to audience outreach
  • Photography Instructor: “Camera Setup and Workspace Checklist”, from lens cleaning to lighting prep
  • Branding Consultant: “Client Reflection Checklist”, covers business goals, visual direction, and ideal customer clarity

This checklist bridges the gap between intention and action. It also subtly signals that your course is built for execution, not just exploration.

18. Grading rubric (for skills-based courses)

Format: Structured rubric table showing progression from beginner to advanced across key skill categories
Purpose: Define what success looks like across specific performance areas, helping learners self-assess and level up

A grading rubric offers clarity for creators teaching performance-based or project-based skills. It removes guesswork from learning outcomes and supports both internal accountability and external benchmarks. For coaches or instructors offering feedback, it standardizes evaluation and supports scalable growth.

This magnet works well when your offer includes multiple levels, certifications, or progressive mastery.

Where to Use It:

  • Embedded in your free mini course or intro module
  • Shared in a free Facebook group or community space
  • Linked as a download from a tutorial or training email

Examples:

  • UX Design Mentor: “Usability Testing Rubric”, criteria like clarity, accessibility, and interaction logic
  • Creative Writing Coach: “Short Story Rubric”, scores on structure, character arc, pacing, and editing
  • Vocal Performance Instructor: “Singing Assessment Matrix”, pitch control, breath management, expression, and consistency

Rubrics function as a roadmap and a progress tracker. They elevate your perceived rigor and invite the learner into a growth path they can measure.

19. Private podcast series

Format: Audio-only mini series (3–7 episodes), gated via email opt-in or course enrollment
Purpose: Build intimacy and trust by teaching through audio, perfect for mobile-first, time-conscious audiences

A private podcast creates a one-on-one experience. Listeners absorb your voice, tone, and ideas in an environment that feels personal and high-touch. For busy professionals or always-on-the-go creators, this format fits seamlessly into their daily habits.

The most effective private podcast series are thematic. They solve one core problem or frame one major shift over several short episodes.

Where to Use It:

  • Lead magnet promoted through LinkedIn, Instagram, or newsletter
  • Part of a welcome series for new subscribers
  • Linked from your blog as an alternate format for high performers

Examples:

  • Founder Coach: “Scaling Without Hiring”, a five-part audio guide to restructuring your offers and energy
  • Remote Team Consultant: “Async Communication Best Practices”, deep dive on Slack, Notion, and documentation culture
  • Designer-Educator: “Design withPurpose”, narrative-style audio on balancing aesthetics, accessibility, and conversion

Private podcasts offer ongoing value while keeping you top of mind. They work well for high-ticket offers where trust and clarity play a central role in conversion.

20. Launch roadmap

Format: Visual timeline or step-by-step PDF outlining phases of a product, course, or service launch
Purpose: Provide structure and sequencing for creators preparing to go live with a new offer

A launch roadmap answers the “when” and “in what order” questions your audience often struggles with. It reduces decision fatigue and gives creators confidence in their next steps. By outlining a clear pre-launch, launch, and post-launch flow, you also position yourself as someone who understands the business mechanics, not just the creative side.

This magnet is ideal for audiences who already have an offer in development but feel overwhelmed by how to organize and deploy it.

Where to Use It:

  • As a lead-in to a paid product or service related to launches
  • Embedded in a blog post or video about launch strategies
  • Shared as a bonus in a live cohort or waitlist funnel

Examples:

  • Course Creator Coach: “30-Day Launch Checklist”, breaks down content prep, tech setup, and email campaigns
  • App Consultant: “MVP-to-Launch Roadmap”, tracks tasks from beta testing to marketing rollout
  • E-commerce Educator: “Online Store Launch Timeline”, from product photography to checkout optimization

This format resonates with business owners who value planning but need outside structure. It also sets the tone for working with you long term.

21. Swipe file (designs, captions, copy, etc.)

Format: Curated PDF, Google Drive folder, or Notion hub with labeled examples and context
Purpose: Offer ready-to-use inspiration and proven formats for faster content creation

Swipe files reduce creative friction and eliminate guesswork. They’re especially valuable for creators working across multiple content platforms or campaign types. This magnet saves time and helps your audience understand not just what works, but why it works.

Use it to reinforce your ability to reverse-engineer results. Add context to each example so it feels like a toolkit, not just a collection.

Where to Use It:

  • From content about creative process or content strategy
  • Bonus resource inside a free course or lead nurture sequence
  • Featured in your link-in-bio or pinned content on social

Examples:

  • Social Media Strategist: “30 High-Engagement Captions”, categorized by goal: conversation, save, share, or click
  • Copywriting Mentor: “Sales Page Swipe File”, headline frameworks, bullets, and CTA language with annotations
  • Brand Designer: “Palette + Layout Swipe Kit”, branded color combos and modular design examples

Swipe files build immediate trust. They show your eye for what works, and your ability to systematize creativity.

22. Lightroom presets (for photographers and other creatives)

Format: Downloadable preset files for Adobe Lightroom with installation instructions
Purpose: Give creators a time-saving tool to apply consistent visual style across photos

Lightroom presets function as both a practical resource and a creative teaser. They’re particularly effective for visual brands, influencers, photographers, and product-based businesses that rely on cohesive content. This format is high-value, easy to showcase visually, and quick to implement.

Presets can also lead into deeper offers like photo editing tutorials, content planning workshops, or visual branding packages.

Where to Use It:

  • From Instagram stories, reels, or TikTok content
  • Embedded in a blog post about branding or photography
  • Shared via email as a reward for completing a challenge or campaign

Examples:

  • Lifestyle Blogger: “Warm & Minimal Presets”, for a clean, high-light aesthetic
  • Wedding Photographer: “Romantic Pastels Pack”, for soft skin tones and bright natural lighting
  • Real Estate Educator: “Crisp Interiors Presets”, ideal for listing photos, walkthroughs, and staging shots

This resource gives immediate visual transformation, making it ideal for creators selling the promise of professional-grade content.

23. Watercolor brush guide (for artists)

Format: Illustrated PDF or short tutorial video showing the function of different brushes and strokes
Purpose: Educate aspiring artists or workshop participants on tools of the trade, building confidence before a project or course

A brush guide acts as an on-ramp for new students while showcasing your teaching style and attention to detail. It’s especially effective in art, illustration, or hand-lettering spaces where tools directly affect outcomes. The guide sets expectations and removes the overwhelm of choosing supplies.

This format works well as a precursor to product-based workshops or course launches involving specific techniques.

Where to Use It:

  • As an opt-in from your YouTube tutorial or Instagram live
  • Intro resource in your Teachable course or free module
  • Lead magnet for affiliate-linked supplies or materials lists

Examples:

  • Watercolor Instructor: “Brush Basics for Beginners”, round vs. flat, dry vs. wet-on-wet, plus sample strokes
  • Children’s Book Illustrator: “Character Design Brush Guide”, hair, fabric, and texture stylization tools
  • Creative Workshop Host: “Stationery Brush Breakdown”, for floral illustration, lettering, and embellishment

This resource builds momentum. It sets your students up to succeed from the first stroke, while anchoring you as the expert who makes complex tools feel usable.

24. Music sample pack (for musicians)

Format: Downloadable ZIP folder of royalty-free loops, stems, or audio clips
Purpose: Provide creative building blocks that reduce production time and spark new project ideas

A sample pack gives musicians, podcasters, and multimedia creators access to high-quality assets they can immediately use in their own work. This magnet attracts leads who value professional sound and efficient workflows. It also positions you as a source of polished, production-ready material, especially useful if you sell audio tools, templates, or training.

Include usage rights, suggested applications, and basic licensing details to add perceived value.

Where to Use It:

  • Promoted on your website, Bandcamp, or YouTube channel
  • Bonus asset from a music theory or production course
  • Part of a podcast or video production toolkit

Examples:

  • Electronic Music Producer: “EDM Starter Pack”, bass lines, vocal samples, and beat loops
  • Podcast Coach: “Intro & Outro Audio Kit”, background music, transitions, and spoken lead-ins
  • Cinematic Composer: “Ambient Scoring Pack”, pads, drones, and mood-based stingers

Sample packs signal both expertise and generosity. They attract working creatives and demonstrate that your knowledge translates into tangible results.

25. Printable coloring sheet

Format: PDF or PNG file formatted for home printing, tablet use, or classroom download
Purpose: Offer a low-pressure creative experience that showcases your artistic style and subject matter

Coloring sheets are lightweight, accessible, and highly shareable. They perform well as top-of-funnel magnets for illustrators, wellness creators, art educators, and family-focused entrepreneurs. This format introduces new audiences to your work while giving them something they can interact with right away.

If you run art-based courses or sell printables, this asset creates a logical step toward your deeper catalog.

Where to Use It:

  • Download from an Instagram or Pinterest post
  • Opt-in from a blog about art, parenting, or mindfulness
  • Gift for email subscribers during a seasonal campaign

Examples:

  • Mindfulness Coach: “Mandalas for Stress Relief”, designed for calm, repetitive coloring
  • Children’s Illustrator: “Animal Adventures Pack”, line drawings for preschool or elementary-age kids
  • Brand Artist: “Logo Concept Sheet”, inspired by your visual identity work, with patterns and icons to color

This format works best when it reflects your core style. It’s also an opportunity to turn casual browsers into buyers who appreciate your design sensibility.

26. Canva template

Format: Editable link to a custom-designed Canva template, paired with usage instructions
Purpose: Save your audience time on content creation while reinforcing design best practices

A Canva template solves two major pain points: blank page syndrome and inconsistent branding. Whether you offer marketing strategy, visual design, or online growth services, this asset lets your subscribers apply your principles in their own workflows. Templates often outperform static PDFs in engagement because they’re editable, visual, and directly tied to results.

Use this magnet to demonstrate visual clarity and reinforce your expertise without requiring additional tools.

Where to Use It:

  • Embedded in a lead magnet funnel for content creation or branding
  • Offered during a free training or product preview
  • Downloadable from a blog post about visual content strategy

Examples:

  • Social Media Coach: “Instagram Carousel Template Pack”, drag-and-drop layouts with engagement prompts
  • Webinar Consultant: “Slide Deck Starter Kit”, designed for clarity, hierarchy, and pitch alignment
  • Blogging Strategist: “Pinterest Pin Template”, optimized for visibility and click-through

Canva templates prove you understand not just what looks good, but what works across channels. They create daily use and long-term trust.

27. Video tutorial: How I made this

Format: 5–10 minute screen recording or voiceover walkthrough of a project, deliverable, or workflow
Purpose: Reveal your process in real time and showcase your skill without overproduction or polish

A behind-the-scenes tutorial is one of the fastest ways to build credibility. It shows how you work, what tools you use, and how you think through each step. Unlike a structured course lesson, this format feels spontaneous and real, which makes it compelling and trustworthy.

Use this lead magnet to turn a finished product into a teachable moment. Let viewers see your decisions, edits, and pivots as they happen.

Where to Use It:

  • Offered as an opt-in from YouTube, TikTok, or email
  • Shared on a course preview page as a free module
  • Embedded in a case study or blog post about your process

Examples:

  • Food Blogger: “Recipe Walkthrough: Sheet Pan Dinners”, explains ingredient swaps and cooking time logic
  • UX Designer: “Wireframe to Final Mockup”, uses Figma to show how visual decisions evolve
  • Lettering Artist: “From Sketch to Vector”, screen-recorded breakdown using Procreate and Illustrator

This format turns transparency into a strategy. It builds trust without needing a polished studio setup.

28. Behind-the-scenes of a creative process

Format: Mini video, annotated photo gallery, or visual walkthrough PDF
Purpose: Show how a project unfolds from concept to completion, highlighting your method, tools, and decisions along the way

This resource gives your audience insight into the layers of creative thinking they don’t normally see. It positions you as both an expert and a systems thinker. The goal is not just to inspire, but to demonstrate a repeatable approach your audience can learn from or hire.

Behind-the-scenes content resonates especially well with visual creators, makers, and service providers who want to emphasize depth and intentionality.

Where to Use It:

  • As a subscriber-only blog post or bonus lesson
  • Shared in a “project breakdown” series on email or LinkedIn
  • Embedded inside a portfolio or service sales page as context

Examples:

  • Filmmaker: “My 5-Step Production Process”, photo series from storyboard to post-editing
  • Fine Artist: “Canvas Prep to Final Stroke”, showcases material choices, color mixing, and layering technique
  • Packaging Designer: “From Sketch to Shelf”, timeline of prototypes, dielines, and brand voice integration

This format reinforces your creative judgment and makes your process part of your value proposition.

29. (Non-AI) prompt calendar

Format: Monthly calendar or spreadsheet with 30+ prompts for content creation, journaling, or skill-building
Purpose: Eliminate indecision and support daily consistency across your audience’s creative or strategic work

A prompt calendar acts as both a system and a motivator. For creators trying to post regularly, journal daily, or complete a skill challenge, this tool gives them the structure to follow through. Each prompt nudges them toward reflection, visibility, or small wins.

This format is ideal for audience segments who are stuck in planning mode and need built-in momentum.

Where to Use It:

  • Downloadable from a content strategy blog or training
  • Sent in a welcome email sequence as a bonus
  • Shared during a 30-day challenge or mini community sprint

Examples:

  • Content Coach: “30-Day Reels & Storytelling Calendar”, a prompt per day mapped to growth, trust, and offer positioning
  • Journaling Educator: “Mindset Reset Calendar”, each prompt targets a belief, decision, or challenge
  • Photography Instructor: “Daily Composition Challenge”, photo ideas tied to lighting, framing, and color

Prompt calendars support habit formation and surface strong, shareable output. They position you as the source of both inspiration and accountability.

30. Bundle of past work samples

Format: Curated portfolio of client work, creative projects, or case studies in PDF or web gallery format
Purpose: Build trust through proof, demonstrating your style, process, and client outcomes

A curated sample pack serves two functions: it validates your authority and gives potential clients a sense of how your work feels in practice. It’s more than a showcase, it’s a filter for alignment. When presented well, this asset speeds up sales conversations by removing ambiguity around scope and results.

Add context to each sample, what the goal was, what you delivered, and what impact it had.

Where to Use It:

  • Linked in service pages or project-based funnels
  • Sent as a follow-up after a discovery call
  • Used as a downloadable asset to qualify inquiries

Examples:

  • Ghostwriter: “Top Blog Posts Bundle”, each with a short commentary on tone, structure, and audience targeting
  • Designer: “Brand Kit Samples”, logos, typography, and visual guides from different niches
  • Videographer: “Mini Documentary Collection”, links or files with notes on editing decisions and creative direction

This magnet works especially well when your prospects are comparison shopping. It moves them from “Who can do this?” to “You’re the one who already has.”

31. AI tool generator (e.g. quiz builder, copy prompter)

Format: Spreadsheet, form, or no-code tool powered by AI scripts or structured logic
Purpose: Give your audience a fast, repeatable way to produce a result, based on your framework

A micro-generator simplifies a task your audience repeats often. This could be writing subject lines, generating quiz questions, or structuring affirmations. The real value isn’t just in the automation, it’s in how your logic shapes what the tool produces.

This format bridges your expertise with your audience’s daily workflow. It’s not about novelty; it’s about speed, quality, and consistency.

Where to Use It:

  • Lead magnet for a marketing or curriculum design audience
  • Bonus resource for a mini course or membership
  • Embedded in a Notion or Airtable workspace

Examples:

  • Curriculum Developer: “Course Quiz Builder”, auto-generates quiz questions based on module topics
  • Email Strategist: “Subject Line Generator”, uses voice tone + offer type to return tailored options
  • Mindset Coach: “Daily Affirmation Builder”, selects intention + goal area to output a ready-to-use statement

Generators function like assistants that run on your thinking. They scale your process, and build dependency on your logic.

32. ROI calculator

Format: Interactive spreadsheet or web-based calculator using prebuilt formulas
Purpose: Help your audience quantify the return on a strategy, product, or service before making a purchase decision

An ROI calculator makes your value tangible. It takes abstract benefits and converts them into potential revenue, savings, or time recaptured. This tool works well in any offer where financial or operational impact is part of the promise. When customized properly, it becomes a sales asset that reinforces your business case, before the pitch.

You control the variables and logic, so the output reflects your methodology, not just raw math.

Where to Use It:

  • Embedded on a course or service sales page
  • Included in an onboarding funnel to pre-qualify high-ticket leads
  • Shared during webinars, masterclasses, or launch events

Examples:

  • Sales Funnel Strategist: “Lead Generation ROI Tool”, projects added revenue from funnel conversion improvements
  • Fitness Coach: “Cost of Inaction Calculator”, compares monthly habits to long-term health outcomes and expenses
  • Green Business Consultant: “Sustainability Upgrade ROI”, models energy savings across typical small office use

This magnet attracts buyers who are analytical, risk-averse, or managing budgets. It helps close the gap between interest and financial commitment.

33. Pricing estimator

Format: Spreadsheet, calculator, or form-based logic tool with built-in pricing formulas
Purpose: Filter serious leads by providing transparent pricing logic before custom proposals or calls

A pricing estimator manages expectations and reduces time spent on non-buyers. It allows prospects to understand how your pricing works, based on scope, features, timeline, or volume. For consultants, freelancers, and service providers, this tool improves the sales process by aligning budget and deliverables upfront.

Unlike static pricing tables, an estimator adjusts to the user’s selections, giving them a sense of control while reinforcing your process.

Where to Use It:

  • On your service inquiry page or booking flow
  • Shared post-webinar or during launch events
  • Gated as a “serious inquiry” magnet

Examples:

  • Web Designer: “Site Feature Estimator”, users select homepage, ecommerce, blog, and CRM integrations
  • Video Producer: “Project Scope Calculator”, estimates cost by footage length, editing complexity, and turnaround time
  • Brand Consultant: “Identity Refresh Estimator”, price estimate based on deliverables like logo, brand book, and messaging audit

This tool helps you qualify leads and remove pricing ambiguity, while also reinforcing the professionalism of your offering.

34. “Find your course idea” quiz

Format: Interactive quiz that maps user responses to viable course topics based on strengths, audience, and positioning
Purpose: Solve indecision by leading creators to a focused, validated course topic

This quiz guides experienced creators who are ready to scale, but unsure what to teach first. It connects their existing expertise with audience demand, bridging the gap between knowledge and monetization. Each outcome should correspond with a specific course format, funnel structure, or launch pathway.

Use this magnet to segment leads by niche, readiness, or product type.

Where to Use It:

  • In your lead generation funnel for course creation products
  • Paired with a webinar or challenge about offer development
  • Shared in content about monetizing expertise or validating ideas

Examples:

  • Content Coach: “What Kind of Course Should You Launch First?”, results link to mini course, signature program, or coaching hybrid
  • Business Strategist: “Course Topic Clarity Quiz”, results mapped to high-ROI pain points
  • Creative Mentor: “Teach What You Know”, quiz segments based on skill type, audience size, and existing content

This quiz does more than deliver clarity, it builds trust by demonstrating that you understand your audience’s skills and their business goals.

35. Content repurposing flowchart

Format: Visual PDF or interactive map showing how one content asset can be transformed into multiple formats
Purpose: Help creators stretch their output, grow their reach, and reduce burnout from creating net-new content

A repurposing flowchart solves a high-friction problem: how to stay visible without constantly producing from scratch. This asset shows your method for multiplying content across platforms, increasing efficiency, and maximizing audience exposure. It’s a strategic magnet for creators who feel overextended or underleveraged.

This tool also leads naturally into offers like memberships, automation tools, or full content systems.

Where to Use It:

  • Shared after a workshop or masterclass on content planning
  • Embedded in your blog or YouTube content around consistency
  • Lead magnet for content marketing, brand building, or audience growth offers

Examples:

  • YouTube Strategist: “One Video, Ten Touchpoints”, flowchart maps clips, reels, carousel posts, blog summaries, and emails
  • LinkedIn Consultant: “Long-Form Content Repurposing Map”, turns a post into polls, carousels, video clips, and lead magnets
  • Podcast Coach: “Audio Repurposing Flow”, diagram for transcripts, quote graphics, reels, and email segments

Repurposing systems offer instant perceived value because they extend what creators already have. When mapped clearly, they become an obvious next step toward your higher-tier systems.

36. Notion or Airtable template

Format: Shareable link to a pre-built workspace for content, task, or client management
Purpose: Help your audience organize their workflow, centralize data, and streamline operations using a customizable tool

These templates reduce cognitive load and operational friction. They work especially well for creators and consultants who need structure but don’t have time to build systems from scratch. When your audience uses your exact process, via your template, you create long-term stickiness and authority.

This magnet leads naturally into offers like premium dashboards, tech stack audits, or consulting packages.

Where to Use It:

  • Embedded in your lead magnet funnel for systems, ops, or productivity content
  • Offered after a webinar about client onboarding or content planning
  • Shared on social with walkthroughs of how it’s used

Examples:

  • Social Media Manager: “Weekly Content Planner”, columns for platform, format, topic, CTA, and media links
  • Business Consultant: “Client Pipeline Tracker”, sorts leads by stage, next action, and deal size
  • Podcast Host: “Episode Production Board”, tracks guest outreach, editing status, and promotion schedule

Notion and Airtable templates become part of your audience’s daily tools. That kind of integration builds trust, and opens the door for long-term engagement.

37. Email swipe file

Format: PDF or document containing pre-written email sequences categorized byPurpose
Purpose: Help creators write better emails faster, using tested structures for launches, follow-ups, or list nurturing

An email swipe file removes blank-page pressure and teaches by example. It delivers immediately usable assets while reinforcing best practices like tone, pacing, and conversion structure. For creators managing their own list, this tool offers both time savings and skill building.

Use this magnet to segment subscribers by offer type, email platform, or funnel stage.

Where to Use It:

  • Offered during a lead magnet funnel tied to list growth or digital product sales
  • Bonus in an email marketing course or workshop
  • Shared on a thank-you page as an upgrade from a checklist or guide

Examples:

  • Course Launch Strategist: “5-Email Launch Sequence”, pre-cart, open-cart, social proof, urgency, final day
  • Consultant: “Proposal Follow-Up File”, three email templates with different angles: reminder, value framing, deadline nudge
  • Coach: “Nurture Series for Cold Leads”, weekly emails designed to rebuild connection and invite re-engagement

Swipe files are easy to implement and easy to upgrade. They also let your subscribers experience the kind of structured thinking they’ll find in your paid material.

38. 11-Day email challenge

Format: Automated daily email sequence with micro-tasks, prompts, or mindset shifts
Purpose: Build trust and habit-forming momentum across a short, focused time frame

An 11-day challenge gives your audience a rhythm. It drives daily action and reinforces the value of small wins. By anchoring each day around a specific prompt or task, you train subscribers to expect consistency from you, while leading them toward a deeper offer.

This format works best when the challenge supports an outcome that directly relates to your course, coaching, or product.

Where to Use It:

  • Main opt-in on your homepage or blog
  • Evergreen funnel connected to a mini course or paid upsell
  • Shared as a social post CTA or “start anytime” onboarding path

Examples:

  • Wellness Coach: “Boost Your Energy in 11 Days”, hydration, sleep, movement, and focus habits
  • Business Coach: “Validate Your Offer in 11 Steps”, daily tasks for refining messaging and collecting feedback
  • Art Instructor: “11 Days of Daily Sketching”, practice prompts and confidence-building activities

Challenges are interactive by design. They give your audience a structured win, and give you a clear opportunity to offer the next step once trust is built.

39. 30-day Instagram content calendar

Format: Editable content calendar with daily post prompts and optional caption starters
Purpose: Help creators stay consistent and on-brand while reducing time spent planning social content

This lead magnet solves a universal problem: “What do I post today?” It also positions you as a strategic thinker, not just someone who posts, but someone who builds visibility onPurpose. Each prompt can be tied to a business goal, growth, trust, or conversion, making the calendar both creative and strategic.

Use this magnet to open the conversation around content batching, audience engagement, and platform strategy.

Where to Use It:

  • Embedded in your content strategy blog, video, or workshop
  • Offered as a download from a reel, carousel, or story
  • Included in a systems or marketing funnel for coaches or creators

Examples:

  • Fitness Creator: “Home Workout Reels Calendar”, daily movement clips tied to different muscle groups or goals
  • Consultant: “Authority Content Plan”, 30 prompts for positioning posts, testimonials, and behind-the-scenes insights
  • Food Blogger: “Daily Recipe Teasers”, post ideas mapped to ingredients, seasons, or dietary tags

Content calendars don’t just help your audience stay visible, they show you understand how daily actions compound into long-term growth.

40. “Tools I use” resource guide

Format: Curated PDF, Notion list, or webpage with tool names, links, and brief descriptions
Purpose: Save your audience time by sharing the vetted tools that power your business, workflow, or content creation

This magnet reduces research fatigue. For creators and consultants trying to scale, knowing what tools to use, and why, adds instant value. The key is context: describe how each tool supports your goals, integrates into your systems, or solves a real problem.

This format also opens opportunities for affiliate links, product partnerships, or deeper systems-based offers.

Where to Use It:

  • Downloadable from your tech stack blog post or setup video
  • Part of your onboarding sequence for clients or students
  • Bonus resource after a lead magnet about systems or automation

Examples:

  • Remote Work Coach: “My Digital Nomad Stack”, VPN, password manager, productivity apps, co-working tools
  • Video Editor: “My Editing Toolkit”, editing software, plug-ins, file organization tools, and royalty-free asset sources
  • E-commerce Coach: “Online Seller Tools Guide”, platform, payment processors, fulfillment software, and product mockup apps

This guide positions you as both a practitioner and an operator, someone who makes smart decisions behind the scenes.

41. Trello board for project planning

Format: Shareable Trello template board with pre-built columns, cards, and checklists
Purpose: Give your audience a hands-on way to organize, visualize, and complete a repeatable process

A pre-built board turns your method into a system. It shows your audience how to move from idea to execution using clear stages and visual workflow. For creators managing launches, client onboarding, or team collaboration, this tool becomes a trusted part of their weekly routines.

It also demonstrates your operational thinking, beyond inspiration, you’re offering implementation.

Where to Use It:

  • Opt-in from a launch planning guide or systems blog post
  • Offered after a live session or training about execution strategy
  • Shared in a course module as a student success tool

Examples:

  • Course Creator Coach: “Course Launch Trello Board”, tracks planning, content creation, email sequence, and tech setup
  • PR Consultant: “Media Outreach Trello Board”, stages include pitch prep, outreach, follow-up, and publication tracking
  • Creative Director: “Client Project Board”, onboarding, briefing, design, revision, delivery

Templates like this create long-term stickiness. Your audience uses them regularly, and associates your brand with clarity and progress.

42. One-page strategy map

Format: Visual PDF or digital whiteboard snapshot mapping out business, brand, or content strategy pillars
Purpose: Help your audience connect high-level vision with day-to-day action across multiple areas of their work

A strategy map offers clarity. It takes fragmented efforts, branding, product, messaging, growth, and pulls them into one visible system. For creators scaling a business, this is a powerful way to plan holistically and act intentionally.

This format is ideal for coaching, consulting, and teaching offers that involve planning, reflection, or structure.

Where to Use It:

  • Part of a welcome sequence for course or coaching subscribers
  • Downloadable from a live session or podcast episode
  • Lead magnet for brand positioning, offer development, or growth planning funnels

Examples:

  • Brand Consultant: “Business Identity Map”, audience, values, tone, visual strategy, content direction
  • Life Coach: “Whole Self Alignment Map”, tracks personal goals across relationships, finance, health, and growth
  • Content Creator: “Editorial Planning Canvas”, maps themes, frequency, repurposing flow, and call-to-action structure

This magnet blends vision with action. It helps your audience zoom out, make smarter decisions, and see how all the parts of their business fit together.

43. Productivity system template

Format: Pre-built productivity framework in Notion, Trello, Asana, or Google Sheets
Purpose: Give creators a proven structure to manage tasks, time, and focus without starting from scratch

This asset addresses one of the most consistent ICP pain points: time. A strong productivity system doesn’t just organize, it reduces overwhelm and drives execution. Your version of productivity becomes the system they adopt. That creates deeper buy-in when you introduce additional offers or coaching.

Focus on clarity, repeatability, and quick integration.

Where to Use It:

  • Opt-in for your workflow-related content or programs
  • Shared inside a lead nurture series or follow-up funnel
  • Used as a foundational asset in a mini course or coaching program

Examples:

  • Executive Coach: “Morning + Evening Routine Board”, habit tracking, goal review, and journaling space
  • Operations Consultant: “Team Task Planner”, assignments by team member, deadlines, and status stages
  • Creative Freelancer: “Project Lifecycle System”, from inquiry to delivery, including revision logs and final invoicing

System templates show that you don’t just deliver value, you deliver structure. And structure sells.

44. 3-step sales funnel walkthrough (PDF)

Format: Visual guide or annotated funnel diagram with copy samples and conversion strategy
Purpose: Simplify funnel-building by giving your audience a proven framework they can replicate or adapt

A 3-step funnel walkthrough removes the guesswork around what happens after someone opts in. It shows how to guide prospects from free offer to paid product using clear milestones: lead magnet → nurture → offer. For time-strapped creators, this resource provides a plug-and-play foundation they can customize.

Use this lead magnet to reframe your value as strategic, not just creative.

Where to Use It:

  • Opt-in from a blog post or training about course or service funnels
  • Embedded in your email marketing course or coaching program
  • Follow-up asset from a webinar, live session, or product demo

Examples:

  • Marketing Consultant: “Info Product Funnel Map”, starts with a checklist lead magnet, nurtures with a 3-email sequence, and closes with a mini course pitch
  • Coach: “Discovery Call Funnel Walkthrough”, uses a quiz as the entry point, followed by testimonials and a booking CTA
  • E-commerce Mentor: “Starter Store Funnel Guide”, opt-in to discount code, nurture with product education, convert through urgency-based promo

This resource helps your audience visualize and build a system. When done right, it becomes the first step toward platform migration, automation, or coaching engagement.

45. Free access to a community trial

Format: Timed access (7–14 days) to a private group, cohort, or membership forum
Purpose: Let prospective members experience your interactive ecosystem before committing to a paid plan

Community trials give leads the chance to observe how your group operates, what you post, how support works, and who else is inside. It’s a powerful magnet for programs centered on peer learning, accountability, or coaching. Rather than selling community through description, you offer direct experience.

Make the onboarding frictionless and the value unmistakable.

Where to Use It:

  • Offered from your course sales page or email funnel
  • Follow-up to an onboarding challenge, webinar, or lead magnet
  • Shared in DM conversations or post-consultation recap emails

Examples:

  • Course Creator: “Join My VIP Community for 7 Days”, includes access to group chats, resource threads, and live Q&A
  • Mastermind Host: “Accountability Sprint Preview”, access to check-in posts, templates, and peer coaching
  • Fitness Coach: “Challenge Group Trial”, daily thread participation and intro Zooms during a 7-day challenge cycle

Trials showcase your culture, not just your content. When members engage with each other and see your presence firsthand, they’re more likely to stay and invest.

46. Digital planner sample

Format: Select pages or sections from your full digital planner, designed for tablet or print use
Purpose: Give your audience a preview of your planning system, building trust and interest in the full product

Digital planners are tactile experiences in a digital format. Sharing a sample lets leads test the format, usability, and layout, while reinforcing the intention behind the structure. Whether you’re selling templates, coaching, or full productivity products, this sample becomes the gateway.

Pair it with usage instructions or a walkthrough to increase implementation.

Where to Use It:

  • Opt-in from a product page, YouTube video, or productivity workshop
  • Embedded in a free Notion setup or planning module
  • Shared in stories, reels, or carousel posts as a link-in-bio CTA

Examples:

  • Academic Coach: “Semester Planning Sample”, weekly views, assignment trackers, and reading logs
  • Executive Coach: “Quarterly Goal Tracker Preview”, includes milestone mapping, review prompts, and habit tracking
  • Wedding Planner: “Venue + Vendor Organizer Sample”, budget table, contact info tracker, and priority list

Planner samples not only demonstrate your system, they invite ongoing engagement with your process, turning one download into a long-term workflow.

47. Vision board kit

Format: Downloadable bundle of digital collage templates, inspirational prompts, and image sets
Purpose: Help your audience clarify and visualize future goals while anchoring those goals in actionable categories

A vision board kit adds structure to an otherwise abstract exercise. Rather than a vague collage of ideas, your version can connect visual inspiration to strategic categories, business, personal, creative, or financial. This tool appeals to both intuitive and tactical learners when executed withPurpose.

Use this asset to frame future-planning as a precursor to transformation, and your offer as the bridge.

Where to Use It:

  • As part of a New Year campaign or quarterly planning series
  • Opt-in from a personal development workshop or creative challenge
  • Shared as an onboarding step before a coaching program or strategy call

Examples:

  • Mindset Coach: “Life Vision Board Starter Pack”, includes goal prompts, mood board templates, and digital layout files
  • Startup Consultant: “Business Clarity Kit”, brand values, company culture, and revenue vision framing
  • Creative Entrepreneur: “Pinterest-Style Vision Kit”, includes visual libraries for lifestyle, product, and brand themes

This kit turns aspiration into structure. It’s ideal for coaches and creators who teach transformation but want to start with visualization.

48. Survey with auto-response analysis

Format: Survey form connected to an automated email response based on the user’s input
Purpose: Collect valuable audience insights while delivering personalized feedback in return

This magnet turns market research into a lead conversion tool. You gather data on your audience’s stage, goals, or challenges, and they receive an immediate, structured analysis based on their responses. The perceived value is high because the feedback feels personalized, even when it’s built from conditional logic.

You position yourself as someone who doesn’t guess, you diagnose.

Where to Use It:

  • Opt-in for a coaching or service-based offer
  • Shared in a social callout asking for feedback or input
  • Embedded in a pre-launch waitlist or validation campaign

Examples:

  • Health Coach: “Lifestyle Habits Survey”, respondents get a personalized tip and a link to a habit tracker
  • Brand Consultant: “Brand Maturity Survey”, response email outlines where their brand falls across positioning, visuals, and voice
  • Leadership Mentor: “Leadership Style Quiz”, each style receives a detailed profile with strengths and growth prompts

This magnet creates both segmentation and credibility. You learn what your audience needs, while they experience your thinking in action.

49. Toolkit download (PDF + links)

Format: Curated PDF with clickable resources, tools, templates, and step-by-step instructions
Purpose: Deliver a comprehensive starter pack that helps your audience take fast, confident action toward a defined goal

A toolkit magnet balances curation and direction. It shows your audience what to use, why it matters, and how to apply it to their work. For creators navigating new platforms, formats, or systems, this type of resource saves hours of trial and error.

Use it to showcase your taste, your method, and your ability to streamline complexity.

Where to Use It:

  • Opt-in from a content-heavy blog post or video tutorial
  • Shared in a lead nurture series connected to systems or marketing
  • Offered after a workshop as a tactical implementation asset

Examples:

  • Content Strategist: “Content Repurposing Toolkit”, apps, workflows, and templates to turn one post into five formats
  • Finance Consultant: “Small Business Budget Toolkit”, expense tracker, invoicing software, and monthly review checklist
  • Music Educator: “Digital Music Creation Kit”, recommended plug-ins, free DAWs, tutorial links, and starter project templates

Toolkits position you as a filter, someone who has already vetted the noise and handed over the best parts.

50. Framework diagram (with explanation video)

Format: Visual diagram of a proprietary method, plus a short explainer video (hosted in Teachable or embedded)
Purpose: Clarify your unique process so prospects can see how your method solves their problem, step-by-step

Your framework is your product’s operating system. When visualized well, it differentiates you from other coaches, consultants, or educators by naming your process and assigning meaning to each phase. The paired video allows you to speak directly to the viewer, building trust in your clarity and confidence.

Use this magnet when your audience needs more than inspiration, they need structure.

Where to Use It:

  • Embedded in your product sales page as a free preview
  • Shared in a funnel focused on results, not just benefits
  • Offered as a lead magnet from a blog or training post

Examples:

  • Time Management Coach: “RESET Productivity Framework”, Reassess, Eliminate, Systemize, Evaluate, Track
  • Sales Consultant: “CONVERT Framework”, each letter tied to a sales behavior or decision point
  • Design Educator: “COLOR Method”, Composition, Opacity, Layering, Originality, Refinement

Frameworks elevate your offer from a collection of tips to a method with momentum. The video builds trust and primes the audience for implementation.

51. Sample nurture email sequence

Format: Pre-written series of 3–7 emails with subject lines, body copy, and recommended send schedule
Purpose: Give your audience a proven way to build trust, drive engagement, and transition from opt-in to offer

This magnet solves a mid-funnel problem: what to say after someone signs up. It helps creators communicate without overthinking or stalling. Each email should serve aPurpose, educate, relate, invite, and convert.

You reinforce your expertise by showing exactly how to move someone from interest to action.

Where to Use It:

  • Bonus in a course on list building, automation, or course creation
  • Offered from a blog post about audience engagement
  • Shared as a download post-webinar or during a free challenge

Examples:

  • Business Coach: “7-Day Trust Builder Sequence”, delivers quick tips, story-based proof, and a low-barrier offer
  • Career Consultant: “Job Hunt Email Series”, shares positioning, market insight, and resume-focused CTA
  • Photographer: “Portfolio Engagement Series”, emails that educate, showcase style, and invite consultations

This resource becomes the starting point for automation. It shows that your business doesn’t just teach, it operates with clarity and intent.

52. Meta-magnet: Lead magnet builder template

Format: Step-by-step guide or interactive template that helps your audience plan and execute their own lead magnet
Purpose: Teach your audience how to build lead magnets, by giving them one they can customize and launch

This magnet creates a self-replicating cycle. If your audience includes coaches, course creators, or service providers who also need to grow lists, this template gives them a head start. Instead of abstract strategy, you provide a fill-in-the-blanks tool that helps them launch fast.

Pair it with prompts, examples, and visual structure to maximize usability.

Where to Use It:

  • Main opt-in for your list-building or audience-growth funnel
  • Embedded in a mini course on digital product creation
  • Shared on LinkedIn, Substack, or Twitter as a call to action

Examples:

  • Marketing Coach: “Lead Magnet Blueprint”, selects format, title, CTA, and delivery platform
  • Copywriting Educator: “Fast-Track Lead Magnet Worksheet”, with prompts for hooks, angles, and follow-up emails
  • Online Business Mentor: “Launch Your First Freebie”, includes tracking dashboard and conversion goals

The meta-magnet proves you know how to teach action. That makes the next pitch even easier.

How to create your own lead magnet in under 24 hours with content you already have

As we mentioned earlier, most experienced creators are already sitting on assets they haven’t yet packaged, transcripts from coaching calls, client onboarding information, content outlines, repurposed blog posts, YouTube videos, and podcast transcripts. Creating lead magnets from content you currently own, significantly speeds up the process.

All you will need to do is structure the content and align each asset with a next step in your paid offer. The goal is to format first, build fast, then distribute with intention.

Step 1: Choose your format strategically

Start with the outcome you want to create for your lead. Your lead magnet should demonstrate what it’s like to work with you, learn from you, or apply your frameworks to a real problem. The goal here is to prove relevance. The format should deliver one useful result, or A-B transformation. That result should naturally connect to your deeper solution.

Here are the most effective formats for business creators focused on list growth and client acquisition.

  • Digital downloads: PDF guides, templates, workbooks, scripts, or diagnostic forms
  • Interactive tools: Quizzes, calculators, scoring rubrics, or intake surveys 
  • Multimedia previews: A sample course lesson hosted on Teachable, a short training video, or an audio session

If you already have a course, clip a lesson and offer it as a preview. If you’re a consultant, share the exact form you use to qualify new clients. If you run a coaching practice, turn a repeated conversation into a self-assessment or intake checklist.

Step 2: Build with speed using AI tools you already trust

Once you’ve chosen your format, use generative AI tools, like ChatGPT, Claude, or Gemini AI to complete key parts of the creation process. These tools should function as productivity partners, not content engines. Their role is to reduce time spent on structure, formatting, and draft development, so you can reserve your attention for subject matter expertise and positioning.

Use text-based AI tools to complete:

  • A clear outline that introduces the resource and leads into your offer
  • Conversion-focused copy including subject lines, confirmation emails, and opt-in landing page content
  • Formatting for PDFs, checklists, workbooks, or response guides

Use visual or code-based tools to:

  • Create simple calculators, quizzes, or decision trees that sort leads by need
  • Structure templates inside Canva, Notion, or Airtable using repeatable logic
  • Standardize formatting across branded materials (color schemes, layout, typography)

If you’re creating a diagnostic quiz, for example, prompt your AI assistant to draft tiered responses linked to next-step offers. If you’re offering a swipe file, ask it to organize your best-performing headlines or design snippets into a usable format with labeled sections.

Think of AI output as a base layer. Layer on your voice, your experience, and your context. When the lead magnet is ready, test it for clarity. Ensure every element answers one specific question: What decision does this move the person closer to?

Step 3: Publish and promote with a clear path to your core offer

Your lead magnet becomes valuable once it reaches the right audience. That reach should be intentional and built into the existing channels you already manage. Be careful not to introduce new friction or complex setup work.

How to distribute your lead magnet inside a system that supports scale:

Host it inside your Teachable school

Add your asset as a digital download, a free mini course, or a sample lesson. This keeps access controlled, trackable, and aligned with your other offerings. If your magnet connects to a course, use that structure to deliver a preview that builds trust.

Automate the delivery and email sequence

Map a short sequence that introduces the resource, confirms value, and positions the next logical step, such as booking a call, joining a full course, or subscribing to a deeper program.

Embed promotion across content workflows you already run

Add it to the end of blog posts, email newsletters, podcast scripts, or presentation decks. Use placements where attention is high and context is relevant. Mention the magnet inside a course module. Add it as a low-cost upsell post-checkout. Link it in pinned comments, bios, and slide decks used in live webinars.

Your lead magnet is a fixed asset that compounds over time. 

With Teachable, you reduce admin, increase conversions, and build a business that grows, on your terms. If you haven’t started yet, launch your free Teachable school and publish your first lead magnet today.

FAQs for lead magnets

What is a lead magnet and why does it matter for established creators?

A lead magnet is a resource that turns passive attention into qualified leads. For business-ready creators, it acts as the entry point to your sales funnel, driving list growth and positioning your offer.

How can I create a lead magnet quickly if I already have content?

Most creators already have assets like templates, frameworks, or client tools. This guide shows you how to package those into a lead magnet within 24 hours, using simple formats like PDFs, quizzes, or mini-courses.

Do lead magnets have to be free to work?

No. Creators often use low-cost or “tripwire” lead magnets to filter for high-intent subscribers. Teachable’s checkout system supports both free and paid lead magnets seamlessly.

What types of lead magnets work best for consultants and coaches?

Checklists, quizzes, mini trainings, and proposal templates are highly effective. They qualify leads, demonstrate your process, and naturally guide prospects toward higher-ticket offers.

How do I automate delivery and follow-up using Teachable?

Teachable lets you host the lead magnet, automate access, and trigger follow-up emails directly. You can also integrate your favorite email service provider for advanced segmentation and automated nurture sequences.

‍

‍

‍

Last day to file taxes in 2025

Software Stack Editor · March 31, 2025 ·

Okay, we admit it: tax season might not be the most exciting time of the year, but for online business owners (especially content creators, coaches, and consultants), it’s a prime opportunity to get your financial house in order. 

That being said, it’s no surprise that 64% of small business owners report feeling stressed during tax season. Between juggling deadlines, deciphering forms, and avoiding penalties, it’s easy to see why this time of year can feel overwhelming. 

The good news is that with proper preparation, you can stay ahead of the curve. So in this article, we’ll unpack why tax deadlines matter, what you need to know about filing taxes as a creator, and how to stay organized to avoid unnecessary stress and expenses.

Why tax deadlines matter for creator businesses

It goes without saying that tax deadlines aren’t just arbitrary dates on a calendar; they’re legal obligations that can have a significant impact on your financial stability. Take the deadlines seriously; they’ll keep you in good standing with tax authorities and help you avoid unnecessary penalties and interest.

Avoid financial penalties 

An obvious reason to respect tax deadlines is simply so you don’t have to pay fines and fees. Missing a tax deadline can cost you more than just a slap on the wrist; it can mean penalties that eat into your hard-earned profits. The IRS charges a failure-to-file penalty of 5% of your unpaid taxes for every month your return is late, up to 25%. That’s not even counting the interest that accrues daily on unpaid balances. 

For creators juggling multiple income streams, these penalties would siphon away money that could be reinvested in your business. So staying ahead of deadlines ensures that your profits stay in your pocket, not in Uncle Sam’s.

Maintain your business reputation 

A lesser-remembered reason to respect tax deadlines is that, for creator businesses, credibility is everything. Tax delinquencies can damage your reputation, especially if you’re seeking collaborations, partnerships, or funding. A clean financial record signals professionalism and responsibility, traits that are very valuable in the competitive world of online business.

Related: Download our business tax glossary of terms to know

Tax deadlines and where to find them

Staying on top of tax deadlines is one of the simplest ways to keep your business running smoothly. Here’s a breakdown of the key dates and where to find the resources you need to stay informed.

Federal tax deadlines

If you’re a sole proprietor or single-member LLC, your tax filing deadline aligns with individual tax filings: April 15. 

If your business is structured as a partnership or S corporation, the deadline is earlier: March 15. 

Deadlines falling on weekends or holidays are often moved to the next business day. Keeping track of these dates ensures you’re always prepared, so mark them on your calendar (and set advance reminders) to save yourself from last-minute stress. 

Additionally, businesses with fiscal years that don’t follow the calendar year will have different deadlines, usually the 15th day of the fourth month following their fiscal year-end. Be sure to check in with the IRS website or a tax professional to confirm the dates relevant to your situation.

Tax filing deadlines / irs.gov

Quarterly estimated tax deadlines

As a creator, you’re likely considered self-employed, which means the IRS expects you to pay taxes quarterly. These payments cover income and self-employment taxes, spreading the financial burden across the year. The deadlines are:

  • April 15
  • June 15
  • September 15
  • January 15 (of the following year)

Not paying enough throughout the year can result in underpayment penalties, so use tools like the IRS Estimated Tax Calculator to stay on top of your quarterly obligations.

State and local tax deadlines

Don’t forget about state and local taxes! Each state has its own tax filing requirements and deadlines. For example, California’s Franchise Tax Board might have different due dates than the IRS. Check your state’s Department of Revenue website to ensure you’re compliant with local regulations on everything from income taxes to sales taxes on digital products.

What happens if you miss the tax deadline?

Missing a tax deadline can have serious financial and operational repercussions, but there are ways to recover and minimize the damage. Here’s what to expect and how to act fast.

Late Filing Penalties 

As mentioned earlier, the IRS imposes penalties for late filings. In addition to the failure-to-file penalty, there’s also a failure-to-pay penalty, which starts at 0.5% of your unpaid taxes per month and can go up to 25% of your unpaid balance. These penalties add up fast, so even if you can’t pay in full, filing on time reduces these penalties and shows the IRS you’re making an effort.

Filing for an extension 

If you’re running behind, file as soon as possible to stop the penalty clock. You can also request an extension using Form 4868, which grants you an additional six months to file. Keep in mind, though, that this doesn’t extend your payment deadline. You’ll need to estimate your tax liability and pay at least 90% of what you owe by the original due date can help minimize penalties. 

Filing taxes as a creator business

As a creator, your tax filing needs may differ from those of traditional businesses. From managing diverse income streams to claiming business expenses, here are some key considerations to keep in mind.

Common tax forms for creator businesses

Creator businesses often deal with a variety of tax forms, and staying organized is key. Some of the most common forms include:

  • Schedule C: Used to report income or loss from a sole proprietorship. This is where you list income and deductions.
  • 1099-NEC: Received from clients who pay you $600 or more for freelance work.
  • 1099-K: Issued by online payment platforms like PayPal or Stripe, if you meet the reporting threshold.

Keeping these forms organized throughout the year makes filing much smoother.

Deductions to maximize savings

One of the perks of running a creator business is the ability to claim deductions that reduce your taxable income. Key deductions include:

  • Home office deduction: If you use part of your home exclusively for business, you can deduct a portion of your rent, utilities, and other expenses.
  • Equipment and software: Cameras, microphones, editing software, and other tools of the trade are essential for many creators and fully deductible.
  • Travel expenses: Business-related travel, including flights and accommodation, can also be written off.

By keeping detailed records and receipts, you can maximize these deductions and keep more money in your pocket.

Related: 5 total beginner tips for understanding and managing small business finances

How Teachable Pay can simplify tax prep

Managing your finances as a creator can be challenging, but tools like Teachable Pay are designed to make it easier. Here’s how:

You can track earnings with Teachable Pay: Teachable Pay provides detailed reports of your earnings, eliminating the need to manually track multiple revenue streams. With everything in one place, preparing your tax return becomes a breeze.

You can simplify reporting and compliance: When tax season rolls around, Teachable Pay’s exportable reports can be handed directly to your accountant or imported into tax software. This reduces the risk of errors and saves time during tax preparation.

Related: 7 reasons teachable:pay can help you sell more confidently

Tools and resources to help meet deadlines

Staying on top of tax deadlines requires the right tools and resources. Here are some recommendations:

Tax preparation software 

Tools like TurboTax, H&R Block, and QuickBooks Self-Employed are excellent for small business owners. They guide you through the filing process step-by-step and help identify deductions you might have missed.

Professional tax help

If your tax situation is complex, consider hiring a CPA who specializes in small businesses or creators. They can provide tailored advice and ensure your filings are compliant with federal, state, and local regulations.

Pro tip: Find a CPA who works with or is a tax attorney. This helps to avoid misinterpretation of tax law vs what’s on the IRS.gov website.

IRS and government resources 

The IRS website offers a ton of tools, including an Estimated Tax Calculator and an Interactive Tax Assistant. State tax websites also provide valuable information specific to your location.

Related: Manage your finances with teachable:pay & BackOffice

Final thoughts on filing taxes

Despite popular belief… tax season doesn’t have to be stressful! By planning ahead, staying organized, and taking advantage of the right tools, you can meet your deadlines with confidence. Remember, filing on time isn’t just about avoiding penalties: it’s about setting your business up for long-term success.

Whether you’re a seasoned creator or new to the game, the key to stress-free tax filing is preparation. Start early, use resources like Teachable Pay, and don’t hesitate to seek professional advice. With the right approach, you can focus on what you do best (building your business and creating great content) while also keeping your finances on track. So take the time to plan now, and you’ll thank yourself when tax season rolls around.

FAQs About Tax Deadlines

Do you still have to file taxes by April 15?

Yes, the standard tax filing deadline is April 15. However, if it falls on a weekend or holiday, the deadline is typically extended to the next business day.

What is the latest time you can file taxes?

You can file your taxes up until midnight on the due date (usually April 15) if you file electronically. Paper filings must be postmarked by the deadline.

Can I still file my taxes after the deadline?

Yes, you can file taxes after the deadline, but you may face late filing penalties and interest on unpaid taxes. If you expect a refund, there are no penalties for late filing, but it’s best to file as soon as possible.

Is there a deadline to file for a tax refund?

Yes, you must file your tax return within three years of the original deadline to claim a refund. After this period, the IRS will no longer issue a refund for that year.

‍

How to Repurpose Content into a Sellable Course

Software Stack Editor · March 26, 2025 ·

image

If you’re a content creator who’s killing it on social media already, you may not have realized this… but the content you’ve already spent hours perfecting can do more than just rack up likes. It can actually become the basis of your next revenue stream. 

We’re talking about repurposing content, which isn’t just about recycling material; it’s about strategically using what’s already working to create something bigger, better, and (most importantly) sellable. 

Your Instagram post that sparked a 100-comment discussion? That’s a course module waiting to happen! Your thread on X (formerly Twitter) that went viral? It’s halfway to becoming an in-depth masterclass. The knowledge is already there; you just need to package it into a structured, valuable learning experience.

And we can help. 😉

In this guide, we’ll walk you through the process of repurposing your best-performing social media content into a sellable course. Whether you’re a YouTuber, Instagram educator, TikTok strategist, or LinkedIn thought-leader, let’s break down how to identify the right material and compile it into a high-quality course that generates revenue.

{{coursepricing-component=”/blog-shortcodes/blog-popup”}}

Why repurposing content is a game-changer for creators

The beauty of repurposing is that you don’t have to start from scratch! If you’ve already built a social media following, you’ve likely tested different content formats, figured out what connects with your audience, and established a niche. So instead of reinventing the wheel, you can take what’s already working and turn it into a structured learning experience.

Some of the biggest benefits include:

  • Saves time and effort: Instead of spending months creating new course materials, you can refine and expand on existing content.
  • Proven engagement: You already know what your audience loves. Why not capitalize on that?
  • Increases revenue potential: Instead of relying solely on ad revenue, sponsorships, or affiliate marketing, you’ll have a direct income stream from course sales.
  • Strengthens your authority: A course establishes you as an expert in your field, helping you attract even more opportunities.

Now, many creators hesitate to launch a course because they assume it requires months of scripting, filming, and editing. While that assumption is valid, you can definitely cut that time in half by making the most of what you’ve already created. 

Because when you’re working with content that’s already been tested, refined, and validated, you cut down on production time significantly… which also means you can go from concept to launch in weeks instead of months. So while other creators are still wrestling with their first module, you’ll be making sales.

Related: How to create a course outline with real examples

Choosing the right content to repurpose

To be clear, not all content is worth repurposing; some posts perform better than others, and you want to focus on what’s already resonating with your audience. The trick is to identify your most valuable, evergreen content: the posts and videos that continue to drive engagement, spark discussions, and solve real problems for your ideal customer.

So to identify your strongest content:

  • Check analytics on each platform: Look at likes, shares, saves, comments, and watch times. High engagement indicates that your audience found the content valuable.
  • Review audience interactions: Did certain posts spark a lot of questions? Those topics may need deeper explanation… which makes them perfect for a course.
  • Identify recurring themes: If you find yourself discussing the same topic over and over, that’s a sign it could be turned into a comprehensive learning experience.

→ Pro tip: focus on evergreen topics 

Trendy content might give you short-term engagement, but evergreen content builds long-term revenue. If your content is tied to a fleeting trend (hello, Instagram algorithm updates), it’s probably not the best fit for a course.

Instead, look for content that covers timeless skills, strategies, and knowledge. A post explaining how to optimize YouTube titles for clicks is solid. A TikTok breaking down last month’s social media trends is… not quite as solid.

Examples of evergreen content:

  • “How-to” posts (like “How to Monetize a YouTube Channel”)
  • Strategy breakdowns (like “My 5-Step System for Instagram Growth”)
  • Educational deep dives (like “The Psychology of Viral Content”)

If a piece of content continues to bring in new audience members long after it was posted, it’s probably a great candidate for repurposing.

Related: How to launch your first course in three days using the Teachable AI curriculum generator

How to structure your course using repurposed content

Even though you’ll be using content you already created, you still might feel a little intimidated about how to put together your course. After all, a successful course isn’t just a collection of posts; it needs a logical flow that guides students through a transformation. Let’s take a look at how you might approach this.

Mapping out course modules

The goal here is to take your best content and organize it into a clear, step-by-step learning experience that leads your students from the basics to advanced concepts.

Begin by grouping similar content together into modules or sections that follow a clear learning path. For example, if you have multiple Instagram posts about personal branding, these can be combined into an introductory module on brand identity. From there, you can expand into more detailed lessons on audience engagement, content strategy, and monetization techniques. 

So you can see how you can begin structuring your content in a way that gives students a well-rounded and organized learning experience.

Consider putting your content together like this:

  1. Introduction and course overview: What students will learn and why it matters.
  2. Fundamentals: The core principles behind your topic.
  3. Strategy and application: How to apply the knowledge in real-world scenarios.
  4. Advanced insights: Next-level tips and strategies.
  5. Action steps and resources: Workbooks, templates, or challenges to reinforce learning.

Adding value through supplementary content

Now keep in mind that while social media is concise in nature due to platform limitations, a course gives you more room to deliver an in-depth experience. 

So to increase the value of your course, supplement your repurposed content with additional learning materials like:

  • Actionable takeaways so that each module includes a clear next step for students.
  • Workbooks, templates, and other plug-and-play resources so students can apply what they learn.
  • Exclusive videos or Q&A sessions that deliver personalized insights beyond what’s available for free.
  • Interactive elements such as quizzes or exercises to reinforce learning.
  • Case studies and real-world examples that illustrate key concepts.
  • Community access so students can connect with each other and you, or receive live coaching.

These additions help differentiate a paid course from free content, while ensuring that students receive a comprehensive learning experience.

Related: How to come up with your profitable course idea

Use Teachable to repurpose your content into a course

If you’re serious about turning content into a reliable income stream, you need the right tools. Teachable makes it easy to upload, organize, and sell your courses, all in one place.

Some key features include:

  • Drag-and-drop course builder: No coding, no tech skills required, no headaches.
  • Built-in video hosting: Say goodbye to needing a separate video platform.
  • Sales page customization: Convert visitors into buyers with built-in landing pages.
  • Easy payment processing: Make sales easily and without hassle.
  • Student engagement tools: Keep learners engaged with quizzes, discussions, and progress tracking.

Teachable has everything you need to turn your best ideas into a high-converting course.

And beyond a course platform, there are several tools that can assist with repurposing content efficiently; here are a few faves:

  • Notion or Trello: Organize content ideas and outline course structures.
  • Descript: Convert video content into text-based lessons through transcription.
  • Canva: Design high-quality visuals and downloadable resources.

These tools reduce manual work and help creators optimize their workflow when developing a course.

{{trial-component=”/blog-shortcodes/blog-cta”}}

Common mistakes to avoid

One of the biggest mistakes creators make is packing too much content into their courses. More isn’t always better, and if students feel overwhelmed, they’re less likely to complete (or recommend) your course.

So the fix is to keep lessons focused and actionable, and break down complex topics into bite-sized lessons that are easy to follow. Give students just enough to learn, apply, and see results.

Also remember that repurposed content must be tailored for educational use. Simply uploading social media posts without context can leave learners feeling lost. To create a great learning experience, make sure that your content is structured, well-explained, and supported with helpful exercises.

Take action

So by now, I hope you can see that you don’t need to start from scratch to create a sellable online course! By repurposing your best social media content, structuring it into a learning experience, and making the most of tools like Teachable, you can launch your course quicker and easier than you probably thought.

Because you’ve already invested time and energy into producing high-quality content for social media… don’t let it get buried by new posts and changing algorithms. Instead, start reviewing your analytics, identify your top-performing content, map out a simple course structure… and take the leap! 

Your audience (and your bank account) will thank you.

Digital Ownership 101: A Guide for Creators

Software Stack Editor · March 26, 2025 ·

image

Think about your favorite social media platform. Now imagine waking up one morning and finding out your account is gone. No warning, no appeal, just poof… years of content and connections wiped out overnight. 

Sounds terrifying, right? Yet, this happens all the time. Creators who rely solely on social media to run their businesses are actually taking a huge risk. The reality is simple: if you don’t own the platform, you don’t really own your content.

That’s why hosting your content independently is one of the smartest moves you can make. Instead of depending on algorithm-driven platforms, you can build a space that belongs to you: a website, an email list, a course platform like Teachable. Hosting your content outside of social media gives you full control over your audience and how you connect with them. 

So in this article, we’ll break down why relying only on social media is risky, how you can start taking control of your content, and what tools will help you make the transition. If you want a sustainable business that isn’t at the mercy of frequently-shifting social platforms, keep reading!

{{aiprompts-component=”/blog-shortcodes/blog-popup”}}

The problem with relying solely on social media platforms

Social media is a powerful tool, but it’s also unpredictable. If your business depends entirely on social platforms, you’re leaving your success in the hands of companies that don’t have your best interests in mind. Let’s take a look at why this is risky.

Algorithm changes affecting visibility

Ever notice how one month your posts are doing great, and the next, it’s like you’re invisible? That’s the magic of social media algorithms. They decide who sees your content, when they see it, and how often. And they change constantly. A strategy that worked last week might be completely useless today.

Take Instagram, for example. In 2016, it shifted from a chronological feed to an algorithm-based system, prioritizing content based on “relevance;” creators who relied on organic reach suddenly saw engagement plummet.

There have been countless changes to Instagram’s algorithms since then, and Instagram is not the only platform that switches things up; TikTok has similarly tweaked its algorithm over the years, shifting from rapid viral growth to prioritizing watch time. And YouTube has changed its recommendation system so often that even long-time creators struggle to adapt. 

For businesses and content creators, this can be a serious issue. If your income depends on social media traffic, an algorithm shift could mean fewer views, fewer sales, and less engagement. Without a strategy for hosting content independently, your business is at the mercy of decisions made by social media platforms whose goals don’t always align with yours.

Risks of account bans or restrictions

Social media platforms are notorious for banning or restricting accounts, often without warning. Whether it’s due to an accidental violation of community guidelines, a mass report attack by bots, or just being on the wrong side of a policy change, losing access to your account can be devastating, especially if it’s your main source of income.

Consider the case of creators who built six-figure businesses on TikTok, only to have their accounts banned without explanation. Some recover their accounts, but many don’t, leaving them scrambling to rebuild their audience.

This is why digital ownership matters. If you don’t have an alternative way to reach your audience, getting shut out of your account can feel like starting over from scratch. But when you own your content, no external platform can take it away from you.

Related: What is an algorithm? A 2025 guide for creators

What digital ownership means for creators

So when we talk about digital ownership, what exactly do we mean? Let’s take a look.

Full control over content and monetization

When you host your content on a website, course platform, or email list, you decide:

  • How your content is distributed
  • How you engage with your audience
  • How you monetize your work

Unlike social media, where platforms take a cut of your earnings, independent hosting allows you to set your own prices, run promotions, and keep 100% of your revenue. For instance, a creator selling a course on Teachable keeps more profits than one relying on YouTube ad revenue.

Building direct relationships with your audience using email marketing

Would you rather have 100,000 social media followers or 10,000 engaged email subscribers? If you answered the latter, you are correct!

Because the truth is that social media followers belong to the platform, while email subscribers and website visitors belong to you. And sure, you might have 100,000 followers on Instagram… but if only 2% of them see your posts, then they aren’t as valuable as an email subscriber.

Emails land directly in inboxes, not in a crowded feed competing with memes and viral videos. Plus, an email subscriber is a direct connection; they’ve chosen to hear from you, making them far more engaged than the average social media follower.

If you’re looking for a great example, marketing expert Seth Godin built his brand through email newsletters instead of social media, which gives him direct, uninterrupted access to his audience whenever he wants to reach them. Because of this, he’s been able to nurture relationships, offer personalized experiences, and create a long-term business model that isn’t dependent on algorithms.

Related: Why the TikTok Creator Fund shuddering matters

How to start hosting your content outside of social media

Okay, so if you’re ready to start owning your content outside of social media, the first step is to choose your platform for independent hosting. 

A big part of that decision depends on your business model. Here’s a breakdown:

  • Online courses and memberships: Teachable, Kajabi, Thinkific
  • Email marketing and newsletters: ConvertKit, Substack, Mailchimp
  • E-Commerce and digital downloads: Shopify, Gumroad
  • Community platforms: Circle, Mighty Networks

For example, Teachable is a great platform for course creators and digital educators looking to host their own content while having full control over pricing, access, and monetization. If you primarily create written content, a blog or newsletter can help build a strong audience. If your focus is community engagement, a membership site could be a great option. The key is choosing a platform that you control, not one that can shut you down at any moment.

→ Pro tip: How to transfer your existing content

You might be internally screaming at the thought of moving years’ worth of content off of social media and onto a new platform. The good news is that you don’t have to abandon social media completely, and you don’t have to start from scratch. 

Here’s how to repurpose content on your own platform:

  1. Turn social media posts into blog content. Compile your Instagram captions or LinkedIn posts into long-form articles and publish them on your website
  2. Convert video content into courses. If you’ve been sharing valuable insights on YouTube or Instagram, consider packaging that content into a paid course on Teachable.
  3. Use social media to build your email list. Offer a freebie (like an eBook or webinar) in exchange for email signups.

The goal isn’t to quit social media entirely; it’s to use it as a tool to drive people to your owned platforms.

Related: Repurpose your content into an online course

Benefits of diversifying your content strategy

It should be super clear by now that there are huge benefits to diversifying where your content lives online. Let’s take a look at a few of the main ones. 

Cross-platform content reach

Instead of being tied to a single platform, spread your content across multiple platforms so you can benefit from:

  • Your website (SEO traffic)
  • An email list (direct engagement)
  • Online courses or paid communities (monetization)

By using multiple channels, if one platform underperforms, the others can still drive traffic and engagement. This keeps your business steady, even when trends shift.

Reduced dependency on any single channel

Building your business on a platform you don’t own is risky. Social media should be a tool, not your entire strategy. The more control you have, the safer your business is.

A great example is the bloggers who started on WordPress years ago; they’re likely still thriving, while Vine influencers disappeared when the app shut down. Or consider the TikTok creator with 500K followers but no email list or website; if TikTok bans their account, they’ll lose everything overnight. So if you want long-term stability, you need ownership.

Related: Plan your course content—the ultimate guide

Tools for building and owning your content hub

If you’re ready to take control of your content, here are some essential tools that can help:

  • Website hosting: WordPress, Squarespace
  • Email marketing: ConvertKit, ActiveCampaign
  • Online courses and memberships: Teachable, Podia
  • Community and engagement: Discord, Circle

These tools let you take control of your content, connect with your audience directly, and generate income on your terms.

Real-life success stories

Every creator’s journey looks a little different, but the ones who take control of their content tend to build the most sustainable businesses. Here are a few examples of people who made the shift from social media dependency to content ownership, and saw their businesses thrive because of it.

Example 1: A fitness coach who took control of her income

For years, Sarah built her brand on Instagram, posting free workout content and relying on brand deals to make money. It worked… until it didn’t. A sudden algorithm change cut her engagement in half. Her sponsored deals dried up, and she realized she needed a better plan.

Instead of chasing reach, she launched an online fitness program using Teachable. She promoted it through her email list and a private membership group, turning followers into paying customers. The result is a stable, predictable income that wasn’t tied to Instagram’s algorithm. Now, instead of worrying about likes and views, she focuses on growing her own business on her own terms.

Example 2: A YouTuber who moved beyond ad revenue

Matt ran a successful YouTube channel teaching people how to invest. He made money from ads, but as YouTube’s monetization policies shifted, his revenue became unpredictable. Some months were great; others, not so much.

To fix this, he launched a paid community where members could get exclusive content, live Q&As, and investment breakdowns. His audience was happy to pay for the extra value, and he finally had a reliable income stream that didn’t fluctuate with YouTube’s algorithm.

Example 3: A blogger who turned readers into customers

Lisa loved writing about personal finance, but she was frustrated with the inconsistency of social media traffic. Some blog posts took off; others barely got seen. She knew she needed a better way to connect with her audience.

She started building an email list, offering a free budgeting guide as an incentive. Over time, that email list became the foundation of her business. She launched ebooks, online workshops, and a membership site, all promoted through her newsletter. Now, her business thrives with or without viral blog posts.

→ Pro tips and lessons learned from digital entrepreneurs:

  1. Start small: You don’t need to leave social media; just use it strategically.
  2. Build an email list early: This is the foundation of content independence.
  3. Focus on quality, not just reach: A small but engaged audience is more valuable than millions of passive followers.

Related: How to effectively plan your online course content

Overcoming challenges of content independence

Taking control of your content sounds great, but it’s not always easy. If you’ve been relying on social media, the transition to independent hosting comes with a few hurdles. 

Here’s the quick version of common hurdles and solutions:

  • Time investment: This is solved by batching content and repurposing existing material.
  • Technical barriers: This is solved by starting with beginner-friendly tools like Teachable or ConvertKit.
  • Audience migration: This is solved by offering exclusive content to encourage sign-ups.

The challenges may feel deeper than that, though. Let’s take a look at a few common fears and how to handle them:

Challenge 1: “It feels overwhelming to start”

Moving content off social media sounds like a massive project. And honestly? It can be… if you try to do it all at once. But you don’t have to. The best approach is to start small.

Pick one thing. Maybe it’s setting up an email list and sharing a weekly newsletter. Maybe it’s launching a simple digital product. The key is to start somewhere and build from there. Every creator you see running their own platform started with one small step.

Challenge 2: “I don’t have time for this”

Running a business is already a lot of work. Adding another thing to your plate might seem impossible. But consider this: how much time do you spend trying to “beat the algorithm” or create content that fits fluctuating platform trends?

Shifting even a fraction of that time toward content that you own (whether that’s writing emails, building a course, or creating evergreen content for your website) means that you’re working toward something lasting. Instead of chasing short-term reach, you’re building long-term stability.

Challenge 3: “What if my audience doesn’t follow me?”

Some creators worry that if they move away from social media, their audience won’t come with them. And sure, some won’t. But the people who truly connect with your content? They’ll follow you anywhere.

The key is to make it worth their while. Give them a reason to join your email list or community. Offer exclusive content, deeper insights, or just a more direct connection. Your most engaged audience members will gladly sign up… and those are the ones you want to reach anyway.

The bottom line: 

No one is saying you should abandon social media entirely. It’s a great tool for discovery. But if your entire business depends on platforms you don’t control, you’re taking a huge risk. The creators who succeed in the long run are the ones who own their content, their audience, and their income. The sooner you start making the shift, the stronger your business will be.

Related: Everything you need to know about content monetization

Conclusion: Take control of your digital footprint

Relying on social media to run your business is like renting an apartment with no lease: sure, it works for now, but at any moment, the landlord can kick you out. By owning your content, you’re building something lasting.

Because digital ownership is the future for content creators. Instead of depending on unpredictable social media platforms, it’s smarter to invest in your own space. Whether it’s a website, online course, or email list, taking control of your content gives you stability, autonomy, and long-term success.

So if you haven’t started hosting your content outside of social media yet, now is the time. Take the first step today; if you start with Teachable, you can both own your content and monetize it, without worrying about algorithm changes!

How To Use YouTube For Lead Generation

Software Stack Editor · March 26, 2025 ·

image

YouTube is more than just a place for viral videos and entertainment; it’s actually a major source of lead generation. If you’re an online course creator, this platform can go a long way in helping you build an engaged audience, connect with potential students, and convert views into enrollments. With over 2.5 billion active users and ranking as the second-largest search engine, YouTube offers an incredible opportunity to position yourself as an expert while generating leads on autopilot.

But simply posting videos won’t cut it. You need a strategy that takes advantage of YouTube’s unique search and engagement algorithms while also leading viewers down a well-structured funnel that guides them from casual watchers to enrolled students.

Because if you do it right, your YouTube videos can attract leads while you sleep. So in this guide, we’ll break down how you can make your YouTube channel churn out sale after sale.

{{socialmedia-component=”/blog-shortcodes/blog-popup”}}

Why YouTube is a powerful lead generation tool

Listen, if you’re not leveraging YouTube for lead generation, you’re leaving serious potential on the table. Unlike fleeting social media posts, YouTube videos actually have staying power; they continue attracting views (and leads) long after publishing. 

But what makes YouTube truly stand out is its search engine capabilities and the natural way it moves people through the buyer’s journey toward making a purchase.

Understanding YouTube’s search engine capabilities

Like we said earlier, YouTube operates like a search engine, ranking content based on keywords, watch time, engagement, and click-through rates. Users actively search for solutions to their problems, and if you position your videos correctly, your content can appear in front of them at just the right moment.

And unlike traditional social media platforms, where content disappears in hours, YouTube videos can work for you for years. If you create evergreen content (like how-to guides, industry insights, or educational explainers), your videos will continue to generate views (and leads) long after they’re uploaded. That’s a long-term investment in your business that can bring in consistent traffic without constant effort.

The buyer’s journey on YouTube

Understanding how potential students move through the buyer’s journey on YouTube is key. Here’s what it typically looks like:

  • Awareness stage: A viewer searches for a solution (“how to start a podcast”) and finds your video.
  • Consideration stage: They watch, like, and subscribe. They start seeing more of your content in their feed.
  • Decision stage: They opt into your free resource, join your email list, and eventually sign up for your course.

So your job is to create content that meets them at every stage, building trust and strategically providing value along the way.

Related: A lead magnet strategy to give your audience what it wants

Creating a YouTube strategy for course promotion

A scattered approach to YouTube won’t drive leads. Instead, you need a content strategy that matches up with your audience’s needs and search behaviors. So from identifying pain points to setting up your videos for engagement, this section will show you how to create a lead-focused YouTube strategy that actually gets results.

Understanding your audience and pain points

Successful YouTube creators don’t just make videos; they solve problems. Before you start filming, ask yourself: 

  • What is my audience struggling with? 
  • What do they need help with? 
  • What topics would they stop scrolling for?

After you’ve explored those questions, use tools like these to dig deeper into what your audience wants:

  • YouTube’s Autocomplete: Start typing a keyword in the search bar, and YouTube will show you what people are already searching for.
  • Google Trends: See what topics are growing in popularity over time.
  • AnswerThePublic: Find frequently asked questions in your niche.

Once you understand what your audience truly needs, you can create high-value content that directly speaks to those needs. For example, if your course teaches email marketing for small businesses, creating videos like “The Top 5 Mistakes Killing Your Email Open Rates” or “How to Write Emails That Actually Convert” will attract the right audience and position you as an authority. 

Structuring video content for maximum engagement

A well-structured video keeps people engaged, increases watch time, and improves your chances of converting viewers into leads. 

Here’s a great format for your videos:

  1. The hook (first 10 seconds): Start strong. Pose a question, share a bold statement, or tease a valuable takeaway. Example: “Most online course creators struggle with lead generation. Today, I’m going to show you a strategy that fixes that.”
  2. The value (main content): Teach, explain, or demonstrate in a way that keeps viewers watching. Use visuals, storytelling, and real-life examples to make your content engaging.
  3. The CTA (call to action): Guide them to the next step, whether it’s downloading a free resource, signing up for a webinar, or joining your email list. Example: “Want my free YouTube lead generation checklist? Grab it in the description!”

Remember, YouTube rewards high watch time, so make sure your content is highly watchable from start to finish.

Related: Lead magnet ideas and templates for the ultimate content upgrade

Optimizing your YouTube channel for lead generation

A well-optimized YouTube channel does more than look good; it makes it easier for audiences to discover your channel, engage with it, and buy things from you. 

So from SEO tactics to compelling CTAs, let’s take a look at the best ways to turn your channel into a lead-generating asset.

Keyword optimization for discoverability

You could create the best video ever, but if no one finds it, it won’t generate leads. That’s where YouTube SEO comes in. Here’s how to get your videos discovered:

  • Use keywords strategically: Include primary and secondary keywords in your title, description, and tags (e.g., “How to Use YouTube to Generate Leads | YouTube Lead Generation Tips”).
  • Transcripts matter: Upload transcripts to improve accessibility and searchability. Also remember that YouTube scans captions for keywords, so ensure your spoken content naturally includes important terms.
  • File name optimization: Instead of “video1.mp4”, rename it to something like “youtube-lead-generation-tips.mp4”.

Best practices for thumbnails, descriptions, and CTAs

A well-optimized channel setup makes it easier to convert casual viewers into active leads.

  • Thumbnails: Make them bold, clear, and attention-grabbing. Avoid clutter; focus on one main idea.
  • Descriptions: The first two lines should feature your CTA and key links before the “See More” cutoff.
  • CTAs that drive action: Use end screens, pinned comments, and YouTube Cards to direct viewers to your lead magnet.

Optimizing the videos in your channel like this makes it easy for viewers to take the next step.

Lead magnet ideas to encourage course signups

Okay, so let’s talk about your lead magnet. Not all lead magnets are created equal; the best ones are high-value, easy to access, and relevant to your video’s topic.

Here are a few that work like a charm:

  • Free course previews: Give them a sneak peek at what they’re missing.
  • Downloadable checklists: Think worksheets, templates, checklists, and cheat sheets that complement your video topic.
  • Live Q&A sessions: Host exclusive Q&A sessions that require email sign-up.
  • Private community access: Offer a members-only space to continue the conversatio.

How to promote lead magnets in your videos

A lead magnet won’t generate leads if no one knows it exists! Here’s how to make sure viewers actually click on it:

  • Mention it early in the video.
  • Drop the link in the video description and pinned comment.
  • Engage with comments to encourage sign-ups.
  • Use YouTube Cards and End Screens to direct them to your offer.

Related: 10 proven and powerful strategies to market online courses with a YouTube channel

Analytics and iteration

If you’re not tracking your results, you’re flying blind. YouTube’s analytics tools offer valuable insights into how your content is performing… and more importantly, how to improve it. Let’s take a look at how to use YouTube metrics to monitor and to refine your strategy based on real data.

YouTube Studio metrics to track

Understanding analytics helps you refine your content and conversion strategy. Here are the most important metrics to monitor:

  • Watch time: The longer viewers watch, the more YouTube favors your content. High watch time signals valuable, engaging content that keeps people hooked.
  • CTR (click-through rate): How effective are your titles and thumbnails? A low CTR means people aren’t clicking, and you might need stronger visuals or more curiosity-driven titles.
  • Lead conversion rate: How many viewers actually sign up for your lead magnet? If this number is low, your CTA might need better placement, a clearer offer, or stronger incentive.

Making data-driven content improvements

If something isn’t working, change it. Try the following:

  • A/B testing thumbnails: Create two thumbnail versions and track which one drives more clicks.
  • Tweaking titles: Test different wording, length, or curiosity-driven phrasing to increase CTR.
  • Adjust posting schedules: Post when your audience is most active for higher engagement.
  • Experiment with video length: Sometimes shorter videos perform better; other times, long-form content wins. Look at audience retention data to see what’s working.
  • Repurpose top-performing videos: Turn top videos into YouTube Shorts, Instagram Reels, or blog content to expand reach.

By continually analyzing what works best, you can attract more leads, and improve conversions over time.

Related: The ultimate guide to YouTube Shorts monetization & strategies

Final tips for success on YouTube

We’ve said it before, and we’ll say it again; while YouTube may look like it’s just a video platform, it can be a lead generation machine when used correctly. 

So by optimizing your channel, delivering value-packed videos, using strategic lead magnets, and guiding viewers through the buyer’s journey, you can turn casual viewers into people ready and willing to buy from you.

Do you already have a YouTube channel but don’t have an online course yet? Teachable’s free trial makes launching a course easy, so why not start today? Start implementing these strategies now, and watch your views turn into leads… and your leads turn into sales!

Best LMS Software for Creators & Small Businesses (2025 Guide)

Software Stack Editor · March 24, 2025 ·

The best LMS software for creators and small businesses in 2025

How to choose the right platform to scale revenue, streamline admin, and deliver better student outcomes

Creators, coaches, and consultants have turned education into a growth engine. If you sell digital products like courses, coaching programs, or memberships, you already know the importance of a strong learning experience. But scaling that experience—without adding more to your plate—takes more than talent. It takes the right tools.

A Learning Management System (LMS) gives you the structure to build and grow a modern education business. You can deliver content, track student progress, manage payments, and create new revenue streams—all from one place.

The best LMS platforms focus on more than just content delivery. They help you:

  • Serve more students without working more hours
  • Automate admin tasks like tax handling, enrollments, and payouts
  • Personalize the learning experience using AI and engagement tools
  • Create repeat revenue using subscriptions, memberships, or communities
  • Scale your business without needing a tech team

This guide explains how LMS platforms work, how to choose one that aligns with your business model, and which platforms to consider in 2025. We reviewed over a dozen options, but only a few support what creator-educators actually need: time-savings, monetization, student engagement, and flexibility.

Let’s break it down.

{{trial-component=”/blog-shortcodes/blog-cta”}}

Why choosing the right LMS matters

Online education isn’t a trend anymore. It’s a proven business model. Since the boom of remote learning and digital content in recent years, creators and small business owners have built entire revenue streams around their knowledge.

But growth brings complexity.

If you started with one course and a simple sales page, you probably managed it with a handful of tools. Maybe a checkout plugin, an email list, and some downloadable files. But as your business grows, those disconnected systems start to slow you down.

At some point, you need a platform that works like a partner.

An LMS helps you go from launching to scaling. Instead of piecing things together, you can create a seamless experience for both you and your students. You can manage everything, course delivery, payments, taxes, analytics, community, etc., inside one system.

The right LMS can help you:

  • Save hours every week by automating time-consuming admin
  • Build stronger student relationships with structured and engaging content
  • Create new revenue streams through subscriptions, coaching, or digital downloads
  • Feel confident about compliance with built-in tools for tax handling and data protection
  • Protect your business by owning your audience and monetizing directly

If you already have an engaged audience, the next step is building a business that scales without burning you out. That starts with choosing an LMS designed for modern creator-educators—not corporate HR teams or universities.

LMS trends shaping 2025

The LMS market keeps evolving fast. According to The Business Research Company, the market will reach $44.68 billion by 2029, growing at a compound annual growth rate (CAGR) of 18.1%. But this growth isn’t just about bigger budgets. It’s about platforms adapting to what modern creators and small businesses actually need.

Here are the top LMS trends shaping 2025, and how they help you build a smarter, more scalable business:

AI-powered personalization

LMS platforms now use artificial intelligence to help you create better online learning structures, dynamic learning paths, suggest relevant content, and adapt to each student’s progress. This creates a more engaging experience that keeps students learning and buying from you.

Mobile-first learning

More students consume content on their phones. The best LMS platforms now prioritize responsive design, app-based access, and on-the-go learning. This helps you meet your audience wherever they are.

Business system integrations

LMS platforms in 2025 connect directly with CRMs, email tools, and finance systems. These integrations reduce manual work and give you a full view of your sales, marketing, and student success in one place.

Recurring revenue models

Subscription-based learning is no longer optional. Leading platforms now support memberships, digital communities, and bundled offerings to help creators build predictable income.

No-code and low-code content tools

You no longer need to hire a developer or designer to launch professional content. New LMS platforms offer intuitive builders, AI-powered editors, and drag-and-drop tools to help you create courses and coaching programs faster.

Automation across the board

From auto-enrollment to payment processing and student onboarding, automation is now standard. These tools save you time, reduce errors, and create a better experience for your students and your team.

As you evaluate LMS options, look for platforms that embrace these trends with real-world features. The right tech should grow with your business and make your day-to-day easier, not harder.

How to choose the right LMS

A practical framework to find the best fit for your business

With so many platforms on the market, choosing the right LMS can feel overwhelming. But once you understand what matters most to your business, the decision becomes much simpler.

{{trial-component=”/blog-shortcodes/blog-cta”}}

Use this five-step process to evaluate each option based on what you need today—and where you want your business to go.

1. Define your goals and audience

Start by clarifying what success looks like for your learning experience. Do you want to teach a course, run live coaching, launch a membership, or build a digital library of downloads? Then identify who you’re serving. Are they paying customers, employees, or community members?

Ask yourself:

  • What kind of content will I deliver (video, text, quizzes, downloads)?
  • Who will use this platform—just me, or my team too?
  • What kind of learner experience do I want to create?

2. Prioritize your must-have features

Once you know your goals, look for features that match them. Pay special attention to areas that save time and improve your student experience.

Look for:

  • A clean, easy-to-use course builder
  • Mobile-friendly student access
  • Payment and tax handling built into the platform
  • Built-in student engagement tools (like quizzes or certificates)
  • Support for coaching, downloads, or memberships
  • Integrations with your existing tools (email, CRM, analytics)

3. Evaluate platform reliability and support

LMS software isn’t just a tool. It’s infrastructure. Choose a platform that offers reliable uptime, data protection, and responsive support.

Check for:

  • Verified compliance with regulations (like GDPR or SOC 2)
  • Active help center and documentation
  • Fast, helpful customer support
  • Transparent pricing with no hidden fees

4. Compare and test your top options

Once you’ve narrowed your list, create a side-by-side comparison. Use a checklist or scorecard to rate how well each option supports your needs. Most platforms offer a free trial or demo. Use that time to build a sample course or workflow and see how it performs.

Ask:

  • Is the platform easy to navigate?
  • Can I build what I need without outside help?
  • Do the tools feel intuitive or frustrating?
  • Can my students find and complete content easily?

5. Plan your launch and scaling roadmap

Choosing your LMS is only the beginning. Think about how you’ll implement it, what content you’ll launch first, and how you’ll market it. A good platform should not only support your first product, but grow with you as you expand into coaching, community, or additional courses.

Before committing, confirm:

  • How easily you can add new products or offerings
  • Whether the platform supports subscriptions or bundles
  • How it integrates with your website and marketing tools
  • What your next 6 to 12 months of growth might look like

Choosing the right LMS is an important decision. With the right system in place, you’ll spend less time managing tech and more time teaching, growing, and building real relationships with your audience.

The 15 best LMS platforms for 2025

We evaluated dozens of platforms and narrowed it down to the top 15 that help you grow, automate, and monetize effectively in 2025. While many LMS options serve enterprise teams or higher education, only a few are built for independent creators and small business owners with serious goals.

Here are the platforms worth your attention, starting with the one designed specifically for modern business creator-educators.

Teachable

Best for: Creators, coaches, and consultants who want to scale with less admin

Teachable gives you everything you need to create and sell courses, coaching, and digital products—without hiring a team or writing a single line of code. It offers AI-powered course creation, automatic tax and payment handling, and direct integrations with tools you already use.

You can deliver engaging learning experiences with quizzes, certificates, and drip content, while keeping everything on-brand. With flexible pricing models and support for one-time payments, subscriptions, or memberships, Teachable helps you grow revenue and protect your time.

TalentLMS

Best for: Corporate teams and SMBs needing fast setup

TalentLMS makes it easy to build training programs for teams and organizations. It supports compliance tracking, certification, and role-based content delivery. Its drag-and-drop builder and multilingual options help businesses scale internal training quickly.

Docebo

Best for: Large businesses with AI-focused personalization needs

Docebo uses machine learning to personalize learning paths, recommend content, and track learner behavior at scale. It’s a better fit for enterprises running complex training programs across departments or global teams.

Articulate 360

Best for: Instructional designers and L&D teams building custom courses

Articulate 360 offers powerful authoring tools like Storyline and Rise. It’s ideal for creators building highly customized, multimedia-rich learning content—especially when paired with an internal LMS or SCORM-compliant system.

360Learning

Best for: Teams building peer-led, collaborative learning experiences

360Learning blends course creation with social learning features like peer feedback, upvoting, and group challenges. It works well for businesses training internal teams or customer-facing roles.

Absorb LMS

Best for: Compliance-heavy teams and workforce development

Absorb LMS supports complex organizational training with strong compliance features, including audit trails, certification paths, and robust reporting. It fits larger companies managing regulatory or safety training.

Litmos

Best for: Companies focused on security and structured learning programs

Litmos is a mobile-first LMS that offers a library of pre-built compliance courses, enterprise integrations, and secure access management. It serves highly regulated industries like finance, healthcare, and manufacturing.

iSpring Learn

Best for: Sales and customer service training with quick content turnarounds

iSpring Learn converts PowerPoint content into interactive learning and supports gamified experiences. It’s useful for small teams building training around products or onboarding workflows.

EdApp / SC Training

Best for: Frontline and deskless teams who learn on mobile

EdApp delivers bite-sized microlearning content through a sleek, mobile-first interface. With built-in gamification and push notifications, it keeps learners engaged on the go.

Sana

Best for: Companies looking to augment internal knowledge with AI

Sana isn’t a full LMS but offers AI tools to turn internal documents into searchable learning hubs. It works best as a layer on top of existing training systems or knowledge bases.

Blackboard Learn / now Anthology

Best for: Academic institutions and universities

Blackboard Learn supports higher education with integrations for student information systems, gradebooks, and formal academic assessment tools. It’s designed for structured curricula and classroom-based learning models.

MoodleCloud

Best for: Institutions or nonprofits needing customization on a budget

MoodleCloud offers the flexibility of open-source LMS software without needing your own server. It suits organizations with technical teams that can manage setup and customization.

WizIQ

Best for: Live virtual classrooms and hybrid teaching

WizIQ specializes in live, instructor-led learning with features like whiteboarding, breakout rooms, and webinar hosting. It’s useful for educators combining live instruction with recorded content.

Tovuti LMS

Best for: Businesses seeking a visually polished, feature-rich LMS

Tovuti combines drag-and-drop course creation with gamification, social learning, and customizable branding. It offers flexibility for companies creating interactive, learner-centric environments.

HowToo

Best for: Small teams or consultants creating branded, interactive learning at scale

HowToo is a visual, drag-and-drop LMS designed for ease of use and fast content creation. It supports SCORM compliance, advanced accessibility, and interactive design features. Consultants and small businesses use HowToo to deliver internal training or client-facing learning without hiring a developer.

This list gives you a range of options, but if you’re an established creator looking to save time, grow revenue, and stay in control of your business, only a few platforms truly fit.

Final recommendations for creators and small businesses

Choosing an LMS is a strategic move for your business. The right platform helps you serve more students, automate busywork, and scale your offerings without sacrificing quality or burning out.

For creators and small business owners, here’s where to focus:

✅ For growing creators with an engaged audience

You’ve already built momentum. You’re ready to package your expertise into courses, coaching, or memberships that generate real revenue. You need tools that save time, support flexible content types, and handle the business side—payments, taxes, student engagement—without custom code or outside help.

Best choice: Teachable

Teachable gives you an intuitive builder, automation tools, and a platform designed specifically for creator-led education businesses. It supports multiple product types, built-in monetization, and time-saving features like automatic tax handling and team payouts.

{{trial-component=”/blog-shortcodes/blog-cta”}}

✅ For consultants delivering client training

If you’re building repeatable learning programs for teams or clients, look for platforms that support branded experiences, flexible content, and strong analytics. You may also need white-labeling or compliance tools.

Top picks: TalentLMS, Tovuti, HowToo, Teachable

✅ For businesses with internal training needs

When your focus is onboarding employees or delivering internal skill-building, prioritize tools that support user management, compliance tracking, and integration with HR or CRM systems.

Top picks: Absorb LMS, Docebo, SAP Litmos, Teachable

✅ For academic institutions or nonprofits

If you’re delivering structured programs with institutional oversight, consider platforms that offer advanced grading, academic integrations, or open-source flexibility.

Top picks: Blackboard Learn, MoodleCloud

No matter what stage your business is in, the right LMS should make growth easier—not more complicated. Look for tools that respect your time, help you serve your audience, and allow you to scale with confidence.

🎯 Ready to start building?
{{trial-component=”/blog-shortcodes/blog-cta”}}

 Frequently asked questions about choosing the best LMS software

1. How do I choose the right LMS?

Start by identifying your business goals. Are you selling courses, offering coaching, building a membership, or training a team? Look for an LMS that matches your delivery style and supports the features you need: automation, engagement tools, payment handling, and scalability. Make sure the platform integrates with your existing tools and fits your level of technical comfort. Try a demo or free trial to see how it actually feels to build and teach with it.

2. How much does an LMS cost?

Pricing varies depending on features and scale. Most platforms charge monthly or annual fees, starting around $30 to $100 per month for creators and small teams. Higher-tier plans—especially those with subscriptions, advanced automation, or white-labeling—can range from $200 to $500+ per month. Be sure to factor in transaction fees, add-ons, and any costs for integrations or additional users.

3. What features should I prioritize as a creator or coach?

Look for tools that save time and support growth. This includes an easy course builder, flexible product types (courses, coaching, downloads), mobile-friendly design, and built-in payments. Engagement tools like quizzes and certificates help retain students. Bonus points if the platform handles taxes, payouts, and integrations for you.

4. Can I use an LMS to sell coaching or digital products, not just courses?

Yes. Many LMS platforms, including Teachable, support multiple product formats—like coaching sessions, memberships, and downloadable resources. This flexibility lets you diversify your offerings and increase revenue without switching platforms.

5. Do I need technical skills to use an LMS?

Most modern LMS platforms are no-code or low-code, meaning you can build and launch products without hiring a developer. Choose a platform with drag-and-drop tools, templates, and a straightforward dashboard. If you’re already using tools like email marketing or payment systems, make sure your LMS integrates smoothly with them to avoid extra setup work.

‍

‍

.

‍

‍

‍

How To Presell An Online Course Before You Build It

Software Stack Editor · March 20, 2025 ·

How To Pre-Sell An Online Course Before You Build It

Software Stack Editor · March 20, 2025 ·

image

What if you could launch your course and start earning revenue while building a community of excited learners—all before you ever hit “record” on your first lesson?

More and more creators are turning to pre-selling as a smarter, leaner way to validate their course ideas and generate real income upfront. Instead of spending weeks (or months) building a course that might sell, they’re flipping the script—using surveys, social content, and strategic offers to get paid before they build.

In this guide, we’re breaking down how to pre-sell your course using Teachable.

You’ll hear directly from creators who’ve done it—some making up to $45,000 in pre-sales alone—and we’ll walk you through the exact steps they followed to make it happen.

We’re keeping it real, practical, and packed with takeaways you can start using today.

Let’s dive in.

{{trial-component=”/blog-shortcodes/blog-cta”}}

Why creators are turning to pre-selling online courses

Let’s be honest—depending on brand deals and ad revenue can feel like a rollercoaster. One canceled partnership or slow month, and suddenly your income takes a hit. 

That’s exactly what happened to creator Jack Appleby.

[embedded content]

So he tried something different: he pre-sold a course—and made $45,000 in just 30 days.

Pre-selling gave Jack financial freedom, creative control, and proof that people wanted what he had to teach. That’s the power of selling before you build.

Why pre-selling online courses works:

  • It validates demand before you spend time creating content
  • It generates income upfront to fund production
  • It reduces refund risk (you’re setting expectations early)
  • It builds community and buzz before your course even launches

Action step:

  • Choose a course topic based on your existing content or expertise
  • Set an early-bird timeline and discounted price
  • Offer something extra—like a bonus lesson or live Q&A—to encourage early signups

How to figure out what course to create (without guessing)

Creating a course can feel overwhelming—especially when you’re stuck asking, “What should I even teach?” The good news? You don’t have to guess.

The smartest creators don’t start with a finished product—they start with a conversation.

Jack Appleby, didn’t brainstorm in a vacuum. He went straight to his audience and asked them directly.

[embedded content]

And it worked. By crowdsourcing course ideas from his community, Jack made sure his offer was something people were actually excited to buy.

Here’s how you can do the same:

Ask the right questions: Instead of saying “What should I teach?” focus on questions that reveal real behavior, preferences, and needs.

Think about asking questions such as:

  • What’s your biggest challenge right now in [your niche]?
  • Have you ever purchased an online course before? What made you buy it?
  • What kind of learning format do you prefer—video, PDFs, live sessions?
  • How much time can you realistically commit to learning each week?
  • What price point feels reasonable for a course on this topic?

Make it easy to respond: Use tools your audience is already comfortable with: Instagram polls, LinkedIn surveys, Google Forms, or Typeform. Keep the questions short, focused, and easy to complete in under 5 minutes.

People are more likely to complete your survey if they get something in return. You could offer:

  • A free digital download
  • An exclusive guide or cheat sheet
  • Early access to the course
  • A discount or limited-time bonus

Start spotting patterns: Once your responses start rolling in, look for recurring themes. 

Is everyone struggling with time management? 

Are most people new to your topic? 

Does your audience lean toward self-paced formats over live workshops?

This is where things get exciting—because your course idea starts taking shape based on real data, not assumptions.

Action step:

  • Share it on your most active platforms and email list
  • Offer a simple incentive to encourage responses
  • Block off 30 minutes to analyze the data and sketch out your course outline

How to turn your existing content into a pre-sell-ready course

Creating a course doesn’t have to start with a blank Google Doc. In fact, the course you’re trying to map out might already exist—in your content archive.

If you’ve ever posted a short explainer, a how-to tutorial, or a behind-the-scenes breakdown, guess what? You already have the bones of a great course.

[embedded content]

Jack realized that one of his most popular videos—something he’d already shared publicly—could be reworked into a full, in-depth curriculum. All it took was expanding on what he’d already taught in short form.

Here’s how to reverse-engineer your best content into a course your audience will pay for:

Break it down into modules: Take a single how-to or educational post and split it into 4–5 core sections. Each one can become its own lesson or module inside your course.

Add depth and exercises: What would you really say if you had more than 90 seconds to teach that concept? Use examples, templates, scripts, or assignments to build out the content.

Use Teachable’s draft mode to build as you go: You don’t need to publish all your content right away. You can keep lectures in “Draft” status during the pre-sale period—and add a “Welcome” module to greet early students and set expectations.

Action step:

  • Identify 1–2 high-performing content pieces that could become your course foundation
  • Use those pieces to outline your modules
  • Load the structure into Teachable—even if the content isn’t finished yet

How to sell your course with stories, not hard sales tactics

The biggest misconceptions about selling online courses? 

You need to become a full-time marketer to make it work. Not true.

[embedded content]

Instead of hard-selling, Jack used personal stories—some funny, some emotive, all true—to highlight the value of his course and connect with potential buyers.

Here’s what worked:

  • Sharing a real story about how personal branding got him a $200K job offer
  • Mentioning that former coworkers, friends, and even old teammates were buying his course
  • Telling his audience why he believes in the product, not just what it includes

Most importantly, Jack shared authentic moments that led people to say: “I want that result too.”

Action step:

  • Brainstorm 3–5 short stories tied to your course topic
  • Turn each one into a post, short video, or email
  • Include a link to your course and a reminder of any early-bird offers

You don’t need slick marketing tactics. You need stories your audience will relate to.

Why preselling your online course builds loyal customers

Sure, pre-selling helps you generate income upfront—but the benefits go beyond just making money.

When you invite people into your course early, you’re actively inviting them to build with you. In a very real sense, you’re bringing them behind the scenes into your creative process and allowing them to shape your products with you.

[embedded content]

Customers from your pre-sale period will give you feedback, ask questions, and cheer you on before the course is even live.

What preselling creates:

  • A built-in feedback loop while you’re still building
  • Higher engagement because students are financially (and emotionally) invested
  • Momentum on launch day, with students who feel like insiders

And when you’re using a platform like Teachable, it’s easy to set this up. You can create a private Slack or Discord group for early adopters, send out weekly updates as you build, or even host a live check-in before launch.

Action step:

  • Add a community element to your pre-sale strategy
  • Set expectations for how students can connect or provide input
  • Use feedback from this group to improve your course before it launches

Start pre-selling your course using Teachable

Pre-selling flips the traditional course launch on its head. You don’t need weeks of content ready. You don’t need a massive audience. And you definitely don’t need to do it all alone.

You need a validated idea. A plan. And a willingness to build in public—with your audience right there alongside you.

Begin pre-selling your course and start a new income stream today on Teachable.

{{trial-component=”/blog-shortcodes/blog-cta”}}

How to Get Started with Teachable in 2025

Software Stack Editor · March 18, 2025 ·

You don’t need months to launch a successful online course, digital product, or coaching program. 

In this guide, we’ll break down the five simple steps you need to take to start selling on Teachable,, so you can get up and running quickly.

With only one to two hours per day, you can go from an idea to a fully functioning online course, digital download, or coaching offer in a single week.

Or you can work on all of these steps at once and knock them out in a single day if you choose.

{{trial-component=”/blog-shortcodes/blog-cta”}}

Understanding Teachable and how it works

Teachable is the education-first platform for modern entrepreneurs, founders, creators, and business owners. 

Whether you’re looking to diversify your online income streams, scale your business effectively, or package your expertise into high-value digital products, Teachable provides the tools you need to build, host, manage, and sell—all while integrating directly with your existing tech stack.

Think of us as your behind-the-scenes business growth partner, handling the tech, sales, and automation so you can focus on what you do best.

With Teachable, you can:

  • Monetize in multiple formats – Courses, coaching, memberships, digital downloads, and even corporate training.
  • Seamlessly accept payments – Offer flexible pricing models like subscriptions, payment plans, and Buy Now, Pay Later (BNPL).
  • Plug and play with your favorite tools– Teachable integrates with powerful tools like Google Analytics, Mailchimp, LinkedIn Insight Tag, and more—so you can track, sell, and scale with ease.
  • Scale on your terms – Whether you’re selling to individuals, entrepreneurs, or businesses, Teachable helps you grow at your own pace.

More than 150,000 business owners, educators, and creators use Teachable to power their online businesses and reach millions of students worldwide.

Now, let’s walk through the exact steps to build, launch, and sell your first digital product on Teachable—starting right now.

The five steps to start selling on Teachable

Launching your digital product is simple with Teachable. Follow these five steps to go from idea to income fast.

  1. Set up your Teachable school – Create your account, customize your branding, and configure your payment settings so you’re ready to start selling.
  2. Establish pricing and checkout – Choose a pricing strategy, enable teachable:pay to offer a more complete sales experience with options like subscriptions and Buy Now, Pay Later (BNPL), and optimize your checkout page for conversions.
  3. Create and upload your first digital product – Structure your course, coaching program, or digital download, then upload your first piece of content to start building your offer.
  4. Build a streamlined sales system for your digital product – Leverage Teachable’s no-code tools to build a high-converting sales process that clearly presents your offer, establishes trust, and maximizes conversions.
  5. Market your digital product – Generate demand with email, social media, affiliates, and live events, and start selling before launch.

Let’s dig deeper into each of these steps together.

Step 1: Set up your Teachable school

Your Teachable school is your home base—the foundation of your digital product business. This is where you’ll customize your school’s branding and prepare to accept payments. In just a few steps, you’ll have a professional, fully functional school ready for your first students.

Create your Teachable account (5 minutes)

If you haven’t already, sign up for Teachable. This will give you access to our course-building tools, payment processing, and student management features—everything you need to start selling.

Choose a school name and customize your branding (20 minutes)

theme_logo_and_branding.png

Your school name is the foundation of your brand on Teachable. Choose a name that aligns with your business, expertise, or audience. You can always update it later if needed.

Once your school name is set, customize your branding by:

  • Uploading your logo and selecting brand colors to match your business identity.
  • Editing your homepage layout to create a strong first impression.
  • Setting up your navigation menu to make it easy for students to find your courses.

You can customize your logo and branding at any time by modifying your school theme.

Set up your domain (15 minutes)

[embedded content]

Your domain is a key part of building a professional brand. While Teachable provides a free subdomain (e.g., your-school.teachable.com), connecting a custom domain (e.g., yourbusiness.com) boosts credibility and creates a seamless experience for your students.

How to set up your domain in 15 minutes or less:

  1. Choose your domain option:
    • Stick with Teachable’s free subdomain (quickest setup).
    • Use a custom domain (recommended for a polished brand experience).
  2. Purchase a domain (if you don’t have one) through a provider like GoDaddy, Bluehost, or Google Domains.
  3. Connect your domain to Teachable:
    • Update your DNS settings with your domain provider.
    • Add a CNAME record pointing your custom domain to Teachable.
    • Go to Site > Domains in your Teachable admin and add your domain.
  4. Make it your primary domain: If you have multiple domains, set your custom domain as primary so all visitors are directed there.

Domains may take up to 24-48 hours to fully connect. If you experience delays, double-check your DNS settings or check out this full support guide for more.

Set up your payment gateways with Teachable Pay (15 minutes)

The screen shows the admin of a Teachable school. From the left side navigation menu, the SETTINGS tab is circled, then PAYMENTS is circled from the submenu. The page shows a dropdown menu for COUNTRY.

Note: It’s essential that you complete this step before you can start selling. Without a payment gateway, students won’t be able to purchase your products, and you won’t be able to get paid.

Teachable Pay is the fastest and most seamless way to process payments on Teachable. It allows you to:

  • Accept credit cards, PayPal, and Buy Now, Pay Later (BNPL) directly through your Teachable checkout.
  • Automate payouts, tax compliance, and financial reporting so you can focus on growing your business.
  • Choose a payout schedule that works for you: daily, weekly, or monthly.

How to set up teachable:pay

  1. Navigate to Settings > Payments in your Teachable Admin.
  2. Select Set up Teachable Pay and enter your business details (individual or company).
  3. Provide your banking information and verify your identity.
  4. Select your preferred payout schedule.
  5. Complete the setup and check your confirmation email to ensure everything is active.

Activate Teachable BackOffice to add PayPal and Buy Now Pay Later options to your checkout (optional, but recommended)

BackOffice

PayPal is a trusted payment method that can increase conversions by giving students an easy way to pay. To enable PayPal:

  • Go to Settings > Payments and connect your PayPal Business account.
  • Once activated, students will see PayPal as a checkout option.

BNPL allows students to split their payments into multiple installments, making high-ticket products more accessible. For example, a product priced at $200 could be split into 4 even payments of $50, making it much easier for your student to purchase immediately.

To enable it:

  • Make sure teachable:pay is enabled in your payment settings.
  • Toggle on Buy Now, Pay Later in the checkout settings.
  • This feature can increase your average order value by 41%.

Here’s an additional quick support article around setting up your payments on teachable:pay.

Step 2: Set up payments, pricing, and checkout

Now that your Teachable school is set up, the next step is to configure pricing and checkout settings. This process allows you to test payment functionality, experiment with pricing strategies, and get familiar with the Teachable checkout system—before your actual product is live.

At this stage, you don’t need to have a fully built product. Instead, you’ll create mock or placeholder products to set up pricing, test different checkout options, and ensure everything works smoothly when you’re ready to sell.

Create a mock product to test pricing (15 minutes)

Before setting up pricing, you’ll create a temporary mock product that allows you to explore different pricing models without needing a finished course or download.

  1. Go to Teachable Admin > Products and click Create Product.
  2. Select a Course, Coaching, or Digital Download as your placeholder.
  3. Name it something simple, like Test Course or Mock Digital Download.
  4. Click Save and Publish to move forward with pricing setup.

Now, you can experiment with different pricing options:

  • One-time purchase – Best for standalone courses and downloads. ($27-$97 for mini-courses, $197+ for premium courses).
  • Payment plans – Ideal for higher-ticket offers ($297+) by breaking up payments over time.
  • Subscription model – Great for memberships, coaching programs, or ongoing access.

To set up pricing:

  1. Navigate to the Pricing tab within your mock product.
  2. Select your preferred pricing model and enter placeholder pricing details.
  3. Save your changes—these settings can be updated later for your real product.

This step allows you to see how pricing displays on your checkout page and adjust it before launch.

Customize your checkout page (20 minutes)

For support-metropolis.png

Your checkout page is where students make their purchase decisions. Even for your mock product, setting this up helps you learn how to optimize the sales experience before your real product goes live.

To edit your checkout page:

  • Navigate to Settings > Checkout in your Teachable admin.
  • Customize key elements to improve clarity and trust, including:
    • Bullet points highlighting product benefits (even if it’s a placeholder).
    • Testimonials or mock social proof for testing.
    • A money-back guarantee or refund policy (if applicable).
    • Buy Now, Pay Later (BNPL) toggle for installment options.

By setting up and previewing this page now, you’ll know exactly how your real checkout page will look and function before launch.

Learn more with our support guide around checkout pages.

Run a test purchase (20 minutes)

Before launching your product, run a test transaction to experience the full checkout process as a student. 

We recommend testing the checkout page so it’s easy to navigate, coupon codes apply correctly, and payment processing works smoothly.

Running a test purchase will also help you to see what your experience looks like from a student’s perspective.

How to perform a test purchase:

  1. Create a 100% off coupon:
  2. Copy your checkout link:
    • Go to your mock product’s Pricing tab.
    • Copy the checkout page link and paste it into a new browser window.
  3. Complete a test purchase:
    • Open the checkout link in an incognito/private browser window.
    • Enter and apply the 100% off coupon code.
    • Click “Buy Now” and complete the purchase and simulate a real purchase.

If you want to make sure your payment processing is functioning properly, set up a temporary $1 pricing plan and complete a purchase. Once confirmed, you can refund yourself using your Teachable admin.

Step 3: Create and upload your first digital product

Now that your Teachable school and payment system are set up, it’s time to get to the fun part: create the actual product you’ll be selling. 

Whether you’re launching a course, digital download, or coaching offer, this step ensures you have something valuable for your audience.

Don’t worry about making it perfect—your goal is to get a minimum viable product (MVP) ready for your first sale on Teachable. You can always refine and add more content later.

In many cases, you can start with a rough outline before fully developing your product. 

Many successful creators validate their ideas by testing, marketing, and even pre-selling their product before all content is finalized. Some have generated five-figure pre-sales before officially launching.

Here’s how you can get started in under an hour.

Decide on your first MVP digital product (10 minutes)

Choose one of the following two simple product types to get started quickly:

  • Mini-course – A short, focused training (1-3 lessons) on a specific topic.
    • Best for sharing expertise without creating a full course.
    • Can include videos, PDFs, or worksheets.
    • Allows you to launch and iterate based on student feedback.
  • Digital download – A resource like a workbook, checklist, or template.
    • Best for quick, actionable learning.
    • Ideal for repurposing existing content (slides, guides, spreadsheets).
    • Can serve as a low-cost entry point to a full course or coaching offer.

If you’re unsure, start with a digital download since it requires minimal setup. You can always expand into a mini-course later.

Set up your product in Teachable (10 minutes)

Once you’ve chosen your product type, create it inside Teachable:

  1. Go to Teachable Admin > Products and click Create Product.
  2. Select a product type: Course or Digital Download.
  3. Name your product (you can change this later).
  4. Set a price or make it free to attract early buyers.
  5. Save and publish so you can start adding content.

For digital downloads, upload your file as a resource that students can access immediately.

Upload essential content (20 minutes)

Your product doesn’t need to be fully complete to start selling. Upload at least one piece of content so students get immediate value.

For mini-courses, add:

  • A title and thumbnail to establish branding.
  • An outline with three to five lessons using Teachable’s AI tools.
  • One video, PDF, or worksheet as a starting point.

For digital downloads, upload:

  • A PDF, template, or workbook students can download immediately.

To add content in Teachable:

  1. Navigate to the Course Curriculum (for mini-courses) or the Product Setup (for digital downloads).
  2. Click Add New Lesson and give it a title.
  3. Upload a video, PDF, or worksheet to deliver value immediately.
  4. Save your changes and preview your product from a student’s perspective.

By the end of this step, your first digital product will be fully created. Now, it’s time to develop a sales-ready publishing plan and marketing system to start attracting and selling to students.

Step 4: Publish your first product

Creating a great product is only half the equation—having a system in place to sell it is just as important. 

A great sales system is more than the sum of its parts; it’s a structured way of getting potential students to understand what you offer, see its value, and feel confident about making a purchase.

Teachable provides multiple options to help you create a seamless sales experience, whether you’re looking for a quick launch or a fully customized approach.

Select the right sales page option for your product (10 minutes)

Before you start driving traffic to your offer, you need a sales page that presents your product in a compelling way. Teachable gives you two options:

  1. Product detail page (currently in development) – This is a fast and simple way to start selling. It is automatically generated when you enable it in the course setup guide, pulling key product details, pricing, and a checkout button into a clean layout. This option works well for creators who want a quick setup without designing a custom sales page. Currently, it is only available for courses, with plans to expand to other product types.
  2. Custom sales page – If you want more control over branding, messaging, and layout, you can build a custom sales page. Teachable’s page editor allows you to add testimonials, videos, FAQs, and more to create a high-converting landing page.

To choose the best option for your product:

  1. If you want to start selling quickly, select the product detail page in your course setup guide. This page is automatically created and requires minimal adjustments. You can preview it, copy the link, and share it immediately.
  2. If you prefer a custom approach, create a new sales page from the Pages section in Teachable. Use the page editor to add sections, images, testimonials, and custom branding.

Optimize your sales page (20 minutes)

Whether using a custom sales page or the product detail page, you can customize your page to the look and feel you desire.

Product detail page

For a quick setup, the product detail page generates a structured sales page automatically. While it does not offer full customization, it allows for:

  • Editing course title, description, and thumbnail directly from the course settings.
  • Selecting which pricing plans to display.
  • Toggling course curriculum preview to give potential buyers a look inside.
  • Using the rich text area to add additional marketing messages.
  • Enabling search engine discoverability so the course can appear in Google search results.
  • Copying the product detail page URL to use in promotions.

Custom sales page

For those who want full control over their layout, Teachable’s sales page editor allows for detailed customization. You can:

  • Use Teachable AI to quickly generate a complete sales page with pre-written content.
  • Add compelling headlines and clear descriptions to highlight key benefits.
  • Include testimonials to build trust with potential buyers.
  • Show pricing details with clear calls to action for each plan.
  • Enable enrollment caps to create urgency if space is limited.
  • Test all links and buttons to confirm everything is working as expected.
  • Copy your page URL for use in promotions.

Set up additional sales tools (15 minutes)

A sales page is one part of the process. Teachable offers additional tools to strengthen your sales system:

  • Coupons – Create discounts to encourage sign-ups and track promotion performance.
  • Abandoned cart emails – Remind potential students who visited the checkout but didn’t complete the purchase.
  • Order bumps and upsells – Adding additional products can increase revenue by offering additional products at checkout (if you have the content already prepared).
  • Affiliate marketing – Allow partners to promote your product in exchange for a commission.

These tools help increase conversions by making the buying process smoother and offering incentives to take action.

Test your sales system (10 minutes)

Before promoting your sales page, run a quick test to confirm that everything is working as expected:

  • Open the page from a student’s perspective and check for clarity.
  • Click all links and buttons to confirm they lead to the right place.
  • If using a checkout page, complete a test transaction to confirm the process works.

Once these steps are complete, your sales system is ready. Now, it’s time to drive traffic and start making sales.

Step 5: Market your digital product

Having a great product and a strong sales system in place sets the foundation, but making sales requires reaching the right people and grabbing their attention. Whether you already have a following or are starting from scratch, there are multiple ways to promote your product and attract buyers.

Announce your product and generate early sales (20 minutes)

Getting the word out early can help you generate momentum before your official launch. Share your offer across different platforms to warm up your audience:

  • Collect email leads directly on Teachable and send them using your favorite email provider – Use the Email Lead Form block to capture email addresses from potential buyers. Leads are stored in your Users > Leads list and can be connected to ConvertKit, Mailchimp, or Zapier for automated follow-ups.
  • Email your audience – If you already have an email list, send an announcement campaign using Teachable’s email integrations. Teachable also allows you to segment leads and track conversions.
  • Share on social media – Post short-form videos, behind-the-scenes content, and launch announcements. Add a link to your Teachable sales page or checkout page in your bio or posts to drive traffic. You can also add your Teachable products to Linktree for increased visibility.
  • Reach out to warm leads – Contact past clients, current prospects, your existing network, and community members who may be interested or who may know someone else who would benefit from your digital product.
  • Engage in online communities you’re already a part of – Share your expertise and provide value in relevant groups or forums where potential customers might be looking for solutions.
  • Host a free live training or webinar – Use Teachable’s Zoom integration to introduce your course topic and invite attendees to enroll.
  • Use affiliate marketing – Partner with micro-influencers, peers, or past students who can promote your course in exchange for a commission.
  • Offer an early-bird incentive – A limited-time discount or exclusive bonus can encourage people to take action sooner.

If you don’t have an audience yet, consider reaching out to peers, past clients, or industry contacts who may be interested. Partnering with a micro-influencer or affiliate can also help expand your reach.

Optional: Use a pre-sale strategy to validate demand (20 minutes)

A pre-sale allows you to start selling before your product is fully completed. This not only helps generate early revenue but also provides valuable feedback from students before your official launch.

To run a pre-sale:

  1. Make sure your product page is set up correctly – Use a sales page or product detail page (as we discussed in step 5) with clear messaging about when content will be available.
  2. Create a pre-sale pricing plan – Offer a discounted rate for early adopters who sign up before the full launch.
  3. Outline what buyers will receive – If your content isn’t complete, provide an overview of what’s coming and when it will be delivered.
  4. Communicate with pre-sale buyers – Send updates to keep them engaged while they wait for the full course.

Convert leads into paying students (20 minutes)

Not everyone buys the first time they see your offer. A structured follow-up system can turn interested leads into customers.

Here are some of the marketing moves you can take to convert more of your audience into customers:

  • Run a three-part email sequence – Teachable integrates with Kit and Mailchimp to automate an email campaign:
    • Product announcement – Highlight key benefits and what students will learn.
    • Reminder email – Share testimonials, answer FAQs, or showcase a case study.
    • Final call-to-action – Create urgency by reminding leads of an expiring bonus or discount.
  • Track and retarget engaged leads – Use Teachable’s sales analytics to identify visitors who viewed your sales page but didn’t purchase. Send them a follow-up email or run a retargeting ad through Meta Pixel, TikTok Pixel, or Google Tag Manager (all of which integrate with Teachable).
  • Encourage referrals with Teachable’s Student Referral Program – Offer a discount to both the referrer and their friend when someone enrolls through a referral link. Set this up under Site > Referrals in your Teachable admin.
  • Use countdown timers and urgency-based marketing – Limited-time bonuses or discounts can increase conversions. Display these on your Teachable sales page or mention them in your email follow-ups.

Track Performance and Adjust Your Marketing Strategy (15 minutes)

Once sales start coming in, monitoring performance helps identify what’s working and what needs improvement. Teachable’s Sales Analytics Dashboard provides key data points to help guide decisions.

  • Check conversion rates – The dashboard shows the total number of transactions, along with the percentage of visitors who completed a purchase. If conversions are low, adjusting pricing, sales page content, or adding an order bump might help.
  • Monitor revenue trends – Sales trends can highlight the best-performing products and the impact of promotions. The dashboard also tracks average transaction value (ATV) to see how pricing strategies are influencing sales.
  • Review coupon performance – The Coupons section provides insights into which discount codes drive the most sales. If a promotion underperforms, consider testing different incentives.
  • Analyze refund rates – If refund percentages are high, customer feedback can help pinpoint concerns with content, pricing, or expectations set during marketing.
  • Track free-to-paid conversions – If a free resource, webinar, or lead magnet is part of the sales funnel, the Free-to-Paid Conversion section shows how many users move from free content to a paid offer.

With this data, adjustments can be made to sales pages, pricing, and promotional strategies to improve sales outcomes. Teachable’s analytics tools make it easy to track progress and refine marketing efforts over time.

Start selling with Teachable today

Launching a digital product doesn’t have to take months of planning, expensive software, or complicated tech. With Teachable, everything you need is in one place—from setting up your school and accepting payments to building a sales system and tracking performance.

By following these five steps, you can turn an idea into a live, revenue-generating product in a matter of days. Whether you’re starting from scratch or expanding an existing business, Teachable gives you the flexibility to monetize your expertise on your terms.

Now, the next move is yours. Set up your Teachable school, start creating, and take the first step toward building a new income stream today. Start for free and see how quickly you can launch.

Why Small Businesses Need Teachable as an LMS

Software Stack Editor · March 6, 2025 ·

Why small businesses need an LMS

Running a small business involves juggling multiple responsibilities, from onboarding new employees to training clients and educating customers. Efficient training is critical for growth, but without the right tools, it can become time-consuming and inconsistent. This is where a learning management system (LMS) becomes invaluable.

Challenges of traditional training methods:

  • Time-consuming processes: Repeating the same training sessions for each new hire or client consumes valuable time that could be better spent on strategic tasks.
  • Inconsistent delivery: Without a standardized system, training quality can vary, leading to misunderstandings and errors.
  • Limited scalability: Traditional methods struggle to accommodate growing teams or expanding client bases, hindering business growth.

An LMS addresses these challenges by providing a centralized platform for creating, managing, and delivering training content. This not only streamlines the process but also ensures consistency and scalability.

What to look for in an LMS as a small business owner

Selecting the right LMS helps maximize training efficiency and effectiveness. Small business owners should consider the following factors:

1. Ease of use: The platform should have an intuitive interface that allows users to create and manage courses without technical expertise.

2. Affordability: Cost-effective solutions are essential for small businesses. Many LMS providers offer flexible pricing plans tailored to smaller organizations.

3. Scalability: As your business grows, the LMS should be able to accommodate more users and expand content without significant upgrades or costs.

4. Integration capabilities: The LMS should seamlessly integrate with existing tools and systems, such as HR software or communication platforms, to ensure a cohesive workflow.

5. Support and resources: Reliable customer support and access to training materials can help your team make the most of the LMS features.

By focusing on these criteria, small business owners can choose an LMS that not only meets their current needs but also supports future growth.

How small businesses use Teachable as an LMS

Small businesses utilize Teachable’s LMS platform to enhance their training processes in various ways.

Employee onboarding and training

Businesses create structured, self-paced courses to onboard new employees efficiently, ensuring they understand company policies and procedures without the need for repetitive in-person sessions.

Example

A small marketing agency hires new team members every few months. Instead of spending hours manually training each hire, they create an onboarding course inside Teachable. The course includes company policies, workflow tutorials, and best practices for client communication. New employees complete the course before their first day, so they are ready to contribute right away.

Why it works: Online training reduces onboarding time, ensures consistency, and allows employees to revisit materials when needed.

Client education

Service-based businesses develop courses to educate clients about their offerings, improving client satisfaction and reducing the time spent on individual consultations.

Example

A bookkeeping consultant helps small business owners manage their finances. Instead of hosting live training sessions for every new client, they create a step-by-step course on using accounting software and tracking expenses. Clients can go through the lessons at their own pace and refer back to them when needed.

Why it works: A structured course ensures clients receive the same high-quality training, reduces repetitive one-on-one calls, and improves client retention.

Revenue generation through course sales

Entrepreneurs and experts monetize their knowledge by creating and selling online courses, adding a new revenue stream to their business model.

Example

A personal trainer wants to expand beyond in-person coaching. They create a fitness course with workout plans, video demonstrations, and meal guides. Customers can purchase access to the course, providing the trainer with a new source of revenue that does not require extra hours in the gym.

Why it works: A one-time course creation effort leads to ongoing passive income and allows the business owner to scale their expertise to a wider audience.

Features that make Teachable ideal for small business training

Teachable provides small businesses with a flexible and easy-to-use learning management system. Instead of dealing with the complexity of traditional LMS platforms, like Articulate or TalentLMS, business owners can focus on creating and delivering effective training. Here are the key features that make Teachable a great fit for small business training:

1. Course Creation and Management Tools

Teachable’s drag-and-drop course builder allows businesses to create multimedia-rich training content without technical expertise with AI, if needed. Users can upload videos, PDFs, quizzes, and presentations to design interactive learning experiences.

Use case: A real estate brokerage creates a training course for new agents that includes video walkthroughs, compliance guides, and interactive quizzes to test their understanding of industry regulations.

🔗 Learn more about course creation tools

2. User management

Businesses can organize learners by roles, departments, or experience levels and set permissions for different team members. This ensures that employees, clients, or customers receive training tailored to their needs.

Use case: A software company provides onboarding courses for both employees and customers. Employees receive in-depth internal training, while customers access simplified tutorials to help them use the product.

🔗 Learn more about user management

3. Reporting and Analytics Capabilities

With built-in analytics and reporting, businesses can track learner progress, identify knowledge gaps, and ensure training is completed. Admins can view course completion rates, quiz scores, and time spent on each module.

Use case: A digital marketing agency assigns mandatory compliance training to all employees. The HR team uses Teachable’s reporting dashboard to confirm that every employee has completed the required courses.

🔗 Learn more about course reporting tools

4. Mobile access

Teachable’s student experience is second-to-none. Our mobile-friendly design allows learners to access training on any device. This is especially useful for remote teams, field employees, or busy professionals who need flexible learning options. 

Use case: A restaurant chain creates a staff training course for food safety and customer service. Employees can complete the training from their phones before their first shift.

🔗 Learn more about mobile app

By offering easy course creation, structured user management, real-time reporting, and mobile access, Teachable makes training more efficient for small businesses.

Get started with your first training program on Teachable

Getting started with Teachable as an LMS is straightforward. Whether you are creating training for employees, clients, or customers, the platform allows you to build and manage your courses with ease. Follow these steps to launch your first training program.

1. Define your training goals

Before creating a course, clarify what you want learners to achieve. Consider:

  • Who is this training for: employees, clients, or customers?
  • What skills or knowledge should they gain: compliance training, onboarding, or industry expertise?
  • How will you measure success: course completion, quiz scores, or project submissions?

2. Build your course content

Use Teachable’s drag-and-drop course builder to upload training materials, including:

  • Videos for step-by-step guidance
  • PDFs and slideshows for reference materials
  • Quizzes to reinforce key concepts
  • Discussion boards to encourage engagement

3. Set up user permissions

Decide who can access your training and at what level. Teachable allows you to:

  • Assign different roles to admins, instructors, and learners
  • Create private courses for specific teams or departments
  • Set enrollment rules, such as prerequisite lessons or timed content releases

4. Launch and track progress

Once your course is live, monitor engagement using Teachable’s built-in analytics tools. Track:

  • Course completion rates
  • Quiz scores and assessment performance
  • Time spent on modules

5. Keep your training program updated

Regularly review and update your training materials to keep content relevant. You can:

  • Add new lessons or case studies
  • Update outdated policies or procedures
  • Collect feedback from learners and refine your course

Teachable vs. other LMS platforms

Choosing the right LMS is critical for small businesses that need a flexible, easy-to-use, and cost-effective solution. While many LMS platforms cater to large enterprises, Teachable stands out by offering a streamlined approach to training that aligns with the needs of small business owners, consultants, and educators.

How Teachable compares to traditional LMS platforms

‍

Why small businesses prefer Teachable

  • Faster setup: No technical expertise required, allowing businesses to launch training quickly.
  • Lower costs: Budget-friendly pricing without the need for IT support or custom development.
  • More flexibility: Supports internal training, client education, and paid course offerings in one platform.
  • Automation tools: Saves time with features like progress tracking, email automation, and certificate issuance.

Unlike corporate-focused LMS platforms, Teachable is built with simplicity and scalability in mind, making it a smart choice for small businesses looking to streamline training and grow their impact.

{{trial-component=”/blog-shortcodes/blog-cta”}}

Frequently asked questions (FAQ)

Small business owners often have questions when choosing an LMS. Here are answers to some of the most common ones:

What is the best LMS for small businesses?

The best LMS for small businesses is one that is easy to use, affordable, and scalable. Many traditional LMS platforms are designed for large corporations and require IT support, making them difficult to manage for small teams. Teachable offers an intuitive course builder, built-in automation, and flexible pricing plans, making it a great fit for small businesses, consultants, and entrepreneurs.

How do I train employees or clients online without a big budget?

An LMS eliminates the need for expensive in-person training by allowing businesses to create structured, self-paced learning programs. With Teachable, you can upload training materials, track progress, and automate enrollments—all without hiring a dedicated training team. Plus, there are no hidden fees or costly add-ons.

Can I use Teachable for both internal training and selling courses?

Yes. Unlike many LMS platforms that are designed only for employee training, Teachable allows businesses to train employees, educate clients, and sell courses in one platform. This flexibility makes it easy to offer free or paid learning experiences depending on your needs.

Do I need technical skills to use Teachable as an LMS?

No. Teachable is designed for business owners who want a simple, no-code platform to create and manage courses. The drag-and-drop builder makes it easy to upload content, set up quizzes, and organize lessons without any prior experience in course development.

Does Teachable provide reporting and analytics for training programs?

Yes. Teachable includes built-in progress tracking so you can monitor course completion rates, quiz performance, and engagement levels. This helps small businesses measure the effectiveness of their training programs and make improvements as needed.

Ready to transform your corporate training in 2025? Explore more about how Teachable LMS can meet your business needs.

‍

‍

‍

Professional headshots for creators

Software Stack Editor · March 5, 2025 ·

A strong personal brand starts with a strong first impression. And for creators, coaches, consultants, and small business owners, that often means having a polished, professional headshot. Your headshot is more than just a profile picture, it’s a representation of your brand, your expertise, and your personality. But what makes a great headshot, and how can you ensure yours helps you stand out?

As a UX designer at Teachable, I’ve seen my fair share of headshots. Some are fantastic, while others make simple mistakes that hold creators back. Whether you’re updating your headshot for LinkedIn, your Teachable course, or your website, here are some tips to help you get and deliver a great headshot.

1. The most common headshot mistake

One common mistake is using the same headshot for years. Over time, this can degrade quality, and quickly creates outdated images that don’t truly reflect who you are now.

Pro Tip: “If you have just one headshot you’re relying on, over time you could misplace the file, end up resizing it, resaving it off Twitter, until eventually you don’t have the original file or it’s low quality. And what was a large file size for a headshot years ago could be considered too small for use now. ” 

2. You don’t need a studio, but lighting matters

A great headshot doesn’t require a professional studio setup. Natural light is your best friend. Position yourself near a window with diffused light or shoot on an overcast day for a soft, flattering effect. Avoid harsh shadows and direct sunlight, which can create unflattering contrast.

Pro Tip: “Some of the best lighting is just natural daylight. If it’s coming through a window, ideally not harsh direct light, it can be really flattering.” 

Cody Scott Milewski on Unsplash”>Source

3. Show your personality and brand

Your headshot should reflect your brand and personality. If you’re a podcast host, consider using your recording setup as a backdrop. If you’re a vibrant, high-energy creator, lean into bold colors or fun props that align with your aesthetic. For more professional creators, a clean, neutral background might be the best fit.

Pro Tip: “I think showing your personality a little bit helps. If you’re a creator that cooks, maybe have something that subtly alludes to that in your headshot.” 

4. Avoid common faux-pas

  • Logos: Avoid wearing clothing with big logos or text unless it’s part of your branding.
  • Cropped Group Photos: A cropped wedding photo isn’t a headshot. Invest in a standalone image where you’re the sole focus.
  • Industry consideration: A fitness instructor might choose an action shot, while a business consultant may opt for a more polished, professional image.

Pro Tip: “Pay attention to your body language—shoulders tend to rise when you’re feeling tense or nervous. Take a deep breath, relax, and look at the first few photos to see if you need to adjust your posture.”

5. Should you have multiple headshots?

For creators balancing personal and business brands, it may make sense to have two headshots, one for your personal brand and another for your business presence. However, consistency is key. If your business and personal brand are closely tied, having one cohesive series of strong, versatile headshots may be the better option.

{{trial-component=”/blog-shortcodes/blog-cta”}}

6. Working with a photographer vs DIY

If you’re hiring a photographer, clarify usage rights and ensure their editing style aligns with your brand. For DIY options, a tripod and a timer can work wonders. If budget is a concern, consider trading services within your local creator community.

Pro Tip: “Some small businesses and creators trade services, like blog writing for a headshot session. That’s something to look into.” 

7. AI vs. real photography

AI-generated headshots can be a cost-effective option, but they come with risks. Many AI images alter facial proportions or create an uncanny effect. If you go this route, check with trusted colleagues to ensure the result is still an authentic representation of you.

Pro Tip: “AI-generated headshots can be useful, but they often smooth out details too much. Make sure it still looks like you.” 

8. Protecting your headshot

Your headshot is part of your brand identity. If you work with a photographer, ensure you understand the licensing terms. Also, be mindful of where you upload your headshot, public images can sometimes be used without permission.

For Teachable Creators

How to submit your best headshot to Teachable

For your Teachable headshot submission, ensure your face is clearly visible with ample space around your head and shoulders. Use natural or studio lighting at eye level, avoiding extreme angles or busy backgrounds. Keep the image in full color without excessive filters, and ensure colors appear natural. Accessories, including glasses, should not obscure more than a quarter of your face.

For an engaging and professional look, wear clothing or accessories that reflect your brand, but avoid anything distracting. If you have additional images that showcase your personality or workspace, feel free to include them—we’re happy to see more options!

Not a Teachable creator yet?

{{trial-component=”/blog-shortcodes/blog-cta”}}

Final thoughts

A high-quality headshot can help you establish credibility, build trust, and make a lasting impression. Taking the time to get a professional headshot ou can be proud of, is a valuable investment in your professional image.

Need a refresh? Grab your phone, find great lighting, and start snapping, you’ll be surprised how much a great headshot can elevate your brand!

FAQs about getting good headshots

How to Get a Good Professional Headshot?

‍A good headshot starts with the right lighting. Natural light or soft studio lighting works best. A neutral or on-brand background keeps the focus on you. Solid colors that complement your skin tone create a polished look. Communicating your goals with the photographer and reviewing their portfolio ensures alignment with your vision. Additional tips include:

  • Focus on your eyes, making sure they are sharp and well-lit.
  • Consider professional hair and makeup services for a refined appearance.
  • Use a tripod or have someone take the photo to avoid the “selfie arm” look.

How Much Should I Expect to Pay for a Professional Headshot?

‍Pricing varies based on location, photographer experience, and session details. General price ranges include:

  • Basic session: $100 to $300 (one or two final images).
  • Mid-range session: $250 to $750 (multiple poses, outfit changes, and retouched images).
  • High-end session: $600 to $1,500 or more (studio sessions, premium editing, and branding consultation).

Some photographers offer mini-sessions or group rates as more affordable options.

Are Professional Headshots Worth It?

‍Yes, professional headshots provide several benefits, including:

  • Enhancing credibility and professionalism.
  • Demonstrating commitment to your career.
  • Saving money compared to buying expensive camera equipment.
  • Providing a cohesive online presence across multiple platforms.
  • Increasing your chances of getting hired or attracting new clients.

How Long Does It Take to Get a Professional Headshot?

‍The time required for a professional headshot varies, including:

  • Shooting time: Quick corporate sessions take 5–15 minutes, while comprehensive sessions can last 1–2 hours.
  • Turnaround time for edited images: Typically 3–10 business days.
  • Expedited delivery: Some photographers offer same-day or rush options.

High-quality retouching takes time, so rushing the process isn’t recommended unless absolutely necessary.

The Ultimate Guide To Selling High-Ticket Offers For Creators

Software Stack Editor · February 26, 2025 ·

image

A business will spend $500 on one client dinner. Why wouldn’t they pay that for knowledge that generates ROI?

Many creators underprice their services, assuming that individuals won’t pay premium rates. But what if you weren’t selling to just individuals?

Businesses and professionals actively invest in growth, efficiency, and profitability. They have dedicated budgets for tools, training, and services that provide tangible results.

 The key to earning more is shifting your mindset—stop selling to budget-conscious consumers and start positioning yourself as a premium solution for businesses that expect and justify higher price points.

In this guide, we’ll walk you through how to charge $500+ for your offers by understanding business spending psychology, offering high-value services, and repositioning your pricing strategy.

{{coursepricing-component=”/blog-shortcodes/blog-popup”}}

Why business creators and B2B entrepreneurs can charge higher rates

When it comes to pricing, there is a fundamental difference between selling to consumers and selling to businesses. 

Consumers typically use their personal funds, making purchases based on emotions, convenience, and personal desire. 

In contrast, businesses justify expenses based on return on investment (ROI), revenue growth, and efficiency improvements. This means they are more willing to invest in solutions that will directly benefit their bottom line.

Businesses also associate higher prices with credibility and quality. If a service or product is too cheap, they may perceive it as less effective or less valuable. 

This is why coaching, consulting services, and professional training programs often charge thousands of dollars—because businesses expect and accept these higher price points.

Some common high-ticket investments businesses make include:

  • Coaching and consulting services ($1,000+ per session)
  • Software and automation tools ($500+/month subscriptions)
  • Workshops and training programs ($500-$5,000 per event)

By understanding this, you can confidently price your offers in a way that aligns with what businesses already expect to pay.

The psychology of business spending vs. consumer spending

Businesses operate on a different financial model than individuals. 

Unlike consumers, who may hesitate to spend $500 on personal growth, businesses have budgets specifically allocated for growth and optimization. 

They justify expenses by analyzing their potential return. If an investment can help them generate more revenue, save time, or improve operations, it becomes an easy decision.

One major psychological factor is perceived value. Higher prices often create a sense of exclusivity and trust. If a business is choosing between two consultants—one charging $100 per session and another charging $1,000—the higher-priced consultant is often perceived as the more skilled or experienced professional.

To set a premium price, frame your offer in terms of ROI (Return on Investment) by asking:

  • How much time or money does your service save the business?
  • How much additional revenue can your solution generate?
  • What operational efficiencies or competitive advantages does your offer create?

For example, if a business pays $500 for a consulting session that helps them land a $5,000 client, the ROI is clear and justifiable. 

Structuring your packaging and marketing around these principles makes it much easier for businesses to say “yes” to your high-ticket offer.

3 types of business offers that sell for $500+ without hesitation

Selling high-ticket offers is easier when you understand what businesses are already willing to invest in.

Companies and professionals prioritize solutions that save time, increase revenue, or provide a competitive edge. Below are three types of offers that businesses are more than willing to pay $500 or more for without hesitation.

1. Done-for-you (DFY) services

Companies often prefer outsourcing specialized tasks to experts rather than figuring them out in-house. Whether it’s website design, ad campaign management, or branding, these services provide clear value because they save time and produce a measurable outcome.

Instead of charging an hourly rate, position your offer as a comprehensive solution with a flat-rate package. For example:

  • Custom website design package: $2,500+
  • Complete branding package: $3,500+
  • Facebook ads setup and management: $1,500+/month

2. Premium consulting and coaching

Businesses seek experts who can guide them through challenges and accelerate growth. Executive coaching, digital marketing consulting, and business strategy advising are highly valued services that businesses willingly invest in. Since the expertise of a consultant can directly impact revenue and efficiency, businesses expect to pay premium prices.

If you offer consulting or coaching, consider structuring your pricing with tiered packages such as:

  • One-time session: $500+
  • 3-month program: $3,000+
  • 6-month intensive: $5,000+

3. High-impact digital products

If you don’t want to trade time for money, creating a high-value digital product can be a great way to sell at a premium price. Businesses invest in online courses, templates, and automation tools that improve their workflow and operations.

To charge $500+ for a digital product, bundle your product with added support, such as:

  • Online course + group coaching calls: $997
  • Business automation templates + implementation guide: $750
  • Masterclass series + exclusive business community: $1,500

How to reposition low-ticket offers into premium pricing

Many creators start by selling low-ticket products like ebooks, templates, or one-off sessions. While these offers may sell, they often require a high volume of sales to be profitable. Instead of focusing on selling low-cost items, consider repackaging and repositioning your offers for a premium audience.

1. Increase perceived value

To justify higher prices, elevate the perceived value of your offer by:

  • Enhancing packaging (adding bonuses, templates, or VIP access)
  • Providing social proof (client case studies, testimonials, and success stories)
  • Positioning your offer as a solution to a high-value problem

2. Offer tiered pricing

Providing multiple pricing levels allows you to appeal to different business needs. For example:

  • Basic package: $97 digital product
  • Pro package: $500+ with added consulting or implementation help
  • VIP package: $2,000+ for done-for-you services

3. Sell transformation, not features

People don’t buy services or products—they buy outcomes. Instead of emphasizing the number of hours or modules included, focus on the transformation your service provides.

  • Instead of: “10 video lessons on LinkedIn ads”
  • Say: “Master LinkedIn Ads to Generate 6-Figure Clients”
  • Instead of: “Marketing Strategy PDF”
  • Say: “A 6-Step Framework Used by 7-Figure Agencies”

By clearly communicating the result, you make your high-ticket offer much more compelling.

Maximize the revenue of your business with Teachable

If you’re ready to charge more for your offers and sell to businesses that understand ROI, you need a platform that supports high-ticket sales and scalable growth. 

Teachable makes it easy to package your expertise into profitable courses, coaching programs, and digital products—all while giving you the tools to maximize your revenue.

Start your journey toward premium pricing today by signing up for a free trial on one of our paid plans. 

Get started now on Teachable and take your business to the next level!

Scale Your Coaching Business Without More 1:1 Calls

Software Stack Editor · February 19, 2025 ·

For many coaches, the dream of building a thriving business quickly turns into an exhausting reality, i.e., endless one-on-one calls, unpredictable income, and the constant struggle to scale without sacrificing personal time. If you’ve ever felt like you’re stuck trading time for money, you’re not alone. And although the coaching field is booming according to a recent global coaching study, up 54% since 2019 for 109.200 practitioners globally, there’s a twist. 

The International Coaching Federation (ICF) study also shows that online coaches hourly rate has increased to $244 per hour. While this growth is excellent, there’s only so much time in a day for coaches who want to scale. Growing beyond 1:1 calls requires a systemized approach that maximizes profit without increasing workload. Platforms like Teachable make it easier than ever to transition from time-intensive coaching to sustainable, automated income models.

{{trial-component=”/blog-shortcodes/blog-cta”}}

The coaching business bottleneck is time vs. reach

Traditional hourly coaching creates a natural income ceiling. Every additional client means more time spent on calls, follow-ups, and administrative tasks. This leaves little room for business growth and personal freedom.

The key to scaling is asynchronous coaching models, where clients can access your expertise without requiring live interaction. For many successful coaches, this means shifting to models like:

These are a few of the many ways you can move beyond the traditional limitations and build a coaching business that grows without draining your time.

Here’s how you scale a coaching business (without more calls)

Now that we’ve identified the bottleneck, let’s explore actionable strategies that allow you to grow without increasing your workload:

Offer On-demand courses

Instead of repeating the same lessons in 1:1 sessions, create a structured, self-paced course that clients can access anytime. As a matter of fact, Teachable allows you to package your expertise into an online course that provides value on autopilot.

[embedded content]

Teachable online coaching case study

Cheryl Porter has built a digital empire with her Vocal Method course. Her course has been purchased in 135 countries, showing how the possibilities are growing a global coaching business with Teachable.

Cheryl Porter Vocal Method Online Course Homepage Image

‍

Launch a membership or subscription model

A membership or subscription helps build recurring revenue while building a loyal, engaged community that keeps coming back for more. Offer exclusive content, live Q&A sessions, behind-the-scenes insights, and group coaching, all without the constant need for one-on-one calls. This setup turns your expertise into an ongoing, scalable business model that grows alongside your audience.

Host group coaching programs

Small-group coaching lets you serve multiple clients at once while still providing personalized guidance. Not only does this maximize your time, but it also creates a dynamic learning environment where members benefit from each other’s insights, making your program even more valuable.

Sell digital resources & templates

Think beyond just live coaching. Help your audience implement what they’ve learned with ready-to-use digital resources. Whether it’s workbooks, scripts, email templates, or swipe files, these plug-and-play tools let your clients take action on their own. It’s a scalable, near-passive income stream that works around the clock.

{{trial-component=”/blog-shortcodes/blog-cta”}}

Automate lead nurturing & onboarding

Use email automation and pre-recorded onboarding materials to educate and convert prospects into clients without spending time on individual consultations.

4 ways Teachable can help

If you’re ready to scale your coaching business now, choosing the right platform is your most important decision. Here’s why Teachable stands out:

1. All-in-one platform

Teachable allows you to sell courses, memberships, coaching, and digital products.

2. Built-in payment and automation features

One of the things we consistently hear from coaches who switch to Teachable from other platforms like Kajabi and Thinkific is how much they don’t miss the admin headaches. Our payouts, tax automation, and student enrollment processes are incredibly seamless by design, so you can focus on coaching.

3. Customizable and scalable

If you’ve been in business for a while and this is the first time you’re launching an online course or if you are scaling to thousands of students, you’ll find it the platform easy to customize.

4. Proven success stories and resources 

Thousands of coaches have built sustainable businesses on Teachable and we are generous when telling success stories and providing resources.

How to start scaling your digital coaching business today

The point we want to drive home is that your coaching business doesn’t have to mean working more hours. By embracing online-courses, digital products, automation, and group coaching models, you can increase your bottom-line and reclaim your time.

🚀 Ready to take action? Try Teachable’s free trial today and build a course using your current resources today.

FAQs

  1. How can I scale my coaching business without doing more 1:1 calls?
    You can scale your coaching business by offering on-demand courses, memberships, group coaching, and digital downloads. These models allow you to serve more clients without increasing your workload. Platforms like Teachable make it easy to automate and streamline the process.
  2. What are the best ways to generate passive income as a coach?
    The best ways to generate passive income as a coach include creating online courses, launching a membership site, selling digital products (like templates or workbooks), and automating lead nurturing. These methods let you monetize your expertise without being tied to live sessions.
  3. Why should I use Teachable to scale my coaching business?
    Teachable is an all-in-one platform that helps you create, sell, and automate your coaching programs. With built-in payment processing, tax handling, and student management, it allows you to focus on growing your business while reducing admin work.

‍

  • « Go to Previous Page
  • Page 1
  • Page 2
  • Page 3
  • Page 4
  • Interim pages omitted …
  • Page 8
  • Go to Next Page »

Get your Software Stack together. softwarestack.tech

Software Stack

© 2024–2025 - Software Stack is a trading name of SouthwestCIO Limited ac ompany registered in England & Wales 11319049

  • Knowledgebase
  • Home
  • About Us
  • Contact Us