Our view at Stack - You definitely can't pigeon-hole SmartSuite as it does so much! It's a collaborative work management platform that enables teams to plan, track, and manage workflows, projects, and everyday tasks. With features like automations, integrations, and AI capabilities, it streamlines work processes and empowers teams to achieve their goals. It's also available in 15 languages.
Welcome to another episode of Smart Tips! This episode walks you through the different ways you can represent your subtasks in SmartSuite. Whether you’re new to SmartSuite or just looking for ways to optimize your workflows, this guide will help you get the most out of your subtasks.
[embedded content]
In this post, we’ll cover three common methods for handling subtasks in SmartSuite:
- Checklist Field Type
- Sub Items Field Type
- Linked Record Field Type
Let’s dive in!
Checklist Field Type
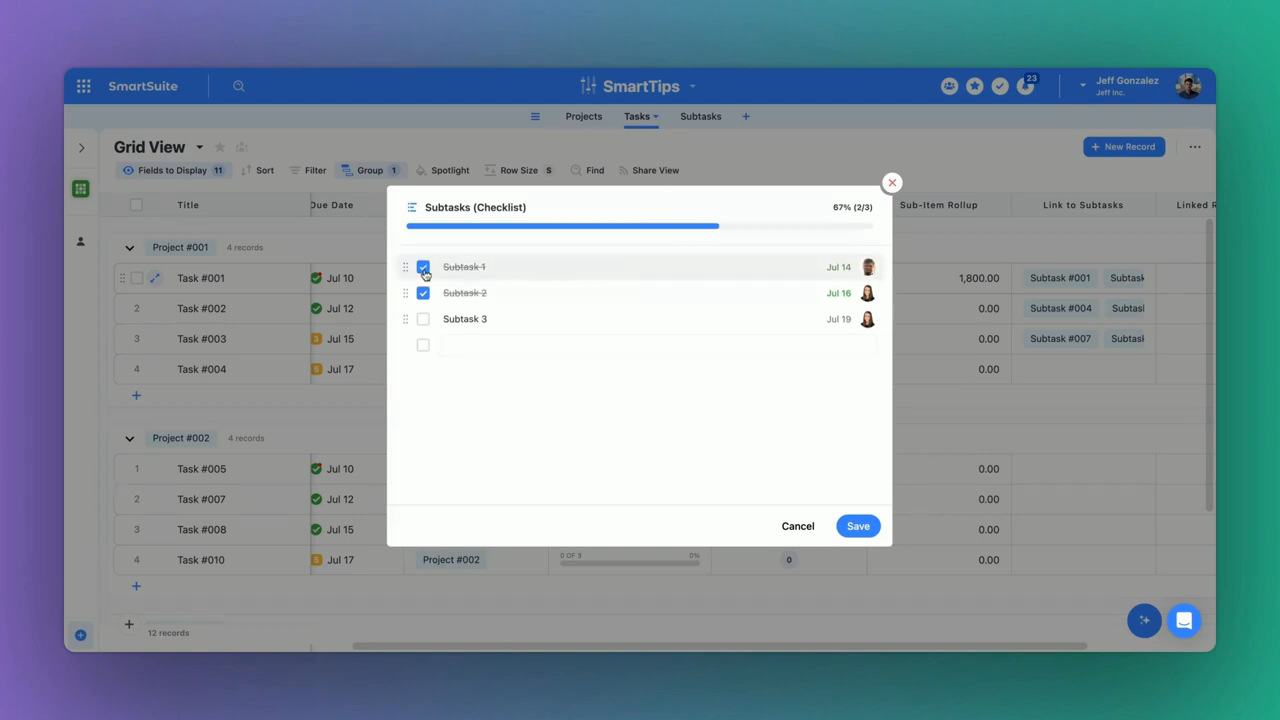
The Checklist Field Type is the most straightforward way to manage subtasks in SmartSuite. This method allows you to create a simple list of tasks with all the necessary information, including who is responsible for each task and when it’s due.

Features
- Text Field: A line of text explaining what needs to be done.
- Assign To Field: Specifies who needs to complete the task.
- Due Date Field: Indicates when the task should be completed.
- Check Box: Marks whether the task is done or not.
By using these fields, you can quickly see the status of each task. When a task is checked off, it appears in the “My Work” section of your SmartSuite workspace, consolidating all tasks across the entire instance.
When to Use
The Checklist Field Type is ideal for:
- Simple Task Lists: When you need to track basic information about each subtask.
- Quick Setup: If you need a fast and easy way to start managing subtasks.
Sub Items Field Type
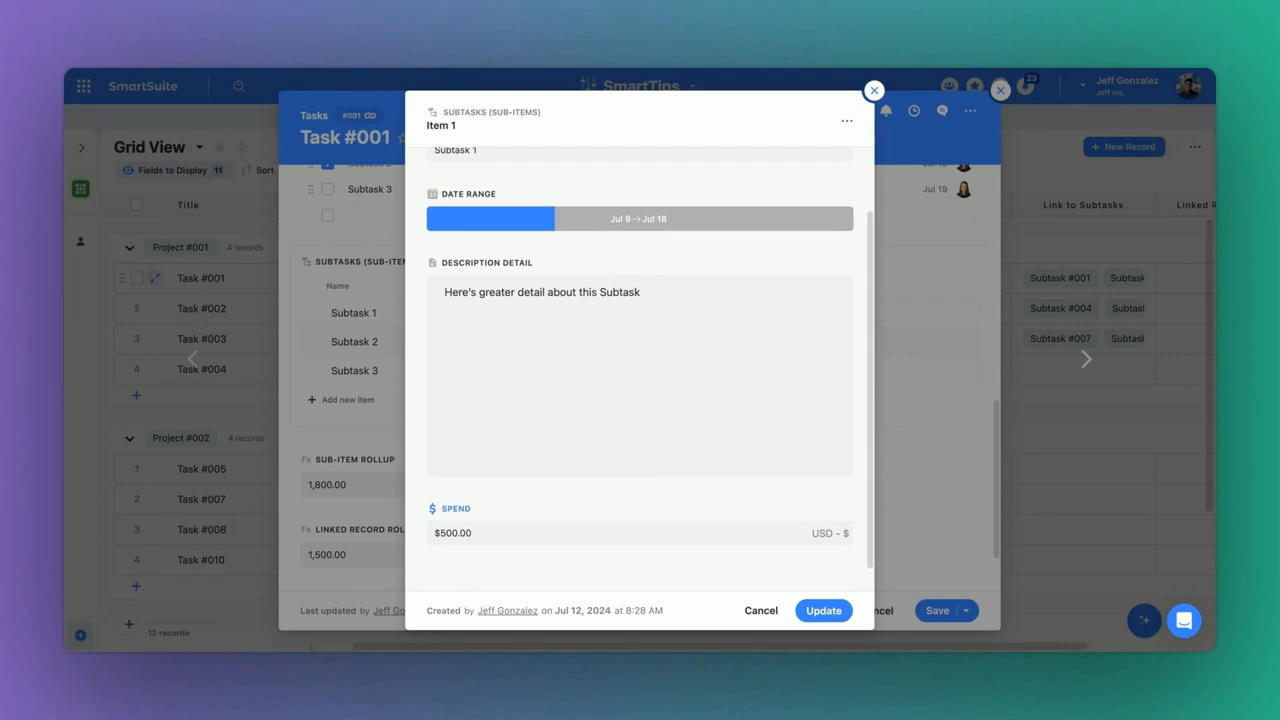
Next, let’s explore the Sub Items Field Type. This method allows you to add more detailed information for each subtask.

Features
- SmartDoc Field: Embed detailed documents within the subtask.
- Date Ranges: Specify a range of dates for when the task can be completed.
- Currency Field: Track the spend associated with completing the task.
One limitation of this method is that you can’t assign the subtask to a specific person, as the “Assign To” field isn’t supported within Sub Items. However, you can still roll up this information using formulas.
Example Use Case
Imagine you are managing a project with multiple components, each requiring detailed tracking. The Sub Items Field Type allows you to include everything from notes to expenses, making it an excellent choice for complex projects.
Linked Record Field Type
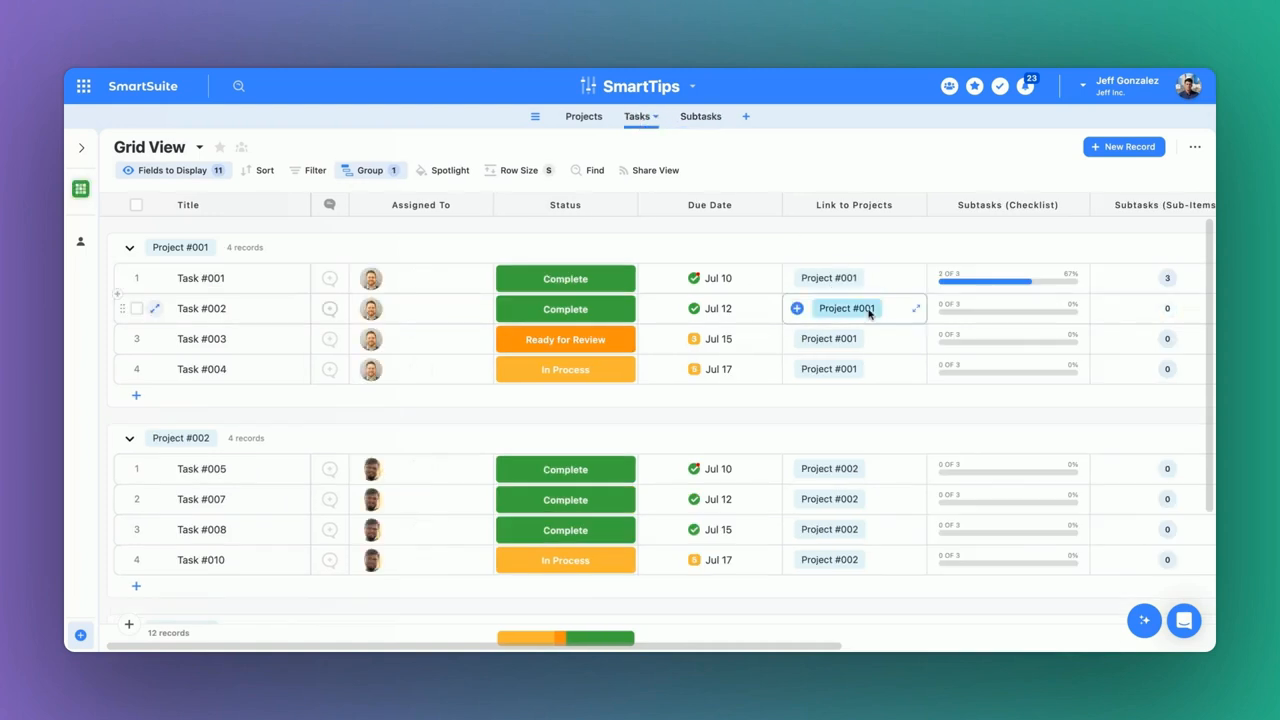
The Linked Record Field Type involves linking subtasks to a separate table of tasks. This method offers the most flexibility and is suitable for advanced workflows.

Features
- Allocation of Spend: Track expenses for each task.
- Comprehensive Fields: Includes all the fields you would expect in a traditional table.
- Hierarchical Organization: Group tasks by project or any other criteria.
You can also use the linked record’s roll-up or formula fields to aggregate data, similar to the Sub Items Field Type.
When to Use
The Linked Record Field Type is perfect for:
- Complex Projects: When you need to manage extensive details and hierarchical relationships.
- Detailed Reporting: If you require in-depth analysis and aggregation of subtask data.
Conclusion
In summary, SmartSuite offers various ways to manage your subtasks, each with its unique advantages:
- Checklist Field Type: Best for simple lists and quick setup.
- Sub Items Field Type: Ideal for detailed tracking without the need for assignment.
- Linked Record Field Type: Perfect for complex, hierarchical projects with intricate data needs.
Stay productive and see you in the next post! To experience the future of work management firsthand, start your free SmartSuite trial today!
If Smartsuite is of interest and you'd like more information, please do make contact or take a look in more detail here.
Credit: Original article published here.
