• Skip to primary navigation
  • Skip to main content
software stack logo

Software Stack

Get your Software Stack together

  • Knowledgebase
    • All Categories
    • Accounting Software
    • Automation & Workflow Software
    • Customer Relationship Management
    • E-Commerce Shopfronts & Payments
    • Marketing Automation
    • Online Courses & Membership
    • Project Management
    • Surveys & Forms
    • Web Hosting
  • Home
  • About Us
  • Contact Us
  • Show Search
Hide Search

Smartsuite

7 Practical Tips to Beat Zoom Fatigue and Stay Productive at Work

Software Stack Editor · May 6, 2024 ·

Remote work and virtual meetings have become the new norm. While technology like Zoom, Teams, and Skype has made collaboration easier than ever, it’s also brought along a new challenge: Zoom fatigue. Spending hours on end in virtual meetings can leave you feeling drained and less productive. But fear not! Here are seven practical tips to help you beat Zoom fatigue and stay productive at work:

  1. Schedule Shorter Meetings: One of the simplest ways to combat Zoom fatigue is to schedule shorter meetings. Instead of defaulting to the typical hour-long meeting, try scheduling 30-minute or even 15-minute meetings when possible. This not only saves time but also keeps everyone focused and engaged throughout the meeting.
  2. Take Regular Breaks: Sitting in front of a screen for long periods can take a toll on both your body and mind. Make it a habit to take regular breaks between meetings. Stand up, stretch, or take a short walk to refresh your mind and prevent burnout. Even a five-minute break can make a world of difference.
  3. Turn Off Video When Possible: While video conferencing can enhance communication, it’s not always necessary to have your camera on. Consider turning off your video during meetings when it’s not essential for communication. This can reduce the cognitive load and give your eyes a much-needed break.
  4. Optimize Your Environment: Create a comfortable and ergonomic workspace to minimize fatigue during virtual meetings. Invest in a good chair, adjust your monitor to eye level, and ensure proper lighting to reduce eye strain. A well-designed workspace can make a significant difference in how you feel throughout the day.
  5. Limit Multitasking: It’s tempting to multitask during virtual meetings, especially when you’re sitting in front of a computer. However, multitasking can actually decrease productivity and increase mental fatigue. Instead, focus on being present and fully engaged in the meeting at hand. Close unnecessary tabs and mute notifications to minimize distractions.
  6. Encourage Interactive Meetings: Keep meetings engaging by encouraging participation and interaction from all attendees. Use features like polls, breakout rooms, and chat functions to foster collaboration and keep everyone engaged. Interactive meetings are not only more productive but also more enjoyable for everyone involved.
  7. Practice Self-Care: Lastly, don’t forget to prioritize self-care to combat Zoom fatigue. Make time for activities that recharge your batteries outside of work, whether it’s exercise, hobbies, or spending time with loved ones. Taking care of your physical and mental well-being is essential for staying productive and avoiding burnout.

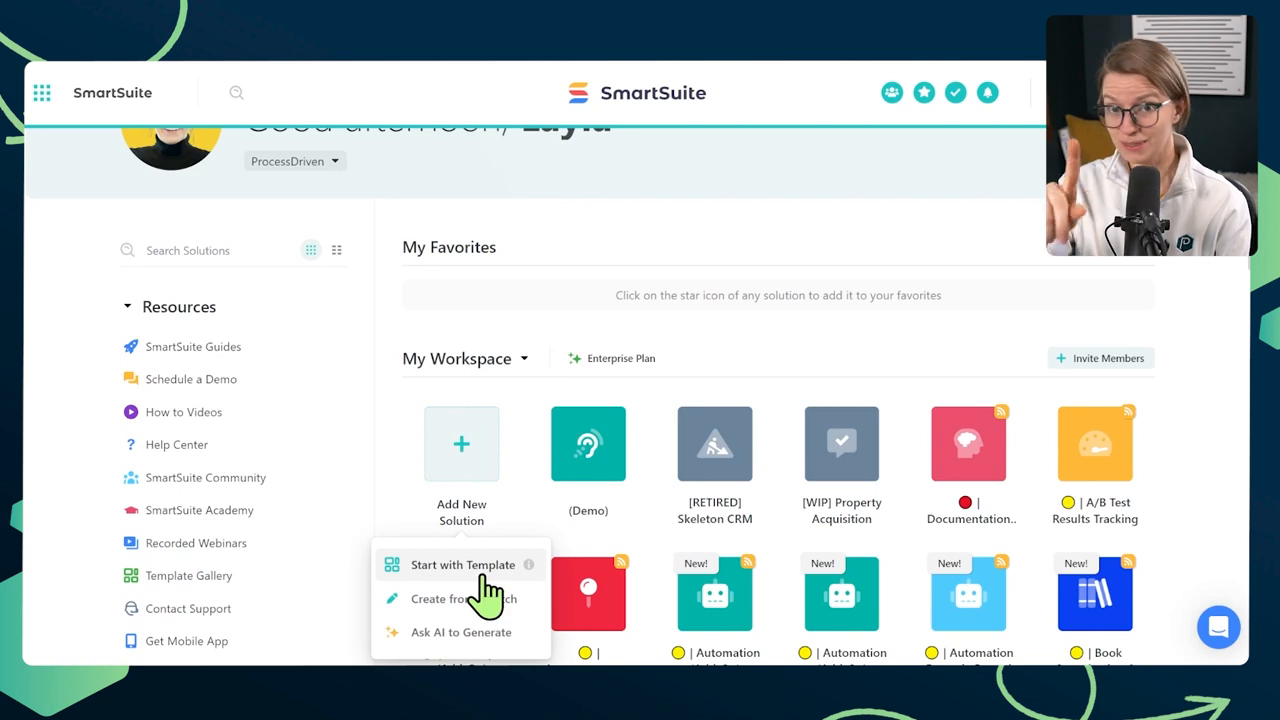
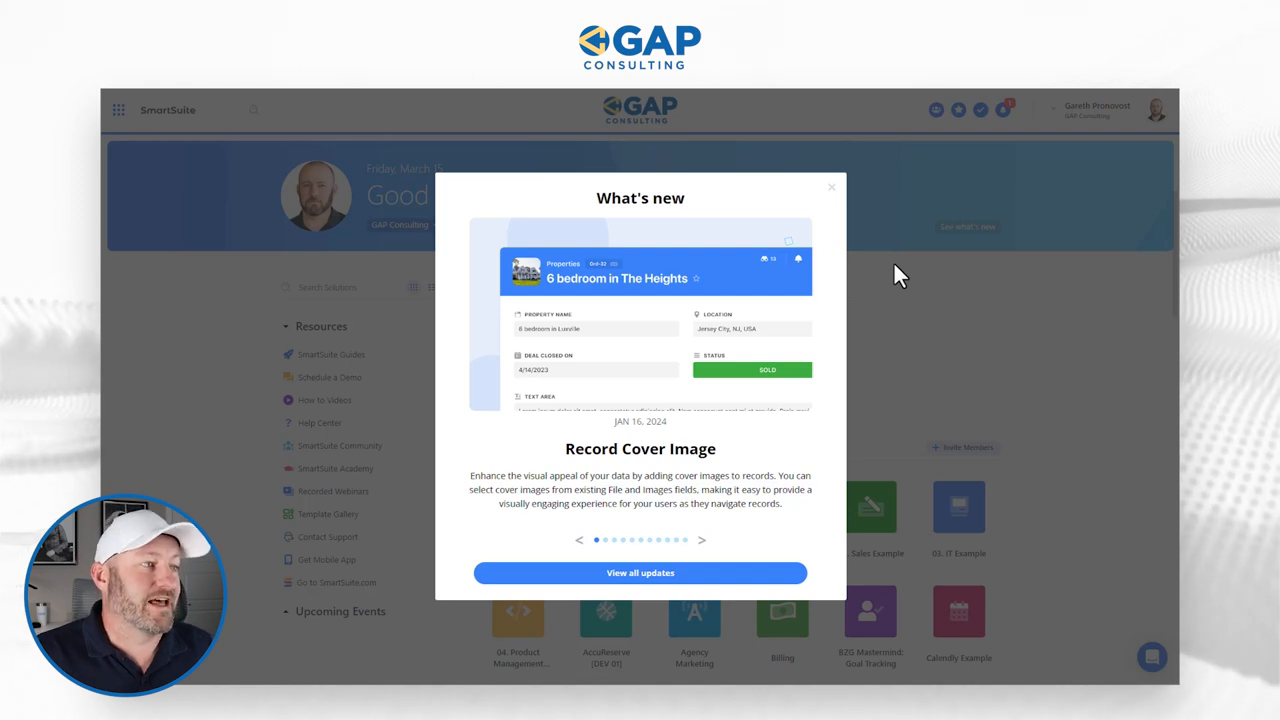
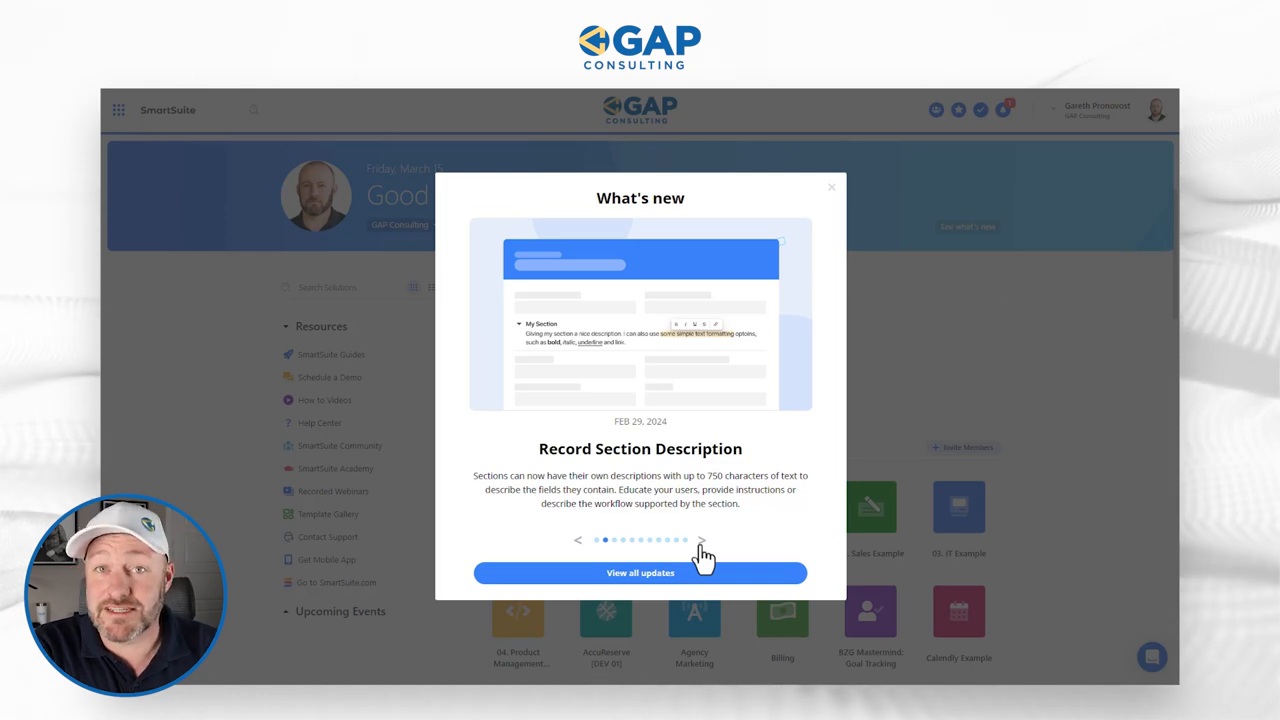
By implementing these practical tips, you can beat Zoom fatigue and stay productive at work. Remember, it’s all about finding the right balance between virtual collaboration and self-care. And if you’re looking for a comprehensive work management platform to streamline your team’s workflow, consider checking out SmartSuite. With features designed to enhance collaboration and productivity, SmartSuite can help you and your team work smarter, not harder.

5 Practical Ways to Boost Your Efficiency at Work

Software Stack Editor · May 6, 2024 ·

In today’s fast-paced world, we’re all looking for ways to get more done in less time, right? Whether it’s meeting deadlines, juggling multiple projects, or just trying to stay on top of our workload, being efficient at work is key to staying ahead. So, if you’re wondering how to be more efficient at work, you’re in the right place. Here are five practical tips to help you streamline your workflow and make the most of your time.

  1. Prioritize Your Tasks: Start each day by making a list of tasks that need to be completed, then prioritize them based on their importance and urgency. Focus on tackling high-priority tasks first, as they have the biggest impact on your goals or deadlines. Breaking down larger projects into smaller, manageable tasks can also make them feel less daunting and more achievable.
  2. Eliminate Distractions: Distractions can significantly hinder your productivity at work. Identify common distractions in your environment, whether it’s email notifications, social media, or noisy coworkers, and take steps to minimize them. Consider using productivity tools or techniques such as the Pomodoro Technique, which involves working in short bursts of focused activity followed by short breaks.
  3. Set Clear Goals and Deadlines: Having clear goals and deadlines can help you stay focused and motivated. Set specific, achievable goals for each day, week, and month, and break them down into actionable steps. Use tools like SMART criteria (Specific, Measurable, Achievable, Relevant, Time-bound) to ensure your goals are well-defined and attainable. By setting deadlines for yourself, you create a sense of urgency that can drive productivity and keep you on track.
  4. Delegate Tasks When Possible: Learn to delegate tasks that can be handled by others, freeing up your time to focus on more important or high-value activities. Trust your colleagues or team members to take on responsibilities and empower them to contribute to the overall success of the project or organization. Effective delegation not only lightens your workload but also fosters collaboration and teamwork within the workplace.
  5. Use the Right Tools and Technology: Take advantage of tools and technology designed to streamline your workflow and enhance productivity. Whether it’s project management software, communication tools, or automation platforms, finding the right tools can make a significant difference in how efficiently you work. Look for solutions that integrate seamlessly with your existing processes and workflows, allowing you to manage tasks, collaborate with team members, and track progress in one centralized location.

By implementing these strategies, you can become more efficient at work and achieve greater levels of productivity and success. Remember that increasing efficiency is an ongoing process that requires dedication and commitment. Continuously evaluate your workflow, identify areas for improvement, and adapt your strategies as needed to stay ahead of the curve.

As a bonus tip, consider exploring SmartSuite, a collaborative work management platform designed to help teams plan, track, and manage workflows effectively. With features like task tracking, milestone management, and automation capabilities, SmartSuite can streamline your workflow and boost your work efficiency. Visit their website to learn more about how SmartSuite can support your productivity goals.

Start incorporating these tips into your daily routine and watch as your efficiency and productivity soar to new heights. With the right mindset and strategies in place, you can take control of your workload and accomplish more in less time.

5 Effective Strategies to Improve Group Communication in the Workplace

Software Stack Editor · May 6, 2024 ·

Communication is the backbone of any successful team. When your team members are on the same page, projects flow smoothly, goals are achieved, and morale soars. However, enhancing group communication isn’t always easy. It requires intentional strategies and tools to foster collaboration and transparency. Here are five practical ways to improve group communication in the workplace:

  1. Establish Clear Communication Channels: Without clear channels, communication can easily become scattered and chaotic. Set up designated platforms for different types of communication. Use email for formal updates, instant messaging for quick questions, and project management tools for collaborative work. By defining these channels, you streamline communication and reduce the chances of messages getting lost in the shuffle.
  2. Encourage Open Dialogue: Foster an environment where team members feel comfortable expressing their thoughts and opinions. Encourage open dialogue during meetings and brainstorming sessions. When everyone has a voice, innovative ideas surface, and solutions are found more efficiently. Remember, effective communication is a two-way street; it’s not just about speaking but also about actively listening to others.
  3. Utilize Collaborative Tools: Leverage technology to enhance collaboration among team members. Tools like shared calendars, document collaboration platforms, and project management software facilitate real-time collaboration regardless of geographical location. These tools streamline communication, keep everyone on the same page, and eliminate the need for lengthy email chains.
  4. Provide Regular Feedback: Feedback is essential for growth, both on an individual and team level. Encourage a culture of constructive feedback where team members provide and receive feedback regularly. Whether it’s through one-on-one meetings, peer reviews, or performance evaluations, feedback fosters improvement and strengthens communication within the team.
  5. Lead by Example: As a leader or manager, your actions speak louder than words. Lead by example by communicating clearly, transparently, and respectfully. Show your team that you value open communication by actively seeking their input, providing timely updates, and addressing concerns promptly. When team members see their leaders prioritizing communication, they are more likely to follow suit.

Effective group communication is vital for the success of any team. By implementing these strategies, you can create a culture of communication that fosters collaboration, innovation, and productivity. Remember, it’s not about the tools you use but how you utilize them to facilitate meaningful communication.

If you’re looking for a comprehensive solution to streamline communication and collaboration within your team, consider exploring SmartSuite. With features designed to simplify project management, automate tasks, and promote transparency, SmartSuite empowers teams to work smarter, not harder. Learn more about how SmartSuite can revolutionize communication in your workplace here.

Top 5 Workflow Improvement Ideas to Boost Productivity

Software Stack Editor · May 6, 2024 ·

Are you tired of feeling overwhelmed by your never-ending to-do list? Do you find yourself spending more time managing tasks than actually getting work done? You’re not alone. In today’s fast-paced work environment, finding ways to streamline workflows and boost productivity is more important than ever. Fortunately, there are simple yet effective strategies you can implement to make your workday more efficient and enjoyable. Whether you’re a seasoned pro or just starting out, here are five practical workflow improvement ideas to help you take control of your workload and achieve your goals. Let’s dive in!

Embrace Task Automation: Automation is a game-changer when it comes to workflow optimization. Identify repetitive tasks that eat up valuable time and automate them using tools like Zapier or IFTTT. From email responses to data entry, automating mundane tasks frees up time for more strategic work and reduces the risk of human error.

  1. Implement Agile Project Management: Traditional project management methods can sometimes lead to bottlenecks and delays. Agile methodologies, on the other hand, promote flexibility and collaboration, allowing teams to adapt quickly to changing priorities. Platforms like Trello or Jira offer intuitive interfaces and customizable workflows, making it easy to manage projects of any size.
  2. Foster Transparent Communication: Effective communication is the cornerstone of any successful workflow. Encourage open dialogue among team members by using communication tools like Slack or Microsoft Teams. Create dedicated channels for different projects or departments to ensure everyone stays informed and aligned. By fostering transparency and collaboration, you can prevent misunderstandings and keep projects moving forward smoothly.
  3. Streamline Document Management: Managing documents and files can quickly become overwhelming, especially in larger organizations. Invest in a centralized document management system like Google Drive or SharePoint to streamline file sharing and collaboration. Organize documents into folders and establish clear naming conventions to make it easy for team members to find what they need when they need it. Additionally, leverage features like version control to track changes and prevent duplication of efforts.
  4. Continuously Evaluate and Iterate: Workflow improvement is an ongoing process that requires constant evaluation and iteration. Take the time to regularly review your workflows and identify areas for optimization. Solicit feedback from team members and stakeholders to gain valuable insights into pain points and inefficiencies. Experiment with new tools and techniques, and don’t be afraid to adapt your workflows as needed. By embracing a culture of continuous improvement, you can ensure your workflows remain agile and effective in the long run.

Optimizing workflows is essential for driving productivity and achieving business success. By embracing automation, agile methodologies, transparent communication, streamlined document management, and a culture of continuous improvement, you can unlock the full potential of your team and organization. While many tools and platforms are available to help streamline workflows, the most important thing is to find what works best for your unique needs and objectives.

If you’re interested in exploring how SmartSuite can further enhance your workflow efficiency, feel free to learn more about our collaborative work management platform by starting a free trial. With features designed to streamline tasks, track progress, and promote transparent communication, SmartSuite can help take your workflow to the next level.

Triggering on a Schedule with SmartSuite Automations

Software Stack Editor · May 3, 2024 ·

If you’re building automations in SmartSuite, you are going to love their trigger that allows you to initiate automations based on a schedule. In this post, we’re going to be diving deep into this powerful SmartSuite automation trigger. So if that’s of interest, stick around and let’s get into it!

[embedded content]

Accessing Automations in SmartSuite

Here I am in my SmartSuite solution. To access automations, simply scroll up to the solution menu and click on “Automations”.

Feel free to follow along with me in your own SmartSuite account. If you don’t already have one, please consider signing up using our link below. That will be a great way for you to show some love back to the channel.

Once you click into Automations, it will take you to the automations dashboard. If you’ve already created automations, you will see them listed here. If you haven’t created any yet, you’ll see a dropdown prompting you to create your first automation.

Setting Up the Scheduled Time Trigger

Inside the automation builder, the first thing you might want to do is rename your automation. I’ll call this one “Test the Scheduler Trigger”. It’s important, especially if you’re new to automation, to make sure you’re labeling things appropriately so you can come back and find them easily in the future if you need to make changes.

Now, every automation breaks down into two key components:

  1. The Trigger – This initiates the automation and provides the instructions for when it should start.
  2. The Action Steps – These are performed after the trigger and make up the body of your automation.

Our focus in this post is on setting up the trigger, specifically the “Scheduled Time” trigger. This is a native SmartSuite trigger, which means we don’t have to go outside of the SmartSuite environment – we can build it right inside our tool.

When you select the Scheduled Time trigger, it will ask you what table you want to look at. Honestly, I’m not terribly concerned with the table selection here, because if I need to look up more information for future steps in the automation, that can be handled in the action steps. So for me, the table choice doesn’t really matter all that much.

What I do care about is the repeating cycle or frequency that we are able to establish. And this is what makes SmartSuite’s scheduler trigger so powerful – we have a lot of flexibility in terms of how often we want this automation to recur.

Scheduling Options

SmartSuite offers several options for scheduling your automations:

  • Hours
  • Days
  • Weeks
  • Months
  • One Time

Let’s break these down one by one.

Hourly Schedule

If you choose to repeat your automation every hour, SmartSuite will show you the next scheduled run. For example, if the current time is 2:00 PM, it will show that the next run is going to be at 3:00 PM, then again at 4:00 PM, 5:00 PM, and so on.

One thing to note is that with the hourly option, you don’t get a lot of control over skipping specific hours. So unfortunately, you can’t come in and say you only want to run this during business hours. If you select hours, it’s going to repeat every set number of hours.

But it doesn’t have to be every single hour. You can set it to every 2 hours, every 5 hours, every 6 hours, etc. Just keep in mind that you cannot include decimals here. So if you try to put 6.5, it will interpret that as every 65 hours.

Let’s look at an example of running an automation every 6 hours. We have 24 hours in a day, so we’re going to start seeing the schedule repeating:

  • First run at 3:00 PM
  • Then at 9:00 PM
  • Then at 3:00 AM
  • Then at 9:00 AM
  • And so on, every 6 hours

‍

So with this setting, your automation would trigger four times a day, literally like clockwork, at these specific hours. Then of course, whatever you set up in your action steps, that’s what’s going to be performed each time it runs.

Daily Schedule

Moving on to the daily option, here we get to specify that we want our automation to repeat after a certain number of days at a specific time. Because we are not working at an hourly granularity here, we’re saying “every X days at a particular time”.

So we could say every seven days, which would be once a week. We could say every three days if we wanted to, which is going to be:

  • Monday
  • Then Thursday
  • Then Sunday
  • Then Wednesday
  • And so on

The key takeaway is that it’s going to happen at the same time on each of those days. And we can pick that time with 15-minute granularity. So we could choose 9:00 AM, 8:45 AM, or whatever time we want.

Again, make sure you’re looking at when you want the automation to start. If you need to set a start date in the past, you can do that. Let’s say we set the start date to May 1st. SmartSuite will say, “Okay, if May 1st was your start date, the next time I iterate will be three days later.” That’s why it’s saying May 4th is when the rule will next be executed, and it shows you the next ten runs from there.

‍

Weekly Schedule

What I find really fascinating with the weekly option is that not only can we set automations to run on a certain cadence of weeks, but we can also specify certain days within those weeks for the automation to run.

For example, let’s say we want something to run on Tuesdays and Thursdays, every other week. We would set it to repeat every two weeks, and within those weeks, we want it to run on Tuesdays and Thursdays.

So it would go:

  • Week 1: Tuesday & Thursday
  • Week 2: Off
  • Week 3: Tuesday & Thursday
  • Week 4: Off
  • And so on

SmartSuite demonstrates this beautifully. If we look at the calendar, let’s say starting from May 1st which is in the middle of a week. The following week, May 6th to May 12th, is an off week. Then the next week is an on week, so the automation will run on Tuesday the 14th and Thursday the 16th.

Then it skips the next week, and the following week it’s back on for Tuesday and Thursday, which would be the 28th and the 30th.

This shows you how customizable this scheduling tool is. I think we can get really granular with any kind of unusual trigger or frequency we might have in our organization.

‍

Monthly Schedule

Lastly, let’s take a look at the monthly option. Here, we can trigger an automation on a specific day of the month.

We could choose to run this automation on the 4th of every month. Or we could select multiple days, like the 4th and the 18th of every month. Again, this gives us a lot of granular control.

But what if we want our automation to run on the last day of every month? Because every month has a different number of days, this could get tricky to set up manually. But with SmartSuite, we don’t have to worry about doing any fancy calculations. We can simply select “last day of the month”.

So if it’s a leap year and the month is February, our automation will run on the 29th. If it’s not a leap year, it will run on the 28th of February. For months with 30 or 31 days, it will run on the 30th or 31st, respectively. SmartSuite handles all of that for us.

To experience the future of work management firsthand, start your free SmartSuite trial today!

How to Create an Employee Training Course with SmartSuite + Softr

Software Stack Editor · April 30, 2024 ·

Are you tired of hitting the pause button on your team’s productivity every time a new employee joins your company? Wouldn’t it be awesome to have a written guide that covers all the basic info a newbie needs to know, so they can learn the ropes while your existing team members keep on doing their thing? In other words, wouldn’t you love to invest some time upfront creating training materials, so you can save a ton of time each time a fresh face comes on board? Yeah, it’s kind of a no-brainer, right?

That’s exactly why we’re diving into this step-by-step video tutorial on building your very own employee training portal (or as I like to call it, a “center learning thing” – catchy, huh?).

[embedded content]

But for now, let’s focus on the dynamic duo we’re working with today: SmartSuite (the sponsor of this video) and Softr.

SmartSuite is going to be our trusty database, housing all the information and course content we’ll be creating. It’s like the ultimate filing cabinet for your training materials. And Softr? Well, that’s the magic wand that’ll transform our SmartSuite data into a snazzy, user-friendly interface that feels more like a dedicated website or app.

The Two Key Ingredients

  1. SmartSuite: Our database and information hub, where we’ll store all the course content.
  2. Softr: The interface builder that allows us to add permissions and fancy features to our SmartSuite data, making it feel like a standalone website or app.

With these two tools and a sprinkle of creativity, we’ll be whipping up a beautiful employee training portal in no time!

Building Your Training Library

First things first, we need a place to store all the information we want to teach. After all, how can your new hires learn if there’s nothing to learn from? That’s where SmartSuite comes in.

Setting Up Your SmartSuite Template

  1. Click “Add New Solution” and choose “Start with Template.”
  2. Search for the “Employee Learning” template and click “Use Template” to install it into your account.

Voila! You now have a pre-built template that’ll save you a good 20-30 minutes of setup time.

‍

Customizing Your Template

Now that you have your template set up, let’s take a quick tour of the data we’re working with:

  1. Resource Libraries: This is where we store the details about our general resources, like the name, type, author, time to consume, description, and how it connects to courses.
  1. Courses: Here, we have similar fields to the Resource Libraries, as well as fields that link to employees. This is where we can pick which team members are enrolled in each course.
  1. Employees: This table is all about your team members. It’s where you’ll track which courses each employee has taken and which ones they should take next.

Pro Tip: Use the Data Schema widget in SmartSuite to get a visual representation of how all your fields and tables connect to each other. It’s like a roadmap for your database!

‍

‍

Adding Some Extra Features

Okay, so we’ve got the basics down, but let’s be real – we’re not here for basic. We’re here to create an employee training portal that’ll knock everyone’s socks off! So, let’s add a few extra fields to make this thing really shine.

‍

Adding a Manager Field

First up, let’s add a “Manager” field to the Employees table. This way, we can keep track of who reports to whom, which will come in handy when we’re setting up permissions later on.

  1. Open the Employees table and click “Insert New Field.”
  2. Choose “Linked Record” and name it “Manager.”
  3. Connect it to the same Employees table, allowing only one entry per employee.
  4. Create a backlink to make it a two-way relationship.
  5. Require an entry in this field moving forward.

Renaming Existing Fields

Next, let’s rename a couple of fields in the Employees table to make them more descriptive:

  1. Change “Link to Learning Tracks” to “My Learning Tracks.”
  2. Change “Link to Courses” to “My Courses.”

Tracking Course Completion

Now, let’s get a little fancy and add a way to track not just which courses an employee is enrolled in, but also which ones they’ve actually completed.

  1. Duplicate the “My Courses” field and rename it “Courses Completed.”
  2. Use a formula field to calculate the difference between the total courses an employee is enrolled in and the courses they’ve completed.

COUNT(My Courses) - COUNT(Courses Completed)

Name this formula field “Courses Remaining” and add it to your Employees table.

Challenge Mode: If you’re feeling extra adventurous, try adding this course completion tracking at the Learning Tracks level too!

Filling Your Training Library

Now that you’ve got your training library structure set up, it’s time to fill it with some juicy content. Here are three ways to do just that:

  1. Buy Courses: Enroll your team in pre-made courses from platforms like Process Street’s “How to Use SmartSuite” course or LinkedIn Learning.
  2. Observe Yourself: The next time you’re training a new hire, have them write down everything you teach them, even if it’s just bullet points. This real-world experience is like capturing your training process in real-time!
  1. Steal from Others: Get inspiration from other people’s learning libraries. Here are some examples of what we love including in our own library at Process Street:
    • Core Values document
    • “What We Sell” document
    • Customer Avatars
    • Brand Voice and Brand Guide
    • Meeting and Communication Guide
    • Our own courses (e.g., “How to Use SmartSuite”)
    • How to Submit Time Off (SOP)
    • Workspace Tour video
    • Company Origin Story
    • Human Resource Handbook
    • Role-specific SOPs and processes

Kicking It Up a Notch with Softr

Alright, so you’ve got your training library filled with awesome content. You could just call it a day and hope your team navigates through the courses on their own. But let’s be real – you’re not the average bear, are you? You’re an overachiever, and you want to take this thing to the next level!

That’s where Softr comes in. We’re going to use this magical tool to turn our SmartSuite database into a full-fledged online course platform. Your employees will be able to log in, view their courses, and have that sweet, sweet online course experience. And get this – even managers can modify the information inside SmartSuite right from the Softr interface. Mind. Blown.

Connecting SmartSuite to Softr

Now that you’ve got your Softr account set up, it’s time to connect it to your SmartSuite database.

  1. In Softr, navigate to the “Pages” tab and select the “List” page.
  2. Click on the “Dynamic Block” and head over to the “Source” area.
  3. Select your SmartSuite account, workspace, and solution.
  4. Choose the “Courses” table to display on this page.

Setting Up User Groups and Permissions

To give managers and employees different permissions and experiences within your learning portal, we’ll need to set up some user groups in Softr.

  1. Go to the “Users” tab and click “Sync with Data Source.”
  2. Connect your SmartSuite account and select the “Employees” table.
  3. Map the SmartSuite fields to the corresponding Softr user fields (e.g., email, name, photo).
  4. Create a “Managers” user group based on the “Title” field in SmartSuite.
  5. Create an “Employees” user group for anyone whose title is not “Manager.”

Building Your Learning Portal

Alright, now for the fun part – actually building out your learning portal in Softr! Here’s a quick overview of what we’ll be creating:

  • A homepage that welcomes users and prompts them to log in or go directly to their courses.
  • A “My Courses” page that displays only the courses assigned to the logged-in user.
  • A course details page that shows the contents of each course based on the information in SmartSuite.
  • Different navigation bars for managers and employees, with managers having access to a “My Direct Reports” page.

Pro Tip: Use conditional filters in Softr to display different content based on user groups or specific criteria.

The Magic of Two-Way Integration

One of the coolest things about using Softr and SmartSuite together is that you can modify your SmartSuite data directly from the Softr interface. This means managers can add new direct reports, update employee information, and even download reports right from the learning portal, and all those changes will be reflected in your SmartSuite database. It’s like having your cake and eating it too!

So, go forth and create some awesome employee training content!

To experience the future of work management firsthand, start your free SmartSuite trial today!

Master SmartSuite Automations: Finding Records & Boosting Workflow

Software Stack Editor · April 30, 2024 ·

Are you ready to take your SmartSuite automations to the next level? In this blog post, we’ll dive deep into the find records action and show you how to unlock its full potential. By the end of this post, you’ll be a pro at using find records to supercharge your workflows and save countless hours. Let’s get started!

[embedded content]

Introduction to SmartSuite and Find Records

If you’re new to SmartSuite, it’s one of our favorite no-code tools for building powerful automations. With SmartSuite, you can create custom apps, databases, and workflows without writing a single line of code. And one of the key features that makes SmartSuite so powerful is the find records action.

Before we dive into the nitty-gritty of find records, let’s take a quick look at the example we’ll be working with throughout this post.

The Sales CRM Example

For this post, we’ll be using the Sales CRM template in SmartSuite. This template includes tables for opportunities, regions, and sales managers. Here’s a quick overview of each table:

  • Opportunities: This table contains information about potential deals, including the stage of the deal (e.g., closed won), the actual close date, and the region associated with the deal.
  • Regions: This table contains a list of geographic regions (e.g., North America, South America, Asia, Europe) and is linked to the opportunities table.
  • Sales Managers: This table contains information about each sales manager and is linked to both the regions and opportunities tables.

With these tables set up, let’s look at two examples of how we can use the find records action to automate common tasks.

Example 1: Finding Closed Opportunities

In this example, we’ll create an automation that runs every Monday morning and looks for all opportunities that have been marked as “Closed Won” but don’t have an actual close date. Here’s how it works:

  1. Create a view in the opportunities table that shows only the stage and actual close date fields.
  1. Create a new automation and set it to run on a schedule (e.g., every Monday at 9:00 AM).
  2. Add a find records action and set it to find multiple records.
  3. Set the conditions for the find records action:
    • Stage is equal to “Closed Won”
    • Actual Close Date is empty
  1. Add an update records action and set it to update the records found in the previous step.
  2. Set the update records action to fill in today’s date in the Actual Close Date field.
  1. Save and turn on the automation.
    ‍

Now, every Monday morning, this automation will find all opportunities that have been marked as “Closed Won” but don’t have an actual close date, and it will fill in today’s date for those records.

Example 2: Finding Sales Managers

In this example, we’ll create an automation that runs whenever an opportunity is marked as “Closed Won” and finds the sales manager responsible for that region. Here’s how it works:

  1. Create a new automation and set it to trigger when a record is updated.
  2. Add conditions to the trigger:
    • Stage is changed to “Closed Won”
    • Region is not empty
  1. Add a find records action and set it to find a single record in the Sales Managers table.
  2. Set the condition for the find records action:
    • Region is equal to the region of the updated opportunity record
  1. Add an update record action and set it to update the original opportunity record.
  2. Set the update record action to link the sales manager found in step 4 to the opportunity record.
  1. Save and turn on the automation.
    ‍

Now, whenever an opportunity is marked as “Closed Won,” this automation will find the sales manager responsible for that region and link them to the opportunity record.

Tips for Using Find Records

Here are a few tips to keep in mind when using the find records action:

  • Multiple vs. Single Records: When setting up a find records action, you have the option to find multiple records or a single record. If you choose to find multiple records, you can update those records in a subsequent step, but you can’t use the information from those records in other actions. If you choose to find a single record, you can use the information from that record in subsequent actions, but you can only update the original record that triggered the automation.
  • Relative Dates: When updating date fields, SmartSuite allows you to use relative dates (e.g., today, yesterday, one week from now). This can be handy for automations that run on a schedule or need to calculate dates based on other dates.
  • Linking Records: When updating a record, you can link it to records in other tables by using the record ID. This is a powerful way to connect related records and build complex workflows.

The find records action is a powerful tool for building automations in SmartSuite. By using find records, you can search for specific records based on criteria you define and then use those records in subsequent steps of your automation. Whether you’re finding multiple records to update or a single record to link to another record, find records can help you save time and streamline your workflows.

To experience the future of work management firsthand, start your free SmartSuite trial today!

4 Ways to Automate Project Management

Software Stack Editor · April 30, 2024 ·

Are you tired of spending your entire day as a project manager reminding people about due dates and changing due dates? It’s time to automate your project management tasks and free up your time for more important things. In this post, we’ll explore four ways to automate project management and make your life easier.

[embedded content]

Why Automate Project Management?

Automating project management tasks can help you:

  • Remove full-time positions that were previously just project management
  • Reduce the amount of time an existing team member spends on project management
  • Set up automations and different things that just make life easier

The goal of automating project management is not to dehumanize your process, but rather to humanize it by allowing your team to focus on tasks that only humans can do, while leaving the repetitive tasks to automation.

What You’ll Need

To follow along with these automation strategies, you’ll need:

  1. A work management software (like SmartSuite)
  2. An automation tool to supercharge your work management tool (like Zapier)
  3. A positive attitude and willingness to learn new skills

Strategy 1: Email from Your Work Management Software

One simple way to automate project management is to start using email from your work management software. This feature is supported in most tools out there, and it allows you to:

  • Email clients directly from your work management tool
  • Have client responses show up in your work management tool automatically

No more copying and pasting! Everything is automatic. If your current work management tool doesn’t have an email feature, it might be time to consider switching to one that does.

Strategy 2: Create a Forwarding System

If you forget to use the built-in email feature or need to retroactively turn an email into a task, you can create a forwarding system using a tool like Zapier.

Here’s how to set it up:

  1. Create a new Zap in Zapier
  2. Choose “Email” as the trigger and set up a new email address
  3. Choose your work management tool (like SmartSuite) as the action
  4. Map the email fields to the appropriate fields in your work management tool
  5. Test the Zap and turn it on

Now, whenever you forward an email to your special Zapier email address, it will automatically create a new task in your work management tool with all the relevant information.

Strategy 3: Automate Task Reminders

Another common project management task is reminding people about due dates, aka “badgering hour.” Instead of spending your time manually reminding people, you can automate this task using your work management tool.

Most tools have built-in automation features that allow you to:

  • Set up conditions (e.g. when a task is due today and not marked as complete)
  • Trigger actions (e.g. send an email reminder to the assigned person)

Here’s an example of how to set this up in SmartSuite:

1. Go to the Automations section

2. Click “Add Automation”3. Set the trigger to “When a record matches a condition”4. Set the condition to “Due Date is today” and “Status is not equal to Complete”5. Set the action to “Email the assigned person” with a reminder message6. Click “Add Automation” and turn it on

Now, whenever a task is due today and not marked as complete, the assigned person will automatically receive an email reminder. No more manual badgering!

Strategy 4: Automate Process Enforcement

As a project manager, you often have to enforce processes and make sure tasks are completed in the correct order. Instead of manually policing this, you can use automations to encourage people to follow the correct process.

Here’s an example of how to set this up in SmartSuite:

  1. Go to the Automations section
  2. Click “Add Automation”
  3. Set the trigger to “When a record is updated”
  4. Set the condition to “Status changes to Complete” and “Approved by Client is equal to No”
  5. Set the action to “Update the record” and change the Status back to “In Progress”
  6. Add a notification to the project manager and/or the person who made the mistake
  7. Click “Add Automation” and turn it on
    ‍

Now, if someone tries to mark a task as complete without client approval, the automation will switch the status back to “In Progress” and notify the relevant people. The robot enforcer is on the job!

Bonus Tip: Scrum View

One of the most painful and time-consuming parts of project management is the daily stand-up meeting, where everyone goes around and reports on what they’ve done. Instead of spending 15 minutes per person rehashing yesterday’s tasks, you can automate this process using a “Scrum View” in your work management tool.

Here’s how to set it up:

  1. Create a new view called “Scrum View” or “Daily Standup View”
  2. Filter the view to only show tasks with a “Complete” status
  3. Sort the view by due date
  4. Group the view by assignee (optional)
  5. Collapse the groups (optional)
  6. Favorite the view or bookmark it in your browser
    ‍

Now, when you start your daily stand-up meeting, you can simply pull up the Scrum View and see everyone’s completed tasks at a glance. No more wasting time on manual reporting!

Conclusion

Automating project management tasks can save you hours of time each week and allow you to focus on more important things. By using these four strategies (plus the bonus tip), you can:

  • Automate email communication with clients
  • Create a forwarding system for retroactive task creation
  • Automate task reminders
  • Automate process enforcement
  • Automate daily stand-up reporting

The key is to observe your own behaviors and manual work, and then find ways to automate those tasks using your work management tool and automation tools like Zapier.

To experience the future of work management automation firsthand, start your free SmartSuite trial today!

5 Tips on Becoming an Excellent Player-Coach

Software Stack Editor · April 26, 2024 ·

In the dynamic world of work, the role of a player-coach is increasingly pivotal across various fields, from sports to business. A player-coach is tasked with the unique challenge of juggling their responsibilities as a team member while also guiding and mentoring others. This dual role demands a broad skill set and a flexible mindset. Here are five essential tips to help you excel as a player-coach and foster a thriving team environment.

1. Understand Both Roles Thoroughly

The first step to being an effective player-coach is to have a deep understanding of both aspects of your role. As a player, you need to stay at the top of your game, consistently performing at a high level. As a coach, it’s your job to inspire, guide, and develop your team members. This means you must be adept at setting strategic goals, managing time effectively, and mastering interpersonal dynamics. Engage regularly with mentors and peers to refine your approach, and never shy away from the front lines where you can lead by example.

2. Communicate Effectively

Clear communication is the cornerstone of effective leadership. As a player-coach, you should strive to maintain open lines of communication with every team member. This includes not only conveying expectations and feedback but also actively listening to team concerns. Regular one-on-one meetings, open feedback sessions, and transparent discussions about team goals and individual aspirations help build trust and clarity. Remember, communication is a two-way street that requires constant attention and refinement.

3. Lead by Example

Nothing builds credibility faster than leading by example. Your team will look to you not just for instructions but also for inspiration. Demonstrate the work ethic, dedication, and integrity you expect from your team members. This approach not only sets a performance standard but also fosters respect and loyalty. Whether it’s how you handle project deadlines, manage stress, or celebrate team achievements, your actions will influence your team’s culture and performance.

4. Balance Team and Individual Goals

Balancing the needs of the team with the aspirations of individual members can be tricky but it is crucial for a player coach. Start by understanding each team member’s strengths, weaknesses, and professional goals. This knowledge will help you delegate tasks more effectively, tailor development opportunities, and manage team dynamics in a way that promotes overall success. Make it a priority to align individual goals with team objectives, ensuring that everyone feels valued and understood.

5. Continuously Learn and Adapt

The most successful player coaches are perpetual learners. Stay updated on the latest trends in your field and continuously seek personal and professional development opportunities. Encourage your team to do the same by providing access to training and learning resources. Regularly review your team strategies and workflows, being open to adjustments and innovations that can improve efficiency and effectiveness. By fostering a culture of learning and adaptation, you’ll keep your team competitive and resilient in the face of change.

Mastering the role of a player-coach involves a blend of leadership, communication, and continuous learning. By understanding your dual roles, communicating effectively, leading by example, balancing team and individual goals, and continuously adapting, you can build a strong, cohesive team that is prepared to face any challenge. Implement these tips to enhance your effectiveness as a player-coach and make a lasting impact on your team. Share your experiences or any questions you might have —let’s learn and grow together!

What’s New in SmartSuite: April 2024

Software Stack Editor · April 26, 2024 ·

At SmartSuite, we are dedicated to innovation that better equips and empowers our customers. Read on to see all the powerful features our product and engineering teams have been diligently working on as well as the upcoming events we have in store!

View Live Demo
View Full Release Notes

Product Updates

Record View: Conditional Display of Sections

The edit record interface has been enhanced to allow you to conditionally hide or show sections and their fields. The record’s layout can adapt to certain workflows, showing sections only when they are needed.

Learn more
‍

Record View: Show / Hide Fields

You can now hide fields on the edit record page to keep your interface clean and organized. Hide supporting calculations or other information that users don’t need to interact to create a streamlined user experience while retaining all of the information and functionality of the hidden fields.

Learn more
‍

Page Settings: Manage Sections and Fields

With the introduction of conditional sections you may now have fields or sections that are not visible on the edit interface. We’ve enhanced the page settings capabilities to provide a convenient way to manage andedit field / section properties even when they aren’t currently visible.

‍Learn more
‍

Automations: Calculate to Update Record Action

A new set of basic math operations is available for numeric fields in the Update Records action. You may choose between using a Static value, a manual input, or a Dynamic value derived from another field.

Learn more
‍

Automation: Allow a choice to Fail / Continue in Find

The find records action has been enhanced to support the option to continue or fail (stop processing the automation) if no records are found. Selecting “fail” does not generate an error (or an email notification) – it simply stops the automation from continuing to the next action.

Learn more
‍

Automations: Delete Record Action

You have a powerful new tool to use in your automations: the Delete Records action. Now you can delete records when specified conditions match, or find a list of records with the Find Action and delete in bulk.

Learn more
‍

Automations: Dynamic Slack Channel Support

The Slack automations action now supports dynamically selecting the target channel or user by referencing the value of a field in the record.

Learn more
‍

Views: Folder Permissions

View folders have been enhanced with a visibility setting. Now – in addition to grouping views in folders – you can determine which Member, Team or even users with particular roles can see a folder and the Views it contains.

Learn more
‍

Forms: Ability to Remove “Powered by SmartSuite” Footer

You can now hide SmartSuite branding on your shared Form Views.On the settings tab, uncheck the Display SmartSuite branding checkbox and the footer will be hidden (along with the header!) for seamless integration with your site.

‍Learn more
‍

Power Search: Comments

Power Search has been enhanced to index all record comments as well as their content. Now you can easily locate a record by keyword match to any text included in its comments.
‍
‍Learn more
‍

Records: Communication Shown in Activity History

Record activity history has been updated to record email activities from the communications center. You’ll now see emails sent and received, the sender, subject line, the time and date as well as the content of the email reflected in the containing record’s history.

‍Learn more

What’s Coming Soon

  • Dashboard Shared View
  • Communication Center – Send email from Outlook or Gmail accounts
  • Document Designer: Improved image and Linked Record handling
  • 2-Factor Authentication
  • Automation Actions: Add Comments

View Our Product Roadmap

Upcoming Live Events & Trainings

Live SmartSuite Monthly Training Classes & Free Certification Opportunity | April 25th, May 30

This 3-part training includes:

  • Comprehensive overview of SmartSuite as a platform, along with key functionality training tailored for end users.
  • Deep dive into SmartSuite, gaining insights into its building blocks and discovering how to implement effective solutions for your teams.
  • Our Recommended Certification session, featuring a live, free certification exam test to earn a SmartSuite Certification of your choice

If you are interested in attending our live training, you can access the registration request form here.

‍

Bi-Weekly: Getting Started with SmartSuite Workshop | Upcoming dates: May 7th, 21st @ 8:00am PT

This interactive workshop offers hands-on learning opportunities to grasp the platform’s fundamentals. From navigating the interface to exploring our key features, our step-by-step guidance ensures you gain a comprehensive understanding as you get started.

Register here
‍

The Future of Student Administration:  How to Organize and Automate for Greater Compliance | May 8th @ 8:00 am PT

Explore a SmartSuite solution for managing student compliance in healthcare education. Learn how to streamline documentation, communication, and oversight processes using innovative features.

‍Register here
‍‍‍

Have questions? Join our Daily Office Hours!
‍
Get all your questions answered live by an Onboarding Specialist during our Daily Office Hours Monday-Friday at 9:00 am PT —or simply join to learn how others are finding value in SmartSuite.Your SmartSuite Team

  Community  |  Academy |  SmartSuite.com  |  Product Roadmap | Webinars 

‍

How to Create a Folder and Deliver Its Permissions

Software Stack Editor · April 26, 2024 ·

Welcome to another episode of Smart Tips! Today we’re going to walk through how to create a folder and deliver permissions for that folder. This will allow you to decide whether specific individuals or groups have the ability to access the views within that folder. Let’s jump in and figure this out.

In today’s video, we’ll be operating out of the deliverables table. On the left hand side, we can see a list of our views. As you can see, they are already organized in folders.

Creating a New Folder

If you’re curious about how to create a folder, simply hover over the “Create New View” button. You’ll see the ability to create a folder and then title it whatever you’d like.

In this case, I’ve already created these folders. I want to deliver permissions based on the approval status of these deliverables:

  • For approved deliverables that are already fitting the status of “approved”, I filtered it down to only show those ones. This is what I am allowing everybody within the company to have access to at this point.
  • If we come into the folder settings, I can choose whether I want it to be everybody who has access to it, or in this case, selected members.

So if deliverables are still in progress, which is what we’re looking at in the “In Progress” folder, maybe I only want select members to be able to access these views.

Selecting Permissions

You have a few options when it comes to selecting who has access:

  1. You can choose from the list of individual members
  2. You can choose a team. If you’ve already put members into teams, like a “Project Team” which consists of a handful of members, you can grant that whole team access to this folder.
  3. You can also deliver permissions based on a group of users’ level of access within this solution.
  4. ‍

Just to make it a little bit easier, this is how we can deliver permissions at the view level via folders.

Practical Examples

Let’s walk through a couple practical examples of when you might use folder permissions.

Example 1: Sensitive HR Information

Say you have a table that contains sensitive employee information – salaries, performance reviews, disciplinary records, etc. You obviously don’t want everyone in the company to be able to see that.

You could create a folder called “Sensitive HR Info” and put all those views inside it. Then in the folder permissions, you select only the specific HR team members who need access to that information. Everyone else won’t even see that the folder exists.

Example 2: Client Projects

Another scenario – let’s say you use your base to manage client projects. Each client has their own table with project details, timelines, invoices, etc.

You could create a folder for each client, like “Acme Co. Projects” and “XYZ Inc. Projects”. Then you can give access only to the team members who are working on those specific accounts.

This way, your whole company isn’t seeing irrelevant project info, and there’s no risk of mixing up or exposing data between clients.

Example 3: Board Meeting Documents

One more example – perhaps you have a “Board Meetings” table where you keep agendas, presentations, meeting minutes, etc.

You’d likely want to keep those documents limited only to board members and a few key executives. Easy – just put them in a “Board Docs” folder and configure the permissions accordingly.

Changing Permissions Over Time

Keep in mind, you can always change the permissions on a folder as needed. Going back to our client projects example – perhaps a new employee joins the “Acme Co.” project team. No problem, just edit the folder settings and add them to the access list.

Or for those “In Progress” deliverables we looked at earlier – once a deliverable moves to “Approved” status, you can move it to the “Approved Deliverables” folder so it inherits those broader access settings.

The key is that you can adjust access at any time with just a few clicks. The folder structure provides an easy way to control permissions in bulk.

Troubleshooting Tips

What if you’ve set up your folder permissions but users are reporting that they can’t access certain views? A few things to check:

  1. Make sure the user is included in the folder access settings. If they’re not listed as an individual or part of a team with access, they won’t be able to see the folder contents.
  2. Check that the views are actually in the right folder. A view will only inherit the permissions of its parent folder.
  3. Confirm the user’s overall permission level on the base. Folder settings can grant access, but they can’t override a user’s base-level permissions. So if a user has “Read Only” access to the whole base, putting them in an “Editor” access folder won’t make a difference.

If those all check out, try removing the user from the folder access list and re-adding them. Sometimes a quick reset like that can resolve any weird caching issues.

In Summary

Setting permissions on a folder level in SmartSuite is a powerful way to control access to specific views and data. The process itself is quite simple:

  1. Create your folders and organize your views in them based on whatever access levels you want
  2. Open the folder settings and choose which individuals, teams, or permission groups should have access
  3. Adjust those permissions any time as your access needs change

Taking a few minutes to structure your permissions this way can make a huge difference in keeping your base organized and your data secure. Plus, your users will appreciate only seeing the information that’s truly relevant to them.

How to Create Task Templates for Large Projects

Software Stack Editor · April 19, 2024 ·

Are you tired of manually setting up tasks for each new project? Do you find yourself repeating the same steps over and over again? In this episode of SmartTips, Jeff Gonzalez introduces a game-changing solution: custom project templates. With this approach, you can fire off anywhere from five to a hundred different tasks at once, tailored to your specific project needs. Let’s dive in and explore how you can revolutionize your project management process.

[embedded content]

Introduction to Custom Project Templates

Jeff begins by providing a quick orientation to the custom project templates solution. Unlike a standard setup where tasks are linked directly to projects, Jeff demonstrates a more efficient approach. He showcases a setup with two additional tables: the project templates table and the tasks table.

The project templates table allows you to define various project template types for your business or organization. Each template type contains a set of tasks associated with it, providing a granular view of your project structure.

Automating Task Creation

One of the key benefits of custom project templates is automation. Jeff explains how you can automate the creation of tasks based on your templates. By specifying the order of tasks and leveraging a lookup field, you can ensure seamless task generation.

The automation process triggers the creation of individual tasks for each template record, streamlining your workflow. As Jeff demonstrates, this automated approach significantly reduces manual effort and ensures consistency across projects.

Enhancing Project Efficiency

With custom project templates, you can streamline your project management workflow and boost efficiency. By automating task creation and maintaining project templates, you can save time, reduce errors, and ensure that your team stays organized.

Conclusion

In conclusion, Jeff highlights the power of custom project templates in SmartSuite. By leveraging automation and predefined templates, you can simplify project setup and focus on delivering results. Whether you’re managing small-scale projects or large-scale initiatives, custom project templates offer a flexible and scalable solution for your business or organization.

Ready to take your project management to the next level? Start your 14-day free trial today.

Hide Record Data Conditionally in SmartSuite

Software Stack Editor · April 12, 2024 ·

SmartSuite has been making waves with its backend enhancements, and now they’re stepping up their front-end game as well. SmartSuite’s latest feature—the ability to conditionally hide sections within our records. Picture this: sharing access to a record while displaying only pertinent information for that precise moment. It’s like having a secret compartment in your digital toolbox that only pops open under the right circumstances.

[embedded content]

How Conditional Hiding Works

Utilizing a template from SmartSuite’s gallery—we picked “Event Planning” for demonstration purposes—we’ve got our playground ready. Inside, we find various tables for meticulous event organization. But let’s get down to business and inspect the ‘Schedules’ table.

Upon expanding a record—let’s say our ‘VIP Showcase Close’—we see a rich tapestry of fields. Previously, we could name a section and opt to collapse it by default. Now, imagine you want to keep certain information like ‘Event Details’ under wraps until specific conditions are met. Fear not; this ingenious new feature has you covered!

We build a new ‘Item Status’ field with options like backlog, in-process, ready for review, and complete. The goal here is to reveal ‘Event Details’ only when the status hits ‘complete’. Enter the ‘Page Settings’ and find a treasure trove of layout options, cover photo settings, field visibility controls, and our star feature, ‘Sections Visibility’.

‍

Here we set a simple conditional rule—if ‘Item Status’ is complete, unveil ‘Event Details’. Now, when you revisit records, those not meeting the criteria will keep ‘Event Details’ secret, and only when you strike ‘complete’ do the details gloriously emerge.

‍

Enriching Your Workflows

This isn’t just about hiding and showing sections; it’s about crafting tailored experiences in your digital environment. Take lead requests on a website. Initially, you may only need a smidgen of what’s provided, saving the meaty details for when a lead is marked ‘qualified’. With this feature, you unveil what you need, when you need it, preserving the pristine simplicity of your interface for all other times.

SmartSuite’s conditional hiding truly refines how we interact with data, demonstrating the potential to shave off hours of needless complexity in handling records. Never again should you wade through a swamp of irrelevant data when a few clicks can streamline your data display to sheer necessity.

I’m all geared up to see how this feature will weave itself into your workflows. Unleashing creativity and efficiency is what SmartSuite serves on a silver platter with this update. And remember, if we zipped through any steps too briskly, drop your questions below. Your curiosity fuels our community, and we’re here to craft clarity together.

So why wait? If you haven’t already infused SmartSuite into your no-code armory, there’s no better time. Go ahead, hide a little, show a little, and watch as your workflow metamorphoses into a more polished, purpose-driven powerhouse of productivity.

To experience the future of work management automation firsthand, start your free SmartSuite trial today!

Use CasesSmartSuite Solution Standards for 2024This blog serves a comprehensive guide for Partners and Solution Builders to follow when setting up and configuring a Solution, so that it is displayed & utilized in it’s fullest form. 5 minutesSmartSuite Staff

Software Stack Editor · April 9, 2024 ·

In our latest SmartSuite Showcase episode, hosted by Nate Montgomery, we explore the essential documentation standards for crafting new solutions tailored to your team’s needs. Departing from our usual use case examples, this comprehensive guide provides valuable insights into setting up solutions effectively, incorporating best practices gleaned from engaged customers. From naming conventions to configuring views, this video offers a thorough walkthrough to ensure your solutions are optimized for success.

‍

[embedded content]

Effective Solution Naming
‍

A crucial first step in solution setup is naming. Opt for concise titles, typically under three words, accurately reflecting the solution’s purpose or workflow. This ensures clarity, memorability, and alignment with your business objectives.

Comprehensive Solution Guides

A well-documented solution includes detailed guides outlining its purpose, tables, and workflow. Provide descriptions of each table, clarifying their roles and how records flow through them. Supplement with supporting resources such as instructional videos for enhanced usability.

Strategic Table Configuration

Tables should accurately represent tracked items and feature concise names, ideally under two words. Customize record terminology to ensure relevance and clarity. Maintain consistency and relevance to facilitate user understanding.

Tailored Views for Enhanced Usability

‍Configure six to ten views per table, catering to item characteristics. Choose descriptive names reflecting each view’s configuration and purpose. Utilize view descriptions to provide context, enhancing user comprehension.

Organized Record Views for Easy Navigation

Incorporate sections within record views to organize information effectively. Strategically group fields to guide users logically through the data. Customize page layouts based on field nature to present information efficiently.

Diverse View Types for Varied Insights

From grid views for comprehensive overviews to map views for geographical visualization, leverage diverse view types to meet specific needs. Tailor views to display relevant data accurately, ensuring users gain valuable insights.

Efficient Form Design for Seamless Data Collection

Craft forms with user-friendly names and clear instructions. Customize fields and appearance to suit external user needs. Enhance usability with help text and conditional logic, streamlining data collection processes.

Streamlined Dashboard Integration for Enhanced Visibility

Integrate dashboards to centralize access to resources and monitor metrics effectively. Prioritize metric widgets for summarizing data and promoting comparisons. Utilize embedded grid views to provide detailed data insights within dashboards.

Conclusion

By adhering to these documentation standards and leveraging SmartSuite’s unique features, you can configure solutions that optimize operations and foster collaboration. Embrace these best practices to ensure your solutions are tailored for success. For detailed documentation and steps, refer to the link in the description. Thank you for watching, and stay tuned for more insights from SmartSuite.

See further documentation here.

Unlocking Innovation: Embracing the No-Code Movement for B2B Success in 2024

Software Stack Editor · April 5, 2024 ·

In an era where agility and efficiency are not just desired but required for success, businesses across the globe are seeking innovative ways to streamline operations and foster creativity. Enter the no-code movement—a paradigm shift fundamentally altering how companies approach software development, workflow automation, and digital transformation. For B2B organizations in 2024, embracing no-code platforms is not just a trend but a strategic imperative to stay competitive and innovative.

What is No-Code?

No-code refers to tools and platforms that enable individuals to create software applications, automate workflows, and build digital solutions without writing code. Using a visual development environment, no-code platforms allow users to drag and drop components, use pre-built templates, and configure logic through graphical user interfaces. This democratizes the software creation process, making it accessible to non-technical users, such as business analysts, project managers, and entrepreneurs, thereby bridging the gap between ideas and implementation.

Examples of How to Use No-Code

  1. Application Development: Without extensive coding knowledge, businesses can rapidly develop and deploy customer relationship management (CRM) systems, internal tools, or customer-facing apps.
  2. Workflow Automation: Automate repetitive tasks and processes, such as email notifications, data entry, and task assignments, to improve efficiency and reduce the risk of human error.
  3. Data Integration and Analysis: No-code platforms can integrate disparate data sources, providing a unified view of business analytics that aids decision-making without complex database queries.
  4. Website and E-commerce Platform Building: Companies can design, launch, and manage websites and e-commerce platforms with advanced features, including payment processing and inventory management, without deep web development expertise.

Top Ways Teams are Becoming More Efficient by Leveraging No-Code

Rapid Prototyping and Deployment

No-code platforms significantly reduce the time from concept to deployment. B2B companies can quickly prototype applications, gather user feedback, and iterate on their products without being bogged down by traditional development cycles. This agility enables businesses to more effectively respond to market demands and technological changes.

Cost Reduction

By minimizing dependency on specialized software developers for every project, companies can significantly reduce development costs. No-code platforms empower existing staff to contribute to digital projects, optimizing resource allocation and reducing the need for expensive technical hires.

Enhanced Collaboration

No-code platforms foster a collaborative environment where business and technical teams can collaborate seamlessly. By breaking down the barriers of technical jargon and complex coding tasks, teams can focus on the functional and user experience aspects of projects, leading to better outcomes.

Scalability and Flexibility

As businesses grow, their needs evolve. No-code solutions offer the scalability and flexibility to adapt to changing requirements without extensive redevelopment. Whether it’s updating a workflow, adding new features to an application, or integrating with new services, no-code platforms make these transitions smoother and less disruptive.

Democratization of Innovation

Perhaps the most transformative aspect of no-code is its ability to democratize innovation within organizations. By enabling individuals with domain knowledge but no programming skills to contribute to digital initiatives, no-code platforms unleash a wave of creativity and innovation, leading to novel solutions and improvements in processes that might not have been possible before.

Conclusion

The no-code movement is not just a passing trend but a significant evolution in how businesses approach technology and digital transformation. For B2B companies in 2024, leveraging no-code platforms is a strategic decision that can lead to increased efficiency, cost savings, and a competitive edge in a rapidly changing digital landscape. By embracing no-code, organizations can empower their teams, streamline operations, and unlock new opportunities for innovation and growth.

How to Onboard Users in SmartSuite with Teams

Software Stack Editor · April 5, 2024 ·

Are you juggling the task of adding new members to your thriving team and wondering how you can make the onboarding process smooth and selective using SmartSuite? Worry not because SmartSuite’s user permissions and teams feature are a game-changer when it comes to controlled, yet straightforward user onboarding. And that’s exactly what we’ll be diving into today.

[embedded content]

‍SmartSuite: A Favorite No-Code Tool

For those new to the world of SmartSuite, it’s a versatile no-code platform that’s equally adept at building robust backend databases as it is at crafting intuitive front-end interfaces and automation schemes. And for anyone with a hunger for mastering no-code automation

Starting with Admin Permissions

Okay, let’s roll up our sleeves and get to the crux of user onboarding in SmartSuite. Naturally, this guide is for those with admin-level permissions. If that’s you, or if you’re about to hop on the SmartSuite bandwagon, let’s proceed.

Managing Teams in SmartSuite

As an admin, your journey begins at the ‘Workspace Administration’. Here you’ve got the power to manage teams. It’s critical that you’ve already structured your teams within SmartSuite, whether it’s Finance, Operations, Sales, or anything in between. With a simple click, you can add new team members or adjust team ownership—these settings help keep the administrative backend neat and tidy.

Onboarding New Team Members

Now for the juicy part: as you welcome new members aboard, it’s a breeze to assign them to the correct team. Simply identify the team they belong to and slide their names over; for our example, we’ll add them to the Automations team. Always remember to hit update to save these changes.

Granular Permissions for Collaborative Growth

Let’s get granular with permissions. After all, SmartSuite shines with its collaborative tools—so let’s make full use of them. Taking our example forward, let’s say you’ve got a shiny new ‘Client Engagements’ solution. By default, it’s locked down to your eyes only. But here comes the magic: you can decide which teams get the VIP all-access pass and which are on the more restrictive guest list.

Advanced Permissions: Sales vs. Finance

The Sales team might need editing rights to tinker with data, while Finance may just need to peek at the numbers without leaving fingerprints. With advanced permissions, you can fine-tune access down to viewer, commenter, or editor privileges. Tailoring permissions to fit the exact needs of each team keeps the gears of your organization running smoothly.

Add Teams: Sales (Editor Access), Finance (Commenter Access)

Remember, these settings are solution-specific. Your teams can have different permissions across various solutions within SmartSuite, which is the savvy way to protect and streamline your operations.

Adding New Members Made Simple

After you’ve sorted out team assignments and fine-tuned permissions across your solutions, onboarding new members is a cakewalk. Hop back to ‘Manage Members’ where you can gracefully invite fresh faces to join. Assign them to a team, and like clockwork, their access permissions are automatically configured.

‍Existing Members? No Problem!

What about the crew that’s been sailing with you for a while? Reorganizing is just as easy. Adjust their team affiliations as necessary to reflect their evolving roles or responsibilities within your digital domain.

Optimistic Permissions and Beyond

Let’s address a crucial concept—optimistic permissions. Simply put, in a scenario where conflicting permissions are at play, SmartSuite favors the more permissive setting. So, double-check those permission levels!

Moreover, don’t forget that permissions in SmartSuite can get granular, and we’ve just scratched the surface today. You can dictate access at the table or even field level for ultimate control.

To experience the future of work management firsthand, start your free SmartSuite trial today!

15 New Features in SmartSuite to Power Your Next Project

Software Stack Editor · April 3, 2024 ·

Smarter Automations for Efficiency

One of the standout additions is the “find records” action’s capability to pinpoint a single record accurately. Frequently, you’re faced with the need to assign tasks or leads quickly—let’s say a new contact is added, for instance, and you’re on the hunt for the right sales representative. The upgraded feature allows you to toggle between fetching multiple records or a single record, providing the precise output you need for subsequent automation steps.

[embedded content]

‍

Imagine a scenario where a new lead emerges. Your objective? Match them with the appropriate sales rep. You can now effortlessly sift through records based on specific criteria. Later, when updating contact information, you have the flexibility to seamlessly modify fields, such as “assign to,” based on the detected sales rep’s data—a significant stride forward in dynamic update capabilities.

Clearing and Appending: A Tailored Touch

Further enhancing the adaptability within SmartSuite are new options to clear or append data in fields, especially beneficial for managing linked records. Instead of the sole default action to replace values, now you have free rein to clear a value to reset a field or competently append additional linked records to an existing list. This simplification is a welcome change from previous workarounds that involved complex concatenations.

‍

The Art of Incrementing: Lead Distribution Redefined

Lead distribution methods like round-robin now have increased precision thanks to direct math operations within update actions. Previously constrained to overwriting existing values, you can now implement mathematical amendments such as incrementing counters. This advancement is illustrated when assigning leads and desiring to boost a sales rep’s lead count; an automation can seamlessly add to their current total, carrying out arithmetic directly rather than depending on external calculations.

Merging Records Made Easy

Another notable automation feature is the ability to merge records. This function is incredibly useful in preventing duplicate entries that can clutter your database. It also represents an upfront approach to data cleanliness that can save significant time and energy.

‍

User Experience Enhancements for Tables and Views

To alleviate visual clutter, SmartSuite now offers the choice to hide tables from view, particularly handy for junction tables that serve merely as connectors and aren’t regularly accessed. A streamlined interface awaits as you effortlessly manage table visibility.

Adding context to views has also been improved. You’re now empowered to elaborate on a view with a description that can serve either as visible text or a hover-over tooltip, enriching user guidance and understanding.

Record Details and Visual Appeal

Customization in record display now extends to descriptions for sections and, more visually, includes cover images. Implementing company logos or other significant imagery alongside records not only enhances the interface but significantly personalizes the experience.

Furthermore, for those extra, sometimes hidden fields that serve crucial behind-the-scenes roles, SmartSuite now allows you to completely conceal them, fostering an uncluttered and focused interface for users.

Formula Functions: A Leap Forward

The formula functions within SmartSuite have received significant enhancements, offering you unprecedented control and data manipulation capabilities:

  • Related Records Sorting: SmartSuite simplifies the process of identifying the most recent or highest value entries within connected tables.
  • Top-N Records: By combining sorting with the powerful ‘top’ function, you ensure only the most relevant records surface, whether basing it on recency or other criteria.
  • Get List Function: This opens a new realm of data querying possibilities, drawing parallels with sophisticated database queries and inching closer to aggregation across unrelated records to generate comprehensive KPI insights.
  • Time Tracking Precision: With access to granular components of the time tracking log, the use cases for SmartSuite broaden significantly, enabling detailed reporting and strategic planning based on logged time.

Field Functionality: A Nod to Nuance

With the latest updates, SmartSuite ensures that linked relationships and nested fields are more manageable and editable than ever. Address fields can now be edited piecemeal, and this granularity extends to lookup fields that reference precise subfields—infinitely handy when information needs to be as precise as geolocation.

Another leap is editing dependency predecessors and successors directly, akin to linked records, thereby streamlining task sequencing and project planning.

SmartDocs and Cross-Collaboration

For those harnessing SmartDocs for team meetings and notes, the export-to-PDF feature stands out. It not only allows for immaculate documentation but also simplifies sharing and disseminating information.

It’s clear that with SmartSuite’s relentless additions to its features, streamlining your projects has never been more within reach.

To experience the future of work management  firsthand, start your free SmartSuite trial today!

Create Your Own Customer Portal with SmartSuite + Softr

Software Stack Editor · April 3, 2024 ·

Picture this scenario: There you are, navigating through your work management software, when you’re struck by how wonderfully streamlined SmartSuite is. The thought dances in your mind—what if your clients could access all this information in one convenient location? No more emails at odd hours, no more endless phone calls. Just imagine the bliss!

Now, SmartSuite does feature public views, and sure, technically, you could invite your clients to collaborate on the platform. But—you ponder—you desire something with a dash of elegance, something that reflects your brand’s aesthetic without the hassle of copying and pasting SmartSuite data just for aesthetics.

Guess what? It turns out this isn’t some far-fetched fantasy. Welcome to a reality where your SmartSuite can undergo a transformation using a nifty tool named Softr—creating a gorgeous customer portal that seamlessly aligns with your brand’s vibe.

Alright, let’s roll up our sleeves and dive into the world of client portal customization.

[embedded content]

The Magic Behind SmartSuite + Softr

First things first, it’s paramount to emphasize that a blend of SmartSuite’s robust functionality and Softr’s sleek interface is like gift wrapping for data—a present of organized information made irresistibly appealing. Consider Softr as the wrapping paper adding that special touch to the core gift: your data within SmartSuite.

Diving into SmartSuite’s property management solution as an example, we’re met with an array of interconnected databases resembling supercharged spreadsheets: properties, units, tenants, requests, key documents—all intricate cogs in the vast machinery of property management.

Customizing Your SmartSuite Data

Each aspect of SmartSuite showcases fields—think of them as detailed layers. Some fields are in plain sight, like visible columns, while others emerge when you delve into individual records, revealing a trove of additional details. And the beauty? All of it can be customized in SmartSuite before it’s elegantly presented in Softr.

Creating a Connection: Linking SmartSuite with Softr

Embrace the notion that integrating SmartSuite with Softr means preserving the integrity of your data while dressing it up for your audience. Fine-tune information accessibility, introduce elements of interactivity, and, voilà, you’ve granted your clients the key to a realm of organized, engaging content crafted just for them.

Step-by-Step: Building Your Client Portal with Softr

Transitioning from concept to reality is squarely in the realm of Softr’s intuitive tools. Begin by adding your SmartSuite as a data source to Softr, then proceed to construct an application where the magic unfolds. Here’s where dynamic and static elements become your widgets and blocks, shaping what clients will witness.

In Softr’s builder, static blocks remain consistent, while dynamic blocks tap into SmartSuite, presenting data in a myriad of customizable ways. Want to display work requests in Kanban view? No problem. Picture clients filtering through requests, searching by specifics—all of this in a polished interface that exudes your brand essence.

Dynamic Personalization: Custom Views for Each Client

Softr offers boundless scope for customization, allowing you to tailor the experience down to individual client levels. Conditional filters enable such personalization, ensuring, for instance, tenants only view information related to their leased properties.

Imagine this: Your tenants, with just a login link, find themselves in a digital sanctuary where each section unfurls pertinent information, relevant requests, billing details, community interactions, and more, all while being wrapped in your brand’s look and feel.

Beyond Aesthetics: Functionality Meets Beauty

But don’t just stop at the aesthetics. Dive deeper by integrating a billing system, crafting an FAQ section, and so forth—transforming this digital space into a centralized hub where all client interactions, no matter their nature, find a harmonious place.

The Benefits You Reap and the Gift You Give

This synthesis of SmartSuite and Softr is more than just a vanity project. It’s about equipping your clients with a user-friendly, personalized digital suite while streamlining your workflow—hone efficiency without forgoing the human touch.

Let’s not overlook the ease of updates. You’re no longer juggling data across multiple platforms; your SmartSuite becomes the single source of truth, elegantly echoed in various facets through Softr.

A Call to Action for a Superior Client Experience

This seamless blend of SmartSuite’s organization and Softr’s interface prowess means breaking down barriers to a polished, professional, and entirely personalized customer experience. So roll up those sleeves a bit higher and take that step toward creating your exclusive customer portal—one that aligns with your operational excellence and exudes your brand’s identity.

Look at it all come together—a portal that’s not just a convenience but an extension of your brand promise. With this comprehensive guide lining the path, you now wield the knowledge to impress clients with a portal that’s uniquely yours, powered by SmartSuite and Softr.

Ready to make the leap? Let’s not just dream of better client interaction. Let’s create it.

So what are you waiting for? Dive into SmartSuite, partner with Softr, and revolutionize the client portal experience. Start your free SmartSuite trial today!

Deep Dive: Reviewing SmartSuite’s Latest Q1 2024 Updates!

Software Stack Editor · March 15, 2024 ·

Today, we’re in for a real treat because I’m about to take you on a journey through the fresh and fabulous features rolled out by SmartSuite in the first quarter of 2024. Here’s what’s been cooking in their labs.

Record Cover Image 😎

Ever opened a record and thought, “A picture would be worth a thousand words here”? Well, wish granted! Assign any attachment from your record as a cover image, and boom! There you have a visual feast right at the top of your record—super handy, particularly for visual fields like real estate.

Record Section Description 📝

Dig into the details with even more context now. You know those sections in your SmartSuite records? You can spice them up with descriptions. Segment your contacts into personal and work info slots, and let the description tell you exactly what’s what.

Showing Off the Hide-and-Seek Game with Tables 🕵️

Keep your workspace squeaky clean by hiding the tables you don’t need daily. Still there, but out of sight, out of the mess—especially if you’re playing the advanced game with junction tables.

Dependency Subfield Accessibility 🚦

Got a complex web of dependencies? Access predecessor and successor data as effortlessly as you would with a linked record, right in your grid view.

Automation Enhancements: “Find & Merge Like a Pro” 🔍

The ‘find action’ in automations now boasts a wicked upgrade, allowing you to nail down a single record or fetch a basket full of them. And for the icing on the automation cake—you can merge records on auto-pilot! Imagine sifting through contact duplicates with robotic precision. Mind-blowing, right?

The Triple Threat: Clear, Append, Replace 🔄

When it comes to record updates via automation, SmartSuite now lets you clear old data, append new tidbits, or replace stuff altogether. It’s the Swiss army knife of record maintenance.

View Descriptions to the Rescue 🕶️

Views in SmartSuite now come with their own set of descriptions. Found the perfect view for a particular task? Label it! Explain what it shows and why it matters.

Sharpened Integrations with Make 🛠️

Here’s a little insider nugget: SmartSuite’s giving their Make integrations some serious muscle. And I’ve heard through the grapevine that there’s even more to come. So, stay tuned.

Formula Function Upgrades on Related Records 📊

And for the formula gurus out there, revel in new functions that will have you sorting related records and spitting out values in a list with unparalleled swag.

Time Tracking Log Fields & Formulas: A Dynamic Duo ⏱️

Finally, they’ve also amped up the formula capabilities with time-tracking log fields for those of you into some serious data magic.

Phew, that’s quite the lineup, right? And remember, March 15th is our vantage point, so if SmartSuite decides to drop another feature bomb in the remaining weeks, you’ll hear it here first.

To experience the future of work management automation firsthand, start your free SmartSuite trial today!

How to Hide a Table

Software Stack Editor · March 9, 2024 ·

In today’s episode, join Jeff Gonzalez on a journey to unlock the power of an often-overlooked technique – hiding tables within a solution. In this insightful session, Jeff demonstrates the simplicity and efficiency of this process using a construction project management template. Discover how concealing irrelevant tables can elevate user experience, streamline workflow, and maintain access to crucial data. Let’s dive into the world of optimizing solutions with Jeff’s step-by-step guide.

[embedded content]

Why Hide Tables?

‍
Jeff starts by addressing the fundamental question – why hide tables? Imagine a clutter-free workspace where only essential information is at your fingertips. Hiding tables is the key to achieving this. By removing irrelevant data, you not only enhance user experience but also ensure a streamlined workflow. Jeff emphasizes that this technique is not about compromising access to vital information; rather, it’s about making that access more efficient.

The Construction Project Management Template: A Real-World Example

‍
To illustrate the power of hiding tables, Jeff walks us through a construction project management template. The template is a comprehensive solution with various tables catering to different aspects of the project. However, not all tables are relevant at all times. By hiding those that aren’t necessary for a particular task, you can declutter the interface and focus on what matters.

Step-by-Step Guide: Making the Magic Happen

‍
Jeff takes us through the step-by-step process of hiding tables, ensuring that even those new to the technique can follow along seamlessly. From identifying irrelevant tables to using the straightforward method of hiding them, Jeff’s instructions are clear and concise. This essential skill can transform your solutions, making them cleaner, more user-friendly, and ultimately more efficient.

Enhancing User Experience

‍
As Jeff demonstrates, the impact of hiding tables on user experience is significant. No longer will users have to sift through irrelevant information. Instead, they can navigate through a clutter-free interface, focusing on the tasks at hand. This improvement in usability is invaluable for any solution, be it a project management tool or a data analysis platform.

Streamlining Workflow

‍
A cluttered workspace often leads to confusion and inefficiency. Jeff highlights how hiding tables contributes to a streamlined workflow. By only presenting relevant data, users can make quicker decisions and execute tasks more efficiently. The time saved by eliminating unnecessary distractions can be channeled into more productive endeavors.

Optimize Your Solutions Today!

‍
In this episode of Smart Tips, Jeff Gonzalez has unveiled the art of hiding tables within a solution. This essential skill is not just about aesthetics; it’s about optimizing functionality and improving user experience. Whether you’re managing construction projects or working with complex datasets, the benefits of hiding tables are universal. Don’t miss out on this transformative technique – watch the episode now and take the first step towards making your solutions cleaner, more user-friendly, and ultimately, more effective. Optimize your solutions today!

  • « Go to Previous Page
  • Page 1
  • Interim pages omitted …
  • Page 7
  • Page 8
  • Page 9
  • Page 10
  • Go to Next Page »

Get your Software Stack together. softwarestack.tech

Software Stack

© 2024–2026 - Software Stack is a trading name of SouthwestCIO Limited ac ompany registered in England & Wales 11319049

  • Knowledgebase
  • Home
  • About Us
  • Contact Us